Microsoft Surface Laptop 5 (13.5-inch) Heatsink and Fan Replacement
Duration: 45 minutes
Steps: 23 Steps
Dive into this guide to swap out the heatsink and fan in your Microsoft Surface Laptop 5 (13.5-inch). Got a swollen battery? Handle it with care. Some of the photos might be from a different model, but don’t sweat it—they won’t mess with the steps. If you need help, you can always schedule a repair.
Step 1
Make sure your laptop’s battery level dips below 25% before diving into this repair. A full battery could lead to some seriously fiery vibes if things go sideways!
– Disconnect all cables and power down your laptop completely.
Step 2
– Time to get started! Flip your laptop over and lay it down with the backside facing up. This will give you access to the four rubber feet on the bottom.
Step 3
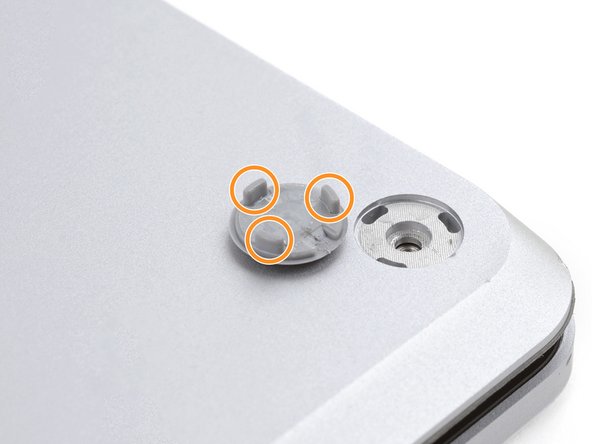
Each foot features a handy little groove to make prying it off the laptop a breeze!
– The back feet recesses are right up against the rear edge of the laptop, just waiting for you to give them some love.
– The front feet recesses are snugly positioned near the front edge of the laptop, ready for your attention.
Step 4
The feet pop out super quickly—hold onto them tight so they don’t go on an adventure without you!
– Slide one arm of your tweezers into the little nook of one of the feet.
– Give your tweezers a twist and gently pry upwards to break the adhesive and pop that foot off the laptop.
– Time to say goodbye to the foot!
– Repeat the fun on the other feet!
Tools Used
Step 5
– This laptop comes with two types of feet. When putting it back together, be sure to pop the feet into their proper spots.
– Press the feet into their slots to secure them firmly in place.
– The back feet have a single center clip to make things easy.
– The front feet are a bit more special with three clips, so they can only go in one way. Don’t worry, it’s foolproof!
– If the old feet aren’t sticking anymore, peel off the old adhesive and add a little Tesa Tape where the sticky stuff used to be.
Step 6
– Before we get started with this repair, take a deep breath and remember that you’ve got this!
– Inspect your device’s feet and check if they’re damaged or worn out – if so, it’s time to bring in the reinforcements with some 8mm rubber furniture pads.
– Now, take one of those pads and gently peel it away from its backing – don’t worry, it’s easier than it sounds!
– Align the pad over a foot cavity, and press down firmly to secure it in place. Take your time, and make sure it’s lined up just right.
Step 7
These screws are delicate, so keep steady pressure and stay cool to avoid stripping them.
Keep it together! Throughout this repair, make sure to keep track of each screw and return it to its original home. This will save you a headache later on.
– Grab your trusty T5 Torx driver and get ready to tackle those four 3 mm screws holding the upper case in place. Let’s get it done!
Step 8
– Turn your laptop upside down and open the screen all the way.
Step 9
Hold up! Keep the upper case attached—there’s still a sneaky cable hiding in there.
Ensure the upper case hugs the entire perimeter snugly. Any gaps between the upper and lower case near the screen could cause a screen disaster.
The top cover is held in place by magnets. Be sure to handle it with care as you work your magic!
– Grab the top edge of the upper case above the keyboard, and gently pull it straight up to pop it free.
– Carefully lift the bottom edge of the upper case upward and away from the laptop—make sure you don’t tug on the ribbon cable underneath.
– When putting it all back together, just lower the upper case onto the lower case until the magnets click into place and everything lies flat.
Step 10
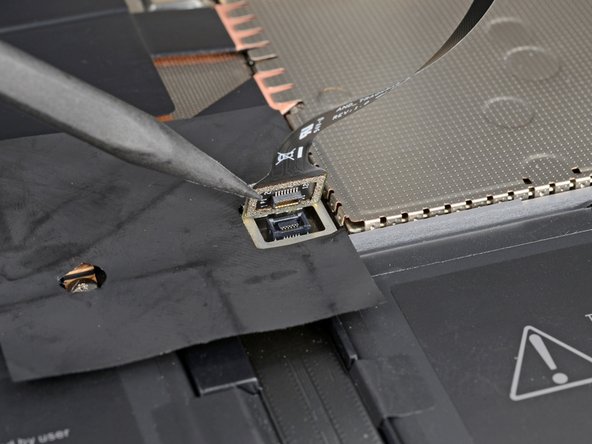
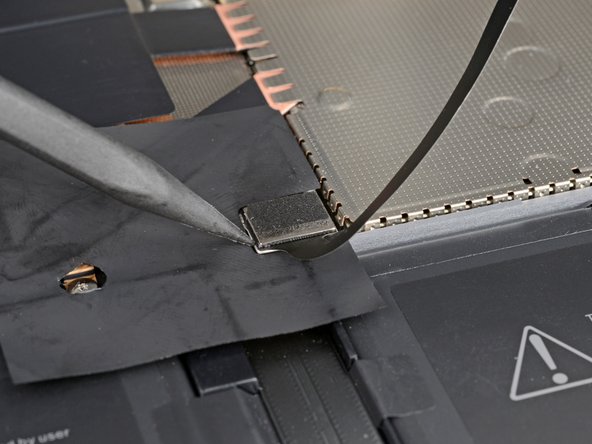
The cable for the keyboard and touchpad is the vital link between the upper case and the laptop. Keep it safe and sound!
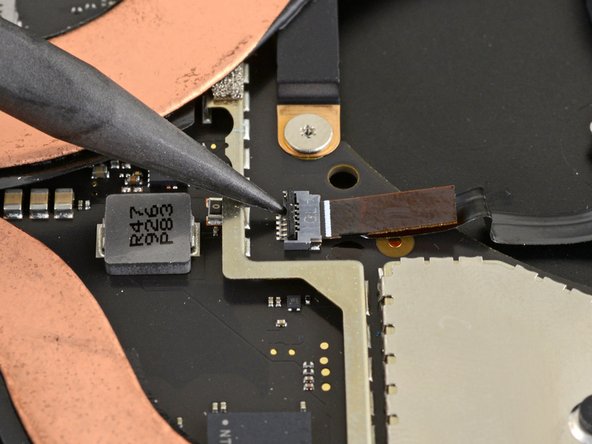
– Slide the pointy end of a spudger under one side of the magnet connector and gently pop it up to disconnect. Easy peasy!
– When reconnecting, line up the magnet connector over its socket with the cable pointing toward the bottom of the laptop. Press it down firmly to click it back into place. Nailed it!
Tools Used
Step 11
– Gently lift off the upper case and place it down with the keyboard facing the surface, making sure it’s on a clean spot. You’re doing great!
Step 12
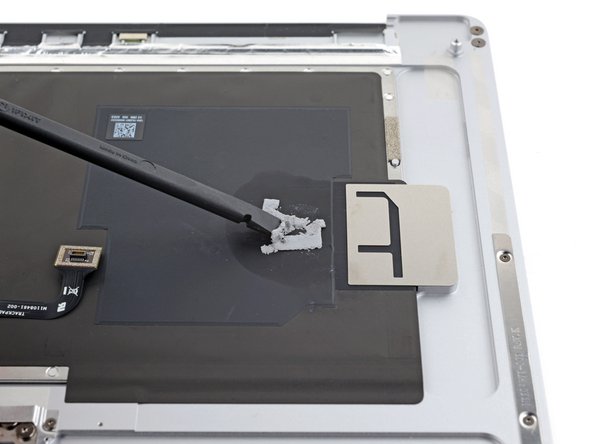
Your SSD has a layer of thermal paste that creates a snug fit with the upper case. No worries! You could also just squeeze a little thermal paste onto the SSD’s label. A good trick is to use the dot method, making a bead that’s a tad bigger than the screw head that keeps your SSD in place.
– Let’s get this reassembly party started!
– Grab your trusty spudger and gently scrape off that old thermal paste from the top of the SSD and the bottom of the upper case. We want a clean surface for optimal performance!
– Next, splash a few drops of highly-concentrated isopropyl alcohol (over 90%) onto the SSD and upper case. Use a lint-free or microfiber cloth to wipe away any residue, leaving everything sparkling clean.
– Finally, pop on a fresh thermal pad that matches the size of the SSD sticker. We’re almost there!
Tools Used
Step 13
Once the screw is out of the way, the SSD will lift up at a nice little angle, just waiting for you to grab it!
– Grab your trusty T5 Torx driver and let’s get that 2.7mm screw holding the SSD out of there!
Step 14
Avoid pulling up at a sharp angle—no need to put the SSD and its socket in jeopardy!
Removing the SSD is like hitting the reset button – it also disconnects the battery, so you’re good to go!
– Gently wiggle that SSD out of its cozy socket and give it a little nudge to remove it.
– When you’re putting everything back together, slide the SSD in at a fun little angle for a smooth fit.
Step 15
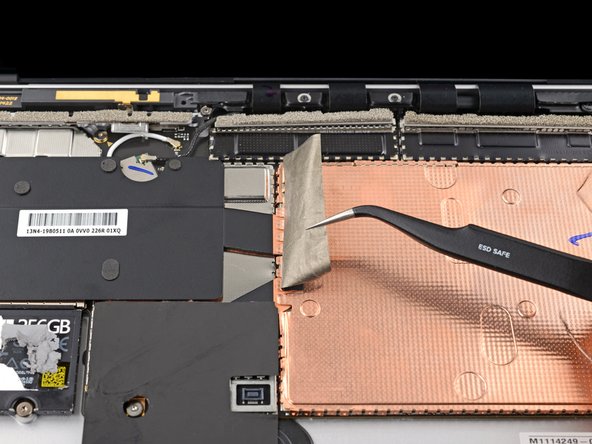
The conductive tape snugly connects the left edge of the heatsink shield to the heatsink—your heatsink’s trusty sidekick!
– Give that tape a little loving warmth with a heat gun or hair dryer to loosen its sticky grip.
– Carefully use tweezers or your fingers to peel away the tape.
– When you’re putting things back together, place the tape exactly where it was. If it’s being a little stubborn and doesn’t stick to the heatsink right away, just reheat the adhesive and try again.
Tools Used
Step 16
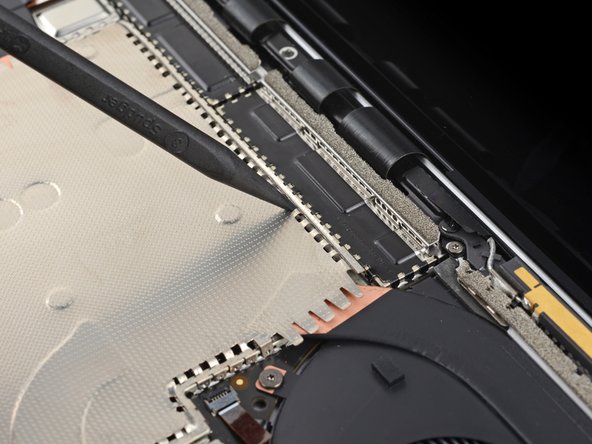
Be gentle with the shield, you don’t want to bend it too much! You’ll need to pop it back in place later when you’re putting everything together.
– Slide the pointed end of a spudger into one of the gaps at the top edge of the heatsink shield.
– Gently lift to pop open the clips holding the shield in place.
– Keep the momentum going and repeat this along the right edge.
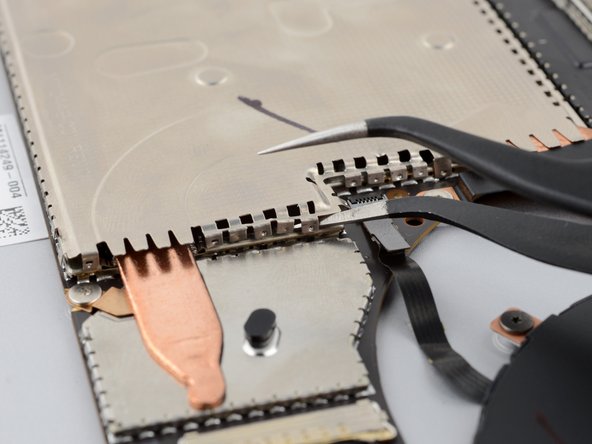
– Now, take your tweezers and slide one arm under the bottom right edge of the heatsink shield.
– With a gentle nudge, pry up to free the last of those pesky clips.
Step 17
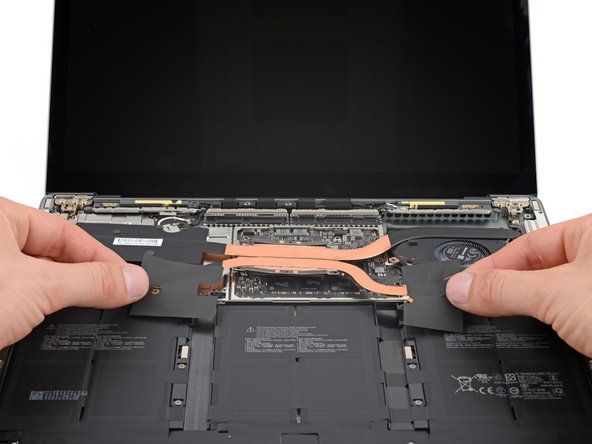
– Pop off that heatsink shield.
– When putting the shield back, press down around the edges to snap those clips into place.
Step 19
– Grab your trusty T3 Torx driver and let’s tackle those nine screws holding the heatsink like a champ:
– Two of those 2.5 mm screws are waiting for you.
– Next up, let’s deal with two 2 mm screws.
– Now, here’s a solo act – one 3 mm screw, just hanging out.
– Don’t forget about the dynamic duo of 4.1 mm screws.
– And finally, finish strong with two 3.4 mm screws.
Step 20
– Alright, it’s reassembly time! Let’s get that heatsink snugly aligned with the centering peg on the motherboard.
– Now, let’s tighten those four CPU tension screws in a stylish ‘X’ pattern: start with the top left, then the bottom right, followed by the top right, and finish off with the bottom left. You’ve got this!
Step 21
This might require a bit of elbow grease! Just be cautious not to twist those heat pipes out of shape.
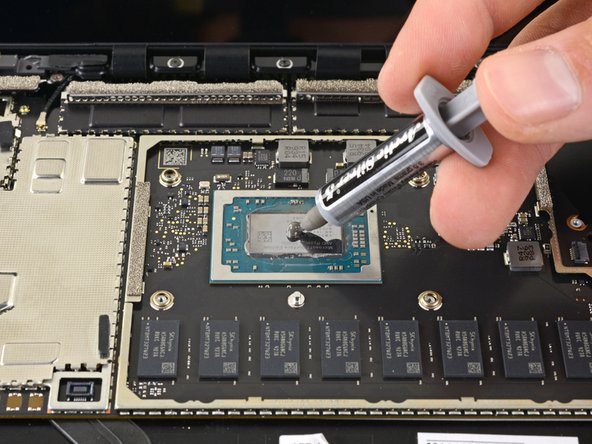
Thermal paste is the trusty sidekick that helps the heatsink team up with the CPU.
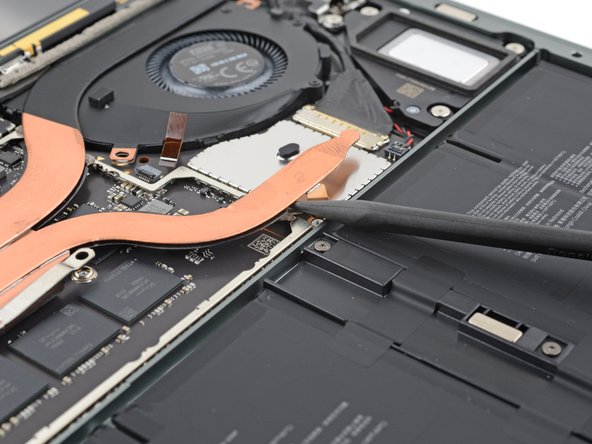
– Slide your trusty spudger right under that left heat pipe.
– Give it a gentle nudge upwards to pop off the left side of the heatsink.
– Now, rinse and repeat for the right heat pipe and the CPU screw mounts until that heatsink is free as a bird from the motherboard.
Tools Used
Step 22
– Gently lift the heatsink and fan, carefully guiding them over the alignment peg in the top right corner.
– Now, slide the heatsink and fan toward the front edge of the laptop, and then remove them with ease.
Step 23
– Take a moment to compare your shiny new replacement part with the original—don’t forget to transfer any leftover components or peel off those pesky adhesive backings before you dive into the installation.
– When it’s time to put your device back together, just retrace your steps in reverse. Easy peasy!
– Got some e-waste? Make sure to drop it off at an R2 or e-Stewards certified recycler. Let’s keep our planet happy!
– If things didn’t go quite as planned, don’t sweat it! Give some basic troubleshooting a shot, or reach out to our Answers community for a helping hand.
– If you decided to take a different route, no worries! Just hit cancel.
–
Tools Used
Success!


