Microsoft Surface Laptop 7 Screen Replacement Guide
Duration: 45 minutes
Steps: 29 Steps
Ready to fix your Microsoft Surface Laptop 7’s screen? We’ve got you covered. Follow this guide to replace that broken or cracked display and get your laptop looking sleek again.
Step 1


Before diving into this repair, make sure your laptop’s battery is below 25% charge. A charged battery could catch fire if damaged.
– Disconnect all cables and power down your laptop completely.
Step 2


– Close your laptop and gently flip it over so the rubber feet are facing up.
Step 3


The feet might pop out faster than you can say ‘oops’—keep an eye on them so they don’t go MIA!
Feel free to use a spudger’s point for this! Just keep in mind, if you’re planning to reuse the foot, there’s a chance it might get a bit damaged in the process. So, proceed with a little caution!
– Carefully slide one arm of your trusty angled tweezers into the little nook near the upper right edge of one of the feet.
– Use those tweezers to gently pry up and pop off the foot.
– Keep the momentum going and repeat this to remove the rest of the feet.
– To put a foot back on, just line up the pegs on the bottom with their cutouts in the frame and give it a good press to snap it into place.
Tools Used


Step 4


As you dive into this repair, keep an eye on those tiny screws—each one has its special home, so make sure it gets back to its happy place.
Even though the Surface Laptop 7 uses Torx Plus screws, regular Torx bits get the job done. Just remember to press down firmly to avoid any accidental stripping drama.
– Grab your trusty Torx Plus 5IP screwdriver and let’s get to work! Carefully unscrew those four 4.5 mm-long screws, complete with washers, that are holding down the lower case. You’ve got this!
Step 5


Avoid poking the pick too close to the outer edges; otherwise, you might accidentally give the antenna bar a little love tap it doesn’t want!
– Slide the tip of your trusty opening pick under the top edge of the lower case, positioning it about an inch (2.5 cm) to the left or right of the Microsoft logo. You’re doing great!
Step 6
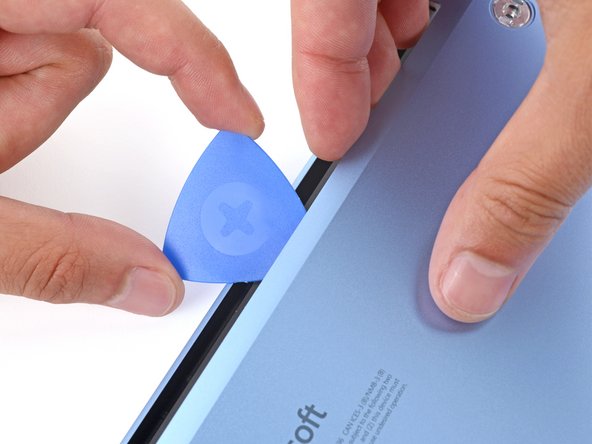
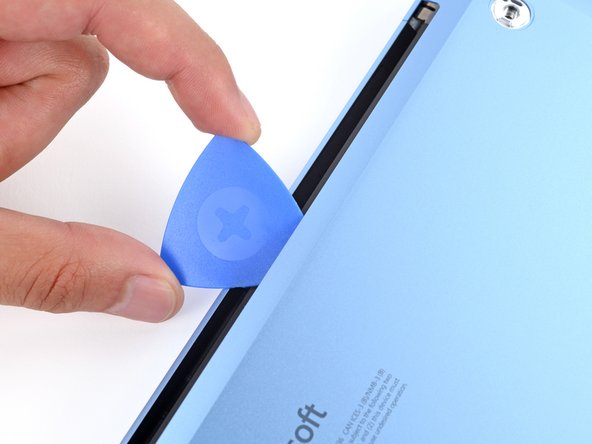

– Give that pick a twist to pop the lower case just enough so you can grab it with your hand.
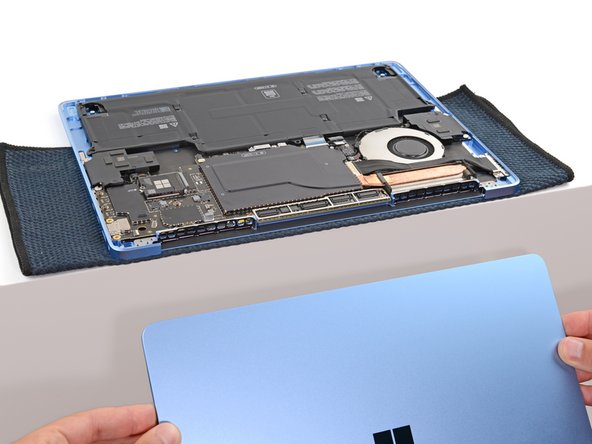
Step 7


– Pop off that lower case and set it aside.
Step 8


– Grab your trusty Torx Plus 3IP screwdriver and get ready for some action! Carefully unscrew those two 2.3 mm-long screws that are holding the battery connector cover in place. You’re doing great!
Step 9


– Gently use tweezers or your fingers to pop off the battery connector cover.
Step 10


To reconnect a press connector, just line it up with the socket and give one side a gentle push until you hear that satisfying click! Then, do the same for the other side. It might take a couple of attempts to get it just right—don’t worry, no need to force it!
– Slide the flat end of your trusty spudger under the top edge of the battery press connector, give it a gentle nudge, and pop it up to disconnect. Easy peasy!
Tools Used
Step 11

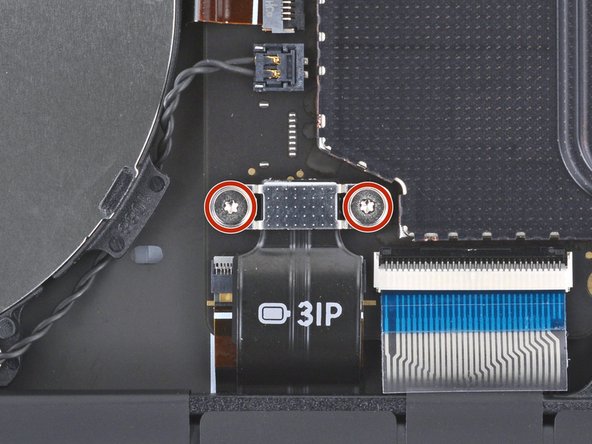
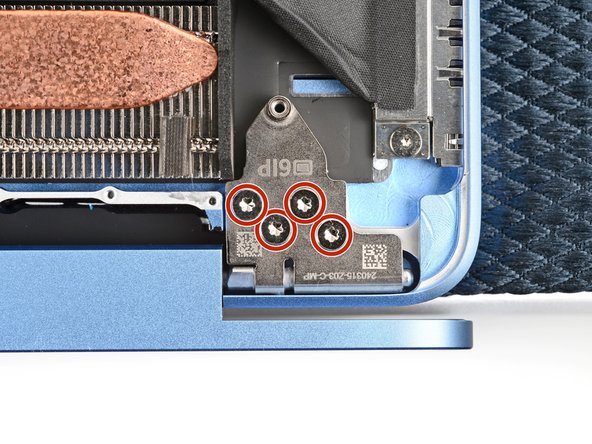
– Grab your trusty Torx Plus 3IP screwdriver and unscrew the two fasteners holding down the right edge of the audio jack cover. Let’s get that cover free!
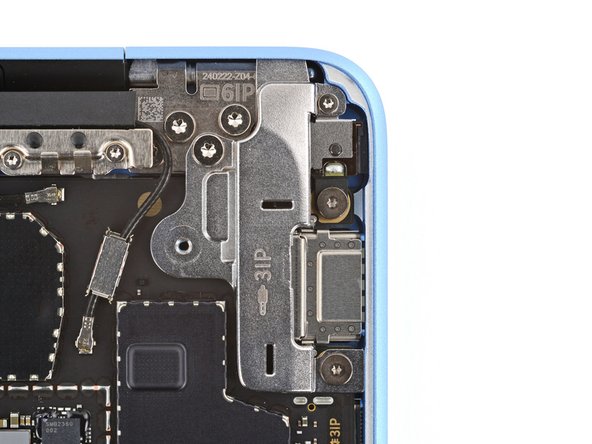
– Switch things up with a Torx Plus 6IP screwdriver and tackle the final 6.3 mm-long screw hanging out in the top left corner. You’re making progress!
– Next, handle the 3 mm-long screw chillin’ in the top right corner. Keep that momentum going!
– Finally, take care of the 4.7 mm-long screw posted up in the bottom right corner. Almost there!
Step 12
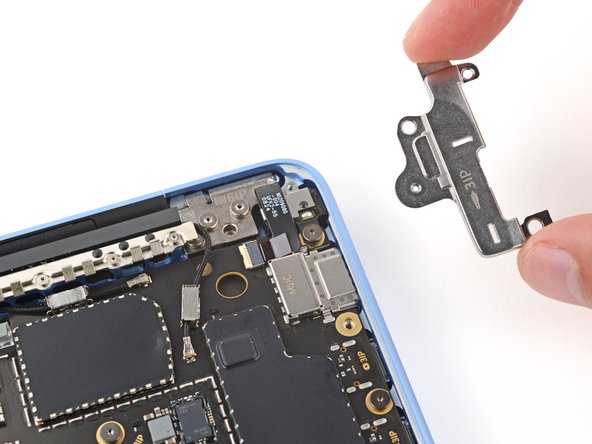

– Pop off that audio jack cover.
Step 13
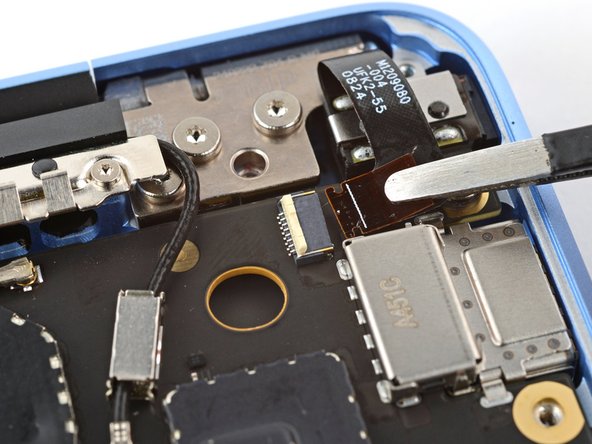
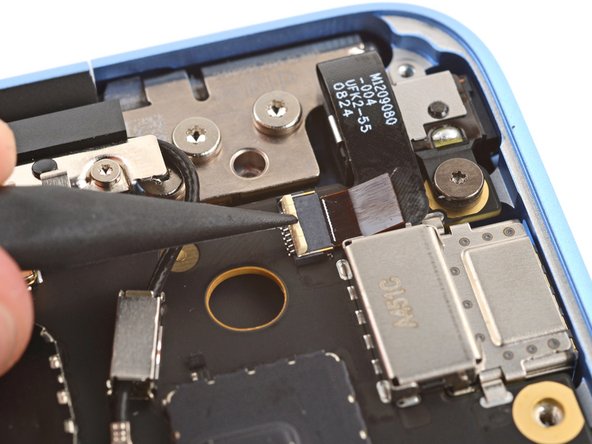

– Grab your trusty spudger and gently lift that little hinged locking flap on the audio jack ZIF connector. You’re on your way!
– Now, take your tweezers and give a gentle pinch to the audio jack cable’s pull tab. Slide that cable out of its cozy socket with confidence!
Tools Used
Step 14
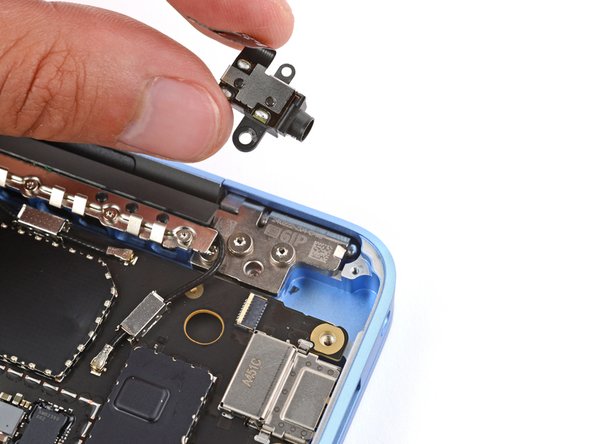

– Gently slide the audio jack out of its cozy little home and give it a good tug to remove it.
– When it’s time to put things back together, carefully slide the audio jack back into its spot and push it into the frame’s cutout. Just make sure it’s snug and snug—so the outer edge is flush with the frame, looking sharp!
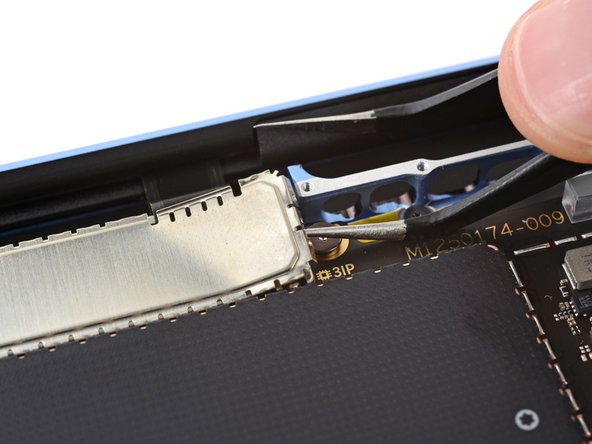
Step 15

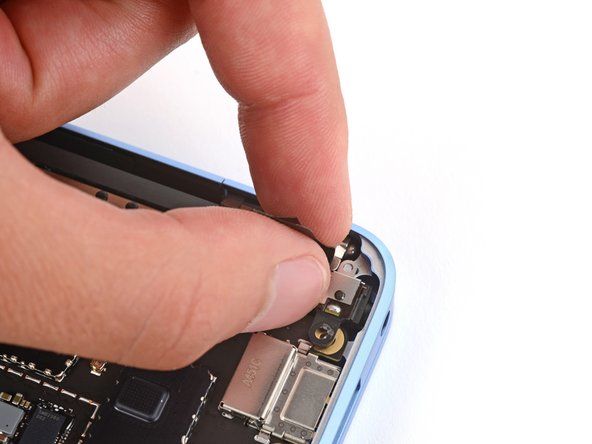
Watch out for those covers—they might just pop off when you least expect it! Keep an eye on them so they don’t go missing.
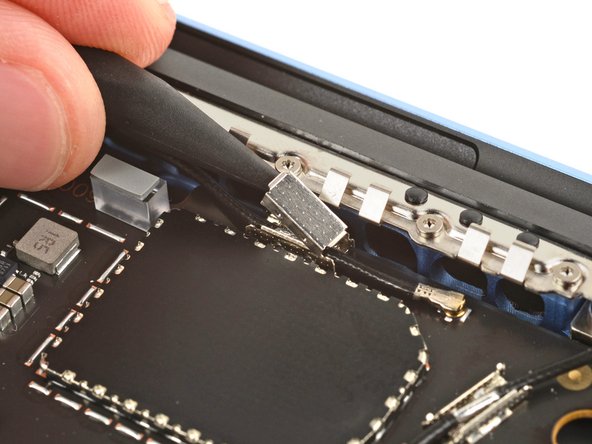
– Time to get started! Use the point of a spudger to carefully pry up and remove the two antenna cable covers from the top right corner of the motherboard. Take your time, it’s an easy step!
Tools Used
Step 16

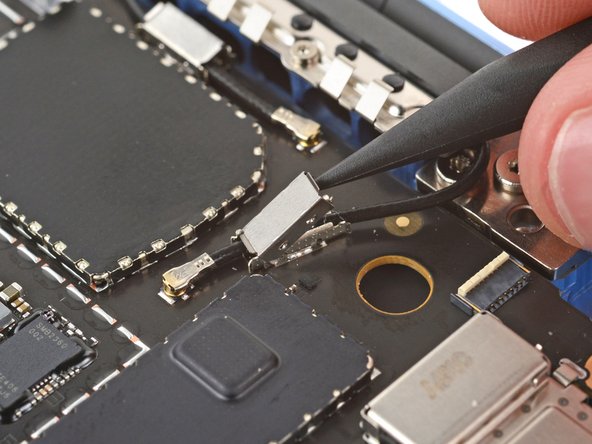
Gently lift under the metal part of the connector, not the cable itself. You’re doing great!
To get those cables back in action, grab some tweezers and gently hold the connector above its socket. With a light touch from your finger or a spudger, press down until you hear that satisfying ‘snap’—that means it’s secure! If it’s not cooperating, no worries! Just adjust the angle and give it another go. Remember, no need to muscle it in; we want a smooth connection, not a wrestling match!
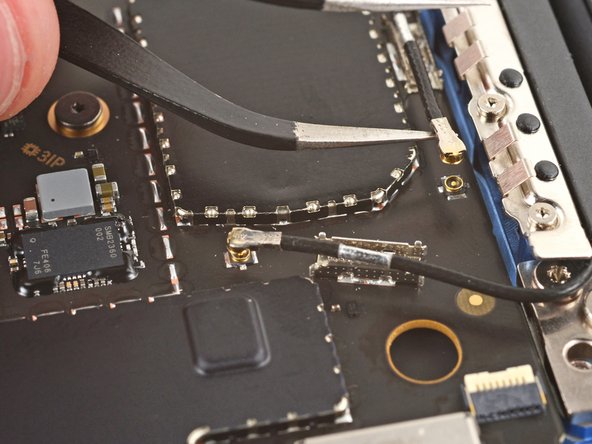
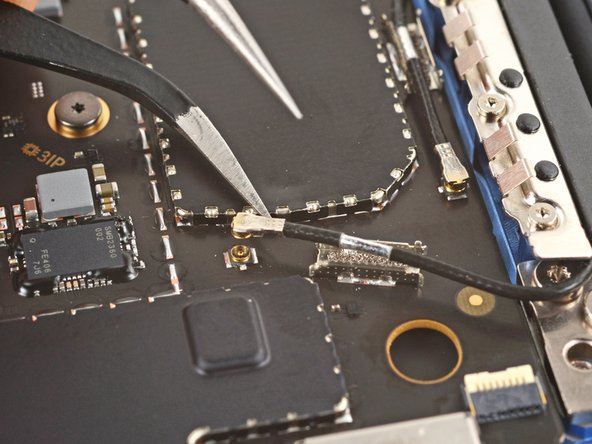
– Gently slide one arm of those trusty angled tweezers right underneath the metal neck of one of the antenna cable coaxial connectors and lift it straight up to disconnect it. Easy peasy!
– Now, just rinse and repeat for the other antenna cable. You’ve got this!
Tools Used
Step 17

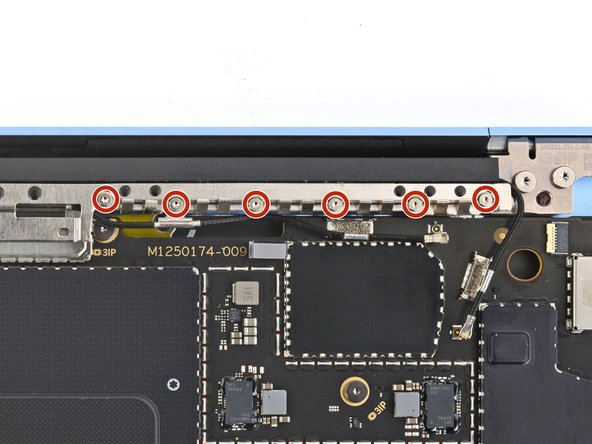
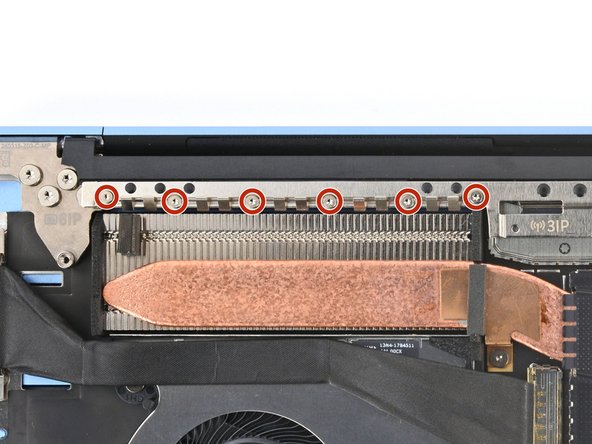
– Grab your trusty Torx Plus 3IP screwdriver and unscrew the twelve 2.4 mm-long screws holding the antenna bar in place. Take it slow and steady—you’re doing great!
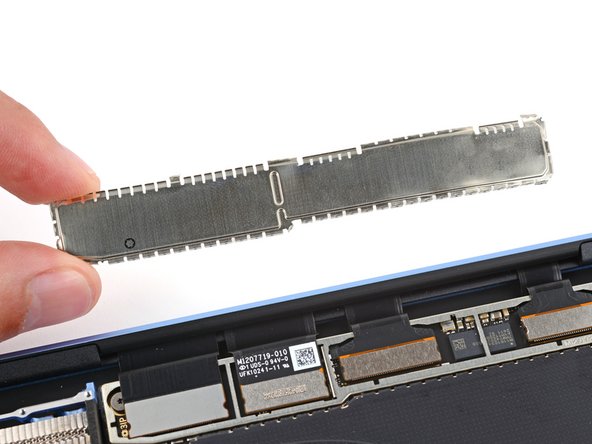
Step 18
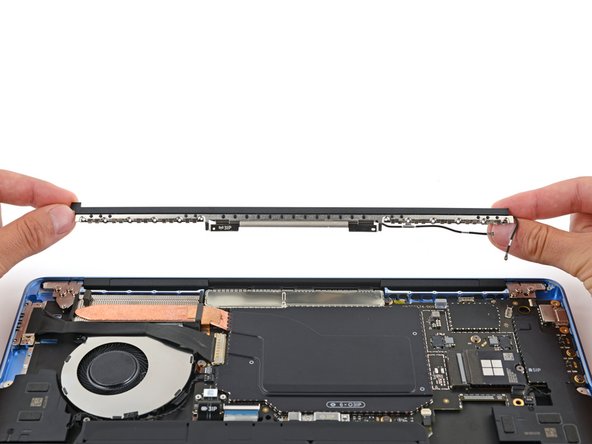

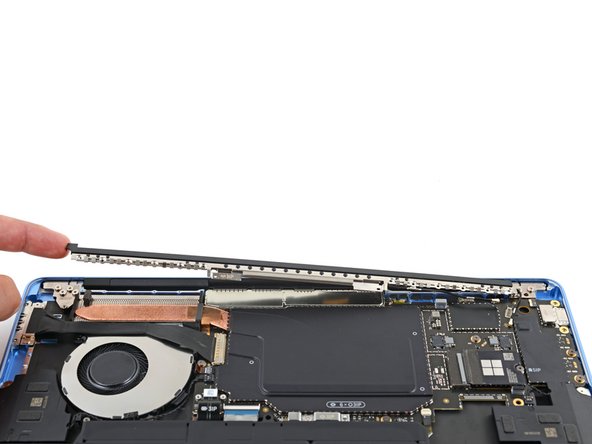
– Gently grab the antenna bar with your fingers, lift it up, and pop it out like a pro.
Step 19

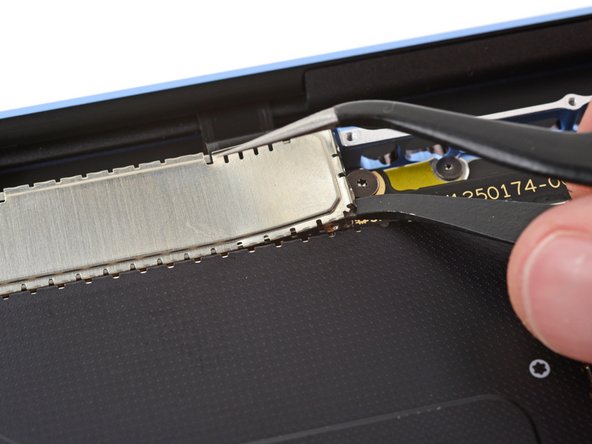
Keep your tools away from the top edge of the shield—it’s a no-go zone for them! You wouldn’t want to accidentally tangle with those delicate display cables.
As you tackle the display cable shield in the upcoming steps, remember to bend it as little as possible. You’ll be reusing it when putting everything back together, so let’s keep it in good shape!
– Wiggle an arm of those angled tweezers into one of the gaps on the right side of the display cable shield.
– Carefully lift the shield to start unclipping it.
Tools Used
Step 20

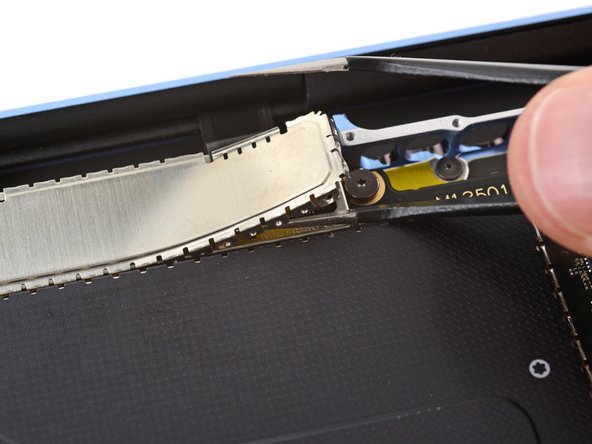
– Wiggle one arm of your tweezers under the bottom of the display cable shield, nearest the right side.
– Twist your tweezers and pop the shield loose.
Step 21

– Follow the same steps to unclip the left side of the shield.
Step 22
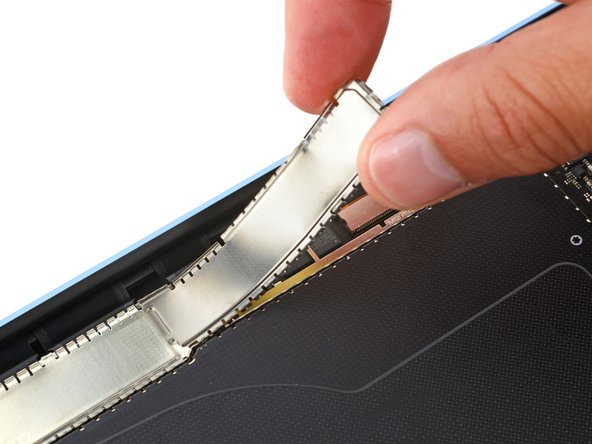

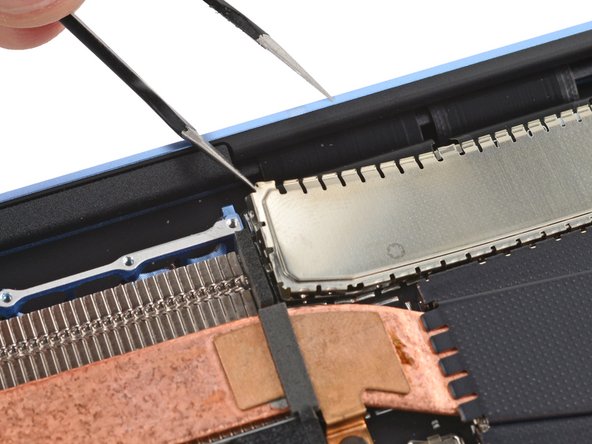
If the shield is feeling a bit clingy, grab your tweezers and gently unclip the stubborn spot.
– With a little finesse, use your fingers to lift and pop the right side of the shield free—easy does it!
– Now grab the left side of the shield, give it a firm but gentle tug, and take it all the way off. Nice work!
Step 23

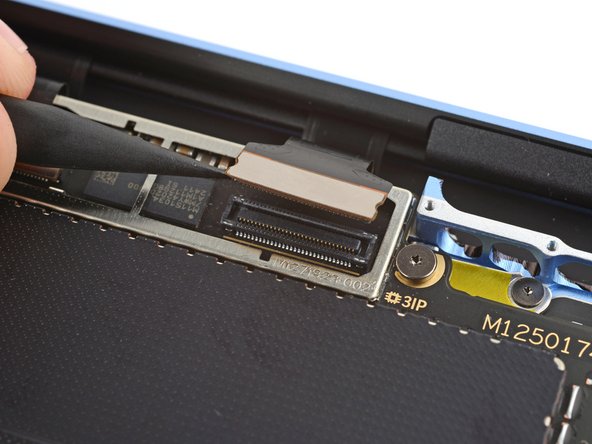
The metal casing around those display cables can be a bit of a challenge to disconnect. To make things easier, slide your tool under the bottom corner on the side with the most space to maneuver.
– Slide the spudger’s tip underneath the bottom left corner of the rightmost display cable press-connector and gently pry it up to disconnect. You’ve got this!
Tools Used
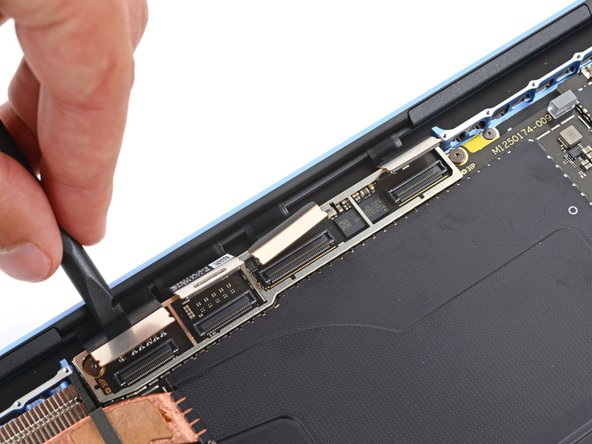
Step 24
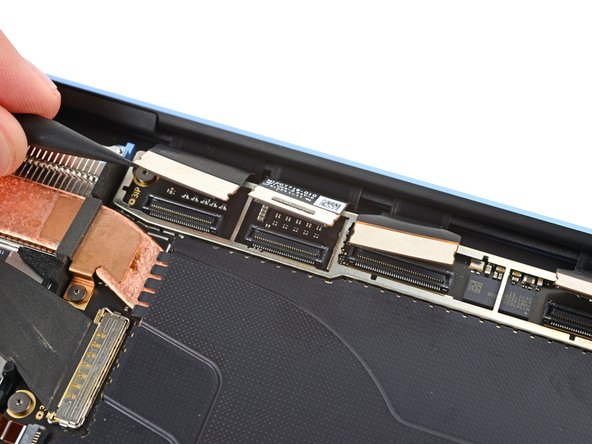
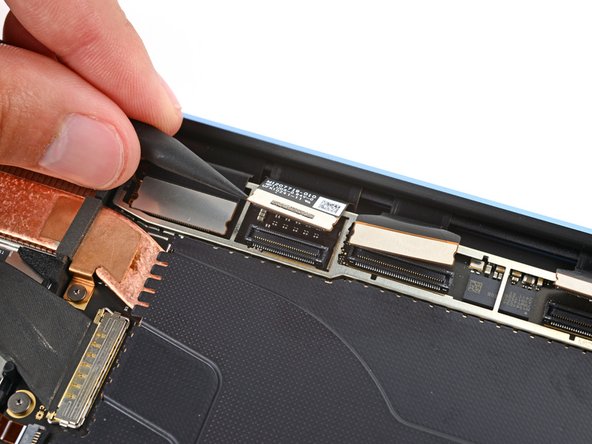

– Grab the pointy end of your trusty spudger and gently pop off the last three display cable press-connectors. You’re almost there—nice and steady does it!
Tools Used
Step 25


– As you put everything back together, take your trusty spudger and gently slide the flat end to tuck all four display cables snugly under the motherboard. You’ve got this!
Tools Used
Step 26
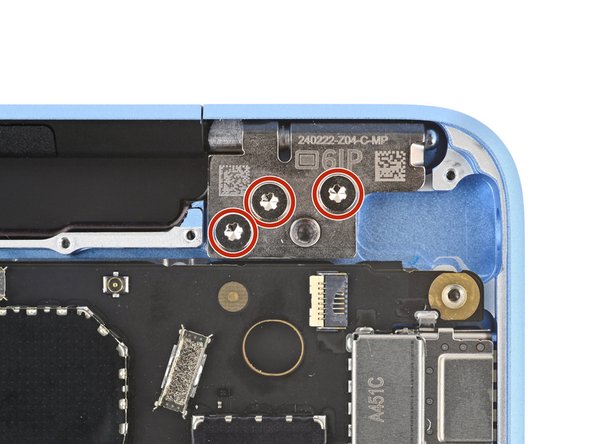

– Grab your trusty Torx Plus 6IP screwdriver and gently loosen (but don’t fully remove) those seven hinge screws. You’ve got this!
Step 27
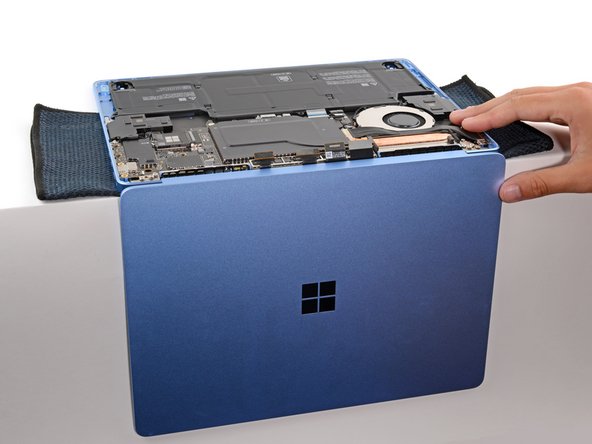

If you want to keep things cushy, feel free to slip a soft cloth under your keyboard for extra protection.
– Flip your laptop open to about a 90-degree angle, then gently rest it keyboard-side down on a table, letting the screen hang off the edge like it’s chilling on a hammock.
Step 28
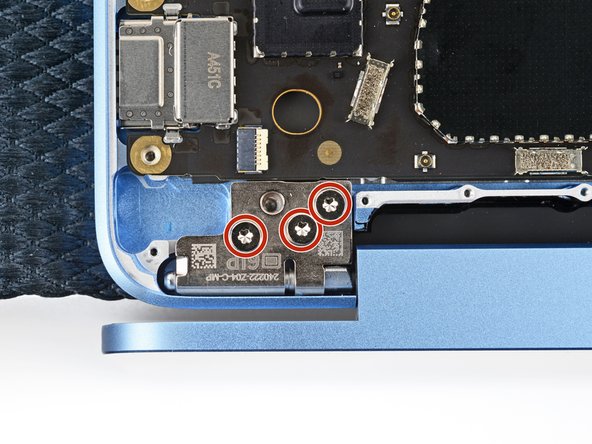

Make sure to hold onto your laptop securely, because it has a knack for taking unexpected dives off the table.
– Hold the screen steady with one hand and use your other hand to remove the seven 6.3mm-long Torx Plus 6IP screws that keep the hinges in place.
Step 29


– Now it’s time to put your device back together—just reverse these steps like a pro!
– Got some leftover e-waste? Be a hero and drop it off at an R2 or e-Stewards certified recycler.
– If things didn’t go as smoothly as you hoped, don’t sweat it! Give some basic troubleshooting a shot, or swing by our Answers community for some friendly advice.
– Oops, I decided to skip this guide. No worries!
–
Success!