Microsoft Surface Laptop 7 SSD Replacement Guide
Duration: 45 minutes
Steps: 14 Steps
Get ready to dive into this repair adventure!
Get ready to dive into the world of SSD replacement or upgrade for your Microsoft Surface Laptop 7 (13.8‑inch)! Before you jump in, take a moment to check out Microsoft’s guide on the best practices for SSD removal. It’s like the warm-up before the big game, and we want you to be prepped and ready!
Step 1


Before you dive into this repair, let your laptop’s battery drop below 25%. A charged battery could ignite if damaged!
– Disconnect all cables and power down your laptop completely.
Step 2


– Flip that laptop over and lay it down with the rubber feet chillin’ on top. You’re doing great—just keep at it!
Step 3


Hold onto those feet! They might pop out quickly, so keep an eye on them.
You can also use the point of a spudger, but be careful! You’re more likely to damage the foot if you’re planning to reuse it.
– With a gentle touch, slide one arm of your angled tweezers into the little recess at the upper right corner of one of the feet. You’ve got this!
– Now, use those tweezers to give the foot a little nudge and pop it off. Easy peasy!
– Keep the momentum going and repeat this for the rest of the feet. Almost there!
– To put a foot back on, just line up the pegs underneath with their matching cutouts in the frame, and give it a nice little press to secure it in place. You’re doing great!
Tools Used


Step 4


Throughout this repair, keep a keen eye on each screw and remember where it belongs. The screws have their favorite spots!
The Surface Laptop 7 uses Torx Plus screws, but don’t stress! Standard Torx bits are cool, too. Just apply steady downward force to avoid any strip slips.
– Grab your Torx Plus 5IP screwdriver and pop out those four 4.5 mm screws (with washers) securing the lower case.
Step 5


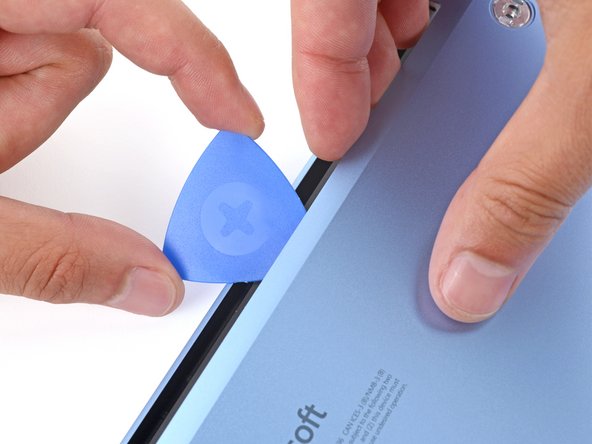
Steer clear of the outer edges with that pick, or you might accidentally give the antenna bar a little love tap!
– Slide the tip of your trusty opening pick beneath the upper edge of the lower case, positioning it about an inch (2.5 cm) to the left or right of that sleek Microsoft logo.
Step 6
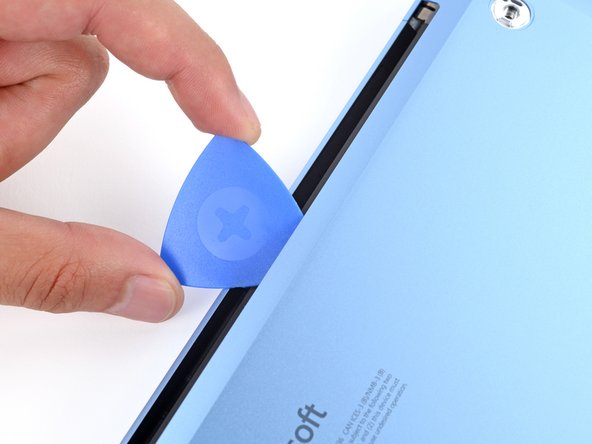

– Give the pick a twist to lift the lower case just enough so you can grab it with your hand.
Step 7


– Gently pop off the lower case and set it aside like a pro!
Step 8

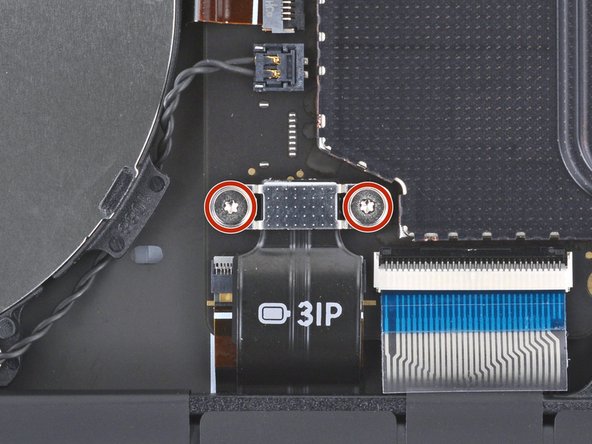

– Grab a Torx Plus 3IP screwdriver and get to work removing the two 2.3mm-long screws holding the battery connector cover in place. You’re almost there!
Step 9


– Let’s get started! Use tweezers or your fingers to gently remove the battery connector cover. It’s an easy first step to get you on your way to a successfully repaired device!
Step 10


To reconnect a press connector, position it carefully over the socket and give a gentle nudge on one side until you hear that satisfying click! Then, do the same on the other side. It might take a couple of attempts to get it just right—so don’t sweat it; forcing it won’t do you any favors!
– Gently slide the flat end of your trusty spudger under the top edge of the battery press connector and give it a little nudge upward to disconnect it. You’ve got this!
Tools Used
Step 11

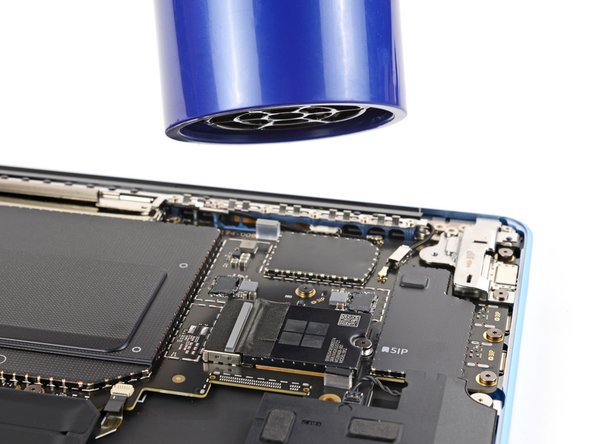

As an alternative, you can gently warm the tape using a hair dryer.
– Warm up an iOpener and place it on the SSD for a minute to cozy up the tape on its left edge.
Tools Used


Step 12


Handle the tape with care—don’t let it tear! You’ll want it in one piece for reassembly.
There’s no need to completely peel off that tape; just get it off the SSD and you’re good to go!
– Slide the pointy end of a spudger under the SSD tape and lift it just enough to grab it with your fingers.
– Gently use your fingers to peel the tape off the SSD like you’re unwrapping a present.
Tools Used
Step 13


Now that the screw is out, your SSD might start to lift up at a bit of an angle – that’s totally normal!
– Get ready to unlock your device’s storage potential! Use a Torx Plus 5IP screwdriver to carefully remove the 2.9mm-long screw that’s holding the SSD in place.
– When it’s time to put everything back together, make sure to gently hold the SSD down while reinstalling its screw – this will ensure a secure fit.
Step 14


The SSD has a special groove so it only fits one way. No mistakes here!
– To put your device back together, just follow these steps in reverse order.
– When your laptop’s all set, check out Microsoft’s post SSD replacement guide.
– Dispose of your e-waste responsibly at an R2 or e-Stewards certified recycler.
– Trouble with the repair? Try some basic troubleshooting or visit our Answers community for help.
– Cancel: I did not complete this guide.
– Need help? You can always schedule a repair.
Success!