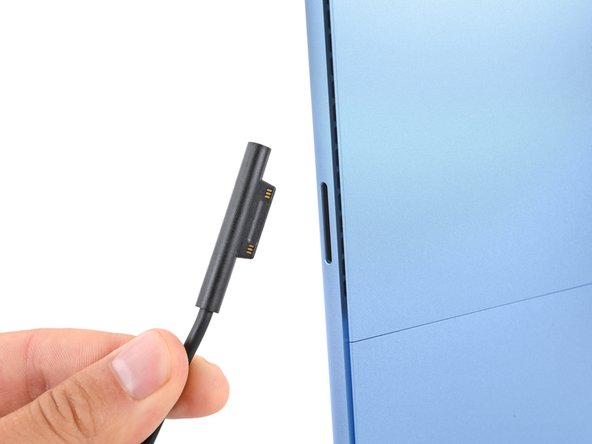
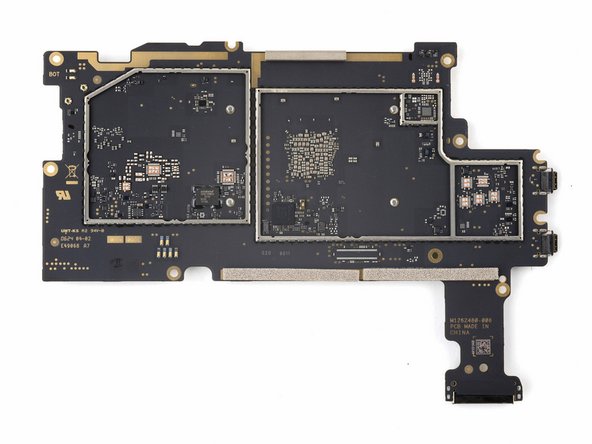
Microsoft Surface Pro 11 Chip ID
Duration: 45 minutes
Steps: 10 Steps
Step 1


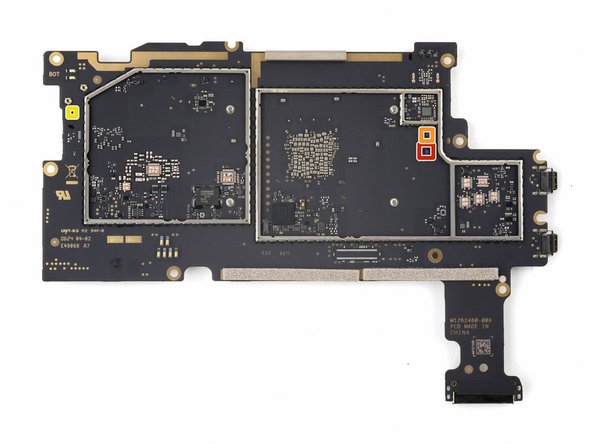
– Meet the Qualcomm X1P-64-100-103 Snapdragon X Plus: your device’s deca-core brainpower station.
– SK hynix H58G56BK8BX068 is here, delivering 4 GB of LPDDR5X super-fast memory for zippy performance.
– The Qualcomm PMC8380-001-00 keeps power management smooth and steady.
– Qualcomm PMC8380VE-001 is another power management pro, working behind the scenes.
– Got Qualcomm PMC1010H-001-07? That’s your charge pump and buck regulator, making sure voltage is just right.
– Qualcomm PMC1010H-001-08 also pulls regulator duty, so your device stays powered up and happy.
– And finally, Qualcomm power management keeps the energy flowing so everything runs like a champ.
Step 2

– Time to identify some key components on your device’s motherboard! First up, look for the Qualcomm SMB2360-002 and SMB2361-002 battery chargers—these are essential for keeping your battery happy. Next, you might come across the likely Qualcomm clock generator, which helps keep everything ticking in sync. Keep an eye out for the Parade Technologies PS8830, a versatile retimer that handles USB4, DisplayPort 2.0, and Thunderbolt 3.0 signals with ease. Don’t forget the Murata PE23108 LED backlight driver—this little guy makes sure your display shines bright. Also, look for the Qualcomm audio amplifier to enhance sound quality, and the Analog Devices MAX34417, which monitors current and voltage to keep everything running smoothly. Follow along step-by-step, and if you need help at any point, you can always schedule a repair.
Step 3

– Monolithic Power Systems MP2322 1 A synchronous step-down converter
– Richtek RT5753ALGQW 3 A synchronous step-down converter
– Monolithic Power Systems DC-DC converter
– Monolithic Power Systems DC-DC converter
– Nexperia 74LVC2G66 dual SPST analog switch
– Texas Instruments TPS22964C 3 A load switch
– Diodes Incorporated AP22653FDZ-7 adjustable current-limited power distribution switch
Step 4

– Start with the NXP Semiconductors NX3P1108UK high-side power switch. It’s your go-to for smooth power management, helping everything run as it should. Just make sure it’s seated properly, and you’re good to go!
– Next up, grab the Toshiba TCR3UM18A 300 mA / 1.8 V LDO regulator. This little guy ensures your device’s power stays stable and reliable, keeping everything humming along like a well-oiled machine.
– Then, let’s move on to the Texas Instruments SN74LV1T08 single 2-input AND gate. This is your decision maker—it ensures the right signals are passed through, so nothing goes haywire. Just pop it in, and you’re on track.
– Last but not least, we have the Diodes Incorporated 74AUP1G08FS3 single 2-input AND gate. Another key player in making sure the circuits talk to each other just right. It’s easy to install and will keep your system in sync with no problems.
Step 5

– Time to power up that WiFi! Grab your Qualcomm WCN7851-501 FastConnect 7800 controller, the magic behind your WiFi 7 and Bluetooth 5.4 connection. This little guy is key for getting your device online and making sure it’s streaming in full speed.
– Next up, let’s tackle the 2.4 GHz front-end module from Qualcomm. This component keeps your device tuned in for the lower frequency, so it doesn’t drop that connection when you’re browsing the web or checking your emails.
– Last but not least, take a look at the Qualcomm 5 GHz front-end module. This one’s for the high-speed connection, ensuring smooth performance for all those high-demand apps or games. It’s your ticket to a solid, speedy connection on the go!
Step 6

– First up, grab your Qualcomm B7530 Bluetooth/WLAN SAW filter and get ready to make some magic happen. Make sure your workspace is clean and organized—it’s easier to keep track of all those tiny parts!
– Power down your device and carefully remove the back cover or casing to get access to the internals. Use the appropriate tools so nothing gets scratched or damaged in the process.
– Locate the faulty SAW filter on the circuit board. It’s usually a small, rectangular component with several tiny solder points—look closely!
– Before you start removing the old filter, take a quick photo or note its orientation. This way, you’ll know exactly how to position the new one when the time comes.
– Using a fine soldering iron and some desoldering braid or a pump, gently melt and remove the solder connecting the old filter to the board. Patience is key here—don’t rush or overheat nearby components.
– Once the old filter is free, carefully lift it away from the board. Be gentle—you don’t want to disturb the neighboring parts or lift any pads.
– Prepare the new SAW filter by applying a tiny bit of solder to its pads, if necessary. Then, align it precisely over the pads, matching the original orientation you noted earlier.
– With steady hands, solder the new filter onto the board. Double-check your work to ensure solid, clean connections without any bridges or cold joints.
– After soldering, inspect your work under a magnifier if you can. Make sure everything looks good and that there are no stray solder blobs or bridges.
– Reassemble your device carefully, making sure all screws and covers go back in their proper spots. Power it on and test the Bluetooth/WLAN functions to confirm the fix was successful.
– If you run into any trouble or need a pro’s touch, you can always schedule a repair with Salvation Repair for assistance.
Step 7

– NXP Semiconductors MIMXRT633SFFOB 32-bit ARM Cortex-M33 microcontroller with Xtensa HiFi4 audio DSP – This little powerhouse handles the brainwork and the audio chops, giving your device the brains and brawn it needs.
– Winbond W25Q512NW 64 MB serial NOR flash memory – This flash memory is the trusty vault that holds all the data your device needs to function smoothly, like the unsung hero of your system.
– Macronix MX25U1633FZUI 2 MB serial NOR flash memory – Another flash memory but with a bit less space. It’s quick and reliable, taking care of the small stuff when your device needs it most.
– Renesas mixed signal array – A versatile little guy, this array handles both analog and digital signals, keeping everything in balance. It’s the multitasker of the group.
– Likely Qualcomm camera power management – If your camera needs a power-up, this is likely the part keeping everything running smoothly. It ensures your photos and videos are well-lit and clear, with all the power they need.
– NXP Semiconductors NX20P0407UK USB type-C port protector – Your device’s USB-C port gets the protection it deserves here. This little shield guards against anything that might try to mess with your ports.
– Analog Devices MAX4983EEVB+ USB 2.0 DPDT analog switch – This switch is quick and efficient, handling your USB data transfers and connections like a pro. It makes sure everything is where it should be with no hiccups.
Step 8

– Vishay DG2723 – This slick dual SPDT analog switch is ready to direct those signals like a traffic cop at rush hour.
– Nexperia 74LVC2G66 – Double up on control with this dual SPST analog switch; perfect for when you want to keep your options open.
– onsemi FPF2495CUCX – Got high voltage dreams? This 28 V over-voltage and over-current protection load switch is your trusty bodyguard.
– NXP Semiconductors NX3P1108UK – This high-side power switch keeps things flowing just the way you like, without breaking a sweat.
– Texas Instruments TPS22964C – Move up to 3 A with this load switch; it’s like a power relay that never takes coffee breaks.
– Diodes Incorporated AP22800HB-7 – Need a programmable load switch? This one’s customizable to your specs, no code required.
– Toshiba TCR3UM18A – For steady, reliable 1.8 V output at up to 300 mA, this LDO regulator is your go-to for keeping things smooth.
Step 9

– NXP Semiconductors PCA9306: The 2-bit voltage-level translator that keeps your signals chatting happily across voltage gaps.
– Nexperia 74AVC2T245: This 2-bit level shifter handles your voltage translations like a pro—no drama, just smooth transitions.
– Nexperia 74LV1T08GX: Single 2-input AND gate, perfect for when your circuit wants to make sure both conditions are met before moving on.
– Diodes Incorporated 74AUP1G08FS3: Another single 2-input AND gate, ready to play referee for your logic signals.
Step 10
– Meet the sensors: we’ve got the STMicroelectronics LSM6DSO 6-axis accelerometer and gyroscope, the STMicroelectronics LIS2DW12 3-axis accelerometer, and the MEMSIC MMC5633NJL 3-axis magnetometer. These tiny tech marvels keep your device sensing motion and orientation. When you’re working with these sensors, handle them gently—no sudden shakes! If you run into any snags or need a hand, remember, you can always schedule a repair. Keep your tools steady, follow each step carefully, and you’ll have your device sensing smoothly in no time.
Success!