Microsoft Surface Pro 11 Front Sensor Assembly Replacement
Duration: 45 minutes
Steps: 46 Steps
Ready to swap out the front sensor assembly on your Microsoft Surface Pro 11? This guide will walk you through replacing the Windows Hello sensor, ambient light sensor, and the two microphones flanking your front-facing camera. If your Surface Pro 11 isn’t recognizing your face, your screen brightness isn’t keeping up with your vibe, or your mic sounds like it’s talking through a sock, this is the fix you need. Fresh adhesive for the screen is a must for reassembly. Heads up: Surface Pro 11 parts are different for LCD and OLED models. Check your screen type before ordering anything, so you get the right gear for your device.
Step 1

Before diving into this repair, let your laptop’s battery run down below 25%. A fully charged battery might spark a fire if it gets damaged. Safety first—if you need a hand, you can always schedule a repair.
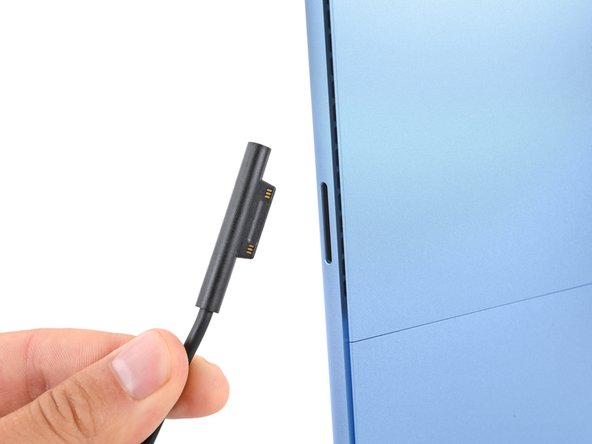
– Disconnect every cable and power down your laptop completely. Give it a moment to rest—no half measures!
Step 2


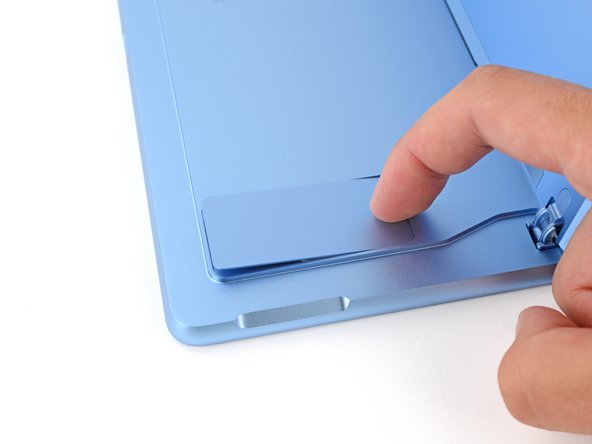
– Place your Surface Pro screen-down on a flat surface and gently open up the kickstand to about a 90-degree tilt. Keep it steady as you prepare for the next step. If you need help, you can always schedule a repair.
Step 3


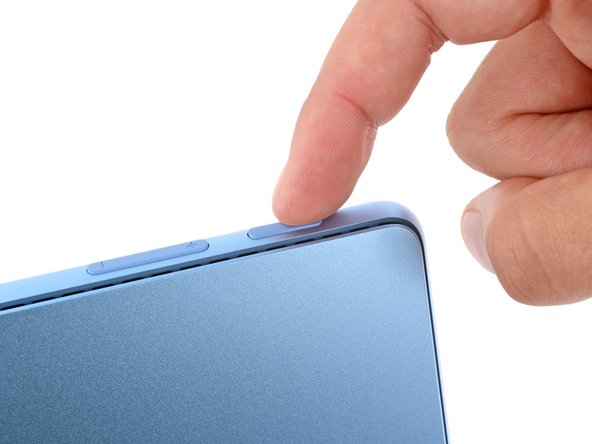
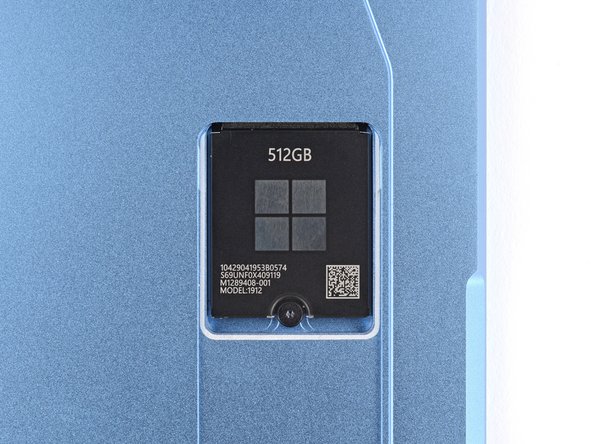
– Give the SSD door a gentle press with your finger right on the indent, and watch it pop open with ease!
– Now, just go ahead and remove the SSD door.
Step 4
Before diving into any major repairs, it’s a good idea to pull out the SSD—that’s also your quick way to disconnect the battery. Think of it as a safety step to keep everything safe and sound. When in doubt, if you need help, you can always schedule a repair.
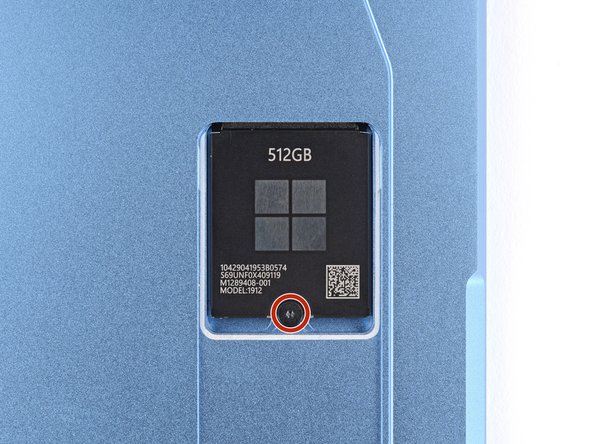
– Grab a Torx Plus 3IP screwdriver and unscrew that 2.4 mm screw holding down the SSD. Easy peasy—just a quick turn to free it up. If you need a hand, you can always schedule a repair.
Step 5
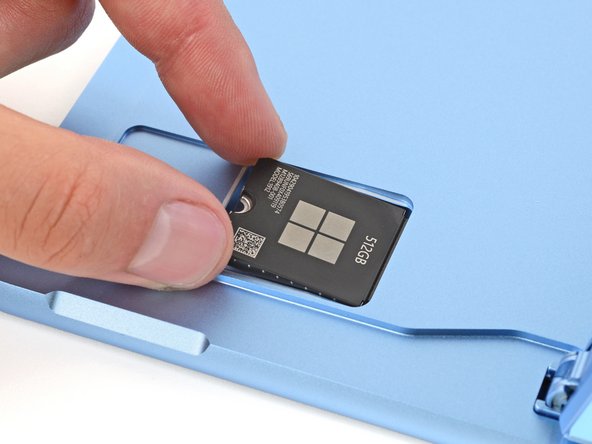
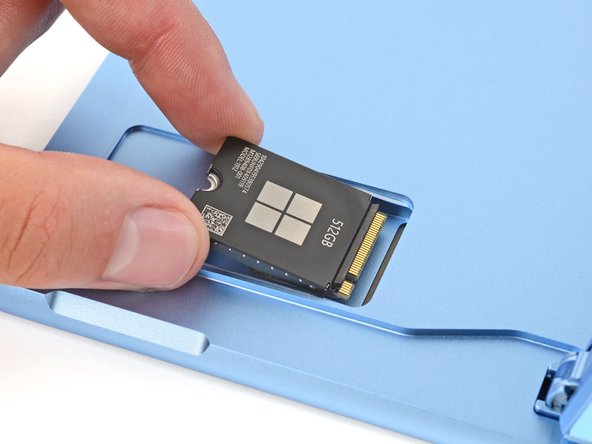

Avoid pulling at a sharp angle, or you might bend or damage the SSD and its socket. Take it easy to keep everything in good shape!
– Gently lift the notched edge of the SSD using the flat end of a spudger so you can get a good grip on the bottom corners with your fingers. Then, carefully pull the SSD straight out of its socket—no twisting or wiggling needed. When putting everything back together, getting the SSD seated properly can be a bit tricky. If you’re having trouble, hold the SSD in place and use the flat end of a spudger to press on the notched edge until it clicks into place. If you need help, you can always schedule a repair.
Tools Used

Step 6


When you’re prying the screen away from the frame, keep your tool shallow—don’t go deeper than the measurements listed for each edge, or you might poke something important inside.
– Keep your tool about 2mm away from the left, right, and bottom edges – just enough to give everything some breathing room!
– Avoid inserting your tool too close to the top edge, especially around the front-facing camera area. We want to keep that lens in one piece!
– For the top edge, give it about 8mm of space everywhere except the camera area. That’s the sweet spot for getting in there without a hitch.
Step 7

The screen is held to the frame with a gentle adhesive around the edges. Warm things up to loosen the stickiness—makes life a lot easier when prying.
A hair dryer or heat gun works, too. Just go easy—screens and batteries aren’t huge fans of high temps.
– Warm up your iOpener and give the right edge of the screen a nice two-minute spa session to loosen up that stubborn adhesive.
Tools Used


Step 8
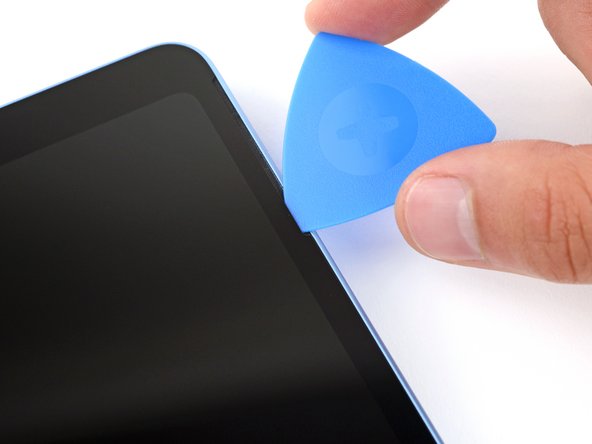

Keep your pick shallow—no deeper than 2 mm on the right edge.
– Take your opening pick and sneak it just under the screen, aiming for the bottom by the right speaker cutout.
– Now, glide that pick along the bottom edge, and give it a little twist to slip the tip under the screen’s notch.
Step 9

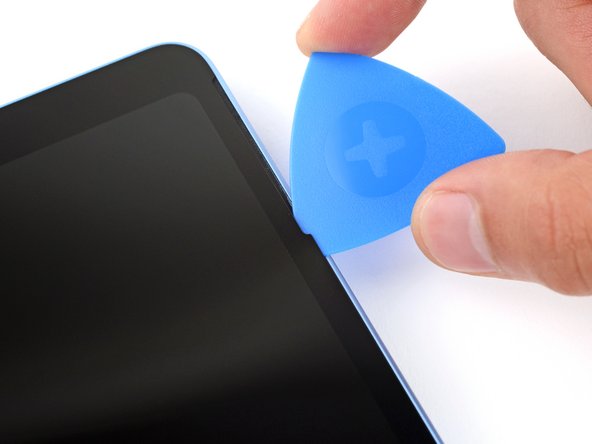
– Gently slide your pick along the right edge to break free the adhesive holding it in place.
– Keep your pick wedged under the bottom right corner to stop the adhesive from snapping back together.
Step 10

– Warm up the bottom edge of the screen with an iOpener, hair dryer, or heat gun to loosen up that adhesive. A little heat goes a long way to make things easier. Just be sure not to go overboard!
Tools Used
Step 11
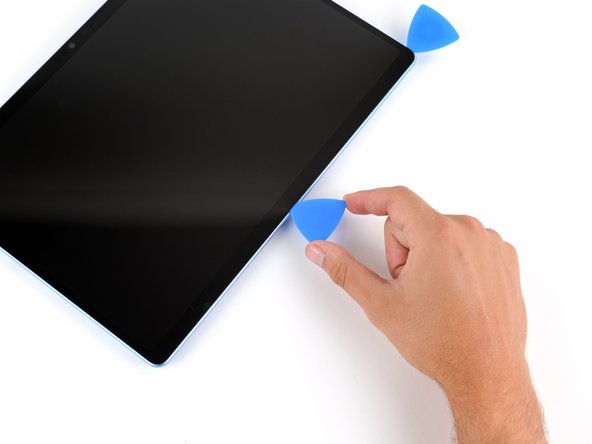


Be careful not to push your pick more than 2 mm into the bottom edge. A gentle touch goes a long way!
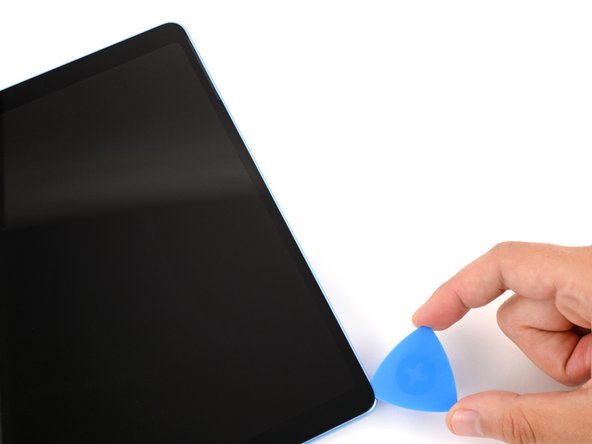
– Slide a second pick gently under the bottom right corner of the screen, and glide it along the bottom edge to break free the adhesive.
– Keep that second pick tucked under the bottom left corner to stop the adhesive from sticking back together.
Step 12

– Warm up the left edge of the screen using an iOpener, hair dryer, or heat gun to loosen the adhesive. This will make the next steps smoother and easier to handle.
Tools Used
Step 13
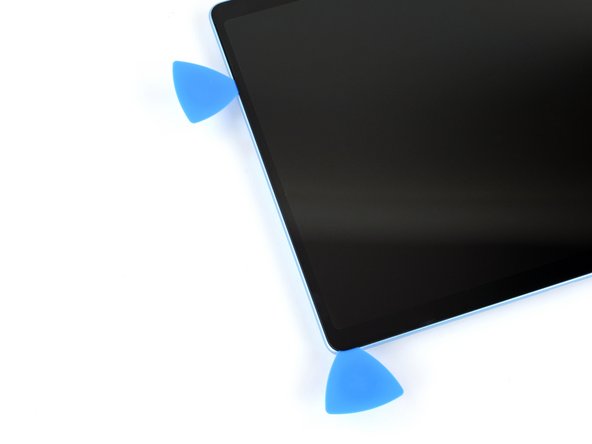

Keep your pick gentle—don’t go more than 2 mm into the right edge to avoid any mishaps. Patience is key!
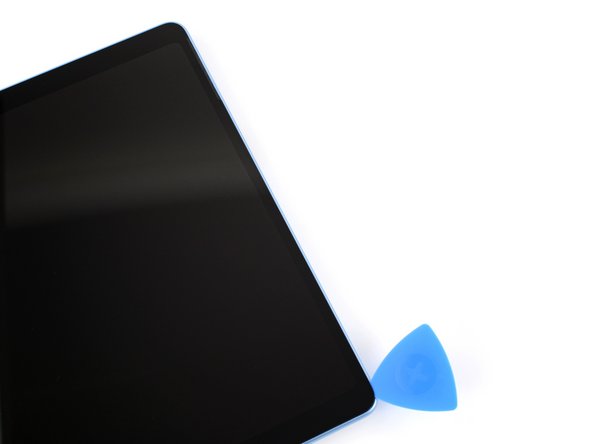
– Place a third pick under the bottom left corner of the screen, then gently slide it up along the left edge. Stop when you reach the bottom of the speaker cutout.
– Keep the pick in place under the screen to stop the adhesive from sticking back together.
Step 14

– Warm up the top edge of the screen using an iOpener, hair dryer, or heat gun to loosen that stubborn adhesive. Keep the heat gentle and steady to make the next steps smoother. If you need a hand, you can always schedule a repair.
Tools Used
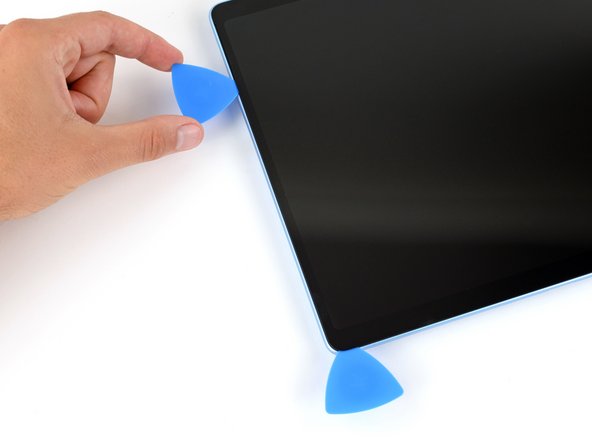
Step 15
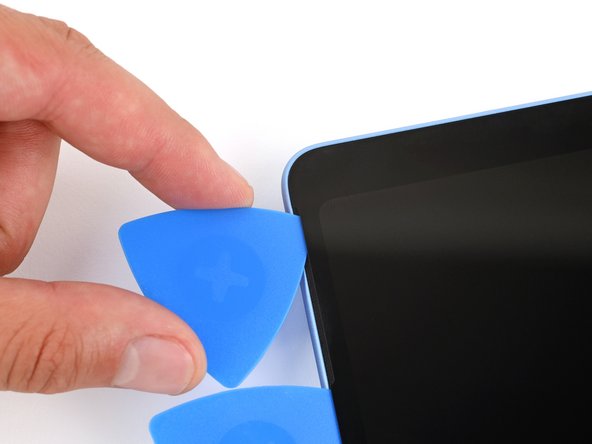

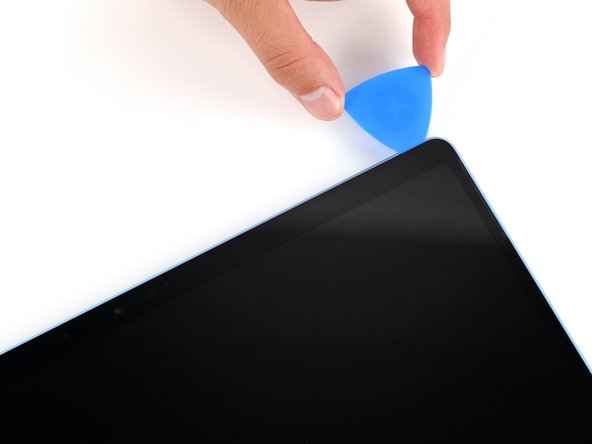
– Slide a fourth pick into the screen near the top left by the speaker cutout.
– Now, gently push the pick upwards towards the edge and twist it just a little so the tip slips neatly under that tiny notch in the screen.
Step 16
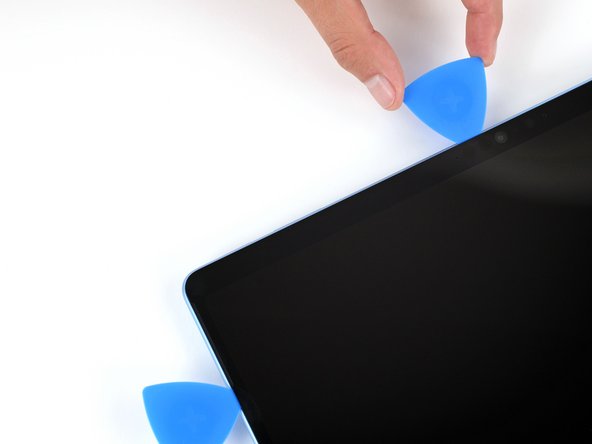

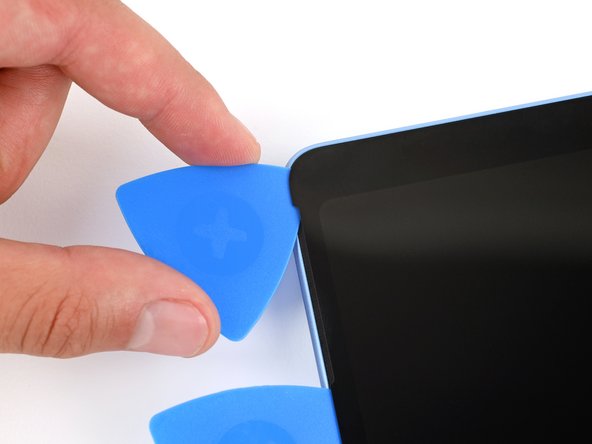
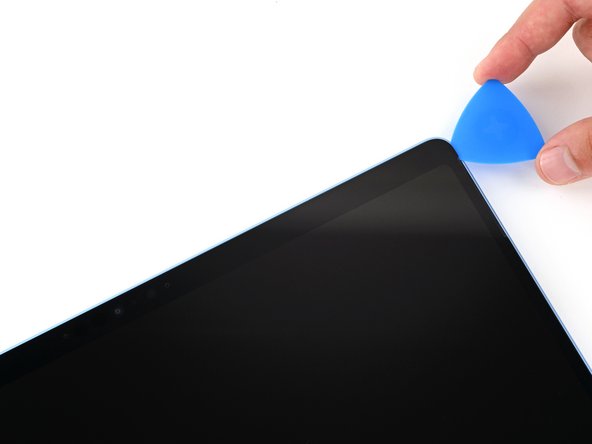
Be sure not to insert your pick more than 8 mm along the top edge. A little goes a long way!
– Gently slide the pick along the top edge, taking care to stop before you reach the front-facing camera. Keep it smooth and steady to avoid any mishaps. If you need help, you can always schedule a repair.
Step 17


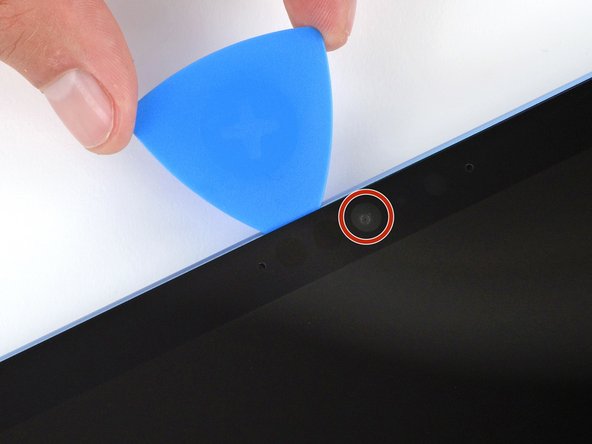
Be extra careful not to let your tool brush against the front-facing camera lens. It’s delicate, and we want to keep it safe!
– Gently lift the pick just enough so it can slide over the front-facing camera.
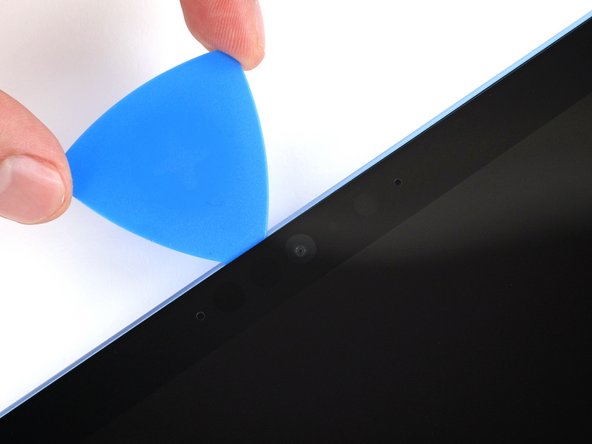
– Slide the pick along the top edge until it’s comfortably past the camera.
Step 18

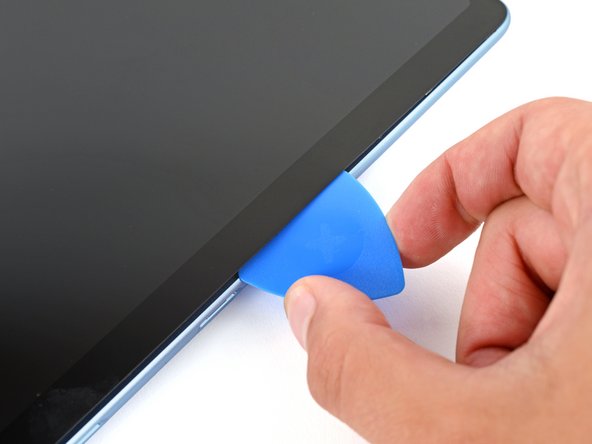
– Gently slide your 8mm pick under the screen’s edge and give it a smooth push towards the top right corner to loosen the remaining adhesive. Keep it steady and patient—this step helps free the display without a fuss. If you need help, you can always schedule a repair.
Step 19


Hold on, partner! Don’t remove the screen just yet – there’s still a ribbon cable connecting it to your device, so let’s take care of that first.
– Slide the flat edge of two picks gently under the screen, right below the speaker cutouts.
– Carefully use the picks to lift the screen up, fully detaching it from the frame.
– If the screen feels a bit stuck, don’t stress! Just use the pick to loosen the adhesive in that spot. Just be sure not to push the pick too far under the screen.
Step 20

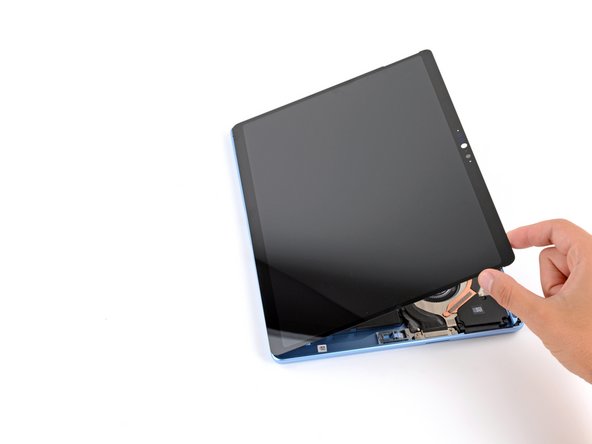
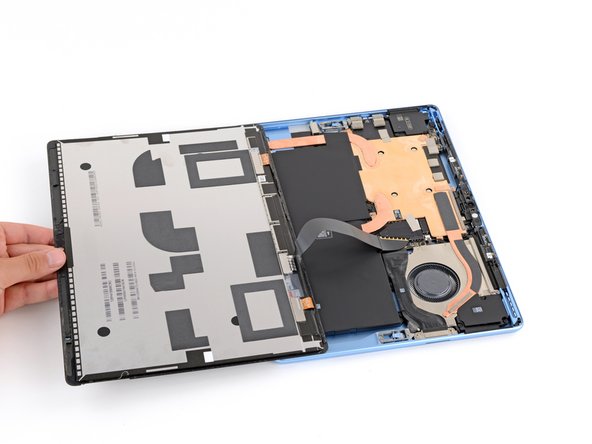
– Once the screen is completely free, gently flip the top edge over the bottom edge and carefully lay the screen flat. Just make sure not to put any strain on that delicate ribbon cable – we don’t want any surprises here!
Step 21
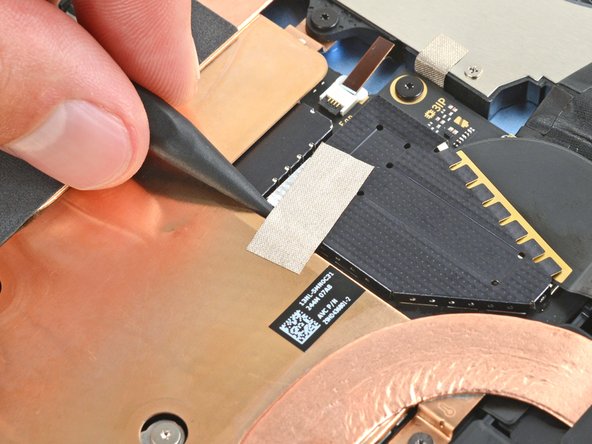


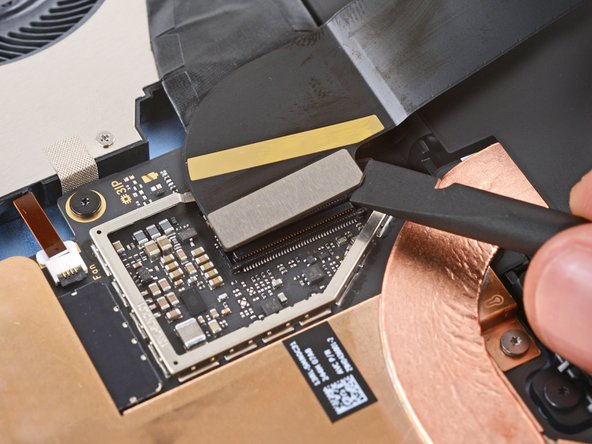
– Gently use the tip of a spudger to lift the conductive tape off the copper shield, right in the center of your device. Take your time and be careful, it should come off without too much fuss!
Tools Used
Step 22
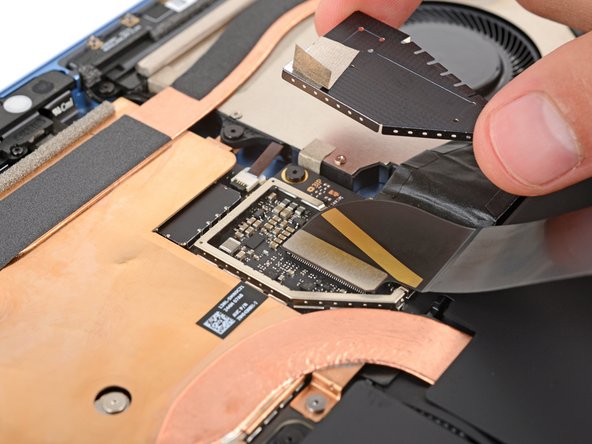

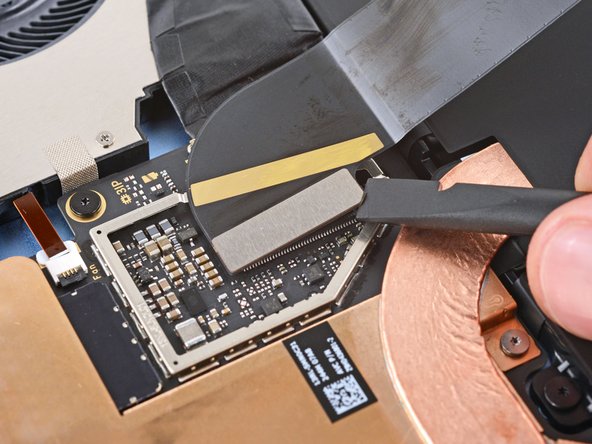
Handle the shield gently—try not to bend or twist it too much, since you’ll be putting it back in place later. Keeping it intact makes reassembly smoother.
– Slide one arm of your angled tweezers into a gap along the edge of the screen cable shield.
– Gently lift up with the tweezers to pop off and remove the shield. Easy does it!
Tools Used

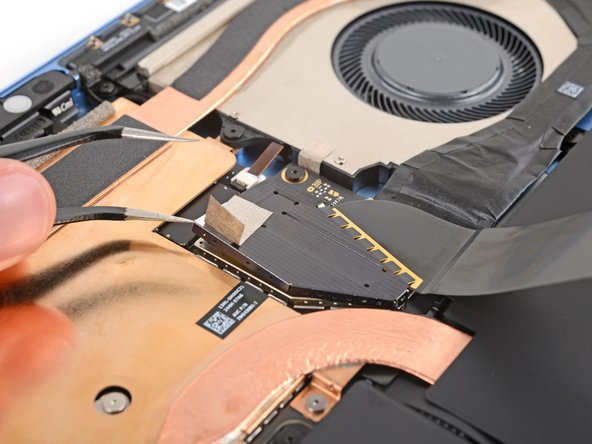
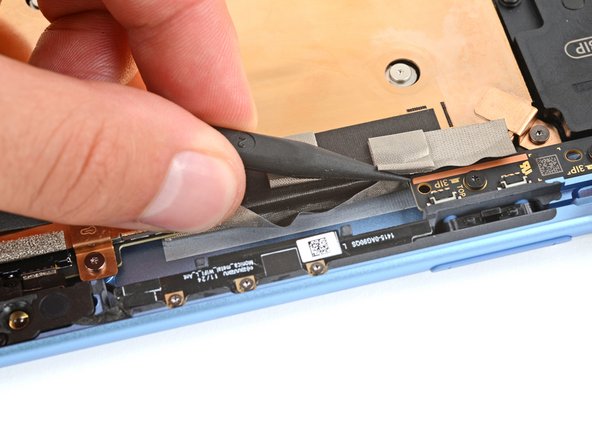
Step 23

– Gently slide the flat side of your spudger under the notched corner of the screen cable press connector and give it a little nudge to disconnect. Easy does it!
Tools Used
Step 24

– Hold the screen securely with both hands and gently lift it away.
– When putting things back together, use this guide to swap out the old screen adhesive and set your screen in place.
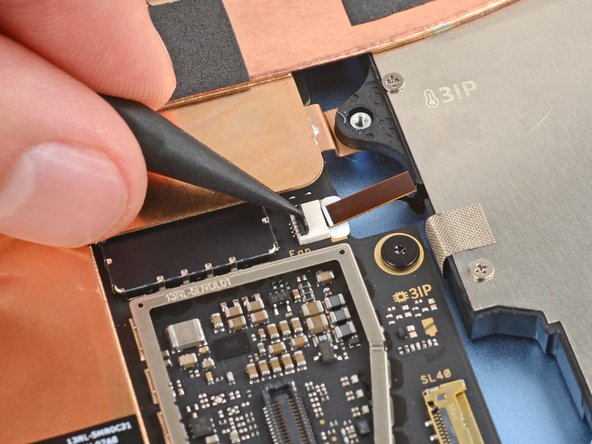
Step 25
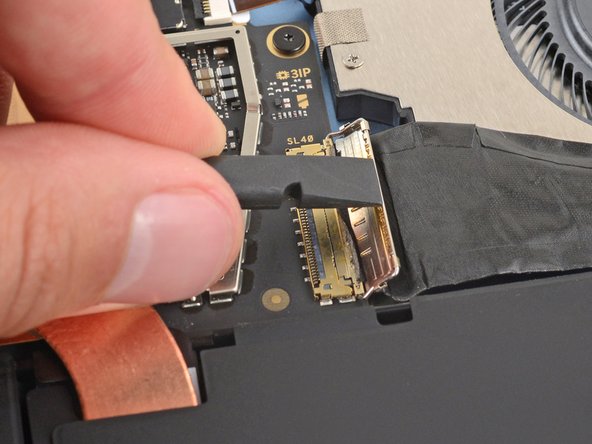

– Grab the flat end of a spudger or a clean fingernail and gently flip up the metal latch on the Surface Connect port cable. Keep a steady hand and take your time—you’re opening the door for the next step. If you need help, you can always schedule a repair.
Tools Used
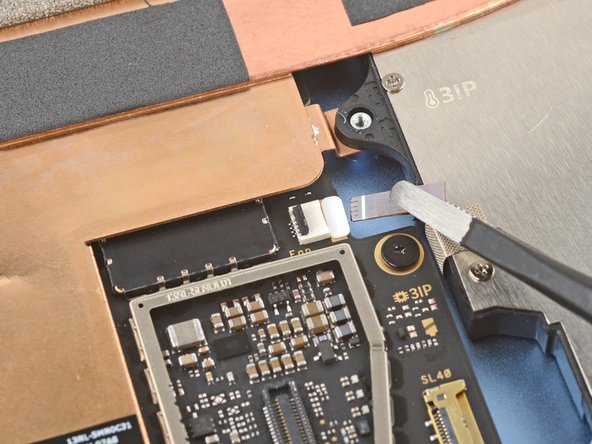
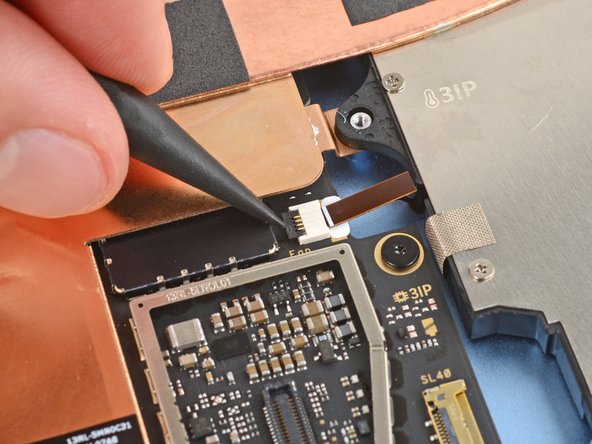
Step 26
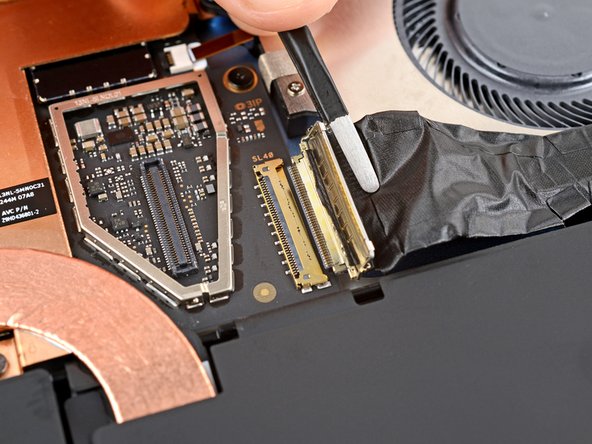
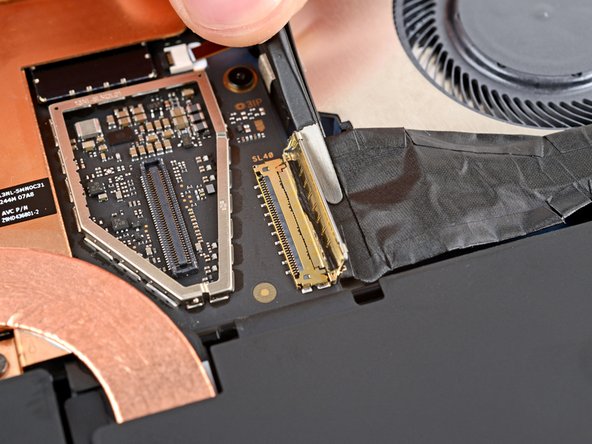
– Grab the Surface Connect port cable near the connector head with tweezers or your fingers, and pull it straight out of the socket—think of it as gently unplugging a friendly connector.
– When putting everything back together:
– Peel off any sticky liners from the Surface Connect port cable or the bottom edge of the fan—it’s like peeling a sticker, but for your device.
– Carefully insert the cable’s connector into its socket using tweezers or your fingers—align it properly and give it a gentle push.
– Flip the metal latch over the connector and press firmly around its edges until you hear it snap into place—like closing a secure door.
– Press the cable firmly onto the fan to secure it with the adhesive—think of it as giving it a friendly hug to keep everything in place.
Step 27

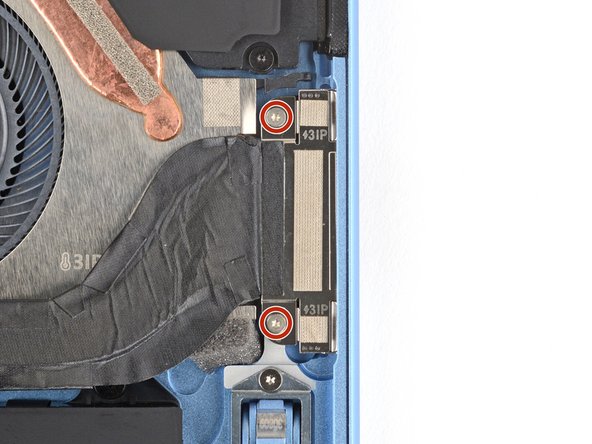
– Grab a Torx Plus 3IP screwdriver and carefully remove the two 3.6 mm-long screws that hold the Surface Connect port in place. Need a hand? You can always schedule a repair.
Step 28
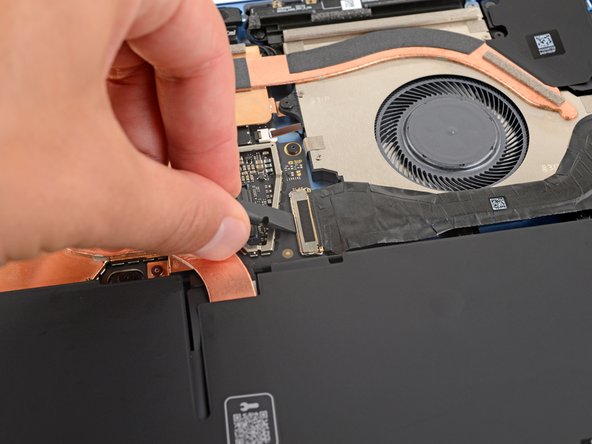
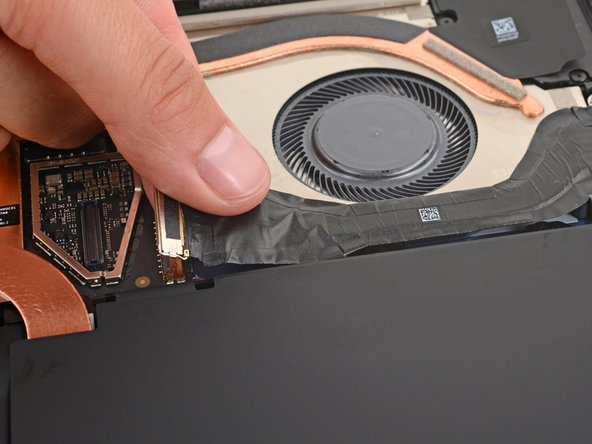
A gentle layer of adhesive is keeping the Surface Connect port cable stuck to the fan’s lower edge.
If you want to loosen things up, a quick blast from a hair dryer or heat gun will do the trick—just take it easy, because the battery isn’t a fan of too much heat.
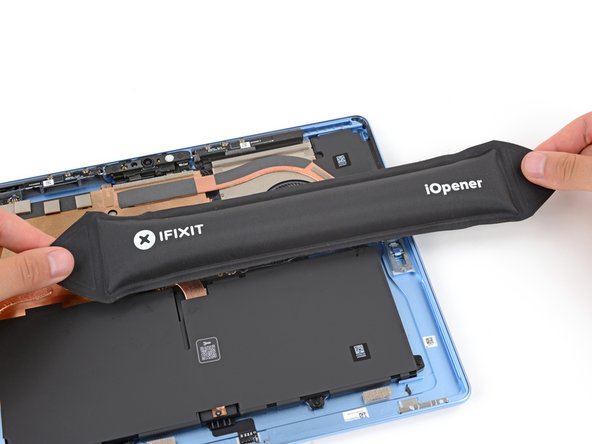
– Warm up your iOpener and place it gently on the Surface Connect port cable for about two minutes. This will help loosen up that stubborn adhesive, making it easier to work with.
Tools Used
Step 29
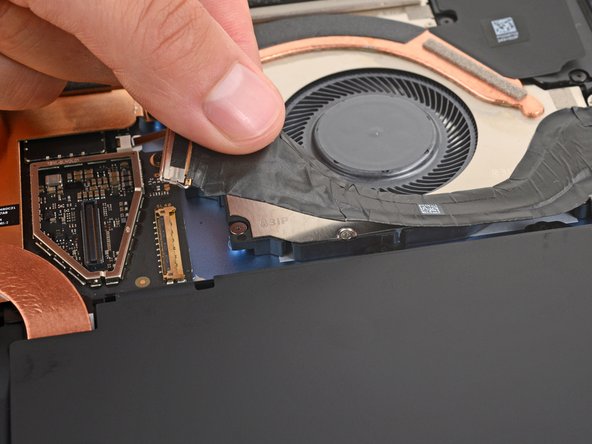
– Grab the Surface Connect cable by its end with the motherboard connector and gently peel it off the fan. Easy does it!
– During reassembly:
– If you’re putting the original port back in, the adhesive should still be sticky enough for a second go-round.
Hold off on sticking down the Surface Connect port cable with adhesive—wait until it’s plugged in. If you secure it too soon, it might not quite reach its socket!
If the adhesive isn’t quite grabbing or you’re replacing a port that doesn’t come with its own sticky strip, grab a thin piece of double‑sided tape and stick it along the bottom edge of the fan (just avoid the cable). If your tape has a backing liner, leave it on—that’s your shield to keep the adhesive clean until you’re ready to stick it down. Need extra help? You can always schedule a repair.
Step 30

Magnetized screws will naturally jump toward the port’s magnet. You might want to grab a pair of tweezers to hold them steady during removal. If you need help, you can always schedule a repair.
– Gently lift the Surface Connect port out of its slot in the frame and set it aside. When you’re ready to put it back, align the port so its cutouts rest neatly over the frame posts, ensuring it’s fully seated—the outer edge should sit flush with the frame. Then, secure it in place with the two screws. Need a hand? schedule a repair if things get tricky.
Step 31
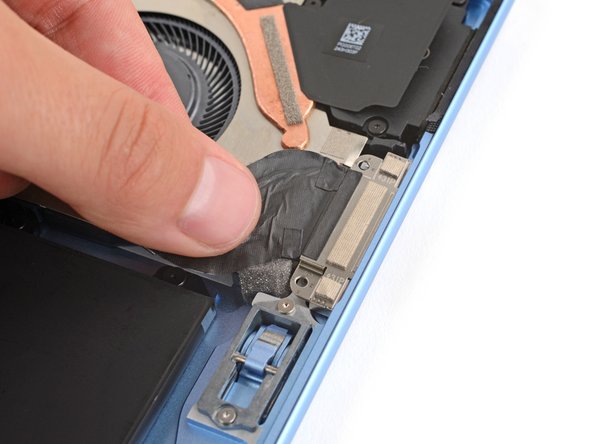
– Grab your spudger and gently lift the two pieces of shiny silver conductive tape from the top left corner of the thermal module. Keep it careful and steady—that’s how we do it at Salvation Repair! If you need help along the way, you can always schedule a repair.
Tools Used
Step 32
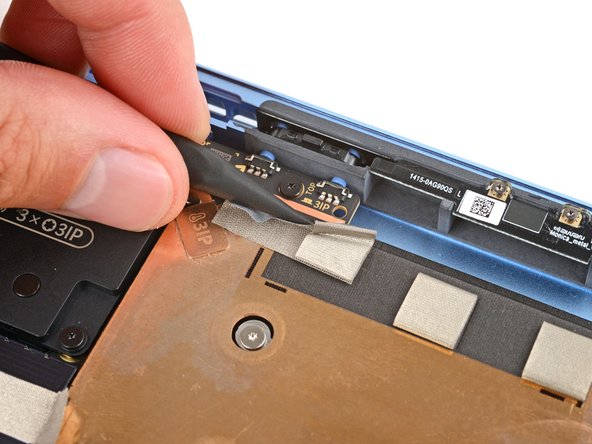
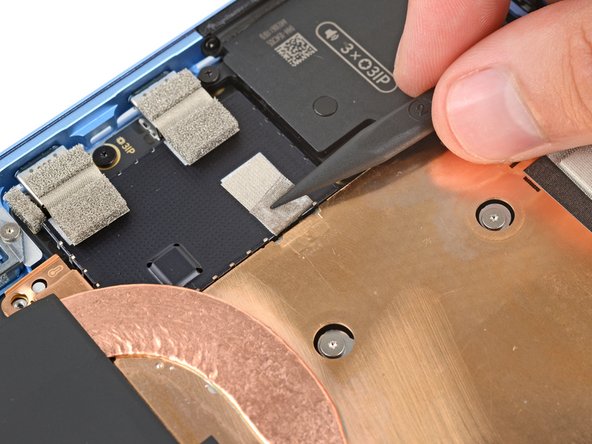
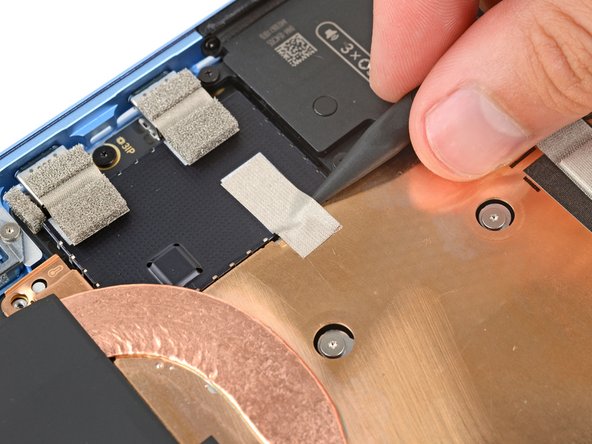
– Gently slide the point of your spudger under the black conductive tape at the top edge of the thermal module, and lift it off the frame. It should come off with a little nudge!
Tools Used
Step 33
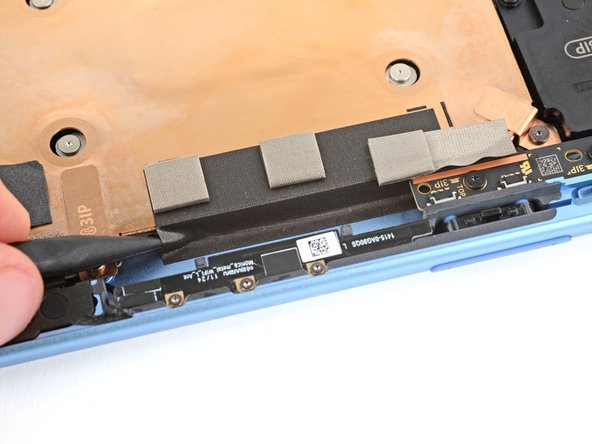
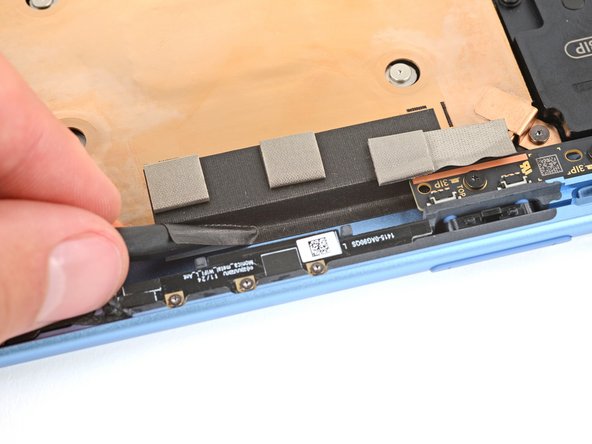
– Take your spudger and gently flip up the black locking tab on the fan cable’s ZIF connector—it’s chilling near the center of the fan’s left edge.
– Now, grab the cable’s plastic pull tab with your tweezers and smoothly slide the cable out of its socket. Easy does it!
Tools Used
Step 34
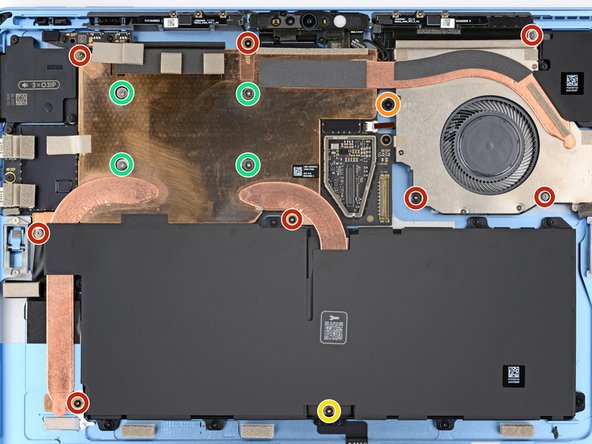
– Grab your trusty Torx Plus 3IP screwdriver and start unscrewing the 14 screws holding the thermal module and fan assembly in place. It’s a bit of a task, but you’ve got this!
– When you’re putting everything back together, begin by tightening the four CPU tension screws in an ‘X’ pattern. So, start with the top left, then move to the bottom right, top right, and finish off with the bottom left. It’ll keep things nice and secure!
– There are eight 2.6mm-long screws to deal with. Don’t worry, just keep track of them!
– One 2.8mm-long screw goes near the top left edge of the fan. It’s easy to spot, don’t miss it.
– Another screw, this one 3.7mm long, is positioned near the center of the battery’s bottom edge. Tighten it up carefully!
– Lastly, don’t forget the four 2.4mm-long CPU tension screws in the center of the thermal module. These will ensure everything stays in place once you’ve reassembled it all.
Step 35
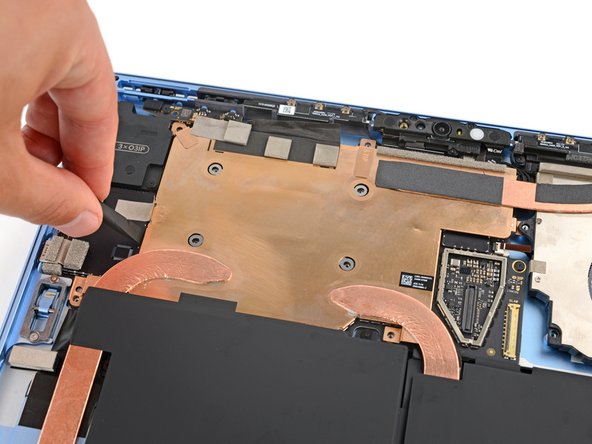
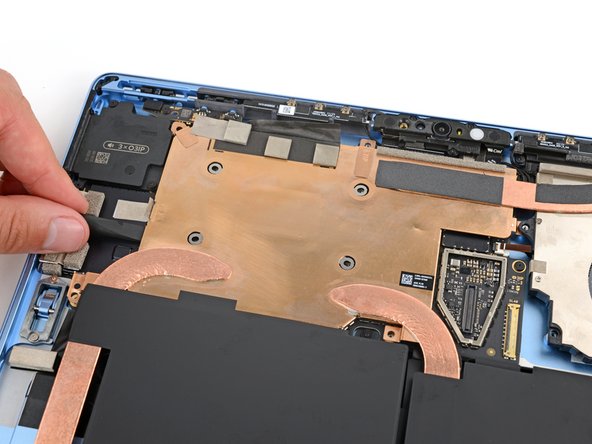
– Grab your trusty spudger and gently pop up the left and right edges of the thermal module, right where those copper heat pipes make their bendy moves.
Thermal paste acts like the glue between your thermal module and the motherboard. Depending on how old your laptop is and how well the paste has held up, you might need to give it a little extra elbow grease to detach. Don’t worry—just take your time and be gentle. If you need help, you can always schedule a repair.
Tools Used
Step 36
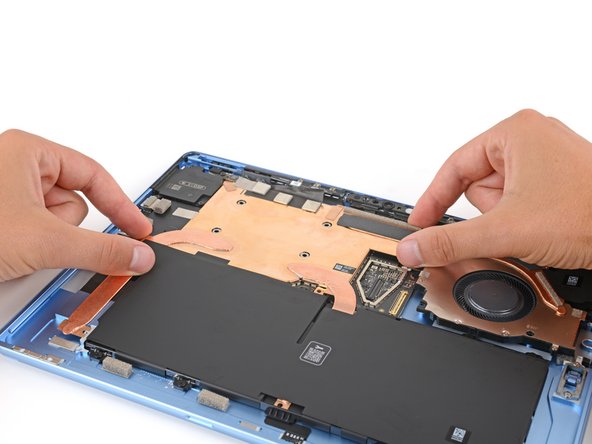
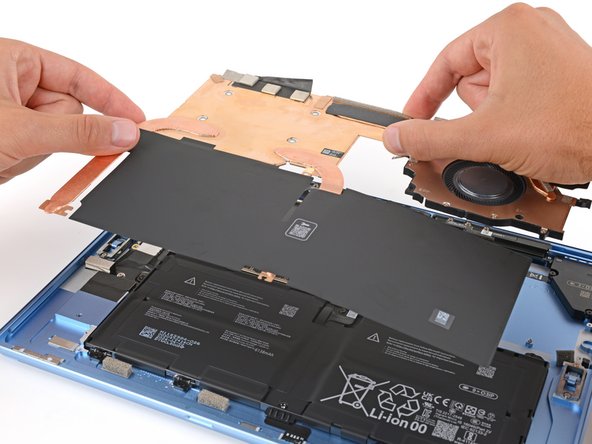
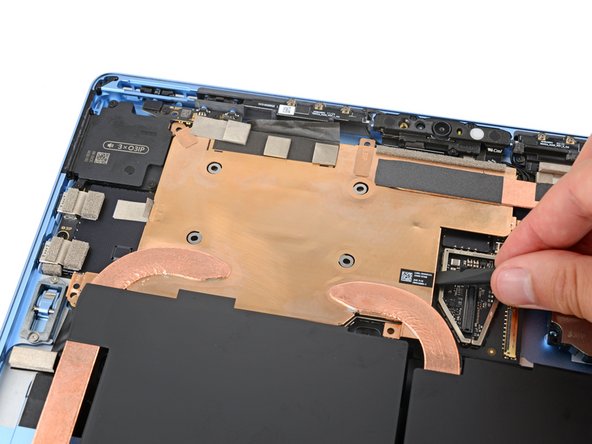
Be careful not to lift the assembly by the fan—that could bend the thermal module and cause trouble down the line. Handle with care!
– Give that thermal module a gentle lift with both hands, and carefully pull it straight up to remove it. You’re almost there!
Step 37
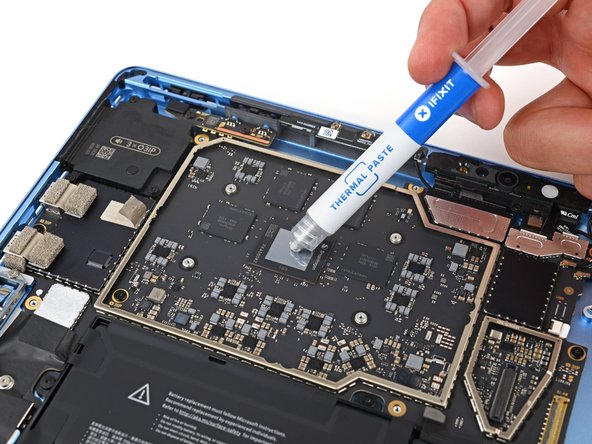
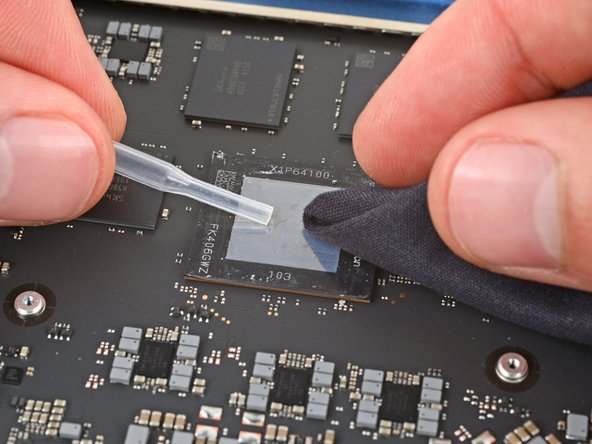

If you’re putting in a new thermal module, the good news is that it’s ready to go – no cleaning needed!
– During reassembly: If you’re installing a new thermal module, check whether the bottom already has thermal paste applied—that means no need to add more, just clean the CPU. Follow this guide to carefully clean the thermal module and CPU, then apply thermal paste properly. If you need a hand, you can always schedule a repair.
Step 38

Prying along the long edge? That could spell trouble for the connector and socket. Go easy here!
– Use the flat end of a spudger to pry up the battery press connector from a short edge and disconnect it.
Tools Used
Step 39


Try to keep the shield in good shape—you’ll need it again when you put everything back together.
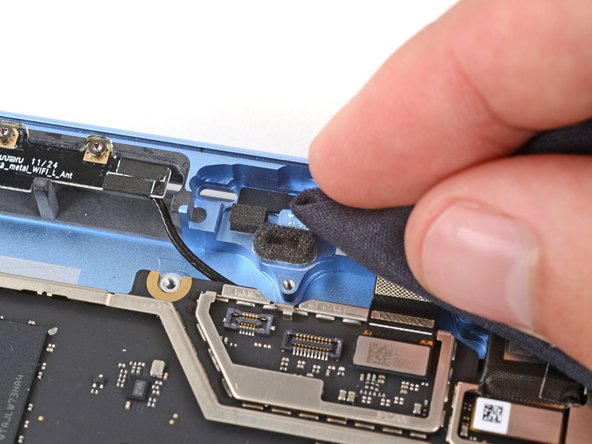
– Take one arm of your angled tweezers and slip it into a gap on the metal shield just below the front camera.
– Gently lift with the tweezers to pop the shield out and set it aside.
Tools Used
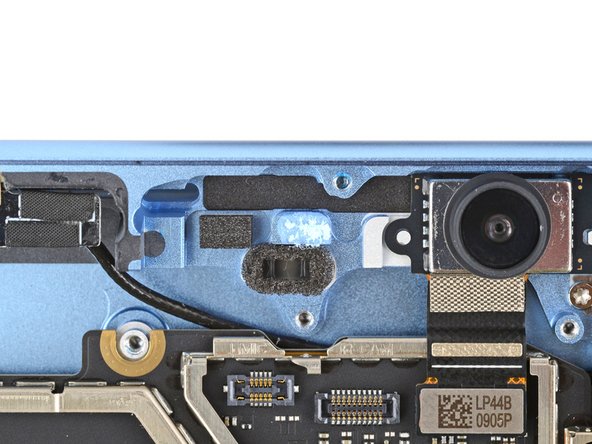
Step 40


– Do that same move again to pop off the metal shield hanging out just to the right of the last one you removed.
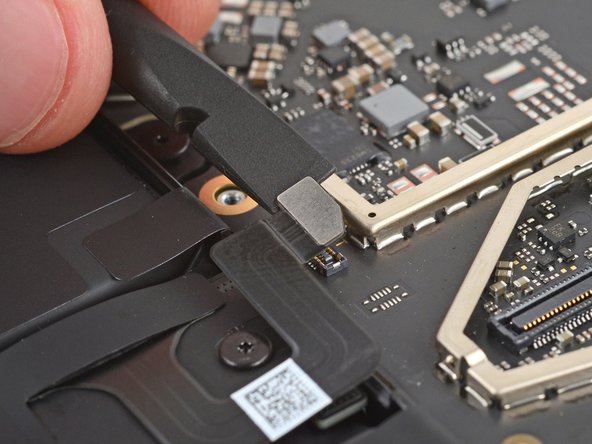
Step 41

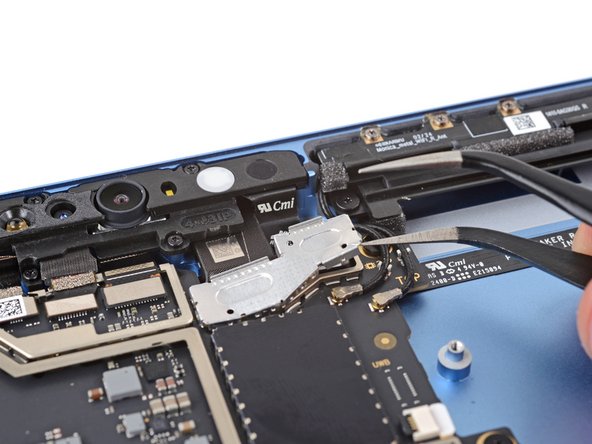
– Grab a spudger and gently lift up to disconnect the left microphone press connector (the one all the way to the left, right below the front camera).
Tools Used
Step 42


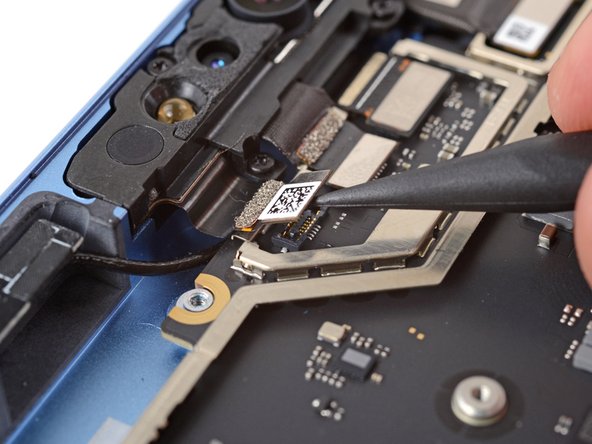
– Grab the flat end of a spudger and gently lift the ambient light sensor’s press connector, just to the right of the previous one. Take your time—patience makes perfect! If you need a hand, you can always schedule a repair.
Tools Used
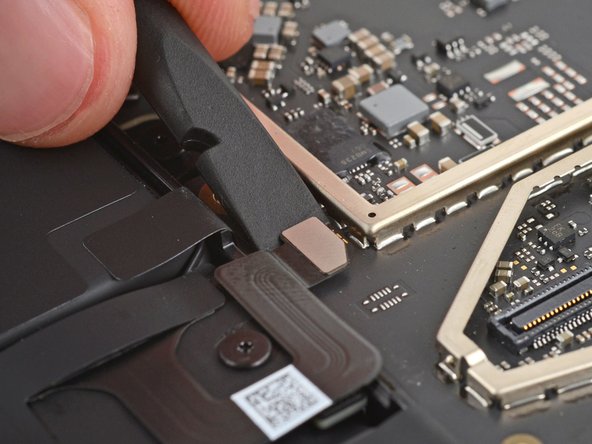
Step 43
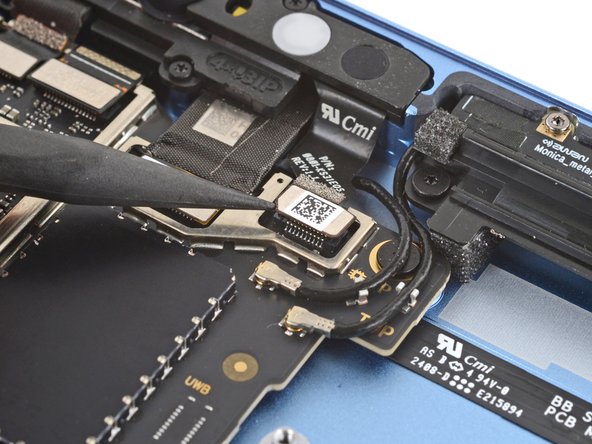

– Grab your spudger and carefully lift the rightmost microphone press connector (that’s the one closest to the front camera) by its notched edge. Gently disconnect it to keep things moving smoothly.
Tools Used
Step 44

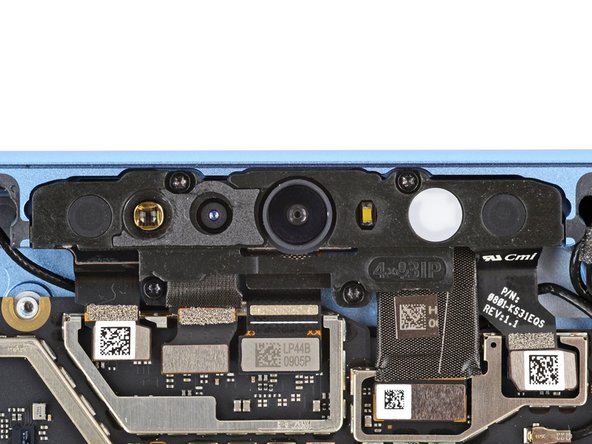
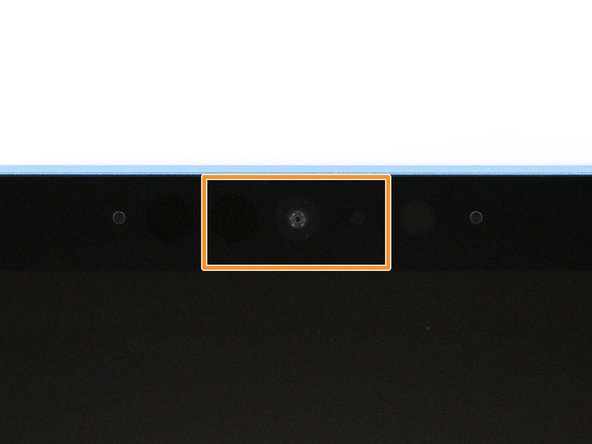
– Grab a Torx Plus 3IP screwdriver and carefully remove the four 3.3 mm-long screws holding the front sensor assembly in place. If you need help, you can always schedule a repair.
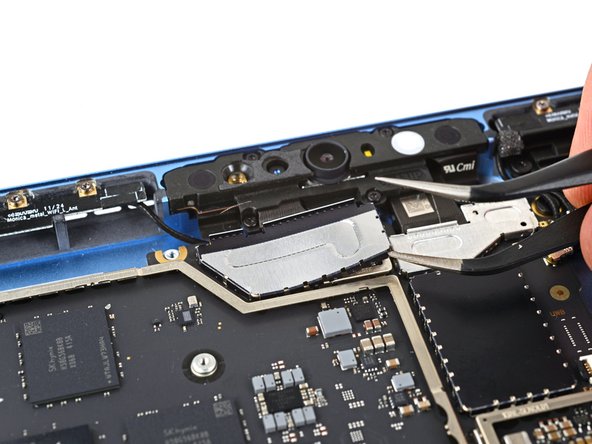
Step 45
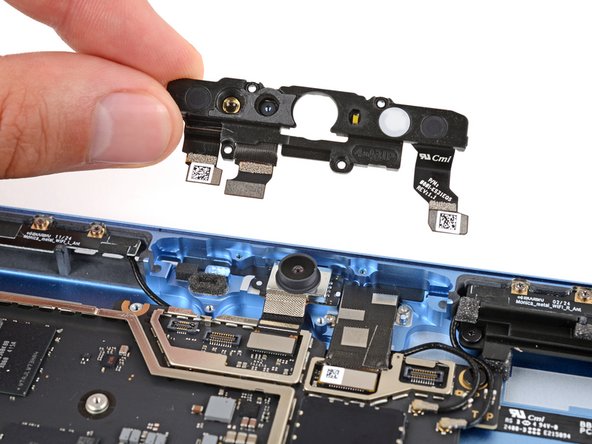

– Carefully lift the front sensor assembly straight up to free it from the device.
– When putting everything back together, double-check your replacement assembly for any plastic liners. If you spot any, make sure to remove them before snapping the assembly back into place.
Step 46

– Now, to put everything back together, just follow the steps in reverse. It’s like a puzzle, but with fewer pieces!
– Got some e-waste? Make sure to drop it off at an R2 or e-Stewards certified recycler. It’s the eco-friendly way to go.
– Did things not go quite as planned? No worries! Try some basic troubleshooting or check out our Answers community for a helping hand.
–
Success!

