Microsoft Surface Pro 2 Audio Ports Replacement
Duration: 45 minutes
Steps: 8 Steps
Step 1


Hey there! Before you get started, make sure to unplug and power down your Surface Pro 2. It’s all about staying safe and shock-free—so take a sec to turn it off before diving in!
Step 2

Keep your skin and eyes away from the heating pad or heat gun—they get seriously hot and can hurt you.
The adhesive hangs out right under the darker edge around your display.
– Grab your heating pad or heat gun and gently warm up the edges of the screen. You’ll want to focus on the area about an inch from the edge of the device to soften the glue and make the next steps a breeze.
Step 3

If the tool isn’t sliding under the screen smoothly, give it another round of gentle heat before moving forward.
– Grab your trusty plastic opening tool and a suction cup for some extra grip. Start by gently slipping one edge of the tool under the corner of your screen.
– Take it slow and steady as you work the tool all the way around the screen’s edge.
Step 4


Take a look at the third tiny connector, marked in red. It’s a crucial one, so make sure you’re paying attention!
– First, gently pull on the small tabs to release the orange cables that connect your screen to the motherboard. You can use a nylon spudger to help dislodge them – it’s like a special key to set your cables free.
– Now, be patient and let the glue cool down completely before it comes into contact with any other surface. This will save you from any sticky situations.
Tools Used

Step 5


– First things first, disconnect that front-facing camera completely, and then carefully take out the plastic bracket.
– Next up, go ahead and remove all 22 screws holding the bezel in place.
– Now it’s time to tackle those brackets: the left one has 16 screws, while the right one has 15. Get those out!
– You’ll be working with three types of Torx screws: T3, T4, and T5, so keep your tools handy.
Step 6
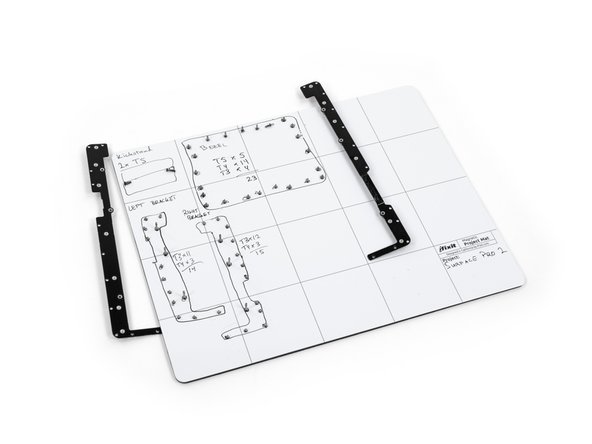

The motherboard is held in place with screws just like the other parts. To keep track of your screws and avoid confusion, check out the screw diagram in the attached photo—it’s a handy visual aid to make reassembling a breeze. If you need help along the way, you can always schedule a repair.
– Once you’ve taken out the brackets, set them aside for now.
– Next, grab your screwdriver and remove the 25 screws of different sizes that hold the motherboard to the back plate. Keep track of which screw goes where!
Step 7


Handle those motherboard cables with care—they’re a bit delicate and like their personal space!
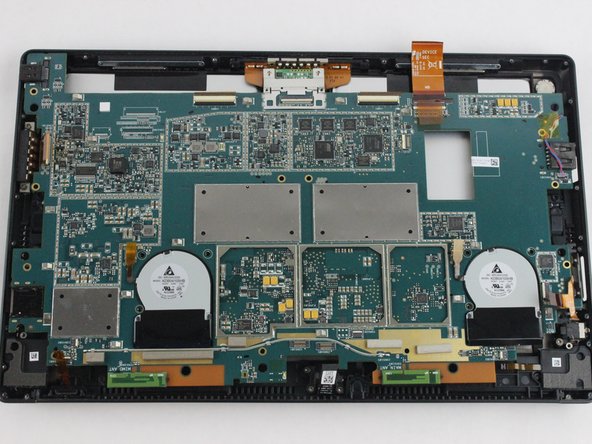
Great job! The motherboard is now fully removed and looks just like the images shown. You’re making solid progress—keep it up!
Step 8
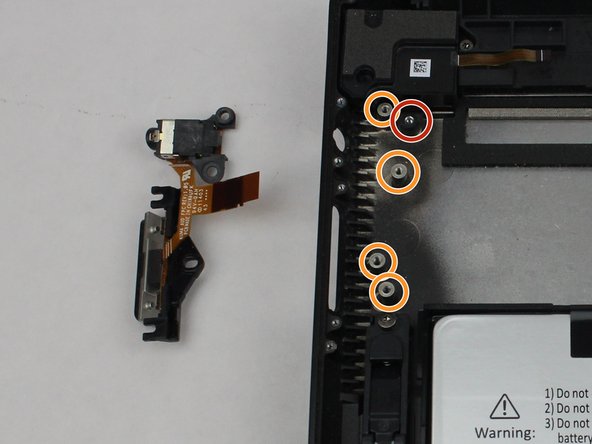

– Finally, remove the last screw to free the entire assembly. Keep in mind, those screws and the ribbon cable were already taken out earlier during the motherboard removal steps. If you need help, you can always schedule a repair.
Success!