Microsoft Surface Pro 2 Fan Replacement
Duration: 45 minutes
Steps: 9 Steps
Use this step-by-step guide to replace the fans in your Microsoft Surface Pro 2. If your device is overheating or making loud grinding noises, the Microsoft Surface Pro 2 Fans (P/N: KDB04105HB CK91 DF43) may need to be replaced due to extended use or damage from dropping the device. Replacing the fans will prevent further damage from overheating or grinding. This guide is a bit more challenging, as it requires proficiency with a heat gun and an opening tool to remove the screen. Follow the steps carefully, and when you’re done, simply reverse the process to reassemble your device. If you need help, you can always schedule a repair.
Step 1


Before diving in, make sure to unplug and power down your Surface Pro 2—it’s the best way to avoid any zaps or sparks. Stay safe and keep it chill!
Step 2

Keep your skin and eyes away from the heating pad or heating gun – they can be a bit too toasty for comfort! Stay safe and keep those digits intact.
The adhesive hangs out just beneath the darker border around your display.
– Warm up the edges of the screen with a heat gun or heating pad. You’re aiming for about an inch from the edge—just enough to loosen up that stubborn glue and make your next step smoother.
Step 3

If the tool isn’t sliding under the screen easily, don’t rush it. Go back to heating it up a bit more before continuing.
– Grab a plastic opening tool and a suction cup to help you out. Start by gently slipping one edge of the tool under the corner of the screen.
– Now, take it slow and carefully work your way around the edge of the screen, making sure not to rush.
Step 4


Check out that third little connector marked in red—don’t let it sneak by you!
– Gently disconnect the orange cables linking the screen to the motherboard by tugging on the small tabs. Use the nylon spudger to carefully release these cables.
– Let the glue cool down before it touches any other surfaces—patience pays off!
Tools Used

Step 5


– First, ensure the front-facing camera is completely disconnected before removing the plastic bracket—no shortcuts here! Next, unscrew all 22 screws around the bezel to free it up. Then, carefully detach the left and right brackets; the left has 16 screws and the right has 15, so keep track of where they go. Finally, note that the three types of Torx screws you’ll encounter are T3, T4, and T5—grab the right driver for each to keep things smooth sailing. If you need help along the way, you can always schedule a repair.
Step 6
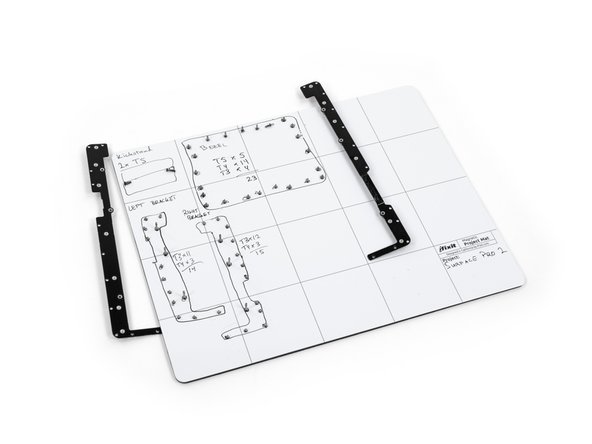

Yep, the motherboard’s got screws too—no surprise there!
Check out the handy screw diagram photo to keep your screws organized and avoid the classic ‘extra screw at the end’ situation.
– With the brackets out of the way, keep them somewhere safe—you don’t want those little guys wandering off.
– Next up, grab your screwdriver and take out the 25 screws (yep, they’re all a bit different) holding the motherboard to the back plate.
Step 7


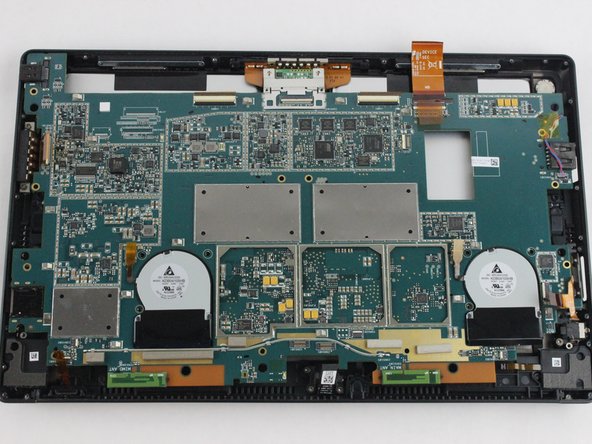
Handle those motherboard cable connections with care – they can be a bit tricky! Take it slow and steady, and if you need help, you can always schedule a repair.
Great job! The motherboard is now fully removed and should resemble the pictures shown. Keep up the good work!
Step 8


Be sure to wear gloves or use tools, the metal edges can be pretty sharp! A little protection goes a long way.
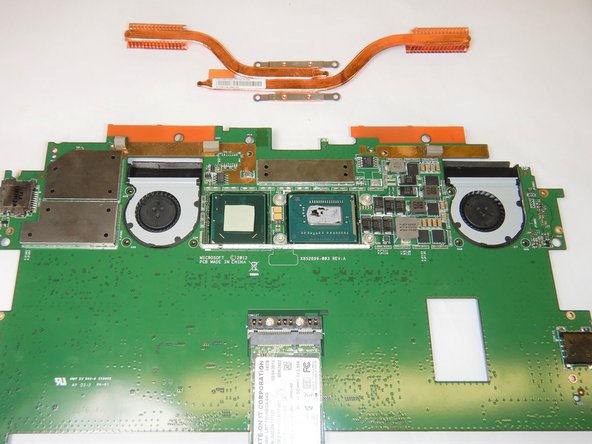
– Flip the motherboard over and find the heat shield, which sits between the two fans at the top of the board.
– Use an opening pick to gently lift the heat shield along its edges and remove it.
– Unscrew the four Torx T5 screws, one at each corner of the heat sink mounting frame.
– Carefully lift the heat sinks off the motherboard, being gentle as you go.
– Before putting the heat sinks back on, make sure to clean both contact surfaces with some isopropyl alcohol and apply a fresh layer of thermal paste.
Step 9


Handle ribbon cables gently, as they’re delicate and can break if you tug too hard. Patience is key—slow and steady wins the repair race. If you need help, you can always schedule a repair.
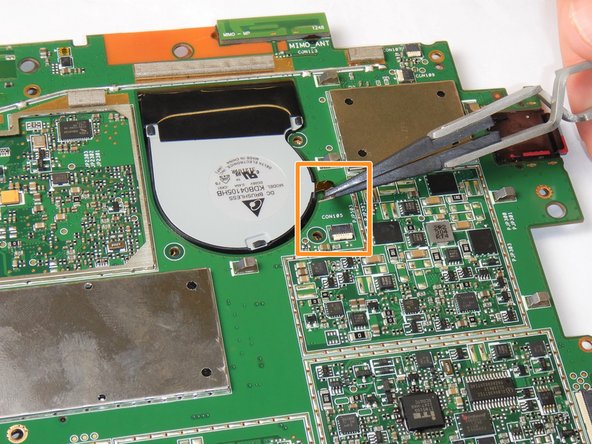
– First, grab your trusty screwdriver and get to work on the top side of the motherboard. Unscrew the three Torx T5 screws holding each of the two fans in place. Easy peasy!
– Next, gently unplug the ribbon cables connecting the fans to the motherboard from their clamps. They’re just a little snug, so take your time!
– Finally, carefully lift the fans out from the underside of the motherboard. Smooth and steady – you’ve got this!
Success!