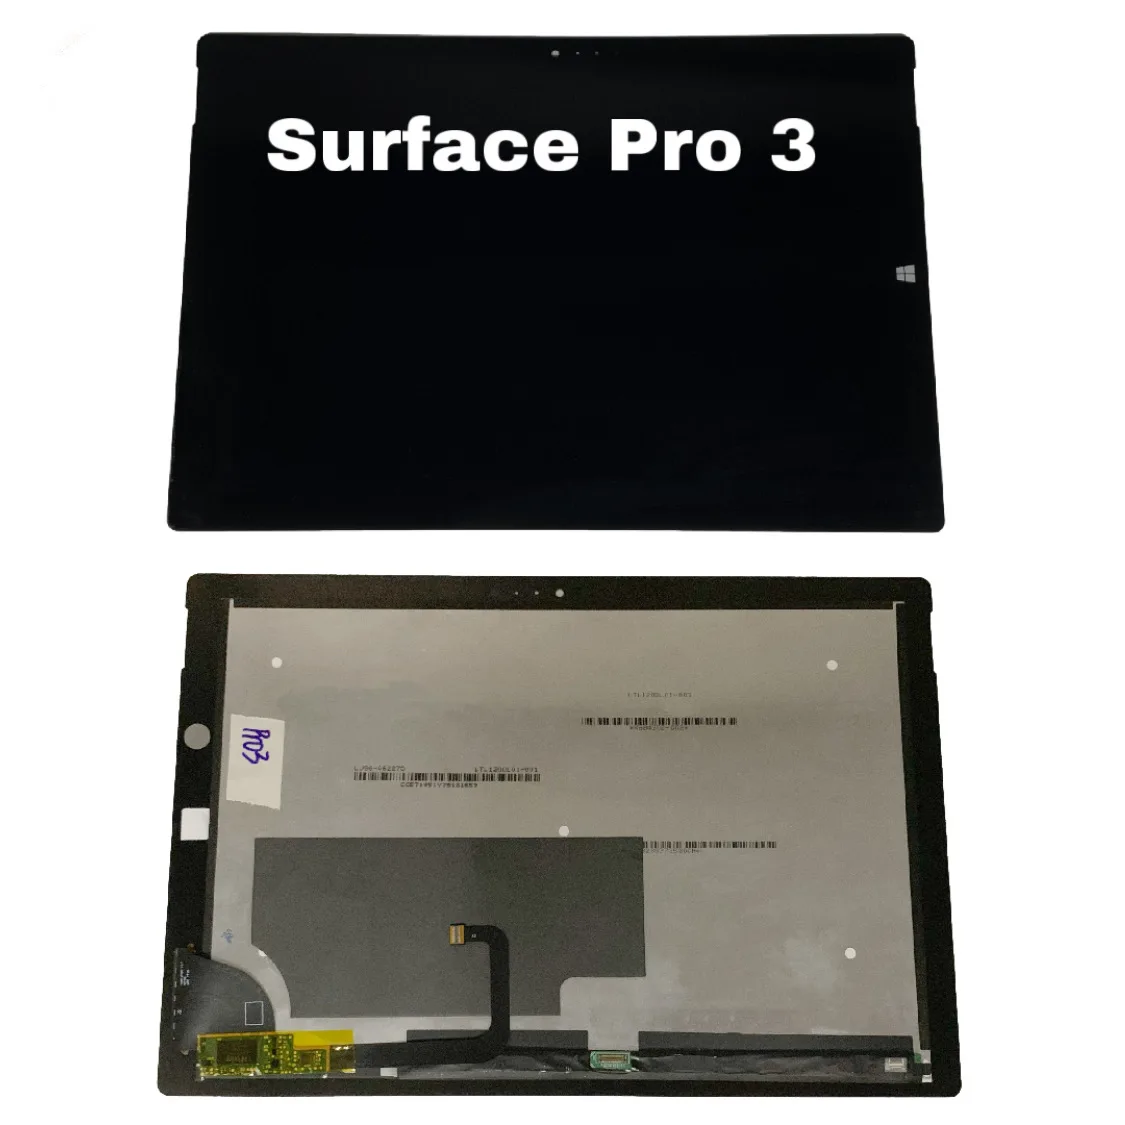
Microsoft Surface Pro 3 SSD Replacement
Duration: 45 minutes
Steps: 9 Steps
Ready to give your Surface Pro 3 a little TLC? This guide shows you how to safely remove the SSD, kicking off with the screen and digitizer removal before diving straight into the SSD. Heads up—this guide skips the step for cloning data from your current SSD onto the new one, but don’t sweat it. You’ve got this!
Step 1


Before diving in, make sure your Surface Pro’s battery is running low—below 25% is best. A charged-up lithium-ion battery might go rogue and burst into flames or explode if it takes a hit during repairs!
Keep your cool when using the heat gun—too much heat can fry your display or battery permanently. Treat it like a zen art project and you’ll do just fine!
The display is really stuck to the device’s frame, so get ready to give it a little love to loosen things up!
– Alright, let’s get that display off! Start by warming up the adhesive—it’s like giving it a cozy blanket. Use a heat pad, heat gun, or an iOpener. If you’re in a tight spot, a hair dryer can step in as a backup.
– Gently and evenly heat the edges of the display until it’s hot enough that you wouldn’t want to touch it. Aim to keep that warmth going for a few minutes to really loosen things up.
Step 2


Handle with care—the glass is delicate and can crack if you apply too much pressure.
The wi-fi antennas are snugly glued beneath the screen border at the top edge (on either side of the camera), so be gentle when separating the top edge. If things get tricky, don’t hesitate to add a little more heat!
Got a display that’s all cracked and shattered? A suction cup might not stick to that uneven surface. No worries! Try laying down some packing tape over the display for better grip. Or, if you’re feeling adventurous, superglue the suction cup onto the display and get to work!
– Grab a suction cup or an iSclack and gently pull up on the glass to make a tiny gap between the glass and the metal frame—nice and easy, no rush!
– Take an opening pick and carefully wedge it into the gap you just made. Use it to slice through the adhesive holding the glass in place—steady hands here, my friend!
– Work the pick all the way around the sides and bottom of the display to loosen things up. If the adhesive starts acting stubborn, apply a little heat and keep going!
Step 3


The screen is super fragile and can shatter easily—handle it with care and keep those fingers safe from any sharp glass bits!
– Keep that heat gun buzzing as you warm up different sections of the screen.
– As you glide around the screen with the heat gun, grab your trusty plastic opening tool and those opening picks to gently coax the screen free.
Step 4


– Gently lift the screen up, taking care not to yank any wires loose.
Step 5


Watch out for that sneaky little rectangular bridge connector hiding underneath! It’s small, but it’s important, so keep an eye on it.
– Take out the 3 mm T3 Torx screw holding down the battery connector, then gently unplug that battery connector. Easy peasy!
Step 6


Watch out for that sneaky little rectangular bridge connector hiding underneath! It’s small, but it’s important—don’t let it escape your grasp!
– Unscrew the lone 4 mm T3 Torx screw that’s holding down the display cable—you’re the boss now!
– Gently lift up that connector and cut the communication by detaching the cable. Easy peasy!
Step 7


– Grab hold of that bright orange cable linked to the shiny silver connector.
– Gently lift the orange cable until the connector pops off – easy does it!
– Boom! The screen is now totally disconnected.
– Heads up: Your replacement display might not come with all the parts you need. Be sure to salvage anything reusable from your original display and transfer them to the new one as necessary.
Step 8


– Unscrew the two 4 mm T3 Torx screws holding the SSD in place.
Step 9


– Ready to put it all back together? Just follow these steps in reverse, and you’ll be golden!
– If you need help, you can always schedule a repair.
Success!