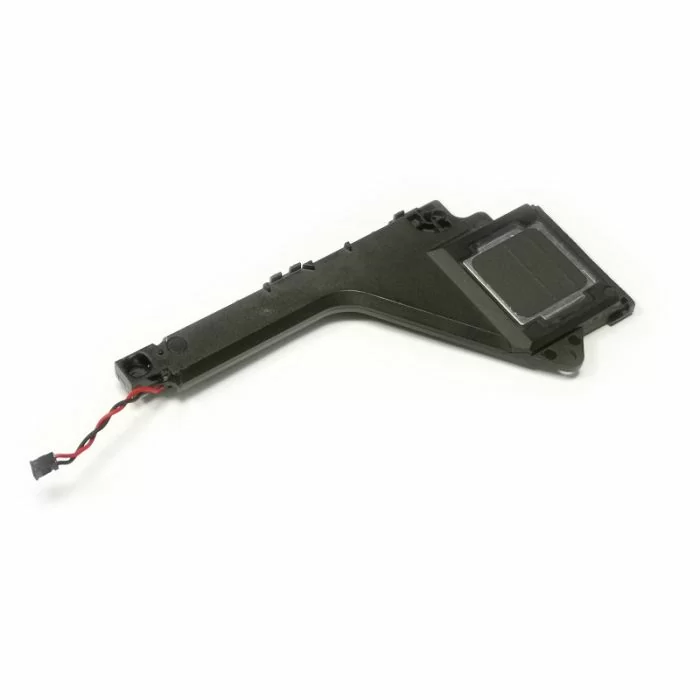
Microsoft Surface Pro 5 Left Speaker Replacement
Duration: 45 minutes
Steps: 39 Steps
Heads-up: There’s a fair chance the delicate display panel could crack under pressure during this step. Take your time and handle it gently!
Ready to swap out the left speaker on your Microsoft Surface Pro 5? Let’s do it! While you’re at it, sprucing up your CPU with fresh thermal paste during reassembly might give your Surface a little extra pep in its step. If you’re game, make sure you’ve got some new thermal paste and either high-concentration isopropyl alcohol or a specialized thermal paste cleaner handy. Heads up, though—this process might get dicey because the display panel is delicate and unreinforced. Keep it cool, crank up the heat when needed, and take it slow and steady during the prying stage. You’ve got this!
Step 1
Before you start, make sure to power down your Surface completely – we don’t want any unexpected surprises!
If you need a little extra heat, a hair dryer, heat gun, or hot plate can be your new BFF. Just be careful not to get too hot and heavy – your Surface’s screen and battery are sensitive to heat, so let’s keep things cool.
You might have to warm up and reapply the iOpener a few times to get the Surface heated properly. Stick to the iOpener instructions to keep things safe and chill—well, not literally chill!
– Got a cracked screen? No worries—keep those shards in check and your fingers safe by covering the glass with some clear packing tape. Layer strips of tape so they overlap until the whole display is secure. Oh, and pop on a pair of safety glasses to protect those peepers!
– Warm up an iOpener and place it on the right edge of your Surface screen for a solid two minutes. Let the heat work its magic!
Tools Used
Step 2
– Get familiar with the layout of the screen adhesive—it’s like a map for smooth sailing ahead.
– This zone here? It’s all adhesive, so you’re safe to cut without worries!
– Watch out near the edges! The display board and flex cables are hanging out close by. Slice gently and don’t go too deep under the display.
– Heads up for fragile antenna cables under this screen section! Stick to the guide and keep steady hands to avoid harm. Oh, and heads up—it’s also where the adhesive gets extra chunky!
Step 3
Keep the opening pick shallow—just till the black bezel on the screen’s side. Push it too far, and the LCD might end up crying for help.
– Grab an opening pick and slide it into the speaker opening on the screen, then run it gently under the glass. Keep it chill—don’t push the pick into the speaker grille, as it’s super delicate and can tear easily.
Step 4
– Swing that pick towards the bottom of the Surface and smoothly slide it under the lower edge of the speaker cutout.
Step 5
As you keep going, if the pick isn’t gliding easily, pause and give that section another warm-up. Pushing too hard could leave you with cracked glass—and nobody wants that!
– Glide the pick along the right edge of the Surface like a pro, slicing through that pesky adhesive under the screen.
– Keep this pick parked on the right edge to stop the adhesive from sneaking back together.
Step 6
You can use a hair dryer, heat gun, or hot plate for extra heat, but play it cool—don’t overdo it! The Surface’s screen and internal battery are heat-sensitive and won’t appreciate the sauna treatment.
You might need to give the iOpener a few warm-up rounds to get the Surface properly heated. Just stick to the iOpener guidelines to keep things cool (and avoid overheating).
– Warm up the iOpener again and let it work its magic on the bottom edge of the Surface’s screen for a couple of minutes.
Tools Used
Step 7
Don’t push the opening pick any further than the black bezel around the screen. Going too deep might give the LCD a tough time.
– Grab a fresh opening pick and pop it into the bottom right corner. Glide it smoothly around the curve to meet the bottom edge—like a pro!
– Work that pick along the bottom edge of your Surface to slice through the screen adhesive. Stay steady, you’re doing great!
– Leave the pick snugly wedged in the bottom edge—this little hero prevents the adhesive from sticking back together.
Step 8
Be careful when applying heat – a hair dryer, heat gun, or hot plate can be used for extra warmth, but don’t get too zealous, or you might damage the screen or internal battery. Heat can be a tricky thing, so proceed with caution!
Keep it chill and steady—you might need to reheat and reapply the iOpener a few times to get the Surface warmed up just right. Stick to the iOpener instructions, and you’ll avoid any overheating drama.
– Warm up the iOpener again and give the left edge of the Surface’s screen a cozy two-minute heat session.
Tools Used
Step 9
Be extra careful when working along the lower 2.5 inches (65 mm) of the left edge. Don’t push your opening pick in more than 1/8 inches (3 mm) here—there are display cables hiding nearby, and they’re a bit fragile. Once you’ve cleared the display cable area, keep the pick close to the bezel and don’t go any further. Better safe than sorry!
– Pop a new opening pick into the bottom left corner and glide it around the edge like you’re slicing cake—toward the left side.
– With steady vibes, drag the pick down the left edge of the Surface to work through that stubborn screen adhesive.
– Keep that pick snug in the left edge to stop the adhesive from acting clingy and resealing itself!
Step 10
Be careful when applying heat – a hair dryer, heat gun, or hot plate can be used for extra warmth, but don’t get too zealous, or you might damage the screen or internal battery. Heat can be a tricky thing, so proceed with caution!
This edge has some thick, stubborn adhesive, so you might need to warm it up a few times with the iOpener before it’s ready to cooperate. Stick to the iOpener instructions to keep things safe and breezy—no overheating drama here.
– Warm up the iOpener again and give the top edge of the Surface’s screen a soothing two-minute heat session. It’s like a spa day for your device!
Tools Used
Step 11
Alright, here’s the deal—about 6 inches (15 cm) along the top edge of the case are snugly guarded by the antennas on both sides. They’re sandwiched between the case and the screen bezel. Be gentle and follow the next steps with care to keep those antennas happy and intact.
– Glide your opening pick around the left corner like you’re on a smooth joyride, and slide it along the top edge of the Surface. Keep cruising until the pick is 2.75 inches (70 mm) shy of the left edge. Stay steady and keep it cool!
Step 12
Keep the pick level with the screen as you work—it’s your trusty sidekick here! Steer clear of those antennas by avoiding any pressure against the case.
– Time to get under that display! Insert the point of your pick where you stopped cutting, but be careful not to go deeper than the edge of the bezel.
– Now, gently rock the pick to the right, pressing it into the screen adhesive underneath the bezel. This will help cut the adhesive as you go – just remember, no sliding along the edge!
– Keep repeating this motion: insert the pick, roll to the right, and cut that adhesive. Keep going until your pick is about 2.5 inches (64 mm) from the right edge of the Surface. You’re making great progress!
Step 13
– After cutting the adhesive over the antennas (8.5 inches or 22 cm from the left edge), guide the pick smoothly along the top edge. Swing it around the top-right corner with finesse to slice through the last bits of adhesive.
Step 14
Hold up! Don’t yank the screen off just yet—it’s still tethered to the motherboard by two cables.
– Gently lift the screen assembly away from the Surface case. If you feel any resistance, pause for a moment and make sure all the adhesive has been released.
– Grab an opening pick and carefully slice through any leftover adhesive.
– Watch out for the flash lens as it might pop out of the Surface case. Keep an eye on it and make sure to place it back into its spot during reassembly.
Step 15
– Carefully lift the top of the screen assembly away from the case while sliding the bottom end closer to the display connectors on the motherboard. Smooth moves, no rush!
– Gently rest the screen on the case with the connectors facing upward. Be extra mindful not to crease those delicate display cables—treat ’em like royalty!
Step 16
Be gentle with the shield—keep it in shape, because it’s making a comeback during reassembly!
– Take an opening pick and gently nudge it under one edge of the EMI shield covering the display board—easy does it!
– Work your way around the shield, popping it loose at different spots until it says goodbye and comes free.
Step 17
– Gently lift the EMI shield away from the display board and take it off. You’ve got this!
Step 18
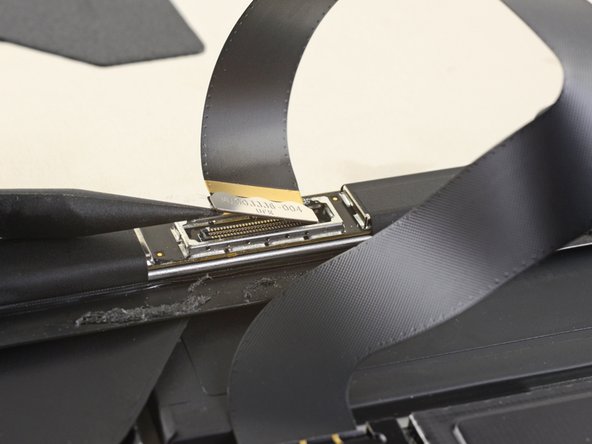
– Grab your trusty spudger and gently pop the display interconnect cable straight up and out of its snug little socket on the board. Easy does it—you’ve got this!
Tools Used
Step 19
Keep that shield in good shape—you’ll need it to snap back into place later on!
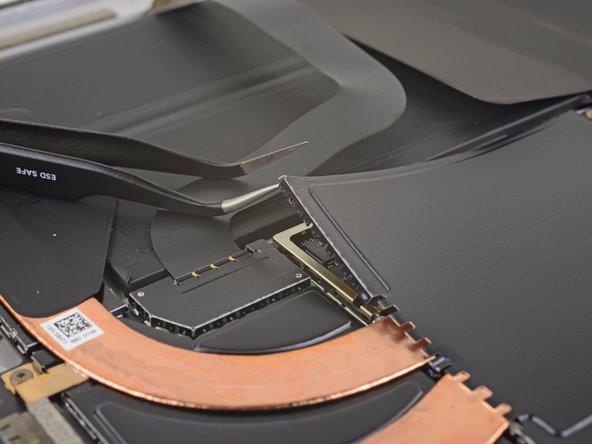
– Take one point of your trusty pointed tweezers and gently slip it into a gap on the edge of the EMI shield that’s covering the digitizer connector.
– Now, use the tweezers to carefully pry the EMI shield away from the display, being sure not to bend it in the process. A little patience goes a long way here!
– Work your way around the shield, repeating this at different points until it’s free. Once it’s all loose, just lift it off and set it aside.
Tools Used
Step 20
– Gently pop the shield off the digitizer connector and set it aside.
Step 21
– Grab your trusty spudger and gently pop the digitizer connector straight up from its cozy little socket on the screen. Easy does it!
Tools Used
Step 22
– Carefully detach the screen assembly from the Surface—easy does it, no rushing!
– When putting it back together, take a moment here to follow the guide for replacing the screen adhesive. It’ll ensure your device is sealed up tight and ready to roll!
Step 23
– Grab your trusty spudger and gently pop the microphone connector straight up and out of its snug little socket on the motherboard.
Tools Used
Step 24
– Let’s get started by using a T5 Torx driver to remove the four screws that hold the antenna support in place:
– You’ll need to remove three 4.5 mm screws – they’re the smaller ones
– And one 6 mm screw – this one’s a bit bigger, so make sure you’ve got the right size
Step 25
– Grab a spudger and gently lift the antenna support out of its snug little spot on the Surface.
– Now, carefully remove the antenna support and set it aside.
Tools Used
Step 26
Be gentle with the shield—it’s going back in place when all’s said and done, so keep it looking sharp!
Watch out with those tweezers! They’re great tools but don’t let them poke holes in the battery while you’re working on that shield.
– Take the pointed tips of a pair of tweezers and gently sneak one point into a corner gap of the EMI shield that’s hiding the heat sink.
– Now, use those tweezers to tease the EMI shield away from the motherboard as far as you can—just be careful not to bend it! Leave it attached for now.
Tools Used
Step 27
– Go ahead and repeat the last step for each corner of the EMI shield over the heat sink. Nice and easy, you’ve got this!
Step 28
– Carefully pop off the heat sink shield—no need to wrestle it, just a smooth move and it’s off.
Step 29
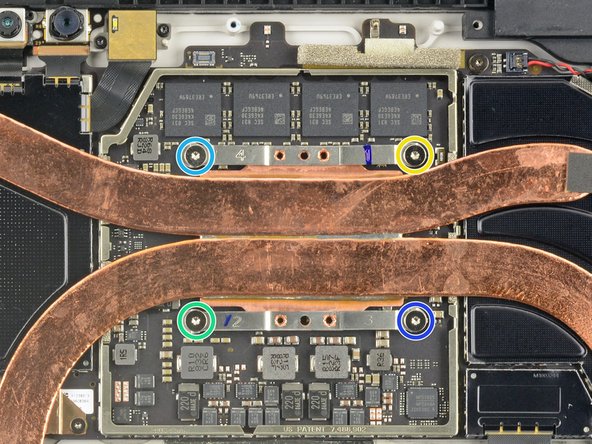
– Pop out those ten Torx screws holding the heat sink in place—you’re doing great!
– When it’s time to put things back together, tighten the heat sink screws in this awesome criss-cross pattern. Go one turn at a time, making sure they’re snug as a bug:
– Five screws are 2.6 mm-long T3 screws—don’t mix these up!
– Four screws are 3.3 mm-long T5 screws—keep track of these too!
– Start with Screw 1, then hop over to Screw 2.
– Next, go for Screw 3, and finally, wrap it up with Screw 4.
Step 30
Be gentle with those heat sink pipes—no dents or creases here, they’re delicate!
– Grab the flat end of your trusty spudger and carefully nudge the heat sink straight up and off the CPU—easy does it, no need to rush!
– When it’s time to put things back together, don’t skimp on the cleaning. Give the heat sink and CPU a good cleanse, and be sure to spread some fresh thermal paste for that cool-factor these components deserve.
Tools Used
Step 31
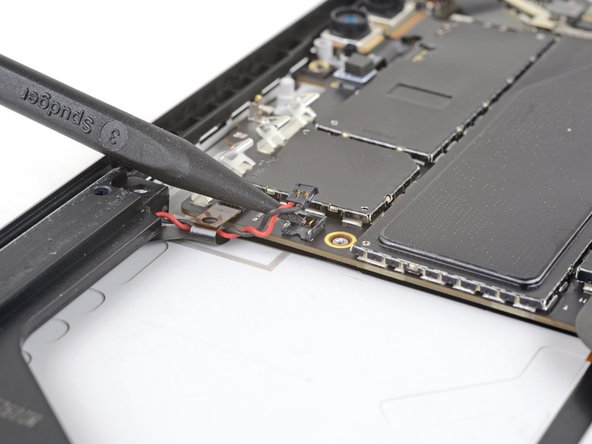
– Grab your trusty spudger and gently pop the left speaker connector out of its socket on the motherboard—like a pro doing a secret handshake.
Tools Used
Step 32
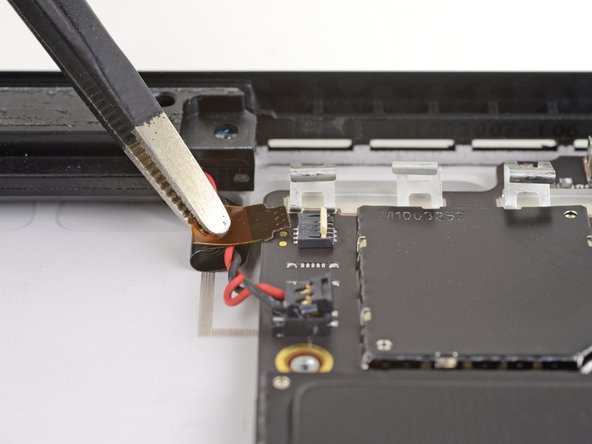
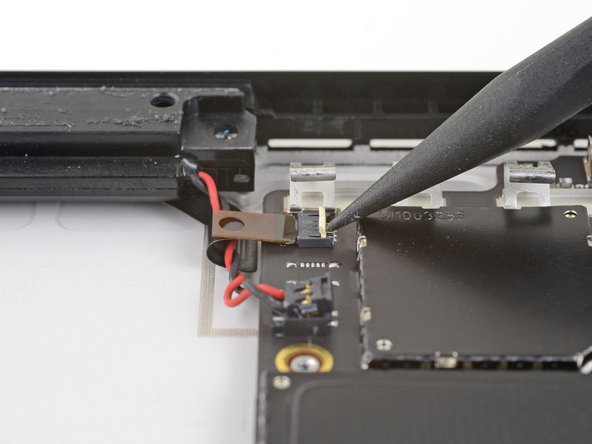
– Take the pointy end of a spudger and gently pop up the tiny locking flap holding the volume and power button cable in place—easy does it!
– Now, slide that volume and power button cable right out of its socket on the motherboard—smooth like butter!
Tools Used
Step 33
– Let’s get started by removing the two screws that hold the left speaker in place – you’ll need a T5 Torx driver for this step. You’re looking for:
– One 6 mm screw – don’t strip it!
– One 3.9 mm screw – be gentle, it’s a small one!
Step 34
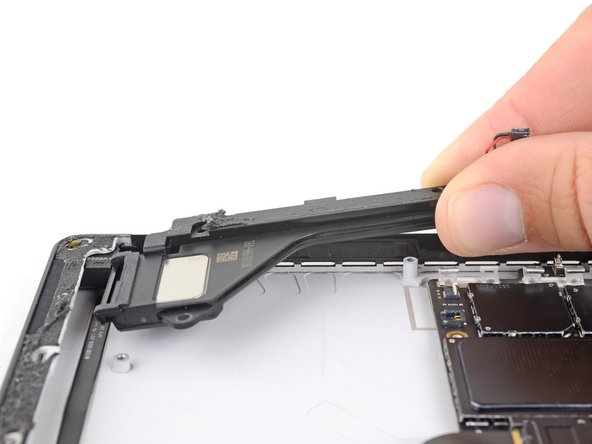
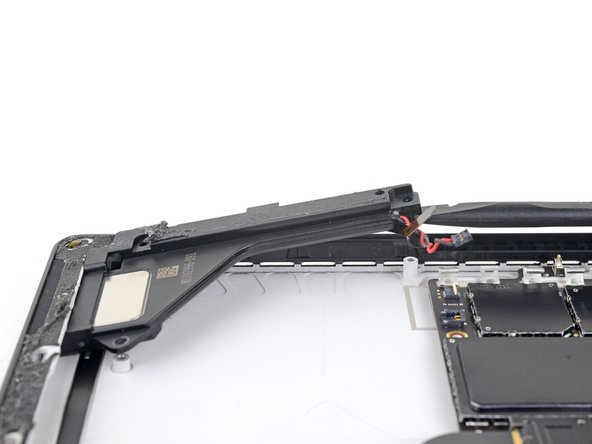
– Grab your trusty spudger and gently lift the right edge of the speaker, making sure it clears the motherboard and those little screw bosses.
– With the right edge up and away, smoothly slide the speaker to the right, straight out of its cozy spot in the case.
Tools Used
Step 35
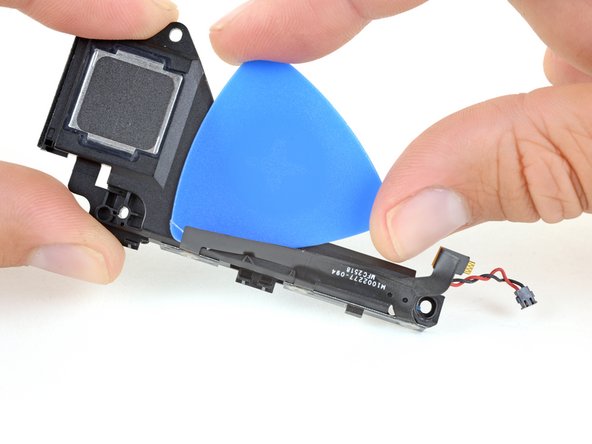
– Warm up your iOpener and give the long edge of the speaker assembly a nice toasty hug for a couple of minutes. That’ll loosen up the adhesive holding those buttons in place, making your next move a lot easier!
Tools Used
Step 36
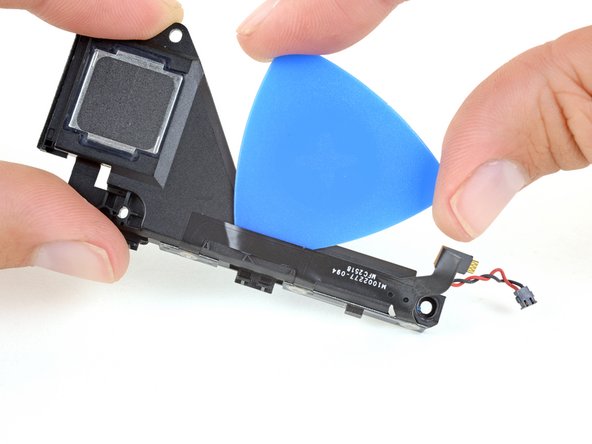
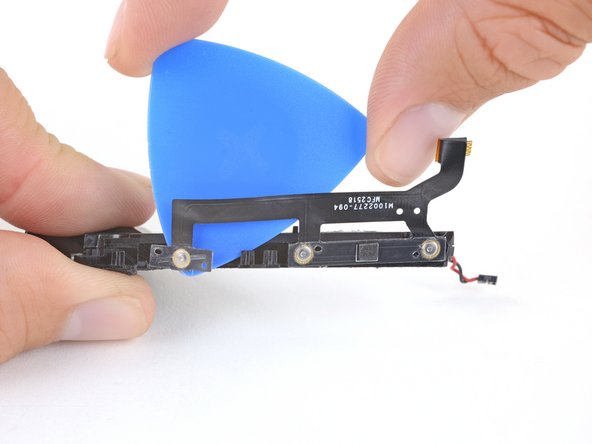
– Gently slide an opening pick under the volume and power button cable. This will help you loosen the adhesive holding the cable to the speaker. Take it slow and steady—it’s all about precision!
Step 37
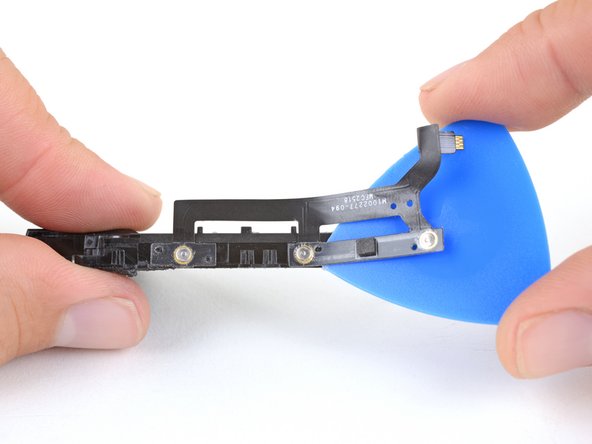
– Gently slide an opening pick under the volume and power buttons to loosen up the adhesive holding them to the speaker. Take it slow and steady—you’re doing great!
Step 38
– Pop out those volume and power buttons with confidence—they’re coming off today!
Step 39
– Before diving in, take a moment to compare your new part with the old one—some leftover adhesive or extra components might need transferring. A little prep goes a long way!
– Ready to wrap things up? Just reverse the steps you followed earlier to reassemble your device, and you’re golden.
– Got old parts? Do the planet a solid and drop off your e-waste at an R2 or e-Stewards certified recycler. Every bit helps!
– Didn’t nail it this time? No sweat—try a bit of troubleshooting, or swing by our Answers community for some extra pointers.
– Still feeling stuck? If you need help, you can always schedule a repair. You’ve got this!
Success!
