Microsoft Surface Pro Camera Replacement
Duration: 45 minutes
Steps: 8 Steps
Use this guide to replace the front and rear cameras in the Microsoft Surface Pro.
Step 1

If you’re using an iOpener, you might need to heat and repeat a few times to get that adhesive nice and soft. Each round, let the iOpener chill on the display for at least a minute before reheating—patience pays off here!
– Warm up the edges of the screen with a heated iOpener or a heat gun to loosen up the adhesive and make the next steps easier.
Tools Used

Step 2


Take it slow and easy here—the display is delicate, and pushing too hard could crack it. If your tools are giving you attitude, a little extra heat will help loosen things up.
Keep your opening pick just along the edge, not past the bezel—going too deep could mean a busted screen.
Watch out for the bottom edge with the Windows logo—the bezel is super thin here. Don’t poke too far with your pick on this side or you’ll risk damaging the display.
– Place a suction cup as close as you can to the display’s edge.
– Gently pull on the suction cup to lift the edge of the display just enough to slide an opening pick underneath.
– Carefully move the opening pick all around the edges of the display to break through the adhesive holding the bezel in place.
– Watch out! Ribbon cables and a circuit board sit about 0.6 cm from the glass edge.
Step 3


If things get a bit sticky, grab some heat and an opening pick to gently work through any stubborn adhesive.
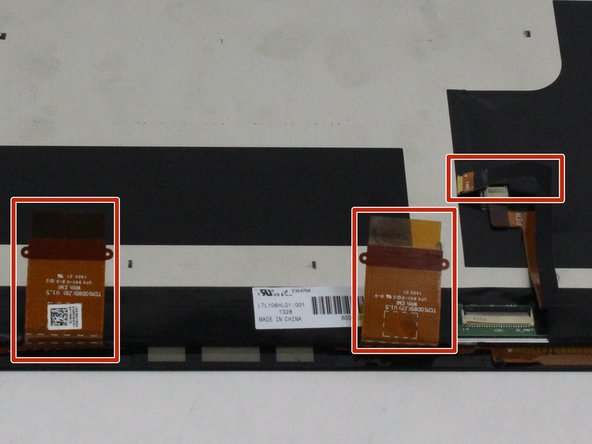
– Start by gently lifting the display from the top edge, just a little bit to get things moving.
– Before going all the way, take a moment to disconnect the three display cables. It’s like giving the display a little breather.
– Now, carefully peel off those two orange ribbon cables that are glued to the frame. They need to stay with the display, so try using a thin plastic card to gently separate them. Just a little finesse here, no rush!
Step 4

– Gently lift off the display—go slow and steady, like you’re peeling a sticker from your favorite notebook.
Step 5
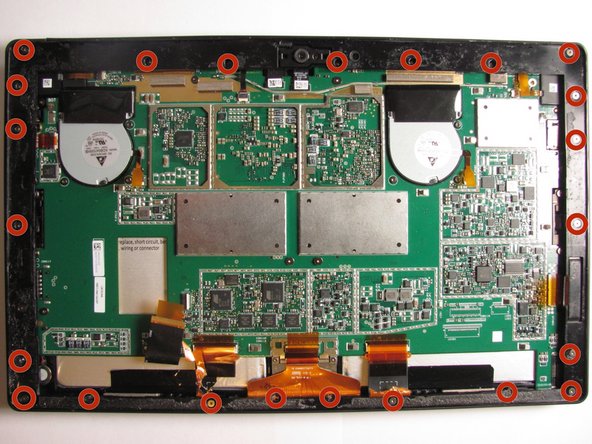

– Grab a T5 Torx screwdriver and get ready to tackle 23 screws along the outer panel of your Surface Pro. Unscrew them all and set them aside—you’re on the right track!
Tools Used

Step 6

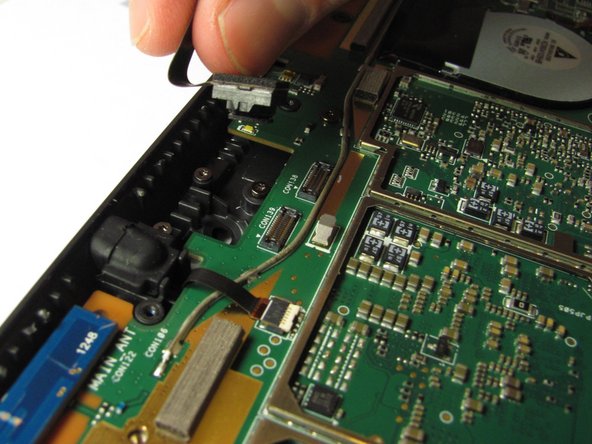
– Grab your plastic opening tool or use your fingers to gently pop out the front camera. It’s like giving your phone a little breather!
Step 7

– Gently lift the outside panel off your Surface Pro.
Step 8

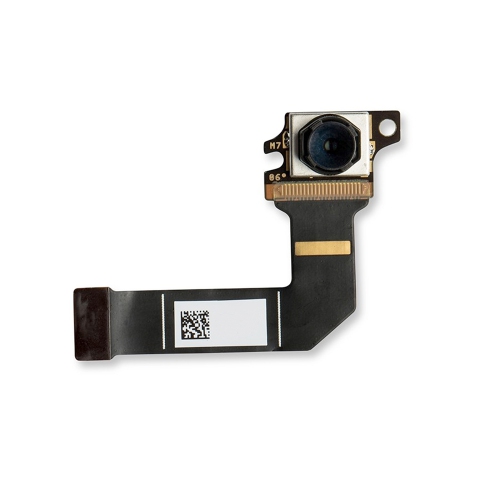
– Grab your trusty plastic opening tool and gently pop out the back camera. It should come loose with just a little nudge.
Success!