Microsoft Surface Pro Speaker Replacement
Duration: 45 minutes
Steps: 10 Steps
Ready to give your Surface Pro a sound upgrade? Follow these steps to swap out both the left and right speakers and bring your device back to life with crisp, clear audio.
Step 1

If you’re rocking an iOpener, you might need to heat it up a few times and let it chill on the display for at least a minute each round. That’s how you get the adhesive to loosen up and make your life easier.
– Grab a heated iOpener or a heat gun and gently warm up the edges of the display to loosen that stubborn adhesive. If you get stuck or need a hand, you can always schedule a repair.
Tools Used

Step 2


Take it easy and go slow here—your display is super delicate and could crack if you apply too much pressure. If your tools feel stuck, try adding a bit more heat to soften the adhesive.
Don’t go too deep with the opening pick, especially near the display’s bezel. Going too far could leave a permanent mark on your screen.
The bezel near the bottom, where the Windows logo is, is thinner than the rest. Be extra careful when using the opening pick on that side, and don’t push too deep.
– Start by gently applying a suction cup near the edge of the display. Use the suction cup to carefully lift the edge enough to slide an opening pick underneath. Slowly run the pick all the way around the display’s edges to carefully cut through the adhesive holding the bezel in place. Keep in mind, ribbon cables and a circuit board are lurking about 0.6 cm from the glass edge, so proceed with caution. If you need help, you can always schedule a repair.
Step 3


If things aren’t budging, grab your heat source and an opening pick to gently work through any stubborn adhesive.
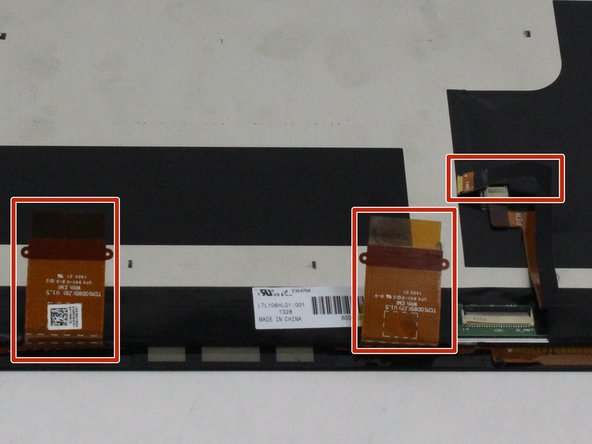
– Starting at the top edge, gently lift the display to get it started. Before you pull it all the way out, make sure to disconnect the three display cables. Then, carefully peel away the two orange ribbon cables glued to the frame—these should stay attached to the display. You can use a thin plastic card to gently separate them without damage. If you need a hand, you can always schedule a repair.
Step 4

– Carefully lift off the screen and set it aside like royalty—just don’t drop the crown!
Step 5
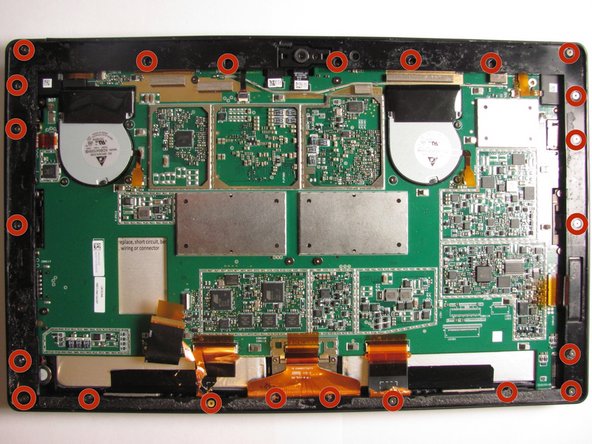

– Grab your T5 Torx screwdriver and carefully unscrew all 23 screws around the outer edge of the panel. Keep track of those tiny screws—they’re the stars of this show! If you need a hand, you can always schedule a repair to get professional help.
Step 6

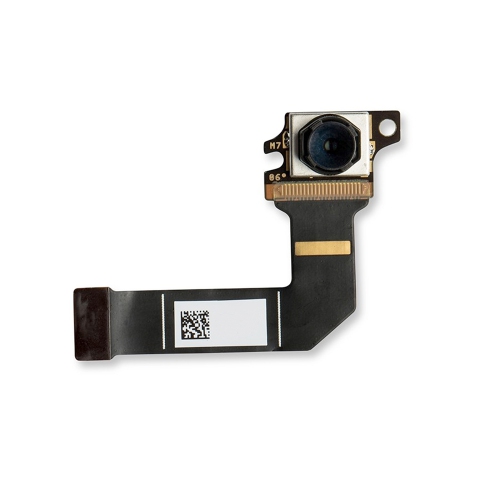
– Grab your plastic opening tool and gently pry around the edges to lift out the cameras, taking your time to avoid any cracks or damage.
Step 7

– Gently use your hands to pull the outer panel away from your Surface Pro.
Step 8

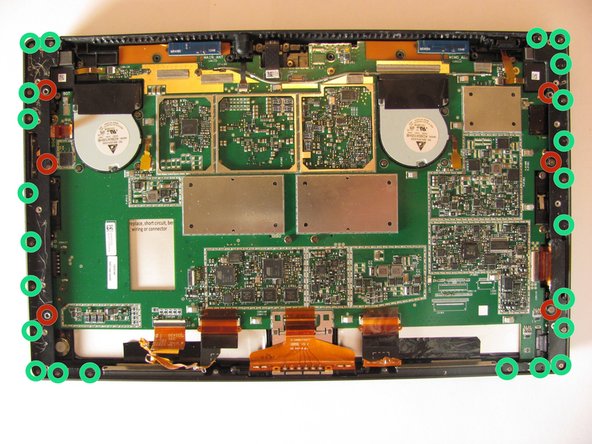
– Grab your trusty T5 Torx screwdriver and carefully unscrew the six T5 screws on the left and right metal panels—smooth sailing from here!
– Switch to the T2 Torx screwdriver and remove the 23 T2 screws on the same panels—you’re getting closer to the goodies!
Step 9

– Carefully pry off the left and right metal panels using your hands. Take your time to avoid any damage, and if you need a hand, you can always schedule a repair.
Step 10

– Put everything back together by retracing your steps in reverse.
– If things get tricky or you want a pro to handle it, you can always schedule a repair.


Success!