Nabi Big Tab HD24 Charging Port Replacement
Duration: 45 minutes
Steps: 15 Steps
Let’s get that device charged up! First, make sure you’re using the correct charging cable – the black one is your best bet, as the white cable is only for data transfer. Don’t get your ports mixed up, either – the audio port and DC port are not interchangeable. Test the power cable and nabi power adapter separately to rule out any issues there. If none of these steps solve the problem, it’s likely time to replace the DC port. If you need help, you can always schedule a repair.
Step 1

Place the tablet face-down so the screen is resting gently on the table in front of you.
– Find those four snazzy red rubber stops hanging out in the corners.
Step 2

– Gently lift them off your device with your fingers to uncover the screws hiding underneath.
Step 3

– Grab your trusty Phillips #1 screwdriver and let’s tackle those 9.5 mm screws in each of the four corners. You’ve got this!
Tools Used

Step 4
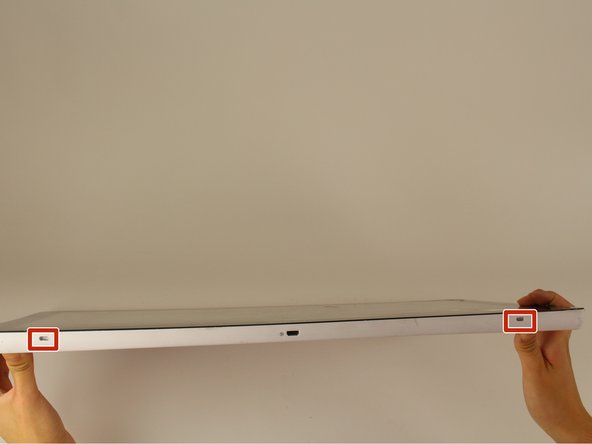
Hey there! Just a friendly reminder: don’t mix up those openings with the charging port or USB ports. Look for the little fan icon, that’s your signal for the openings, along with the Nabi logo. You’re doing great!
You’ll find 2 screws at the bottom of the tablet and 1 on each side. Imagine looking at the tablet from the front, like you’re about to use it. That’s the setup!
– Turn the tablet over so the screen is facing up and ready for action!
– Find those four tiny openings hanging out on the sides of the tablet.
Step 5

– Slide a metal spudger into one of the slots and gently pry the device open by pressing down with a smooth, steady motion.
– Work your way around and repeat the process for the other three slots.
Step 6


Stay sharp while opening up the device—those sneaky cables inside are linking up the front and back assemblies, so handle with care!
– Flip that device over and let’s get started – the back assembly should be facing you now.
– Time to get a little tricky – use a plastic opening tool to carefully pry open the device from its hinges. Take your time, you got this!
Step 7
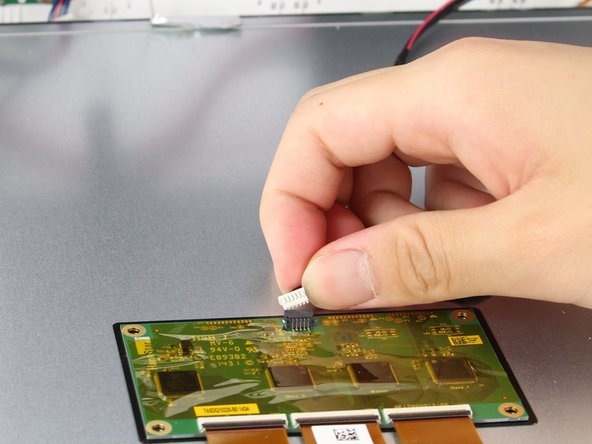

– Find that little white port connecting the back panel to the circuit board at the back of your display. You’ve got this!
– Gently wiggle and pull the plastic connector straight out. Easy peasy!
Step 8

Watch out for that aluminum foil tape – it’s super easy to rip, so be gentle!
When removing the ribbon cables from the screen, be careful not to pull too hard, as there’s a plastic piece glued to the metal display that’s holding them in place.
– Gently peel back the aluminum foil tape with your fingers until you can see the ribbon connector underneath.
Step 9

Keep the connector disconnected but make sure it’s still attached to the metal display. It’s like giving it a little break, but don’t let it wander off!
– Time to get disconnected! Locate the two switches on the sides of the connector and give them a firm press. This will release the connector from its connections, making it easy to remove.
Step 10

– Get ready to dive in! Use a plastic opening tool to carefully pry underneath the grey plastic case surrounding the ribbon cable. Take your time, it’s a delicate process.
– Now it’s time to get a little more aggressive – but still gentle, we don’t want any accidents! Apply some downward force to carefully peel the grey plastic off the metal display. You got this!
Step 11

– Find the two cables running along both sides of the device, hanging out near the bottom of the screen. They’re like the secret pathways connecting the tech world—handle them with care!
Step 12


Easy does it! Tugging on the red and black cable is a risky move—it’s not the most rugged connection, and yanking might leave you with a loose end. Handle with care!
– Get a good grip on both sides of that white plastic piece with your fingers and gently lift it straight up – you got this!
Step 13
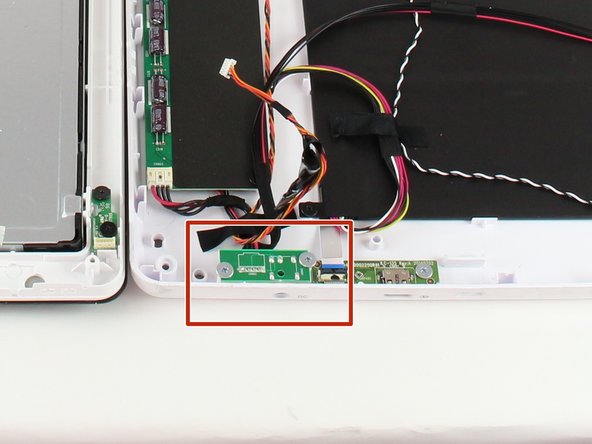

– Find the battery charging port marked ‘DC’—it’s chilling on the tablet’s side, waiting to be discovered.
Step 14

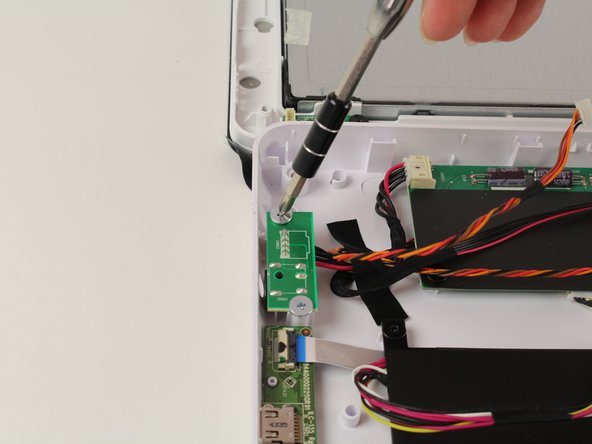
– Grab your trusty Philips #1 screwdriver and get ready to tackle those two silver 4.5 mm screws sitting on top of the circuit board. Simply unscrew them to move forward with your repair.
Step 15

Removing the cable might take a few attempts since it’s snug as a bug in a rug. A little wiggle can work wonders!
– Gently unplug the white connector with the black and red wires from the circuit board using your fingers.
– Swap out the old circuit board for your shiny new one.
Success!