Nabi Big Tab HD24 Speakers Replacement
Duration: 45 minutes
Steps: 16 Steps
The Nabi Big Tab HD 24 is equipped with two internal speakers, one snugly nestled in each top corner when you’re facing the front of the tablet. Before diving into disassembly, let’s figure out which speaker is giving you trouble. To keep things organized, use a removable adhesive to mark the back panel on the side of the faulty speaker. You’re doing great—let’s keep it rolling!
Step 1

Place the tablet on the table in front of you, screen facing up, and get ready to dive in.
– Spot those four red rubber stops hanging out at the corners—they’re the key to your next move!
Step 2

– Time to get a little hands-on! Use your fingers to gently pry off those pesky adhesive strips covering the screws. This will give you clear access to the screws underneath, and you’ll be one step closer to fixing your device.
Step 3

– Grab a Phillips #1 screwdriver and carefully remove the 9.5 mm screw in each of the four corners. Take your time—those screws aren’t going anywhere!
Tools Used

Step 4
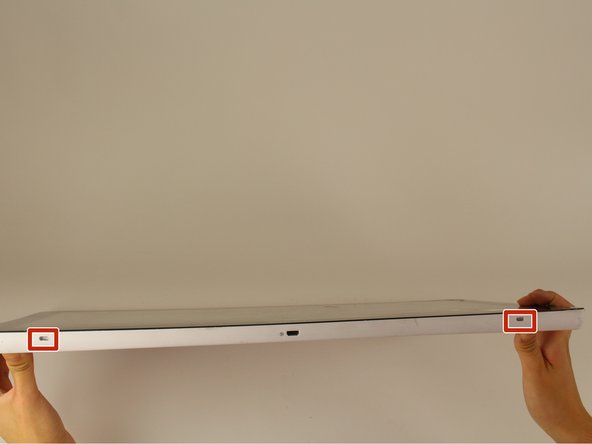
Let’s be clear: those little openings are not the same as your charging port or USB ports. Look for the cool icon of a tiny fan, which is the Nabi logo, to identify them.
You’ll find 2 screws at the bottom of the tablet and 1 on each side, all positioned as if you’re looking at it from the front like a pro!
– Set your tablet down so the screen is looking up at you.
– Check out the sides and spot the four tiny slots waiting for some action.
Step 5

– Slide a metal spudger into one of the slots and gently pry the device open by pressing down with steady pressure. No need to rush—slow and steady wins the race.
– Move on to the other three slots and repeat the move until the device pops open like a well-timed surprise.
Step 6


Be extra careful when cracking open your device! There are sneaky cables running inside that connect the front and back parts, and we wouldn’t want to mess those up.
– Flip your device around so the back is facing up. We’re getting ready to dive in!
– Grab a plastic opening tool and gently work your way around the edges to separate the device from its hinges. Take it slow, no rush!
Step 7

– Find the white connector linking the back panel to the circuit board behind the display.
– Gently wiggle and pull the plastic connector straight out—no twisting or yanking needed!
Step 8

Handle the aluminum foil tape with care – it’s super delicate and can rip easily, so let’s keep it intact!
When working with the ribbon cables, be gentle and patient. There’s a plastic piece glued onto the metal display surrounding them, so don’t try to yank them off the screen.
– Gently peel back the aluminum foil tape with your fingers to uncover the ribbon connector waiting to be revealed.
Step 9

Now, carefully leave the connector hanging loose, but still attached to the metal display – don’t worry, it’s not going anywhere just yet!
– Give those two switches on the sides of the connector a good press and gently pull to disconnect it from its connections. You’ve got this!
Step 10

– Grab your trusty plastic opening tool and gently slide it under the grey plastic casing around the ribbon cable. Take your time and be careful not to rush it!
– Apply a little downward pressure and slowly peel the grey plastic away from the metal display. It should come off nice and easy, no need to force it!
Step 11

– Check out the two cables hanging out on each side at the bottom of your screen—they’re easy to spot.
Step 12


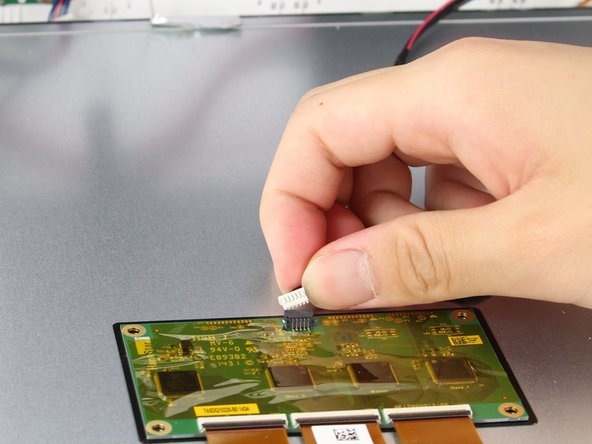
Handle the red and black cable with care—yanking on it can loosen it from the connector, and nobody wants that kind of chaos!
– Gently pinch the sides of the white plastic piece with your fingers and smoothly pull it straight up. You’ve got this!
Step 13

– Find the faulty speaker. You’ll spot both of them tucked into the upper corners of the back panel. Time to get them back in action!
Step 14

Gently lift it from the cross-shaped white plastic that hugs the edges of the speakers.
– Gently pry the speakers loose from their cozy little home and lift them up with your fingers.
Step 15

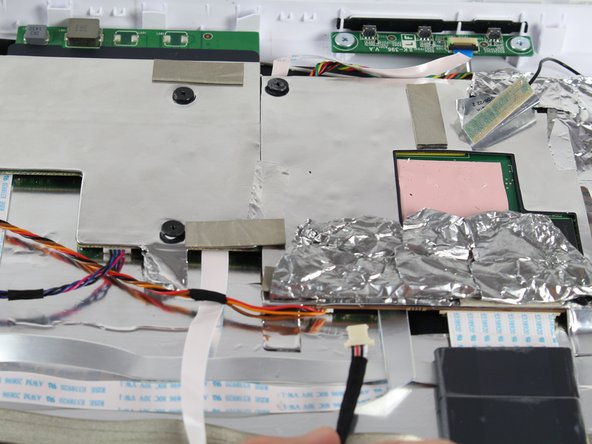
– Peel off the black tape that’s holding the two wire bundles together.
– Follow the wires from the speakers all the way to the motherboard.
– Carefully lift the aluminum tape to reveal the white connector where the wires are hooked up to the motherboard.
Step 16

– Gently pull the wire bundle away from the motherboard to disconnect the speakers. It’s like giving them a little nudge to say goodbye!
– Swap out that broken speaker with a shiny new one. Let’s get your sound back on track!
Success!