Nabi DreamTab HD8 Front Panel Assembly Replacement
Duration: 45 minutes
Steps: 7 Steps
The DreamTab’s tough polycarbonate case keeps all those sensitive parts snug and secure. But if it gets damaged, jagged edges and exposed wires can quickly turn this kid-friendly gadget into a safety hazard. Swapping out the case doesn’t call for a full-blown toolbox—just a few basic tools, some elbow grease, and a budget-friendly mindset.
Step 1


Got a different case on your device? No worries! Just consult your case’s manual for removal instructions, and then come back to this step. We’ve tailored these steps for the included manufacturer case, so you’ll want to adjust accordingly. If you need help, you can always schedule a repair
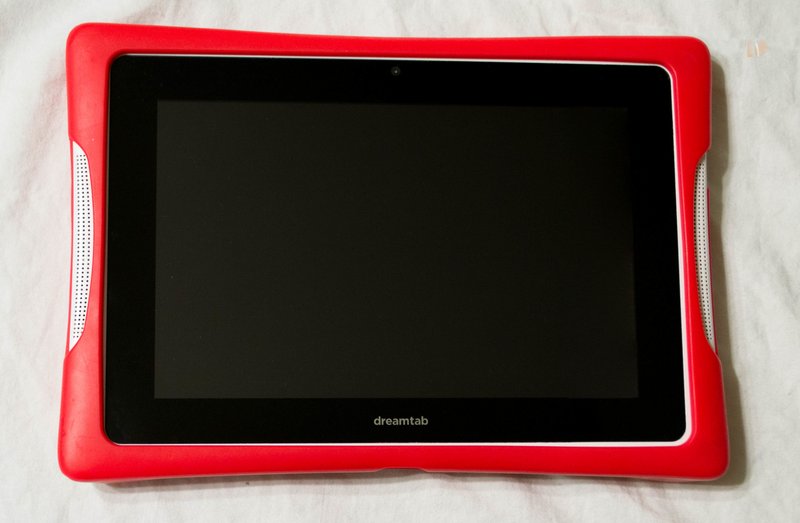
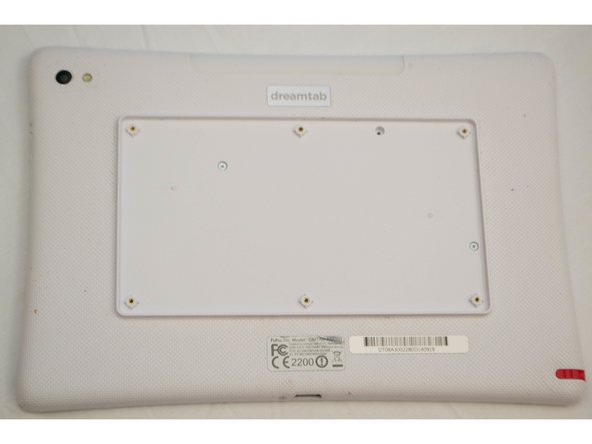
– Place your Nabi DreamTab on a non-metal surface, with the screen facing up and the DreamTab logo closest to you. Let’s get started!
– Gently peel off the vibrant red silicone case from your Nabi DreamTab HD8. We’re almost ready to dive in!
Step 2

Keep in mind, if you go any further, you’ll be stepping outside the boundaries of the manufacturer’s warranty. But hey, if you’re ready for the challenge, just follow these steps carefully and you’ll be golden!
– Flip the device over so the small black circular camera sits comfortably in the upper left corner. You’re almost there!
Step 3
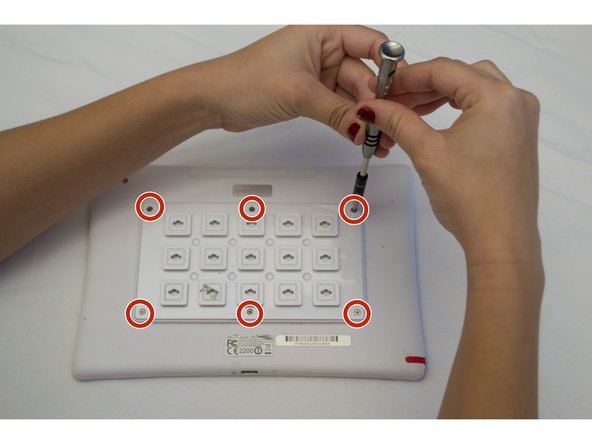
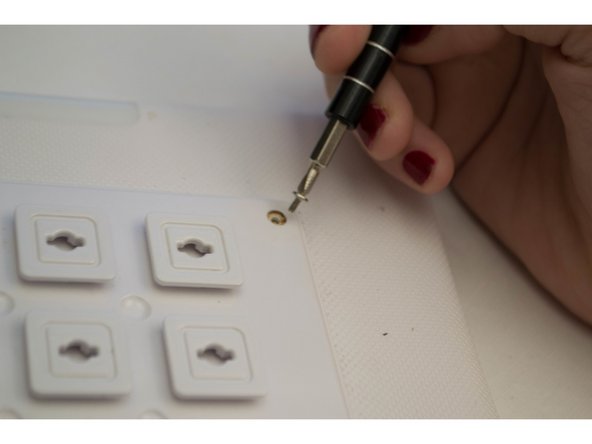
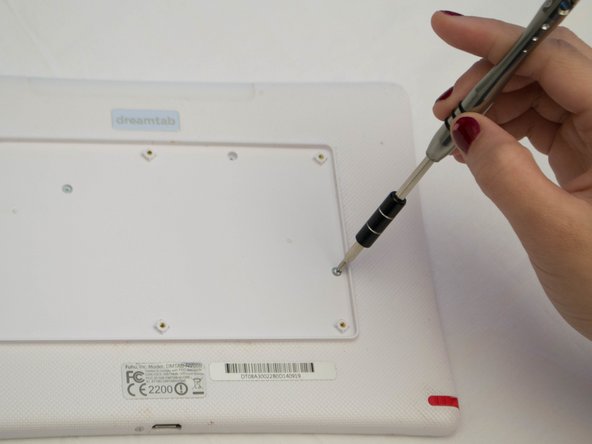
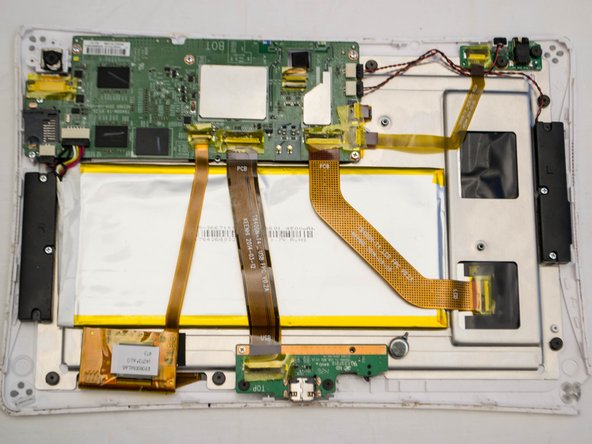
– Time to get your tools ready! Unscrew those six 2.5 mm JIS #000 screws that are holding the custom grid snugly against the back panel. Let’s get this party started!
Step 4

This part should pop right off. If it’s giving you a hard time, double-check that all the screws are out—you might’ve missed one.
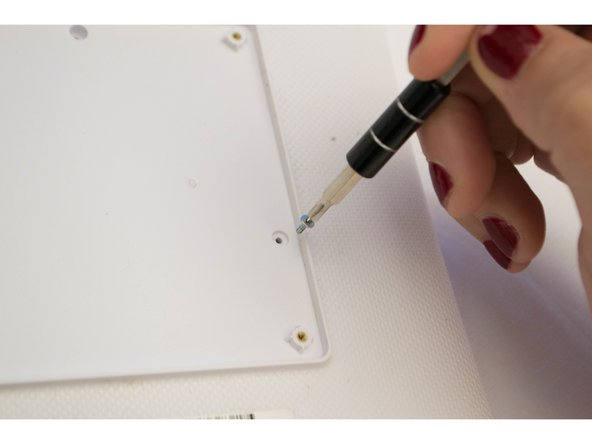
Don’t mistake the shiny gold lines for screws—they’re just part of the design!
– Grab one of those cheeky squares sticking out and gently lift off the back plate like a pro. Set it aside so we can put everything back together later!
Step 5

– Let’s get started by removing the three 3.5mm screws that hold the back panel in place. Grab your trusty J-0 screwdriver and get to work – this is the first step towards fixing your device!
Step 6
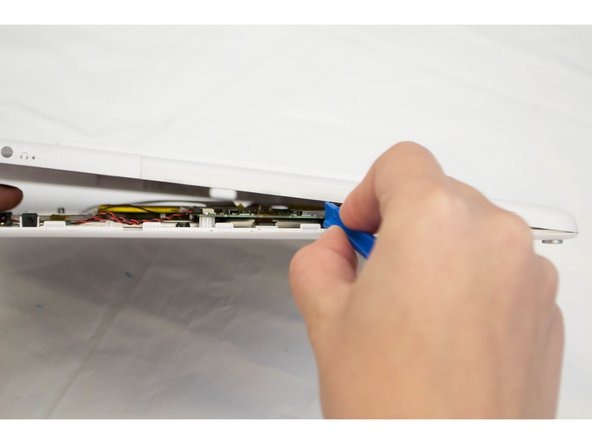


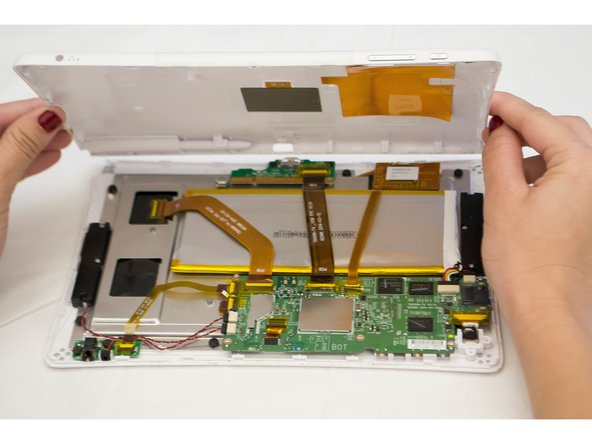
Heads up! You might crack a few parts of the case in this step. No worries though—just be extra gentle around the speakers, audio jack, and charging ports to keep things smooth. Take it slow and steady!
Look for a tiny headphone icon next to a small hole, about 3.5mm across. That’s your audio jack!
– Flip the top of your device towards you so that the audio jack is on the right side, ready to rock!
– Slide that trusty plastic opening tool between the front and back case panels right by the audio jack. You’ve got this!
– Gently pry open the device with a bit of muscle until you hear a satisfying click— that’s the sound of those clips saying, ‘We’re free!’
– Keep moving around the edges of the device with the same prying technique to carefully pop the front and back panels apart.
– Once you’ve opened the edges, head back to your starting point next to the audio jack and admire your progress!
Step 7

– Now that you’ve successfully separated the front and back panels, it’s time to flip the script – literally! Place the device back on the table with the display facing down and the camera at the top left. Easy peasy!
– Next up, gently lift off the back panel and give the device a 180-degree spin while the screen is facing down. Think of it as a little dance move for your device!
Success!