Nexus 6 Teardown
Duration: 45 minutes
Steps: 15 Steps
The battle of the phablets is still going strong, and today, we’re checking out the Nexus 6. This device, born from a partnership between Motorola and a certain tech giant, has been dubbed the Android counterpart to the iPhone 6 Plus. So, what cool features does the Nexus 6 have tucked inside? Let’s dive in and discover together! For all the latest in tech news and teardowns, don’t forget to follow us on Facebook, Instagram, and Twitter.
Step 1


– Nexus 6 Tech Specs:
– Enjoy the vibrant 5.96″ display, packing a sharp 1440 x 2560 pixels resolution (493 ppi) to make every detail pop.
– Under the hood, you’ve got a 2.7 GHz Quad-core Krait 450 CPU (Qualcomm Snapdragon 805 SOC) + Adreno 420 GPU, paired with 3 GB of RAM, so it’s smooth sailing through your apps.
– You can choose between 32 or 64 GB of internal storage – plenty of space for all your apps, photos, and memories.
– Running Android 5.0 Lollipop, this phone’s got a cool, smooth interface that’s ready to go.
– Stay connected with 802.11ac 2×2 (MIMO), Bluetooth 4.1, and NFC, making your wireless experience faster and more convenient.
– The 3220 mAh ‘non-removable’ battery ensures you have the power to keep going, day or night.
– Capture great photos with the 13 MP rear-facing camera with Optical Image Stabilization, and video chat in style with the 2 MP front-facing camera.
Step 2


– The Nexus 6 sports a central rear-facing camera that might have some hidden flash tricks up its sleeve. Up top, you’ll find a 3.5 mm headphone jack and a nano SIM card slot that seems a bit out of place but is part of the design. Down at the bottom, there’s the Micro USB port along with the usual FCC markings, keeping the back clean and simple. More details on this later… If you need help, you can always schedule a repair.
Step 3


– The Clone War has officially kicked off.
– Three tech giants, two massive phones—let’s see how they measure up side by side. The Nexus 6 makes the most of its slim borders, giving you more screen without making your hand feel like it’s holding a tablet.
– Nexus 6: 82.98 mm x 159.26 mm x 10.06 mm
– iPhone 6 Plus: 77.8 mm x 158.1 mm x 7.1 mm
Step 4


– Since the rear cover shows no visible screws, we’ll need to get creative with opening picks to gently pry or slide our way inside. The downside: no simple clips here, so your fingernails probably won’t do the trick. The upside: the adhesive holding the cover is fairly mild, so once you slide the pick into the seam, peeling the cover away becomes manageable. The tricky part: removing the rear cover still doesn’t give direct access to the internal parts. But now you can see the screws—quite a few of them—so getting inside just got a little clearer. If you need help, you can always schedule a repair.
Step 5


Let’s make sure to check for these and disconnect them ahead of time, just to be on the safe side!
– Time to remove those screws—there are 22 T3 Torx screws patiently waiting for your precision driver. Let’s get them out and keep things moving.
– Look out! We’ve uncovered a hidden connector behind a secret door. It’s a small but important detail in the disassembly process.
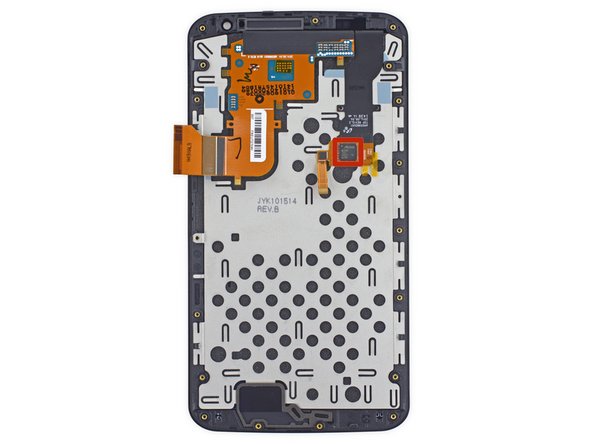
– Through the midframe’s holes, a shiny copper coil catches our eye. We’ll be sure to check it out once we’ve cracked open the device.
Step 6

No sticky adhesives or pesky plastic clips here—just a bunch of screws, making this job way easier for you.
– The Nexus is all set to share its little secrets with us! It turns out that elusive connector was just waiting to be linked to the battery!
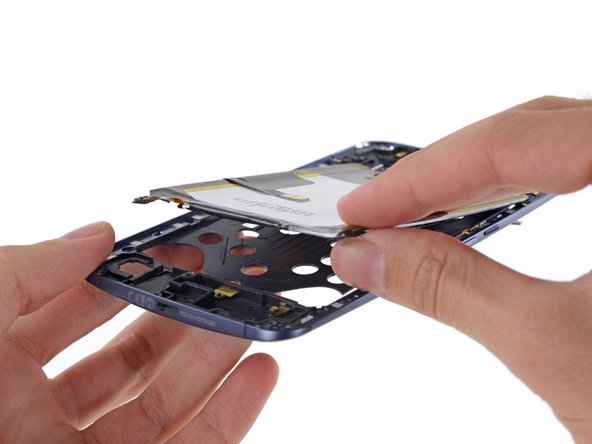
– Now that we’ve untangled the cables, it’s clear why there were so many screws in the midframe. The Nexus 6 is like a puzzle, easily splitting into two sections: the midframe/battery assembly and the display/motherboard assembly.
Step 7


A ‘non-removable’ battery? Not as tricky as you might think. Let’s take it step by step and get that battery sorted.
– Check out that shiny copper coil—that’s actually an inductive charging coil! (Who knew charging could look so cool?). Carefully peel it off to reveal the 3.8 V, 3220 mAh (12.2 Wh) battery underneath. Here’s a quick refresher: an inductive charging station sends alternating current through a coil, creating a magnetic field that induces current in the device’s coil. This AC current is then converted into DC power to charge the battery. Compared to the iPhone 6 Plus’s 11.1 Wh battery, this one packs a bit more punch, but it seems the battery life isn’t that much better. If you need a hand along the way, you can always schedule a repair.
Step 8

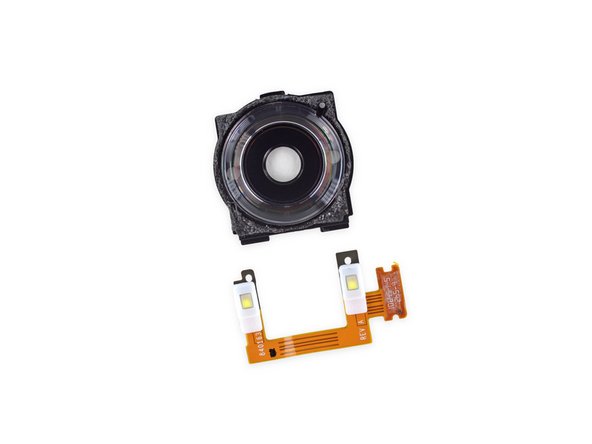
The round camera lens cover serves as a light guide for the two side LEDs, creating a cool ring flash effect. How awesome is that?
– As we move forward, let’s take a closer look at that flash assembly. The Nexus 6’s dual LED flash has a unique setup—two different directions, actually. Keep going, and you’ll see how it all fits together. If you need help, you can always schedule a repair.
Step 9


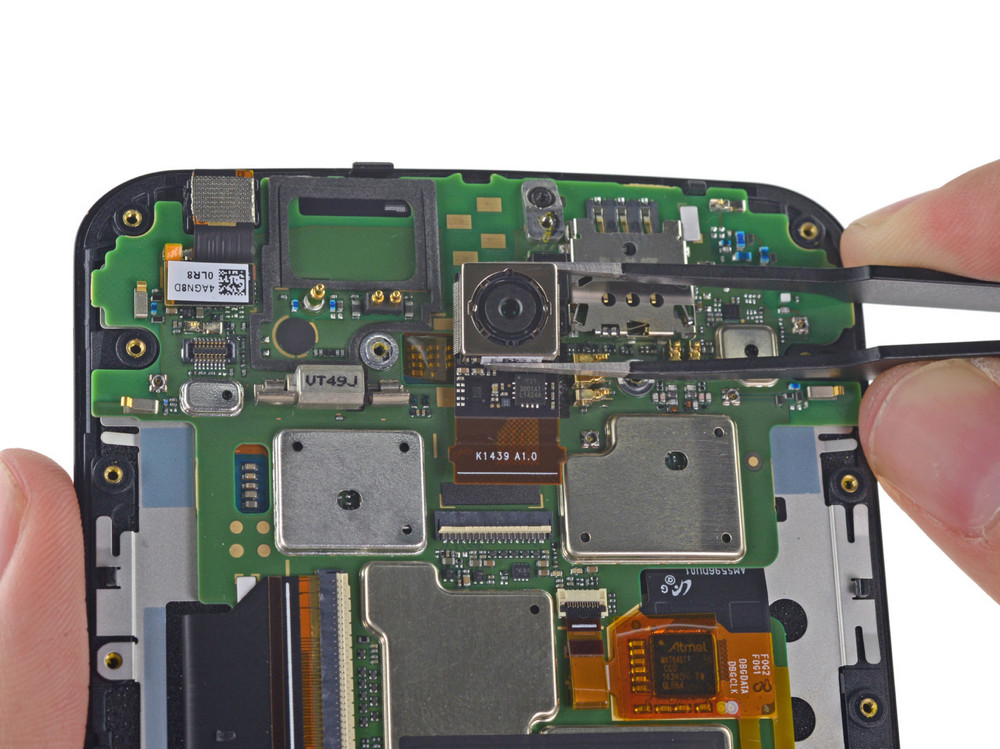
– Take a look at the motherboard—doesn’t it just give you Moto X vibes? It’s green, it’s bold, and it’s hiding under a bunch of tiny EMI shields.
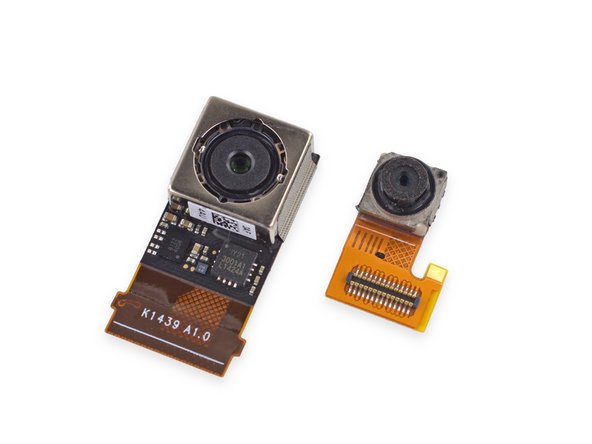
– Grab your tweezers and gently lift out both the rear and front cameras. Simple as that!
– This phone isn’t playing around with its cameras. The rear one’s rocking a 13 MP Sony Exmor IMX 214 CMOS sensor—the same one found in the OnePlus One.
The Nexus 6 also packs optical image stabilization, just like the iPhone 6 Plus, helping you capture sharper, steadier photos. This feature makes a noticeable difference, especially in low-light conditions or when you’re on the move. If you need help with your device, you can always schedule a repair.
Tools Used

Step 10

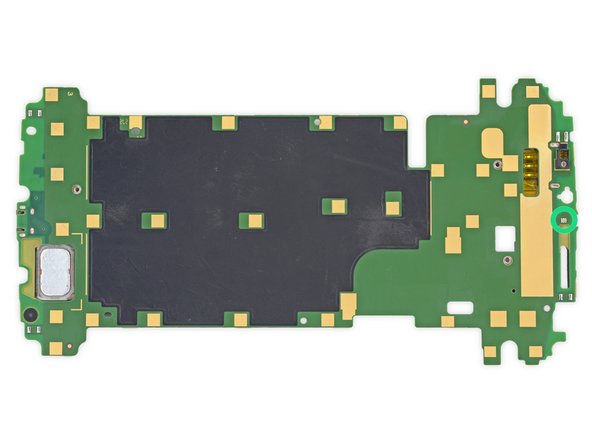
Getting to this point was a breeze, but keep in mind that the display is still stuck to the digitizer glass. So, take care not to damage it, as replacing a cracked screen can get pricey. If you feel uncertain about this step, don’t worry – we’ve got your back!
– Once you’ve carefully separated the motherboard from the display assembly, you’ll spot a single IC standing all alone:
– And that’s it! The display assembly is now stripped down to just the essentials, after a quick and smooth journey to the heart of the Nexus.
– Atmel MXT640T CCU 1424D TW QLR64 Touchscreen Controller
Step 11

– Alright, time for a little chip detective work! Let’s check out some of the brains and brawn inside this Nexus:
– SK Hynix H9CKNNNDBTMTAR 24 Gb (3 GB) LPDDR3 RAM stacked with the Qualcomm Snapdragon 805 SoC underneath
– Qualcomm PMA8084 Power Management IC
– SanDisk SDIN9DW4-32G 32 GB eMMC NAND Flash storage
– Qualcomm MDM9625M LTE Modem
– Qualcomm WTR1625L RF Transceiver
– Qualcomm WFR1620 Receive-Only Companion Chip
– Texas Instruments TMS320C55 Digital Signal Processor
Step 12

Motorola tucked this LED away like a little hidden treasure.
– More tiny chips ahead:
– Qualcomm SMB1359 keeps your charging on point.
– Broadcom BCM4356: manages Wi-Fi and Bluetooth 4.1, so your connections stay smooth.
– RF Micro Devices RF7389EU F14NRC2: handles envelope tracking power for efficient amplification.
– Speaker Grille RGB LED: adds a splash of color to your tunes.
– NXP TFA9890A: pumps up audio with a dedicated amplifier.
– Qualcomm QFE1100: another envelope tracking chip, making sure your signal stays strong.
Step 13
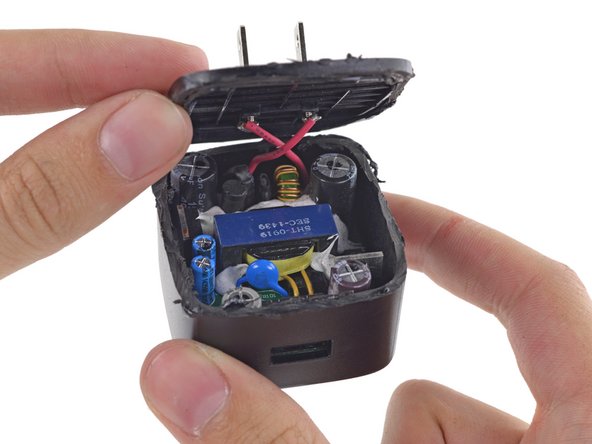

– Motorola’s Turbo Charger is quite the speed demon – it can give you 6 hours of use after just 15 minutes of charging!
– The Turbo Charger is compatible with Qualcomm’s Quick Charge 2.0 tech and has three different output options: 5 V at 1.6 A, 9 V at 1.6 A, and 12 V at 1.2 A.
– Let’s put the Turbo Charger to the test – the only way to know for sure is to take a closer look.
– It’s time to get started – grab your rotary tool and let’s slice our way in!
Step 14

– On one side, tucked amidst blobs of epoxy, you’ll spot a transformer surrounded by some basic capacitors, voltage regulators, and a USB port—pretty standard components hanging out together.
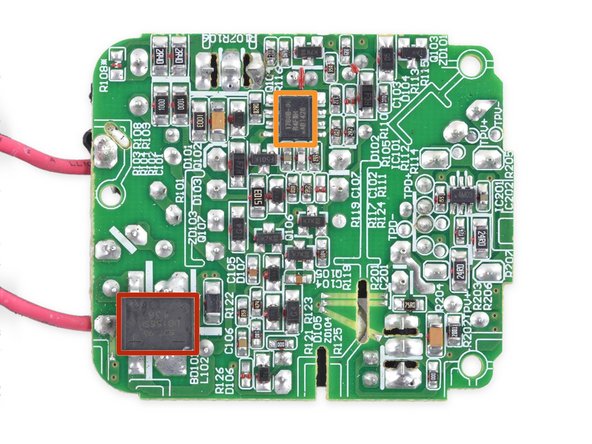
– On the flip side, amidst a jumble of solder and surface-mount parts, you’ll find a bridge rectifier—this little guy handles converting AC to DC current.
– And right there, you’ll see the iW1760B Power Supply Controller—think of it as the control center, the main brain keeping everything running smoothly.
Step 15


– Motorola Nexus 6 Repairability Score: 7 out of 10 (10 is the easiest to repair).
– The modular components (cameras, buttons, headphone jack) are pretty easy to replace thanks to pressure contacts and cable connectors.
– The Nexus 6 uses just one type of screw, though it’s a bit of a rare size (T3).
– There are a ton of screws holding the midframe in place—while that makes removal a little time-consuming, it also means no need for clips or sticky adhesives to keep it stuck to the front panel.
– The battery is glued in, which makes it harder to get to than we’d like, but it’s still replaceable with some patience.
– Some parts (vibrator, SIM slot, speaker, USB port) are soldered right onto the motherboard, so replacing them is trickier than if they were connected with cables.
– The digitizer is fused with the display, so repairing a cracked screen will cost more, but getting to the bare display assembly is pretty straightforward.
Success!