Nintendo Entertainment System 72-PIN Connector Replacement
Duration: 45 minutes
Steps: 7 Steps
The 72-PIN connector is a nifty little component nestled inside your game console. With its 72 shiny metal pins, it connects with the metal spokes in your game cartridge to bring your favorite games to life. However, over time, those pins can get a bit out of whack, making it tough for your console to recognize your games. Don’t worry, though! This guide will walk you through the steps to find and replace that worn-out 72-PIN connector, so you can get back to gaming in no time!
Step 1


The screws are tucked away about 40 mm, so grab your trusty tool and let’s get to it!
– Alright, first up: grab a #2.5 flathead screwdriver and carefully unscrew the six 13.25mm Phillips screws hanging out on the bottom of your game console. Easy peasy, right?
– Now flip that console over so it’s right side up. Gently lift the top piece—just pull it up and away from the rest of the device. Use those hands like a pro!
Step 2


– First things first, grab your trusty Phillips head #2 screwdriver and take out those seven 13.25mm Phillips screws from the metal cover. You’ve got this!
– Now, gently lift the metal cover up and away from the console using your hands. Easy peasy!
Step 3
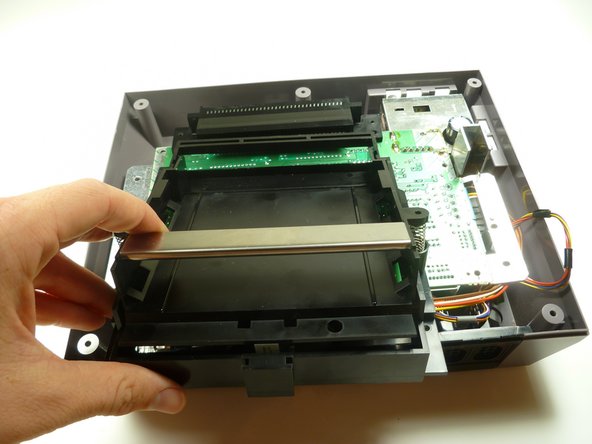


– Grab your trusty Phillips head #2 screwdriver and unscrew the two silver 17.45mm screws from the cartridge tray.
– Now, use the same screwdriver to remove the two bronze 13.25mm screws from the cartridge tray.
– Slide the cartridge tray toward you, away from the 72-PIN connector, and off the motherboard assembly.
Step 4


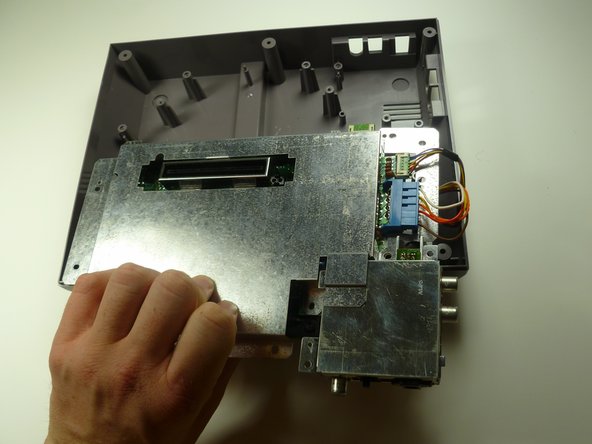
When you’re putting things back together, be sure to tuck this tab snugly under the motherboard and line up the tray just right on top. If you skip this step, the cartridge tray might bend, putting extra stress on the component and jamming up the cartridge spring mechanism. Take your time—you’re doing great!
– Note: Check out the black trapezoid-shaped tab/lip underneath the cartridge tray (see marker). When everything is put together correctly, this tab/lip should fit snugly below the motherboard and shielding, just like in the picture. If you need help, you can always schedule a repair
Step 5
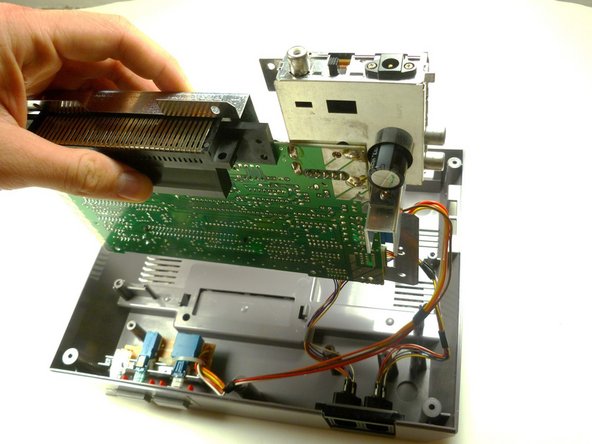

Flip the motherboard assembly over so the shiny metal cover is looking right at you.
– Grab your Phillips head #2 screwdriver and unscrew the three 13.25mm Phillips screws holding the motherboard to the lower case. Keep those screws safe—they’re your ticket to a secure reassembly!
– Now, channel your inner superhero and lift the motherboard assembly straight up and out of the plastic case with your hands. Steady hands win the day!
Step 6

To keep your wires from getting mixed up during reassembly, try labeling them with a piece of tape – it’s a simple trick that’ll save you some hassle later on!
– Time to unplug those wire harnesses from the motherboard assembly! Let’s get to it:
– Controller 1 (left)
– Controller 2 (right)
– Power
Step 7


Flip the motherboard assembly over so that the 72-PIN connector is facing up. You’ll want it on top for the next steps.
– To put your device back together, just follow these steps in reverse. Easy peasy!
– Not feeling it? No worries. You can always give up here.
– If you need help, you can always schedule a repair
Success!