Nokia Lumia 920 USB and Microphone Replacement
Duration: 45 minutes
Steps: 15 Steps
This step-by-step guide walks you through replacing the USB port and the main microphone, which are connected, so they come out together. Keep your spirits high and follow along—if things get tricky, remember you can always schedule a repair for extra help. Let’s get your device back in action!
Step 1


First things first, let’s give your phone a little break – make sure it’s completely powered off.
– Grab your T5 screwdriver and take out the two screws (they’re 8.6mm long, with a 2.5mm head) hanging out at the bottom of your phone.
Step 2


– Grab a tiny Torx screwdriver or a small poking tool and gently press into the hole on the SIM card slot. The plastic SIM protector should pop out pretty easily. Once it’s out, set that plastic piece aside. If you need help, you can always schedule a repair.
Step 3


– After you take out both screws from the bottom and remove the plastic SIM cover, gently press around the edge of the screen.
– The screen should pop loose with very little effort. It’ll look just like the pictures when you’re done!
Step 4


Taking out the battery first can make this step a breeze, but it’s totally optional.
– Set your spudger or a flat plastic tool right on top of the ribbon cable—think of it as a shield to keep the cable safe while you work your magic on the metal clip.
– Now, grab a plastic opening tool and gently pop up that metal clip. If the plastic doesn’t fit or just isn’t cutting it, a small metal flat-head screwdriver will do the trick. Just be gentle—this isn’t a wrestling match!
Step 5


– After removing the metal clip, gently lift the ribbon cable connection from underneath it. Take your time to avoid any damage. If you need help, you can always schedule a repair.
Step 6


– Start with the prerequisite: removing the back panel. Grab your T4 Torx screwdriver and unscrew the 3mm screw—it’s the one with a 1.5mm diameter head—fastened to the metal clip that keeps the battery snug. If you run into any snags, remember, you can always schedule a repair to get professional help.
Step 7


– Grab your plastic opening tool and gently pop up the metal clip that’s keeping the battery in place.
– Take the clip out all the way and set it aside—you won’t need it for a bit.
Step 8


– Grab your trusty plastic opening tool and start on the right side. Gently lift the copper strip up like you’re unveiling a surprise!
– No need to take the copper strip all the way out—just lift it enough to see the connection to the battery. You’ve got this!
Step 9

– Grab a plastic opening tool or spudger, and carefully lift the connective piece. No need to rush—gentle does it.
Step 10


– Grab a plastic opening tool and gently work it at the bottom of the battery to lift it out.
– The battery should come out smoothly with a little gentle prying. If you need help, you can always schedule a repair.
Step 11


– Before you get started, check out these helpful guides: Back panel removal, Battery removal.
– On the side where the volume buttons are, grab a tool (plastic ones might not do the trick since the parts are glued). Carefully pry up the plastic strip around the volume, power, and camera buttons.
– Go easy on it—those pieces are super thin and could snap like a twig if you’re not careful.
Step 12

– Once you lift off the thin plastic button cover, don’t worry if the buttons make a break for it—just gather them up and set them aside.
– If you want, you can use a screwdriver to nudge the buttons out, but it’s not a must.
Step 13


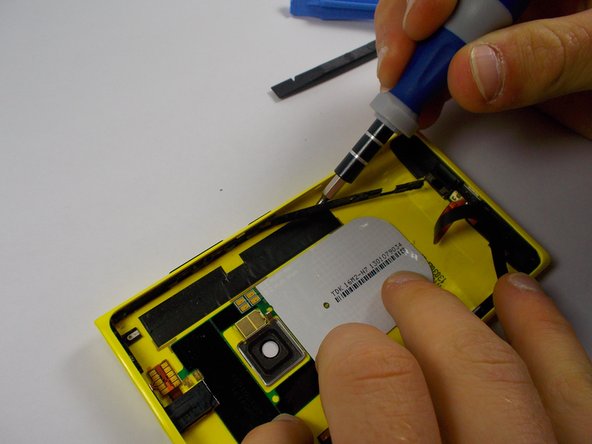
– Start by gently pressing down on the plastic piece connected to the USB port, just as shown. While maintaining that pressure, also push away from the USB port to loosen things up. Next, carefully pull the plastic piece away from the bottom of the phone. Once one side is free from the shell, insert your screwdriver into the gap you’ve created and gently pry the entire piece away from the back panel. Finally, remove the plastic piece completely from the phone’s back shell. If you need help, you can always schedule a repair.
Step 14
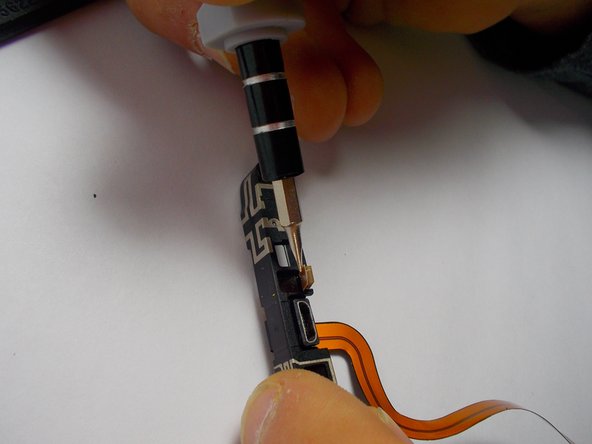

– Carefully slide the screwdriver under the microphone, just like in the picture.
– Gently lift it up until the microphone pops out of its plastic home.
– Don’t worry, the microphone is still hanging on to the ribbon cable, so it’s not going anywhere just yet.
Step 15
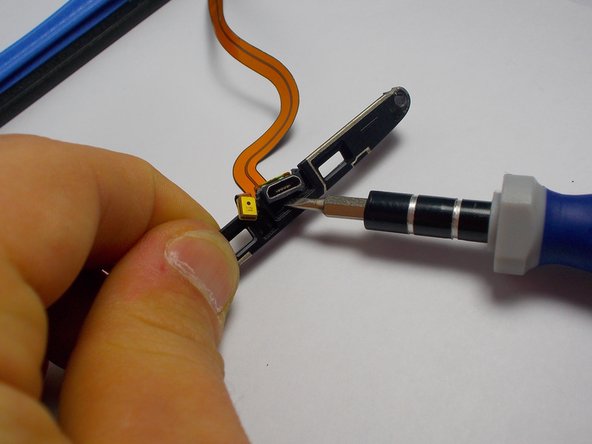

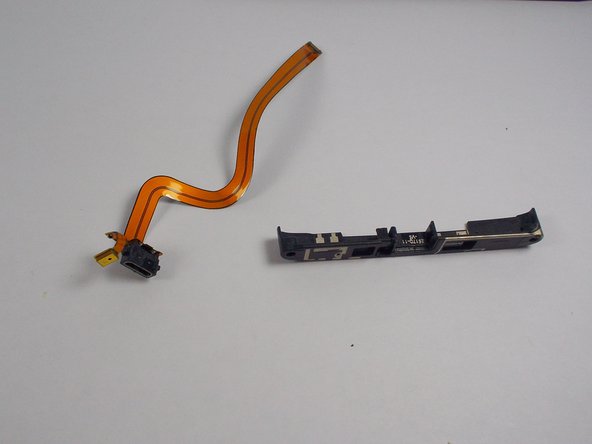
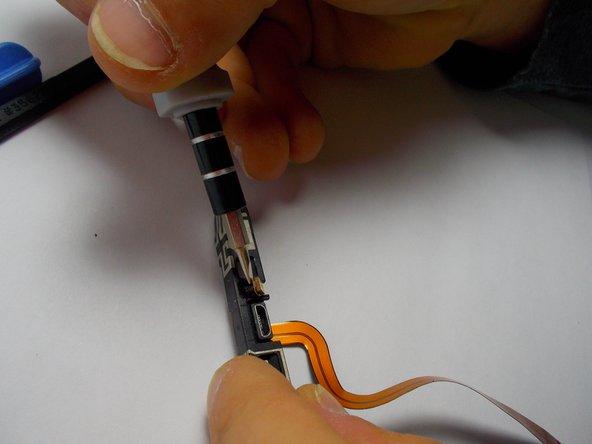
– Just like you did with the microphone, carefully slide that screwdriver under the USB port.
– Now, gently lift it up to free it from its plastic home.
Success!