OnePlus 5 Charging Port/Headphone Jack Replacement
Duration: 45 minutes
Steps: 15 Steps
Get ready to tackle a fun little project! This guide walks you through swapping out a dodgy charging port and headphone jack in the OnePlus 5. These two components are part of the lower port assembly and need to be replaced together for optimal performance. The trickiest part? Freeing up those pesky frame clips on the back cover. But don’t worry, you’ve got this! And remember, if you ever feel like you need a helping hand, just schedule a repair.
Step 1


– Grab a SIM card eject tool, a bit, or even a trusty straightened paperclip and aim for the tiny hole below the SIM card tray, right by the rear cameras along the phone’s edge.
– Give it a good, confident press to pop that tray right out—you’re practically a SIM tray whisperer now!
– When you’re putting it all back together, make sure the SIM tray is facing the right direction as you slide it in. Easy does it!
Tools Used

Step 2

– Let’s get to work! Start by unscrewing those two 2.6 mm T2 screws that are hanging out right next to the USB-C port on the bottom edge of your phone.
Step 3


Be careful not to damage that beautiful display panel – make sure you follow this opening procedure to the letter!
Take a closer look and you’ll notice two different seams between the phone’s body and screen. Let’s get familiar with them before we dive in.
Let’s get started with the repair! The following four steps will walk you through how to carefully pry the rear case from the plastic frame. Take a minute to read through each step before you begin, and don’t hesitate to reach out if you need help along the way.
– There are twelve clips holding the frame to the rear case. Keep an eye out for them as you gently work the back cover off in the next steps.
– Display panel seam: This seam is part of the display assembly. Whatever you do, don’t pry at it or you’ll risk damaging the display.
– Frame seam: This is where the plastic frame meets the back cover. Pry gently here, but no further!
Step 4

Keep your cool and try not to accidentally power on the phone while you’re working. If it happens, no worries—just turn it off before carrying on with the teardown.
These parts are snug and don’t want to let go easily, so brace yourself for some serious effort here. Grabbing a fresh opening tool with a clean edge will make this step way smoother.
– Pop a suction cup onto the bottom edge of the display—place it just right so you have a solid grip.
– Give the suction cup a good, steady pull—not too hard, not too soft—you’re aiming for a nice, firm tug.
– Take your opening tool and slide it into the seam near the suction cup. Wiggle it gently until it sneaks between the plastic frame and the back cover’s lip. You’ll know when you’re in, so keep cool!
Step 5


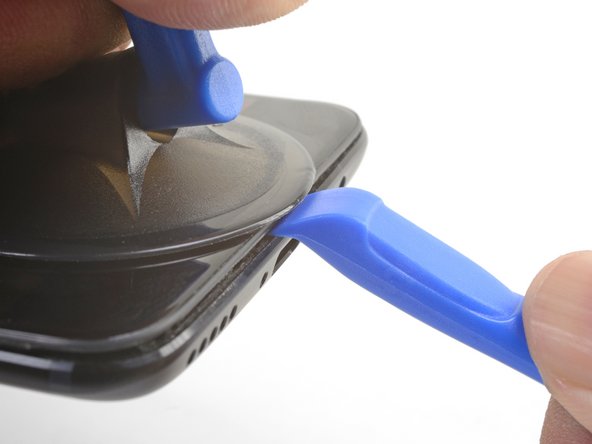
– Wedge the edge of your opening tool into place and glide it smoothly along the phone’s bottom like you’re skating on ice!
– Swing that opening tool around the left corner of the phone with finesse, keeping its edge snugly within the seam.
Step 6


– Use the opening tool to gently pop the first clip free from the frame.
Step 7


The last clip in the top-left corner, right by the front-facing camera, can be a bit shy and tricky to pop open. No worries, just take your time and use the flat end of a spudger or an opening pick to give it a gentle nudge.
– Keep the positive vibes rolling! Glide that opening tool along the long edge and gently pop those clips loose as you go. You’ve got this!
Tools Used

Step 8

The frame is still hooked to the back cover by a long flex cable. So, keep the back cover where it is—no need to yank it off just yet!
– Now that you’ve set free the bottom and left edge of your phone, give that frame a gentle wiggle to pop those top and right edge clips loose.
– Before you wrap things up, take a moment here to check if your phone is working like a charm before sealing the back cover.
– For putting the back cover back on:
– Start by aligning the top edge of the frame with the back cover, making sure those top clips slide into their cozy spots.
– Give a little squeeze along the long edges of your phone to snap the rest of those clips into place.
Step 9


Handle that flex cable with care—it’s the delicate lifeline connecting the back cover and the frame.
– Alright, with all those clips undone, gently flip the phone over so the display is chilling face-down.
– Swing that back cover around and let it rest comfortably on top of the exposed frame. You’re doing awesome!
Step 10


– Start by unscrewing the 2.6 mm Phillips screw that’s keeping the cable bracket snugly above the battery. You’ve got this!
– Next, gently lift and remove that cable bracket—it’s just hanging out, waiting for you to take it off.
– When it’s time to put the bracket back on, tuck one end in first, then give it a little bend to pop the other end into place. Easy peasy!
Step 11


To snap those press connectors back in, line it up like a pro and push down on one side until you hear that satisfying click, then do the same on the other side. Skip pressing on the middle—it’s a no-go zone! Misaligned connectors can bend pins, and trust us, that’s not a vibe.
– Gently nudge the back cover flex cable loose with the tip of your spudger, and disconnect it from its cozy little socket.
Tools Used
Step 12

– Pop off that back cover like a pro—you’ve got this!
Step 13

– Time to get started! Remove the four 2.6 mm Phillips screws that are holding the port assembly in place on the back cover. This is the first step in freeing up the assembly, so let’s get those screws out!
Step 14


– Time to get this repair started! Carefully slide an opening pick under the port assembly’s flex cable to loosen it from the back cover. This is the first step in freeing it from its cozy spot.
Step 15

– Ready to piece your device back together? Just retrace your steps and follow these instructions in reverse order.
– If things didn’t quite go as planned, no worries! For a little extra guidance, feel free to check out our OnePlus 5 Answers Community for troubleshooting help.
– And remember, if you find yourself stuck, you can always schedule a repair.
Success!