OnHub Teardown
Duration: 45 minutes
Steps: 13 Steps
Ready to get your router back in shape? This guide walks you through the steps to take apart and repair your device with ease. Keep your connection strong and your tech in top form—just follow along, take your time, and enjoy the process. If at any point you need a hand, remember you can always schedule a repair to get expert help. Let’s get started and make your device work like new!
Step 1


– Ready to take your Wi-Fi game to the next level? With these specs, you’re in for something solid:
– A speedy 1.4 GHz dual-core CPU to keep things running smoothly
– 4 GB e-MMC flash storage for all your essential apps and files
– Support for IEEE 802.11 b/g/n/ac standards—basically, it’s a Wi-Fi powerhouse
– Dual-band magic: 2.4 GHz and 5 GHz with a 12-antenna array to keep things fast and reliable
– A smart congestion-sensing radio and antenna to avoid slowdowns
– USB 3.0 port + Bluetooth 4.0 for easy connections
– 1 GB DDR3L RAM to keep things snappy
Step 2


This LED ring is your colorful friend, letting you know what’s up with the OnHub. When it’s blue, you’re all set to kick off the setup. An orange glow? Uh-oh, that means something’s not quite right. But if you see teal, you’re in the clear and ready to roll!
– No blinking router lights here; let’s hope the constant status light isn’t blinding in the dark (it’s not).
– We also spy a small cutaway on the bottom of the cowling for the cabling.
– This mysterious anomaly in the speaker grille is probably an ambient light sensor enabling dimming.
– A novel idea for cable management, but not great for ease-of-access. You’ve got to twist the cowling off to plug anything in.
Step 3


The confident TP-Link enthusiast gives a thumbs up to this product! It will be interesting to see his reaction when the ASUS OnHub enters the scene later this year.
– First, twist off the outer cowling – it’s easy. Don’t worry, you can’t connect any cables without removing it anyway, so it’s definitely a must-do.
– Inside the barrel cowling, you’ll spot some rifling fins. They’re probably there to help with airflow, since this tower doesn’t have a fan.
– Take a peek under the hood and you’ll find the true branding. Looks like TP-Link has helped create the first version of this device.
– We also get a sneak peek at some components. Could that be an antenna? We’re definitely curious about what’s inside.
Step 4


Looks like this wasn’t the right spot to start—some clips didn’t survive the adventure. No biggie, though! Onward to the next approach.
– The rubbery foot seems like a perfect spot to hide some screws. Sure enough, we pop out a couple. But did that actually help? Not really.
– After removing the screws (yes, they’re all gone now), it’s time to go for the tempting seam along the sides of the tower.
– This thing still isn’t giving up easily… Keep at it gently, and remember, if you need a hand, you can always schedule a repair.
Step 5

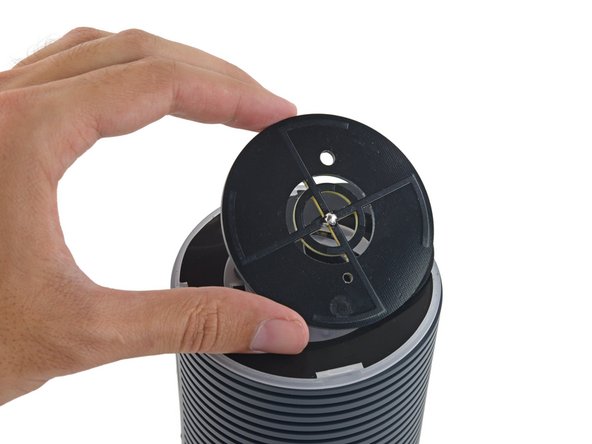
If there were a repair manual, it would definitely tell you this cap should’ve been the first thing to pop off.
– Let’s revisit what we initially thought was a solid top; surprise! This was the way in all along.
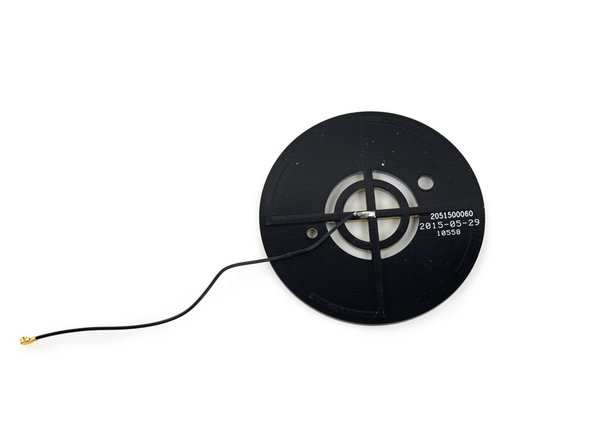
– We finally managed to pop the lid off this can of worms, and the first thing we see is the famous congestion-sensing antenna.
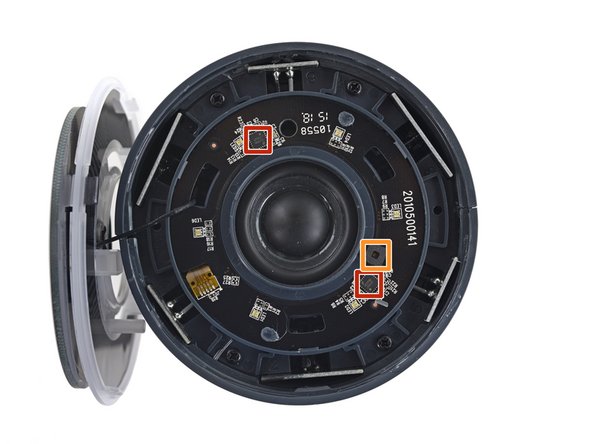
– We can’t quite take it out just yet, so let’s gently set it aside to reveal the LED board hiding some control hardware:
– National Semiconductor LP5523 programmable 9-output LED driver
– Ambient light sensor
Step 6

– Now that we’ve got the top panel sorted out, it’s time to uncover a few screws.
– The two halves of the casing are now prepped and ready to part ways, giving us a sneak peek at the OnHub’s sleek, antenna-packed interior.
– That wild disk antenna up top, which helps tune in to network congestion like a pro, is finally ready to make its exit from the OnHub.
– It looks like the OnHub is all set to keep your Wi-Fi signal on point with that bullseye-shaped antenna!
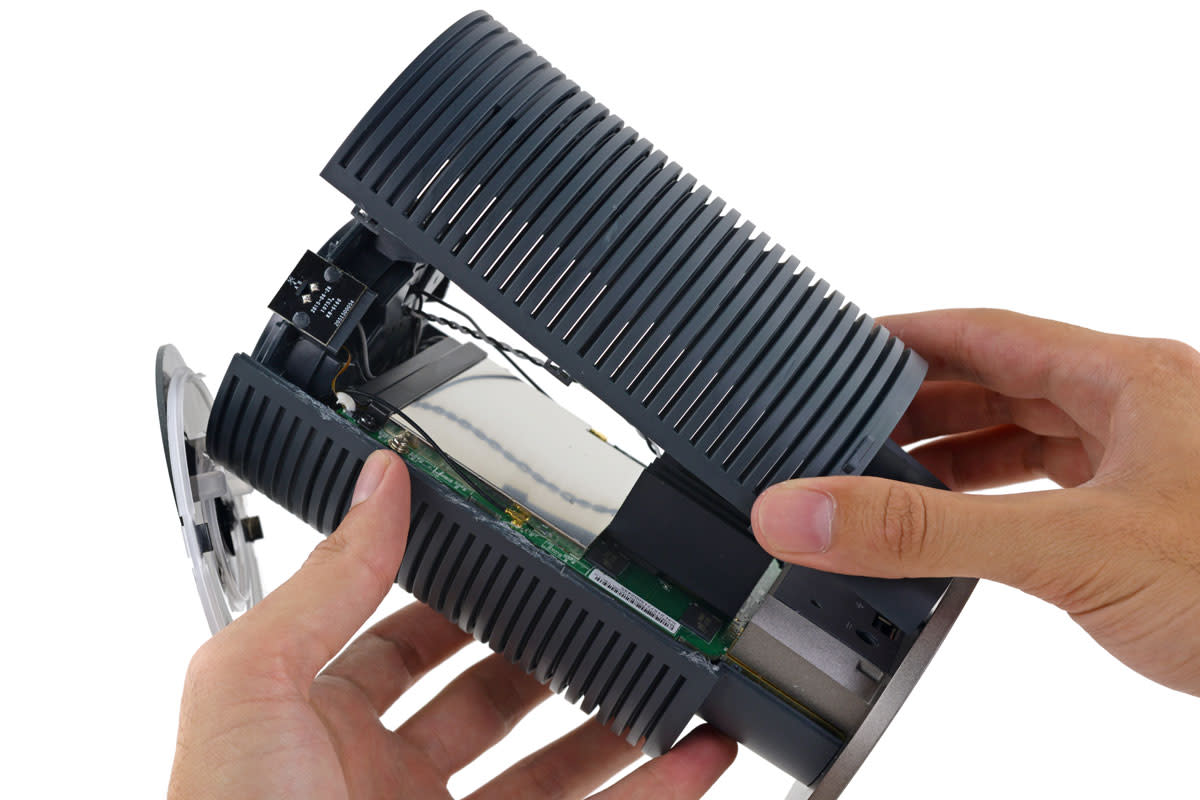
Step 7
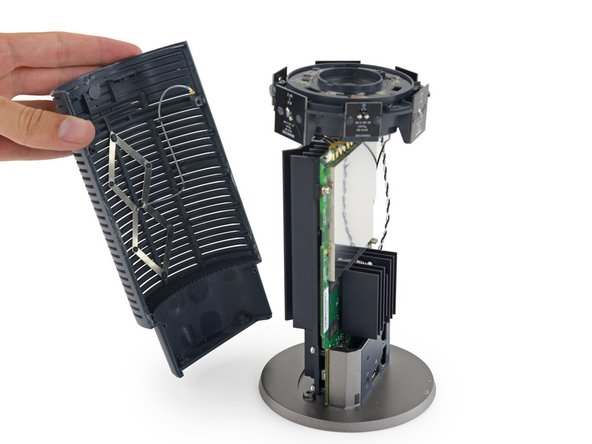

– Get ready to see a whole bunch of cables—12 to be exact! That’s six 2.4GHz antennas and six 5GHz antennas, along with a congestion antenna on one side and a coax cable on the other.
– As you peel off the second half of the outer shell, you’ll uncover a fascinating antenna array shaped like a double diamond. More details on this little gem later!
– Behold the antenna array in all its quirky glory, with leads that might remind you of tentacles. Quite the sight, isn’t it?
– There appears to be a color coding system that could be handy during repairs, but unfortunately, the board markings are not giving us any clues just yet.
Step 8


The hexagonal speaker enclosure bears a striking resemblance to the logo of the Galactic Empire. How’s that for a cosmic coincidence?
It turns out, OnHub uses a loud tone combined with ultrasonic signals to help pair and set up Android devices running Google’s companion app—kind of like a tech DJ dropping beats for your device to connect. Who knows, maybe in the future it’ll feature even cooler sounds to get your devices grooving.
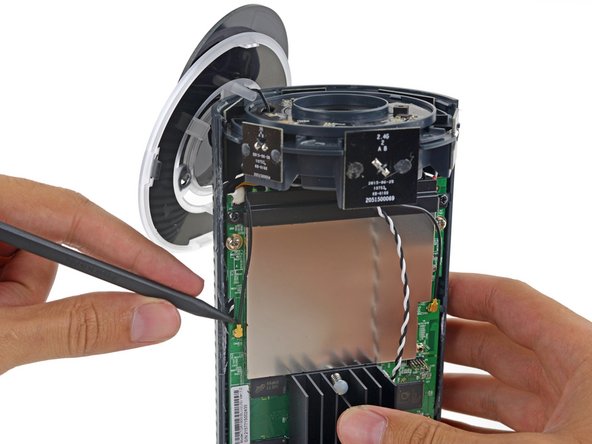
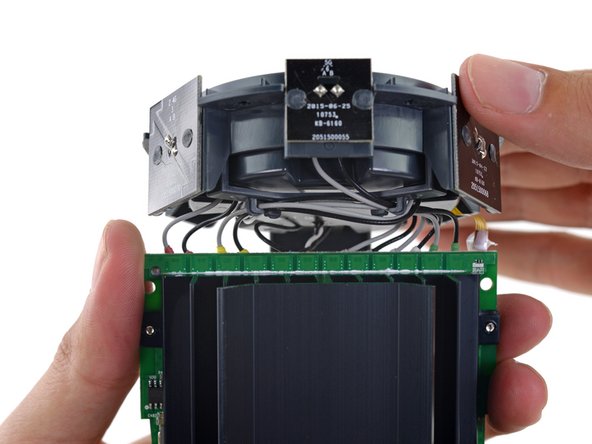
– Once we’ve untangled a whole bunch of connectors, it’s time to gently lift the antenna assembly away from the motherboard.
– Check out that massive speaker! Seriously, what’s up with a 3-watt speaker in a router?
Step 9
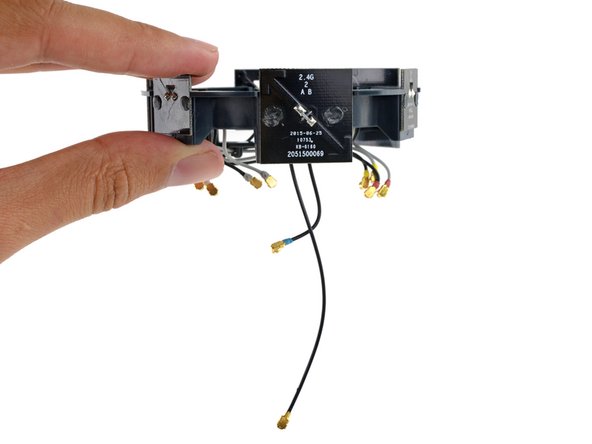

You’ll spot six little circuit boards here—each one is actually a pair of antennas. The smaller ones work on the speedy 5 GHz band, and the bigger ones handle 2.4 GHz. They’re arranged so that each pair of the same frequency is spaced 120° apart for top-notch coverage.
– With a quick flick of your spudger, the last of the antenna connectors should pop off—almost like opening a tiny portal, or maybe just a super-efficient antenna array.
– Looks like someone had a creative moment designing antennas in the shape of an arrow. Pretty sleek, right?
– That extra-long cable? It sits a little lower on the motherboard, connecting to a ZigBee network co-processor. Say hello to 802.15.4, it’s coming soon!
Tools Used

Step 10
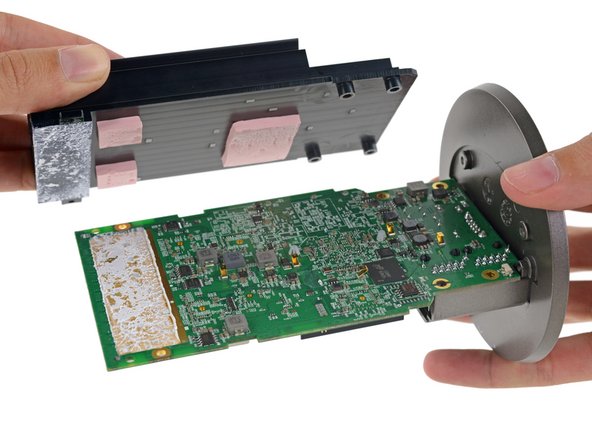

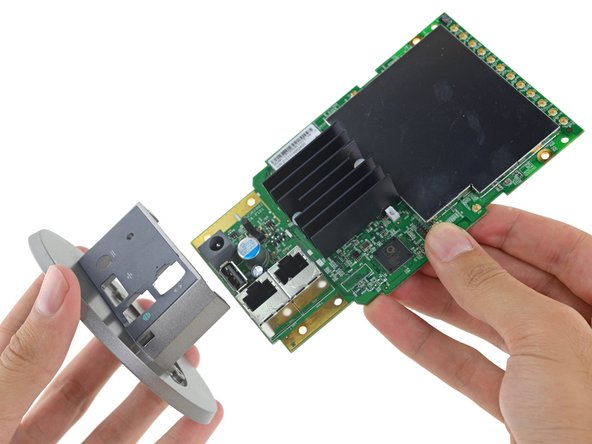
– Remember that diamond-shaped antenna we saw earlier? That’s the directional antenna, designed to boost your signal in a specific direction. The components in this device are pretty sizable, and the heat sink is no exception. As you pry up the metal mass, you’ll notice some thick thermal pads doing their job. It looks like the heat sink actually pulls heat through the motherboard—those hefty heat-generating components are on the back side. Next, slide off the plastic base and port cover to free the motherboard. The heatsink acts like a reflector dish, helping push Wi-Fi signals further into your home where you need them most. If you need help, you can always schedule a repair.
Step 11

– Now that we’ve got the heat sink removed and the chips all set, let’s dive into the fun stuff:
– Qualcomm Atheros IPQ8064 quad-core Internet Processor featuring 2 Krait 300 CPUs running at 1.4 GHz
– Micron MT41K256M16HA-125:E 4 Gb DDR3L SDRAM
– Qualcomm Atheros QCA8337-AL3C seven-port gigabit ethernet switch
– Qualcomm Atheros QCA9882-BR4A 802.11ac/a/b/g/n Wi-Fi SoC
– Qualcomm Atheros QCA9880-BR4A dual-band 3×3 MIMO 802.11ac/abgn WLAN SoC
– Silicon Labs EM3581 SOC network co-processor for ZigBee
– Skyworks SKY66109-11 2.4 GHz ZigBee/Smart Energy front-end module
Step 12


– Hold on, we’re not done yet!
– Skyworks SE2623L-R 2.4 GHz WLAN power amplifier
– Skyworks SKY85405-11 802.11ac 5 GHz WLAN power amplifier
– Atheros AR3012-BL3D Bluetooth radio
– Bluetooth antenna
– Micron MTFC4GACAAAM-1M WT 4 GB NAND flash
– Micron N25Q064A 64 Mb SPI flash
– Infineon SLB9615 Trusted Platform Module
Step 13

– OnHub Repairability Score: 4 out of 10 (10 being the easiest to repair)
– The speaker can be swapped out if needed.
– The device is mostly held together with clips—while these are sturdier than glue, they can snap if you’re not careful during disassembly.
– With all the ports living on one board, fixing a wobbly USB port means you’ll need to break out the soldering iron.
– The tiny antenna connectors are delicate and can snap during disassembly, so handle with care.
– This device is a bit of a puzzle to take apart, and since there’s no repair manual available, putting it back together is a challenge. If you’re feeling unsure, you can always schedule a repair.
Success!