Opening Procedure
Duration: 45 minutes
Steps: 7 Steps
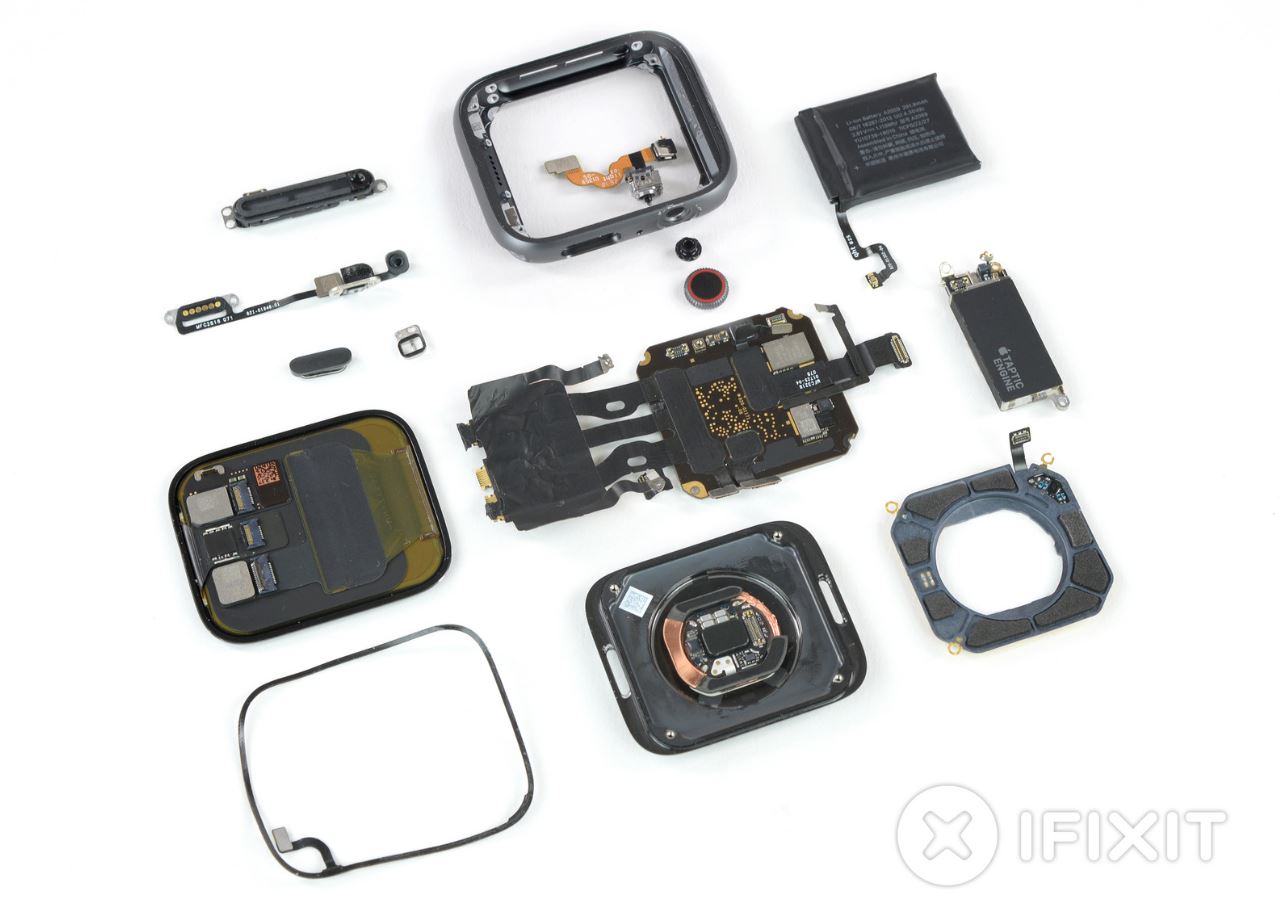
Ready to dive into your Apple Watch Series 4? Let’s get that display open for repairs. Heads up: the Force Touch gasket is a bit of a diva and can get damaged during opening. If it comes apart or the cable gets snipped, you’ll need a new one. And don’t forget the replacement adhesive for putting everything back together once you’re done.
Step 1


- First things first—take your watch off the charger and shut it down before you dive in.
- If your touchscreen is out of commission and won’t let you power off, there’s an alternate way to turn off your watch.
Step 2


Keep your fingers out of the knife's path—no one wants a surprise manicure! If you're not sure, throw on a sturdy glove (think leather shop or gardening glove) to keep your hand safe.
Take it easy with the pressure—too much muscle and the knife could slip, leading to cuts or scratched-up watches.
Pop on some eye protection. Knives and glass can be dramatic, and you don't want any flying bits headed your way.
Feel free to swap the watch band in and out as needed for better control while tackling your repairs.
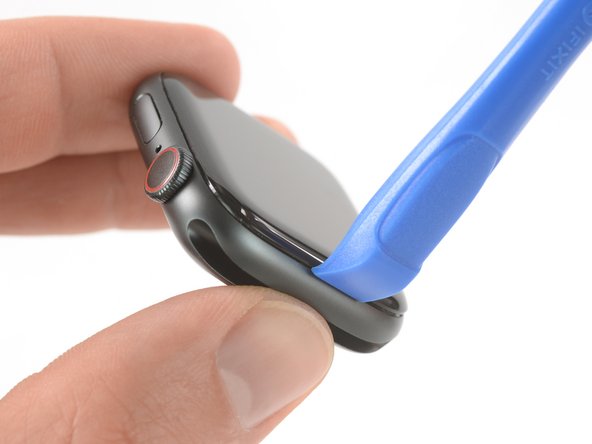
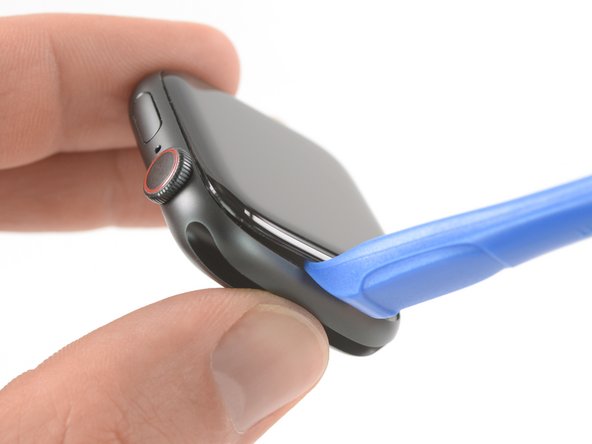
- Now it's time to get this repair started! To separate the screen from the watch body, you'll need a sharp blade - the gap is super thin, so be careful. Before you dive in, take a minute to read the following warnings and make sure you're prepared.
Step 3

Keep that iOpener handy—you might need to warm it up and go over the area a couple more times until the adhesive gets nice and soft.
- Grab your iOpener (or your trusty hair dryer or heat gun) and give the watch face a gentle warm-up to loosen that stubborn display glue.
- Let the heat party continue— park the iOpener on the watch for a solid two minutes so the screen gets nice and cozy and the adhesive waves the white flag.
Tools Used

Step 4


Keep that knife at a safe distance—just a smidge over 1/16th of an inch (about 2 mm) should do the trick! We want to keep that Force Touch sensor happy and undamaged.
- Slip the edge of your curved blade into the slim gap between the screen and the case. Start on the short side by the digital crown.
- Give it a little push—straight down—so the blade slides into the gap.
- With the blade in place, gently twist it to nudge the display open just a bit.
Step 5
Hold your horses! We're not ready to pop the display off just yet.
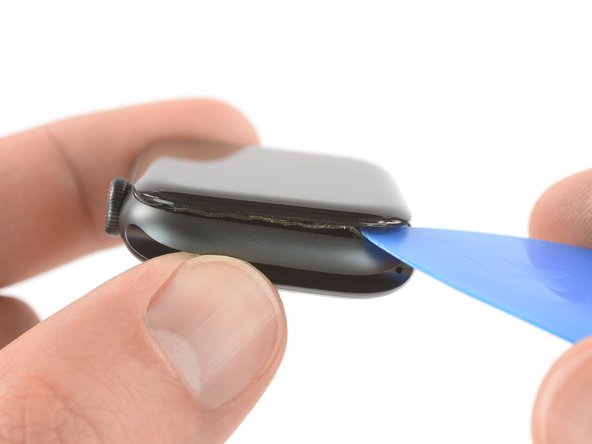
- After you've created a little opening with your trusty curved blade, go ahead and take it out. Now, slide the thinner edge of your opening tool into that gap.
- Gently press the opening tool further into the gap, and use your thumb to help lift the display just a bit more. You're doing great!
Step 6


Be gentle when prying under the edge of the display to avoid damaging the Force Touch gasket. If it splits or the layers separate, you'll need to replace it as well.
Insert the opening pick carefully, no more than 1/16th of an inch (~2 mm), to avoid causing damage to other components.
- Since the Force Touch sensor might stick to the display frame rather than the watch's body, gently insert an opening pick under the display and carefully pry the Force Touch gasket away from the screen. Then, slide the pick around the display to carefully separate the adhesive holding the Force Touch gasket from the display itself.
Step 7


Hold up! Don’t swing the display all the way open just yet—give those display cables some slack!
- Now, to put Humpty Dumpty back together again, just retrace your steps and do it in reverse!
- Once you're done, don’t forget to give your old gadgets a proper send-off by taking them to an R2 or e-Stewards certified recycler.
- If things didn’t go quite as smoothly as you hoped, don’t sweat it! Swing by our Answers community for some troubleshooting tips and tricks. And remember, if you ever feel stuck, you can always schedule a repair to get back on track.