
Apple Watch Series 5 – How To Open it Yourself (Tutorial Guide)
Duration: 45 minutes
Steps: 7 Steps
Get ready to open up your Apple Watch Series 5 for some repair magic! Be cautious during the display opening process, as the force touch gasket might get a little upset. If you happen to separate those gasket layers or accidentally snip the cable, no worries—you'll just need to swap out the Force Touch gasket too. And don’t forget, when you’re putting everything back together, grab some replacement adhesive to ensure everything sticks like a charm!
Step 1


- Before diving into repairs, remove your watch from the charger and power it down. If your touchscreen is acting up and you can't turn off the watch normally, no worries—use this alternative method to power it down and get ready to get the job done.
Step 2


Keep those fingers safe and sound! Make sure they're out of the way of the knife. If you're feeling extra cautious, throw a heavy glove on your free hand - like a leather shop glove or a gardening glove - to keep it protected.
Be gentle, friend! Applying too much pressure can cause the knife to slip and cut you, or worse, damage the device. Take your time and be careful.
Don't forget your eye protection! The knife or glass might break and send shards flying, so keep those peepers safe and sound.
Slide the watch band on or off to get a better grip while you're working. This makes handling the device a lot easier and keeps things from slipping. Need a hand? You can always schedule a repair if things get tricky.
- Since the gap between the screen and the watch body is super slim, you'll need a sharp blade to carefully separate them. Make sure to read the following warnings before you start to stay safe and prevent damage.
Step 3

You might need to warm up the iOpener and go through this process a few times to get that display adhesive nice and soft.
- Grab your trusty iOpener (or if you're feeling crafty, a hair dryer or heat gun will do the trick) and warm up the front of your watch to break that stubborn display adhesive loose.
- Keep the iOpener cozy on the watch for at least two minutes to ensure the screen is nice and toasty, making it easier to separate from the case.
Tools Used

Step 4

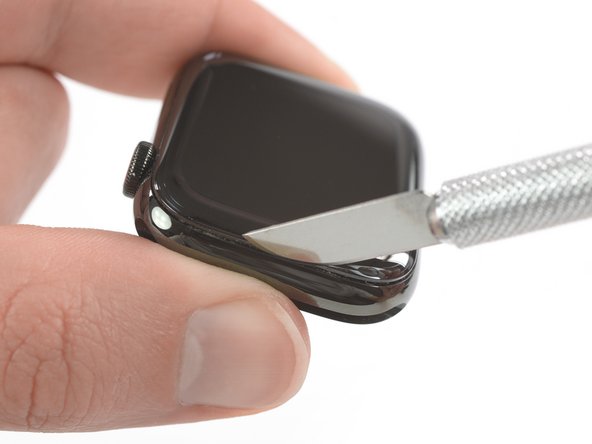

Careful now—don’t let the knife sneak in more than 1/16th of an inch (about 2 mm), or you’ll risk slicing the force touch sensor.
- Slip the edge of a curved blade into that slim space between the display and the outer shell. Start on the short edge, right by the digital crown.
- Give it a confident push straight down into the gap.
- Once you’re in, give the blade a gentle tilt to nudge the display up just a bit.
Step 5


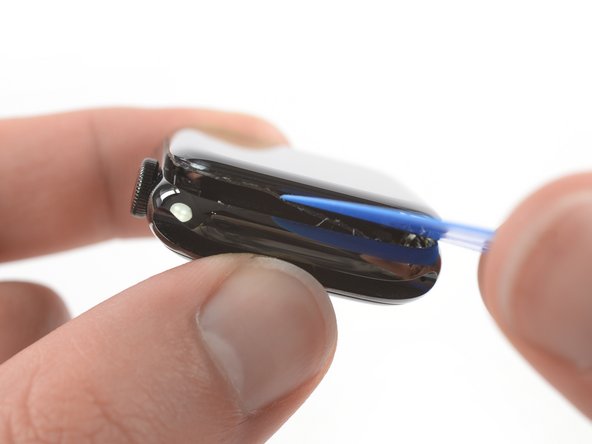
Hold up! Don’t try to swing the display all the way open or take it off just yet.
- After you've got a tiny gap started with the curved blade, switch it out for an opening tool with a thinner edge and slide it into the opening.
- Use your thumb as a lever and gently push the opening tool further into the gap to nudge the display open a bit more.
Step 6

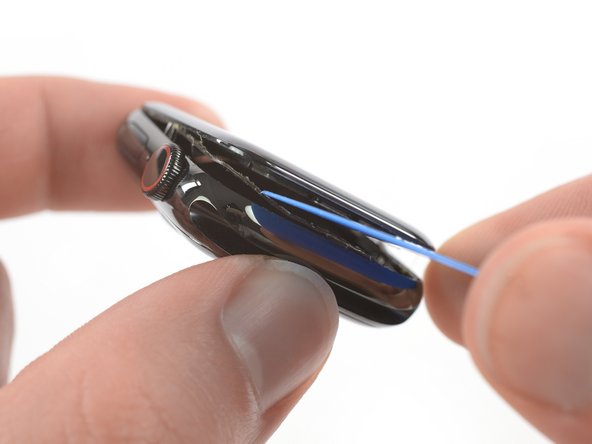
- The Force Touch sensor might get a little too cozy with the display frame instead of sticking to the watch's body. No worries! Just grab an opening pick and carefully slide it under the display to gently separate the Force Touch gasket from the screen.
- Now, slide the pick around the edges of the display to loosen up the adhesive between the Force Touch gasket and the screen. Take your time – it's all about a gentle touch.
To keep the Force Touch gasket happy, gently pry around the display edge—think of it as a delicate dance. If the gasket cracks or layers come apart while lifting, you'll want to swap out the gasket itself. And remember, don’t force the opening pick more than 1/16th of an inch (~2 mm)—no need to go all Hulk on it and risk damaging other parts. If you need a hand, you can always schedule a repair.
Step 7


Don’t let those display cables stretch or strain while folding the screen back—keep them comfy!
- You made it! To put everything back together, just follow these steps in reverse. Before installing new adhesive, use a Q-tip or cleaning pad with some high-isopropyl alcohol (>90%) to gently wipe away any leftover adhesive from the Force Touch gasket.
- If things didn't quite go as planned, don't worry! Check out our Answers community for some troubleshooting help. And if you're still stuck, you can always schedule a repair with Salvation Repair.

