Ozito SSH-2440 Garden Shredder Full Teardown
Duration: 45 minutes
Steps: 16 Steps
Let’s dive into rescuing an Ozito SSH-2440 Garden Shredder with a cutting blade shaft that’s stubbornly rusted in place. Follow along for a smooth step-by-step fix, and get your shredder back in action!
Step 1


Chances are those holes are packed with dust and all sorts of mysterious gunk. Grab something long and pointy to clear out as much as possible so you can actually reach the screws.
Both times I’ve cracked these open, one screw just refused to budge—totally rusted out. I had to bite the bullet and cut into the side to pop the top off. Sometimes you just have to get creative!
– There are six 30mm long triwing screws anchoring the top in place. These screws are quite deep—about 120mm—so take your time removing them carefully.
Step 2

– To remove the base, simply unscrew the 4x10mm nuts (with washers). It should come right off with ease.
Step 3

Heads up! There’s a hefty capacitor inside, so take it easy and avoid poking around too much just yet.
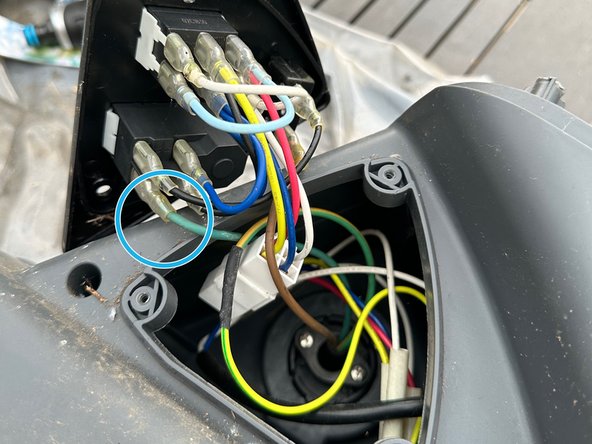
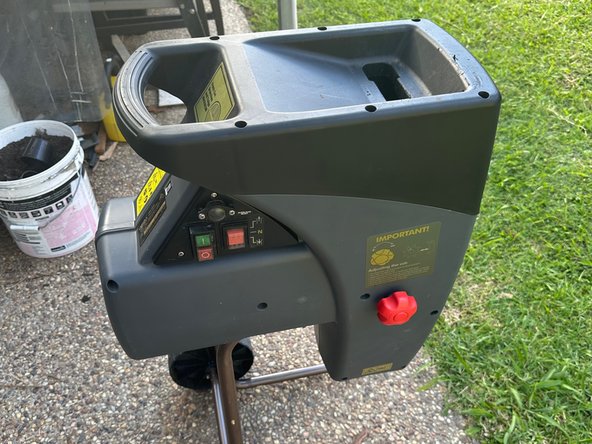
– There are three 10mm triwing screws securing the power switch—one might be hiding under the Forward/Back switch label, so keep an eye out. The two screws near the reset button aren’t a concern, so no worries there. Carefully pull the entire component out, but remember, wires are still connected at the back, so handle with care. From the power plug side, you’ll see a light blue wire and a brown wire clipped onto the switches. They might be held in place with a retention clip—look closely before pulling to avoid any surprises. If you need help, you can always schedule a repair.
Step 4

– Twist the big red knob counterclockwise until it pops right out, then set it aside.
– You’ll only find two other screws on this side; the rest are chilling on the other side. Look for two 10mm PH3 Machine Screws.
Step 5


– Turn the device upside down so the power cable is looking right at you.
– Unscrew those two screws from the bottom and two from the top – we’re talking about 4x20mm PH2 screws with a washer.
– Now, let’s tackle the 2x10mm PH3 screws right in the center.
– Time to remove the 6x20mm PH2 screws from their cozy little holes. They might be a bit deep and could have some dust or even a surprise wasp nest in there, so give them a gentle clean-up before proceeding (don’t worry, they’re not as tricky as those from Step 1!).
– Carefully lift off the cover, but be mindful of that wire connected to the power plug – it’s still hanging on.
Step 6
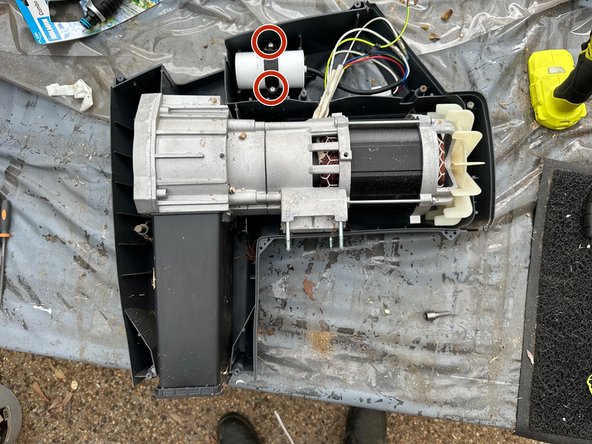
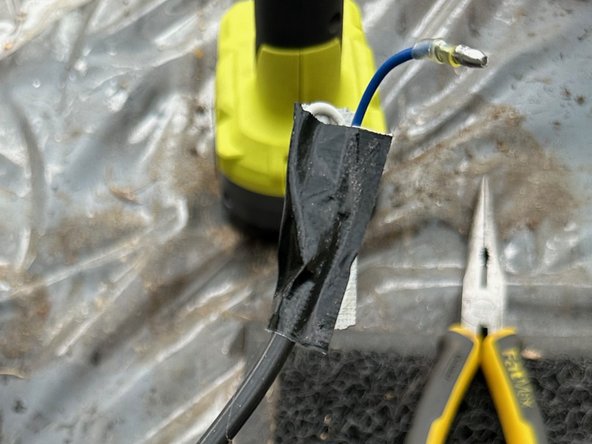

The capacitor is connected by two wires. If your device was recently powered on, it might still have some charge hanging around, so proceed with caution! Start by disconnecting one wire and taping it off before you disconnect the second one.
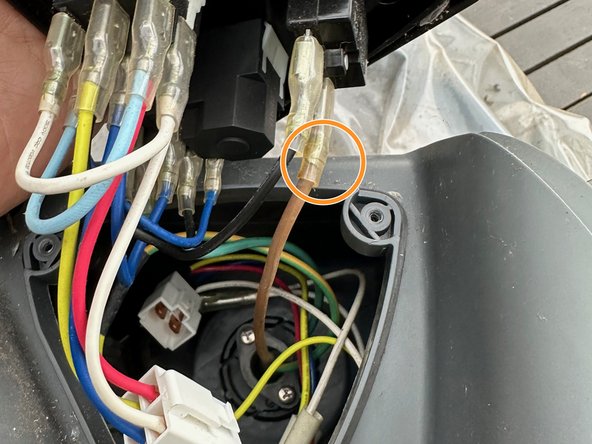
– The earth wire connecting the power plug to the motor is crimped together. If you need to remove this part, simply cut the wire and reconnect it later during reassembly. Easy fix!
– Unscrew the 2x20mm PH2 screws from the Capacitor bracket and move the capacitor out of the way for now. You’re on the right track!
Step 7
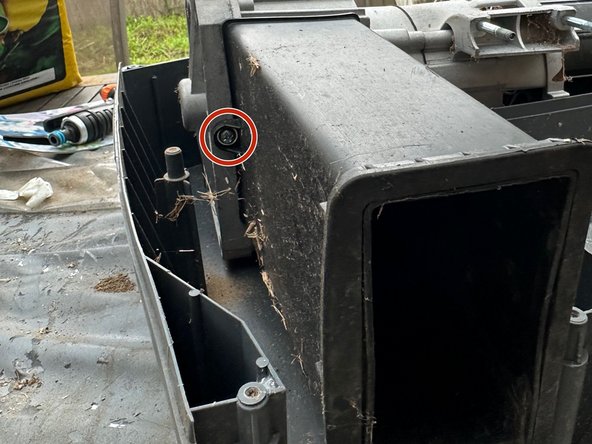

Keep an eye out for sneaky spiders!
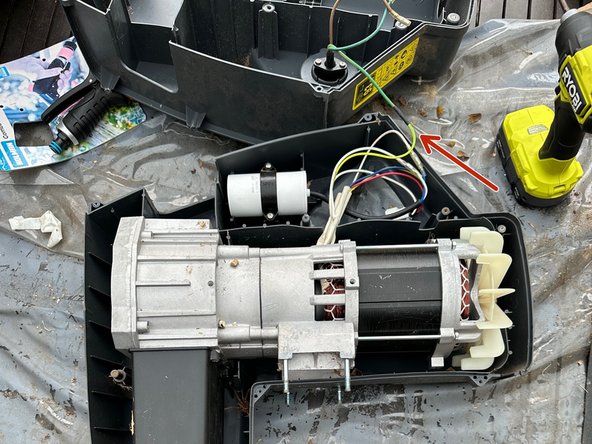
– First things first, let’s get that outlet chute out of the way! It makes pulling the motor a whole lot simpler. Just remember, it’s secured by three 15mm PH3 screws.
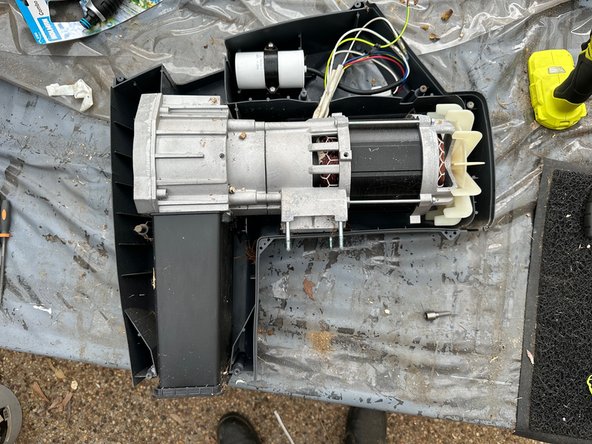
– Now, the motor can be a little tricky to handle. Just keep giving it a gentle wiggle until it pops free from the case. The two screws holding the base and wheels are the sneaky ones, so take your time with those!
Step 8
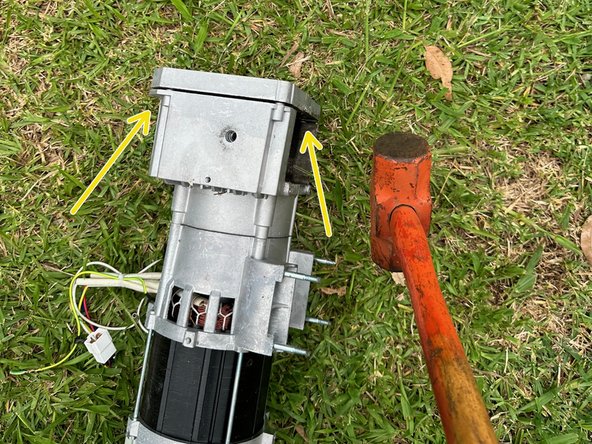

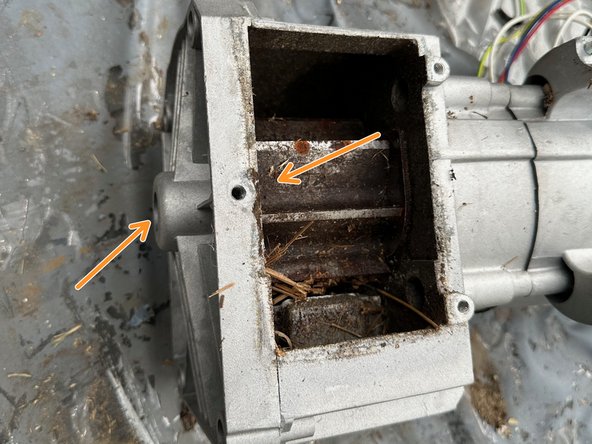
If your shredder is totally locked up, this is one of the two spots it’ll be jammed. Let’s get you unstuck!
The first one had been baking in the elements for months, so it took a lot of hammering to finally get it loose. The next one was only stuck for about a month—just a couple of taps and it came right off.
– Take out the four H5 22mm screws from the end.
– If your shredder is being stubborn, hit the marked spots with some penetrating spray and let it chill for a few minutes.
– Grab your trusty hammer and gently tap back and forth on each side of the end cap. Sometimes it pops right off, sometimes it feels like a boss fight—just keep at it until it budges.
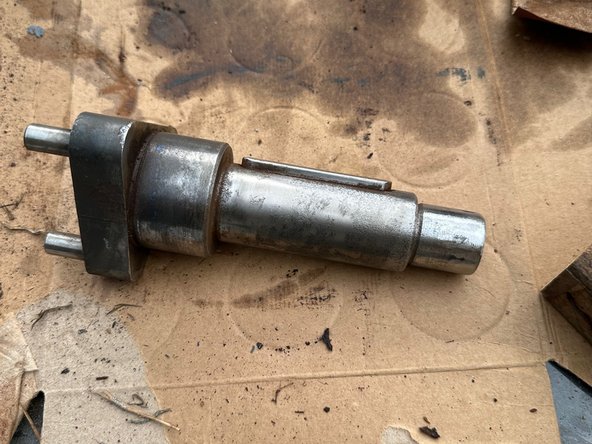
– With the end cap off, remove the adjustment piece. Heads up: there’s a plastic spacer and a nut on the red adjustment knob. Set them aside somewhere safe so they don’t pull a disappearing act!
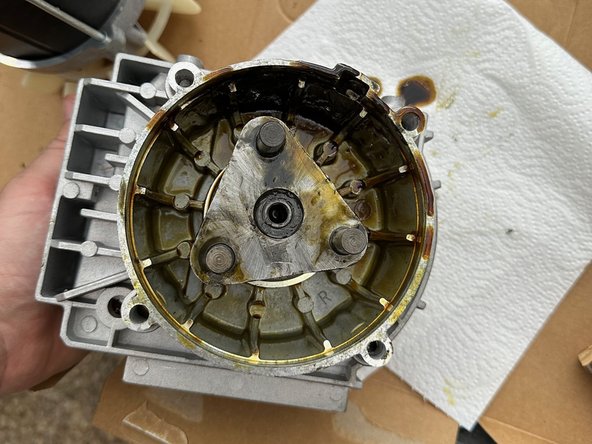
Step 9
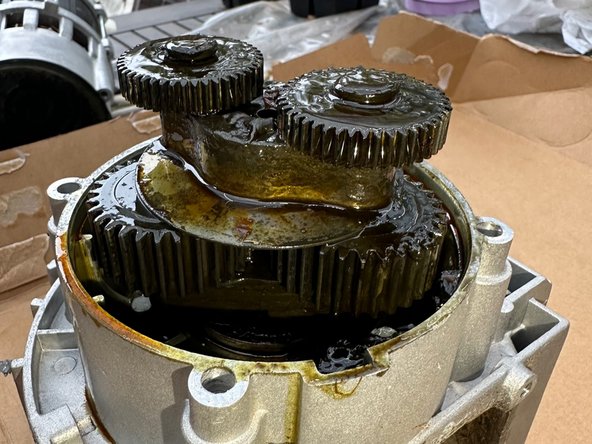

Alright, folks! Time to gear up! Slip on those gloves and clear a workspace because we’re diving into some serious grease action here. We’re talking about the gooey stuff that can be both solid and slippery, so let’s keep our bench clean and ready for action!
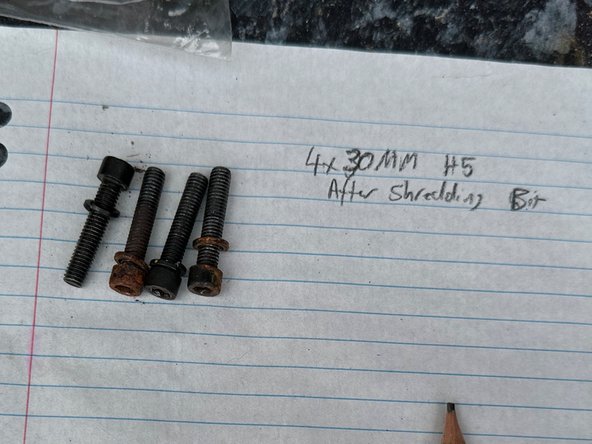
– Unscrew the 4xH5 bolts around the shredder blade. A gentle tap or wiggle should free the gear box from the motor.
– Once it’s off, the gears will be loose, so keep an eye on them—don’t let them slip away!
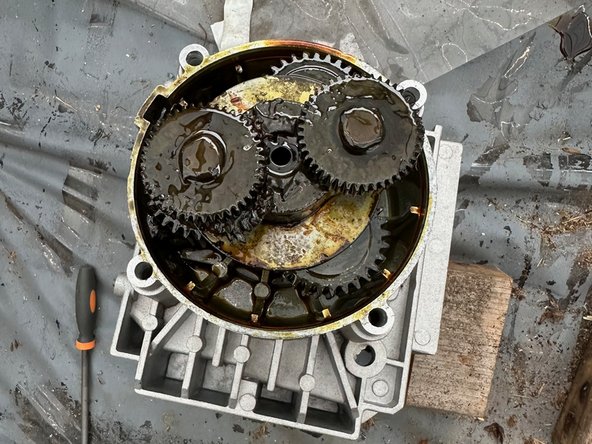
Step 10

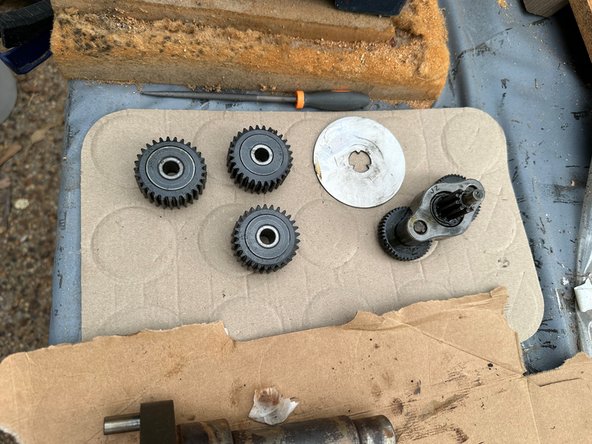
– Carefully remove each gear one at a time. Wipe off the old grease from each as you go, since you’ll be adding fresh grease during reassembly.
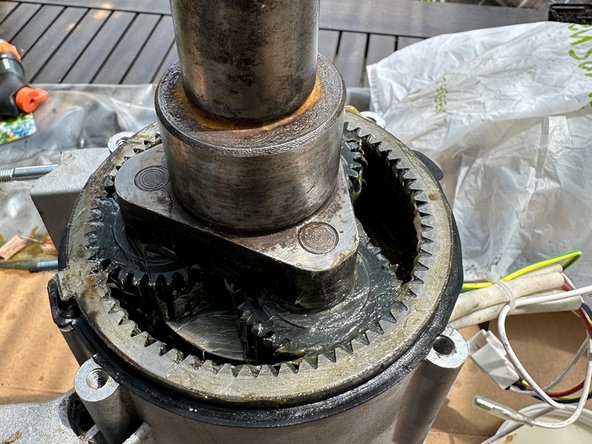
– When you reach the last piece with the two spokes, try spinning the shredder blade. If it moves easily, you’ve just scored some good luck and can probably skip taking out the shredder blade.
– No such luck for me—the shredder blade was completely stuck in place.
Step 11

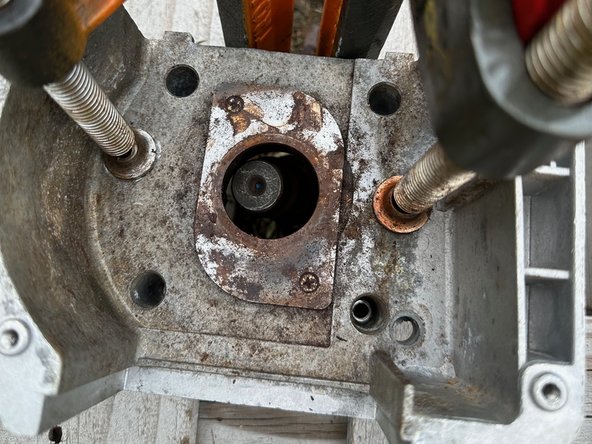
Heads up: If the axle is really stuck, you might end up flaring out the end. If that happens, just grab a file or a grinder to smooth it back down so it fits again.
This step is the trickiest one. If the part spins freely (check out Step 10), you might just be able to skip this step altogether—give it a quick oiling and you should be good to go!
– Spray the blade generously with some penetrating spray, focusing on the top, the little hole, and underneath it—get it all in there.
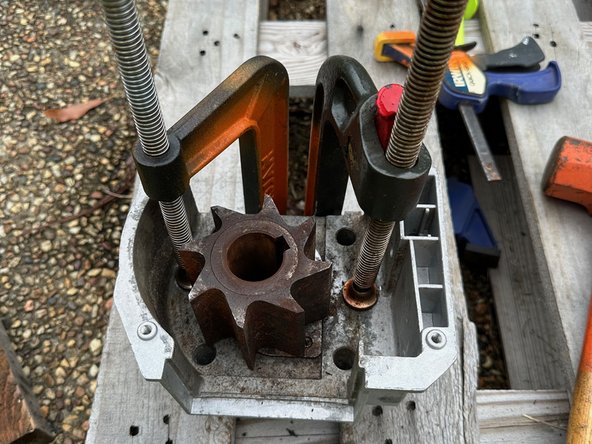
– Find a sturdy spot to rest the device so that it’s sitting securely on the casing, not on the gears. I used an old pallet for extra stability. Clamp it down with C-clamps (the Irwin quickclamps are no match for this task, trust me) and give it a couple of good hits.
– If you’re lucky, it’ll pop right out. If not, don’t sweat it. For the first one, I had to break out the SDS drill in chisel mode (you want that up-and-down motion, not spinning) and give it a solid go until it budged. Keep at it!
Step 12
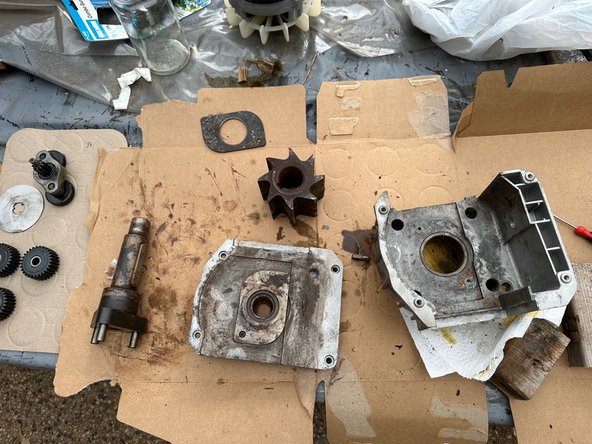

– Alright, it’s time to give everything a good scrub before we put it all back together!
– Shredder Blade – Grab a wire brush and get that rust off, then hit it with a bit of sandpaper for a smooth finish. If there are any stubborn nicks on the blades, you can tidy them up with a file too. Don’t forget to give the inside a quick sand, as it’s mostly just light rust in there.
– Casing – A quick scrub will do wonders here! I like to use vinegar and steel wool to tackle any rust. Also, give those two openings a little love with sandpaper to clear away any rust.
Step 13

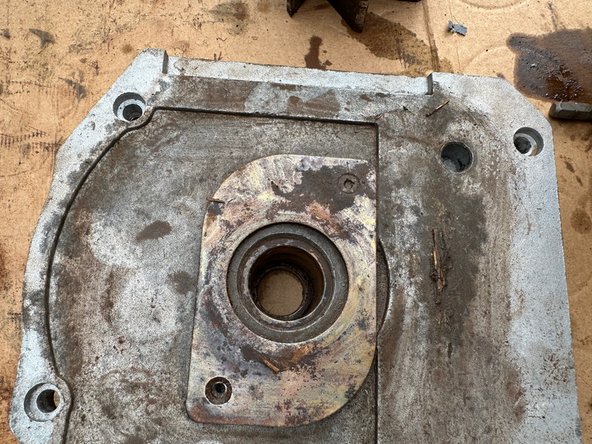
– For the inside, clear off the rust and sand it down as much as you can. A wire wheel works great to blast away stubborn rust.
– On the middle section, same game plan: remove the rust. This part doesn’t need to be flawless—just get it reasonably smooth.
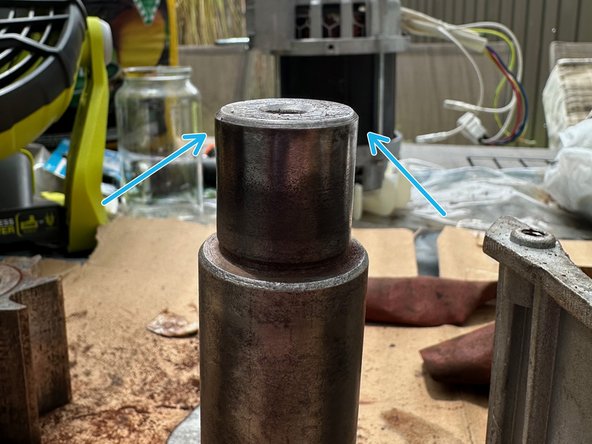
– At the end piece, you want it as slick as possible. This bit has to slide back into the housing and spin easily, so smooth it out well—though honestly, perfection isn’t a must with this shredder.
– If you went to town on it in Step 11, the end probably got a little mushroom-shaped. Grind it back down until it fits nicely in the housing and spins freely. Take your time: grind, check, repeat.
– I started with an angle grinder to get close, switched to a hand file for precision, then finished things off with sandpaper for a tidy look.
Step 14

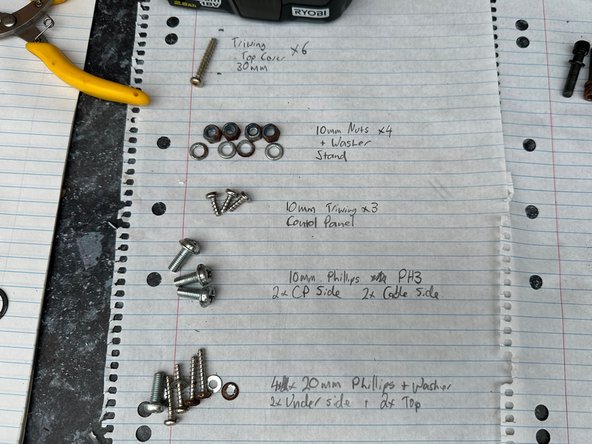
– For the most part, just work your way back through the steps!
– Here are some handy tips to make reassembly a breeze!
– And check it out, here are all the screws laid out, even if my handwriting looks more like a secret code…
Step 15
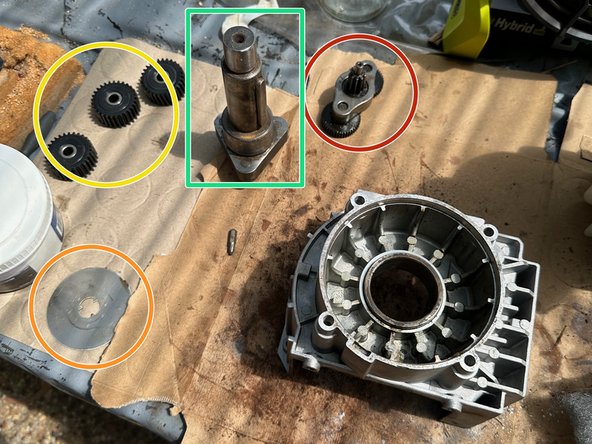

– Kick things off by assembling the gears from the motor side. Get generous with the grease—don’t be shy, smoother is better.
– Pop in the part with the red mark right up against the motor. Give it a little wiggle until it’s snug where it belongs.
– Next up is the orange flat disc—slide it into place.
– Now drop in the green axle with its trio of gears. Another round of wiggling until it settles in.
– Once everything’s cozy, put the cover back on and screw it down. If anything feels off or refuses to fit, you can always schedule a repair.
Step 16

… Taking this out could get risky…
– The exit chute isn’t really needed—others have mentioned removing it to prevent clogging. Feel free to take it out if you want smoother operation.
– Don’t forget to give everything a quick wipe down, and if the wheel frame’s looking a bit rusty, a fresh coat of paint can do wonders!
Success!