PlayStation 2 Slimline Clock Battery Replacement
Duration: 45 minutes
Steps: 7 Steps
Get ready to dive into the world of your PlayStation 2 Slimline! In this guide, we’ll walk you through the simple steps to find and swap out that sneaky clock battery, also known as the CMOS or motherboard battery. Let’s keep your gaming sessions on point!
Step 1

– Unplug all the cables from the console and gently flip it over to expose the base. Let’s get started on this repair adventure!
Step 2


Heads up! One of the little feet is hiding under that sticker you see in the photo. Just a friendly reminder: peeling off this sticker will cancel any warranty you have with Sony. So, think twice before you go on a sticker adventure!
– Find the six little feet hanging out at the bottom of your device. Use a spudger to gently pop them off and uncover the hidden screws waiting for you.
Tools Used

Step 3


– Using a #1 Phillips screwdriver, carefully take out all six 4.0 mm screws from the bottom of the device. You’ve got this!
Step 4


Tip: Sometimes a little extra oomph with your hands can help pop the two pieces of the outer shell apart.
– Let’s get started! Begin by prying open the outer shell at the corner where the power and Ethernet ports are located. Use a spudger to gently work your way around the entire unit, taking care not to damage any internal components.
Tools Used
Step 5

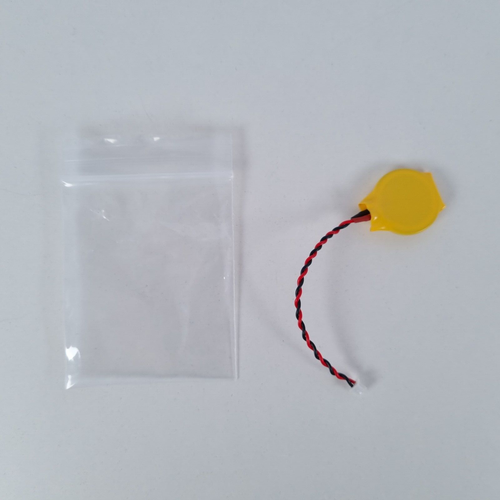
– Let’s get started by locating the clock battery, which is cleverly hidden at the front, right section of the unit. You’ll recognize it by its circular shape and the red (+) and black (-) wires that connect it to the motherboard.
Step 6


– Grab a pair of tweezers and firmly pop that connector off the motherboard with an upward motion—smooth and confident, like you mean it!
Tools Used

Step 7


– Time to put your device back together! Just follow these steps in reverse order and you’ll be good to go.
– If you need help, you can always schedule a repair.
Tools Used
Success!
