PlayStation 3 Super Slim Teardown
Duration: 45 minutes
Steps: 18 Steps
Sony shook things up nearly six years after the debut of the original PlayStation 3 by introducing the third iteration of their third console—the PlayStation 3 Super Slim. It sure lives up to its ‘slim’ name, but is it truly ‘super’? Only one way to find out: let’s pop it open and uncover the revamped hardware inside this fan-favorite design. Got a cranky old PS3 throwing YLOD shade? Don’t worry—you’ve got options to rescue it from the scrap heap. If you need help, you can always schedule a repair!
Step 1

– Geared up and ready to impress, the PlayStation 3 Super Slim crams some serious power into its sleek, compact design. Here’s the lowdown on what makes it tick:
– – Crystal-clear display with HD 1080p, 1080i, 720p, 480p, and 480i output.
– – Immersive sound including LPCM 7.1 channel surround sound, Dolby Digital, Dolby TrueHD, DTS-HD, and AAC, making every explosion and whisper sound amazing.
– – The gutsy Cell Broadband Engine™ that keeps the system running like a champ.
– – RSX® GPU for graphics that look sharp and vibrant.
– – 256MB XDR Main RAM and 256MB GDDR3 VRAM under the hood for smooth performance.
– – Comes in configurations of 12GB (flash memory) or 250GB/500GB internal storage (and yes, it’s upgradable!).
Step 2


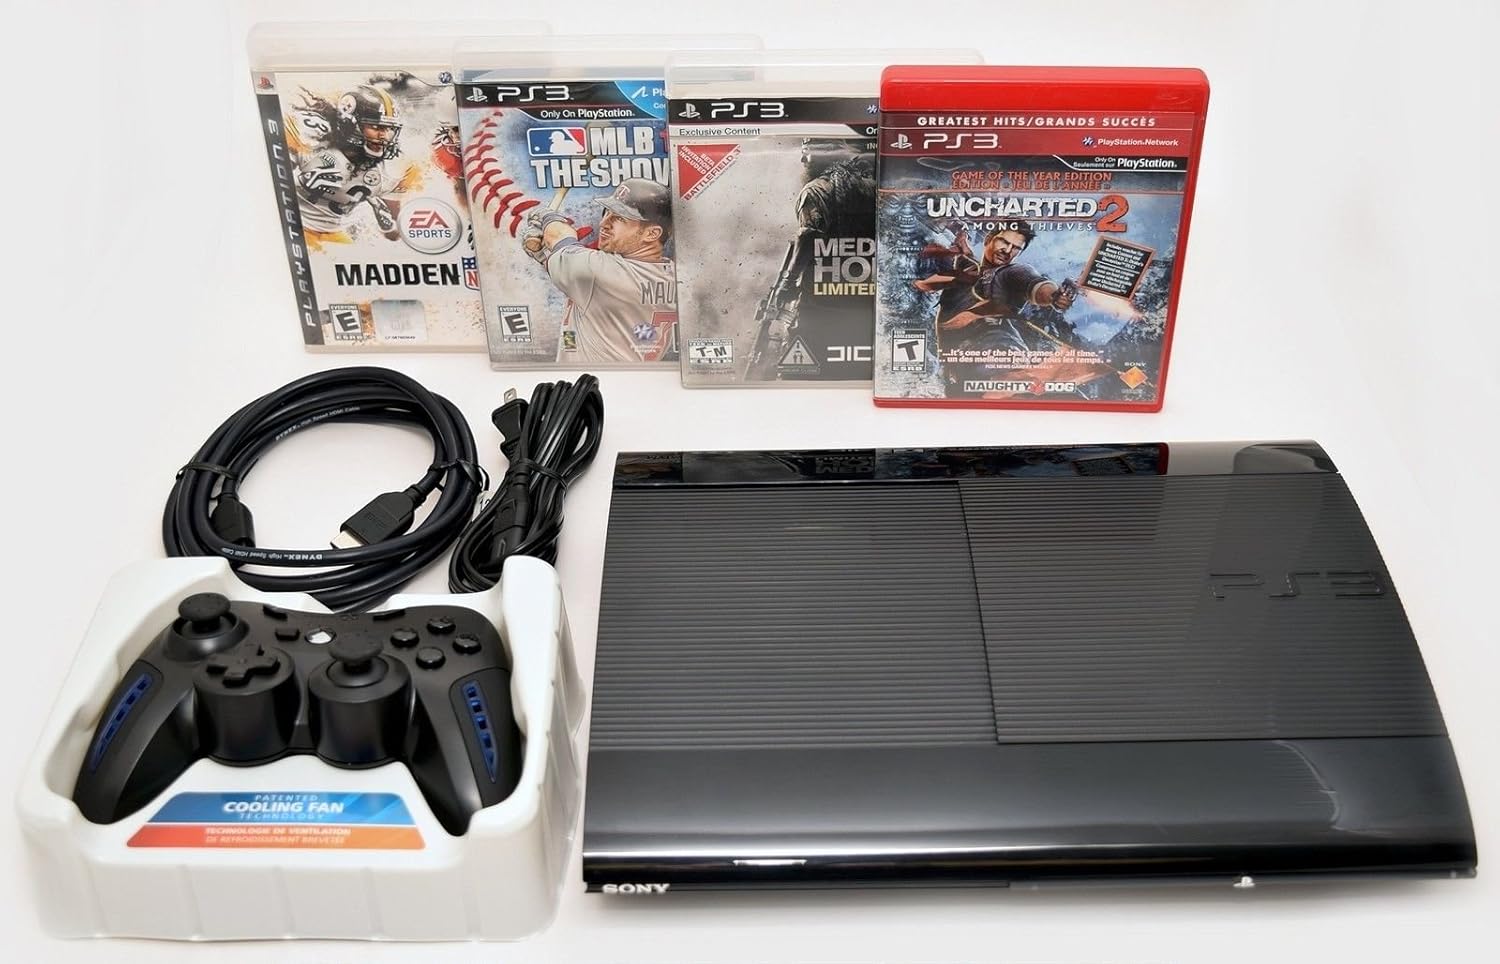
– Alright, so here’s the deal: we got our hands on the PlayStation 3 Super Slim, but it came bundled up with some extra goodies. After many wild adventures, it looks like Nathan Drake finally discovered something worth celebrating.
– So, what’s packed in this bundle? Here’s the scoop:
– 250 GB PlayStation 3 Super Slim System
– DualShock 3 Wireless Controller
– AV Composite Cable (unfortunately, there’s no HDMI cable in this bundle)
– AC Power Cord
– USB Cable (you’ll need this to charge the DualShock controller)
– Uncharted 3: Drake’s Deception (Game of the Year Edition) + Dust 514 (Downloadable content included)
Step 3


– We want to compare the brand new PS3 Super Slim with the old standard slim model to see what’s changed.
– Our testing shows that, as expected, the Super Slim lives up to its name with significant size reductions.
– Comparing the backs of both consoles provides some clues about the revisions that have been made to the Super Slim.
– Notice that the cooling vents are smaller on the Super Slim. This probably means the fan itself is smaller and has to deal with less heat.
– The ports on the Super Slim are also laid out slightly differently, which answers a common question: the motherboards of the Slim and Super Slim are not interchangeable.
Step 4

– One of the most talked-about changes in this new model is the switch to a manual top-loading disc drive, which has definitely rubbed some consumers the wrong way.
– It seems that ditching the tray was a necessary move to trim down costs and the size of the Super Slim. This design choice has stirred up quite a bit of chatter, reminiscent of another recent size-conscious tweak.
– Besides giving Sony a boost to their bottom line, lowering production costs helps to ensure the PS3 remains relevant in the future. When the PlayStation 4 finally drops, you can bet the PlayStation 3 Super Slim will still be hanging around, but at a friendlier price tag.
– Just a heads up—the door is made of a thin, somewhat flimsy-feeling plastic, and now this PS3 is going to need some overhead space to swap out discs. No more squeezing it into those tight shelves!
Step 5

– The bottom section of the Super Slim has a familiar vibe to its predecessor, except for the missing Wi-Fi indicator light—don’t worry, that little light’s absence doesn’t mean the Super Slim is offline.
– Here’s a fun fact: the Super Slim is Wi-Fi ready, even without that indicator light. Pretty neat, right?
– On the front, you’ll still find the essentials—two trusty USB 2.0 ports, a hard drive activity light, and a lineup of logos flaunting its capabilities, including the iconic Blu-ray Disc logo.
Step 6


Just a quick heads-up: it’s one Phillips screw and about 5-10 minutes to swap out that hard drive. A pretty breezy task, right?
– The PS3 Super Slim’s hard drive bay cover snaps right off, revealing a bright blue Phillips screw.
– Once you’ve taken out that screw, the Hitachi TravelStar Z5K320 2.5″ SATA II 3.0Gbps 250 GB 5400 RPM hard drive slides out easily.
– Here’s the awesome part: Sony lets you upgrade your PlayStation with any 2.5″ laptop hard drive. No confusing firmware, no weird cases—just you, your console, and as much storage as you can fit in there.
Step 7


– The small rubber feet on the PlayStation 3 Super Slim not only hide three of the outer case screws but also give the console some extra grip. Handy, right?
– Ah, the fourth screw is guarded by the infamous Warranty Void sticker. Well, that sticker has got to go—no big deal.
– These little rubber feet? Super easy to pop off, functional, and they keep the console looking sleek. We’re fans.
– As for that sticker? Let’s be real—it’s just there to annoy you. Don’t let it!
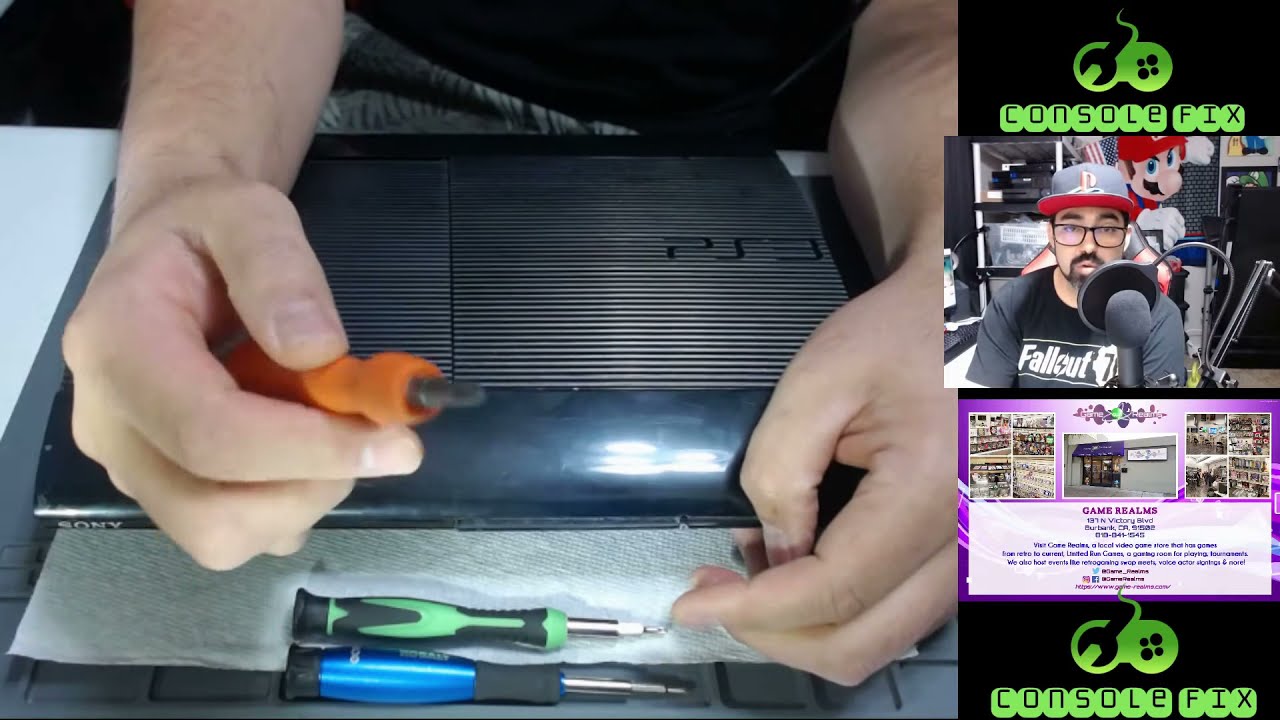
Step 8

– Grab your trusty plastic opening tool—it’s perfect for popping off the outer bezels in no time.
– Hiding under the front outer bezel, you’ll spot the ever-alluring laser warning sticker—hard to miss, right?
– With the bezels out of the way, say hello to the screws we’ve been waiting for—time to crack open the Super Slim!
Step 9

– Alright, let’s dive in! What exciting discoveries await us inside the PS3 Super Slim? The only way to uncover the mystery is to gently slide the top cover aside.
– It seems like the internal plastic casing is giving a warm hug to almost every component.
Step 10


– Once you’ve popped off the top cover, let’s keep the momentum going by removing the manual top-loading disc tray. It’s like peeling layers off a fascinating tech onion!
– Love it or hate it, the tray-free disc loader in the Super Slim is undeniably a breeze to repair. Props to practical design!
– The laser lens wears the label KEM-850 PHA 0672 23020A—like a tech tattoo, letting us know exactly what’s what.
– We’ve heard mixed reviews about the noise levels from the PS3 Super Slim’s disc drive, so we dove in to check out Sony’s noise-reducing wizardry:
– The disc drive sits cushioned on super-soft rubber bumpers and cozied up in a noise-dampening plastic tray. Vibration, meet your match!
– That said, the thin plastic tray door doesn’t do much to hush the sounds coming straight from the drive. But hey, every little bit helps, right?
Step 11


– Removing the power supply module is a breeze! Just pop it out from the rear side of the case.
– Now, while the layout of components looks neat and tidy, getting to the power supply’s insides can be a bit of a puzzle. It’s tightly secured with four screws and a bunch of sturdy plastic clips, so be prepared for a little challenge!
– Just like its sibling, the PS3 Slim, this power supply is a world traveler, handling inputs from 100V to 240V AC. So whether you’re in Tokyo or New York, it’s ready to roll!
– Oh, and here’s a fun tidbit: the power consumption has taken a little vacation! While the PS3 Slim was rated at 12 V and 18 A DC, our Super Slim is cruising along at a cooler 12 V and 13 A DC.
Step 12


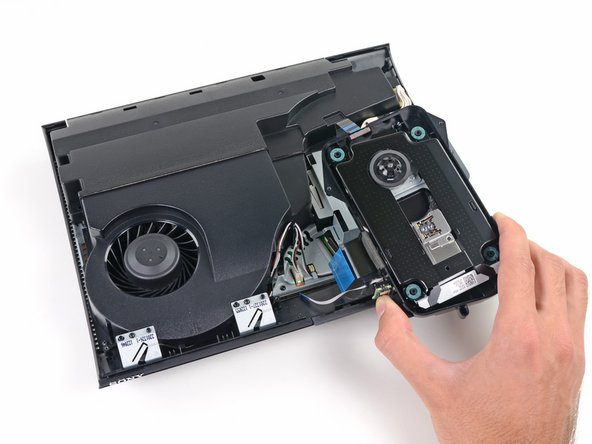
– Let’s kick things off by carefully removing the motherboard and fan assembly from the lower case as we dive into this adventure.
– We were a bit surprised to discover that the whole motherboard assembly needs to come out to get to the fan or heat sinks, but hey, it does create a sleek and sturdy design!
– On the front side of the fan assembly, we spot the Wi-Fi and Bluetooth antennas, ready to keep you connected.
– Look closely at the antennas, and you’ll see the TE Connectivity logo. Fun fact: TE Connectivity claims their antenna designs have been used in a variety of wireless products, including some pretty cool gaming consoles!
Step 13

– Peek behind door number two and guess what? It’s the motherboard waiting for you!
– After a bit of nail-biting, we finally managed to lift the metal frame off the motherboard. Phew!
– A quick look shows there’s decent thermal paste on the GPU, but the CPU could definitely use a little extra love.
– Looks like there’s some room for improvement to keep our tech-loving friends happy!
Step 14

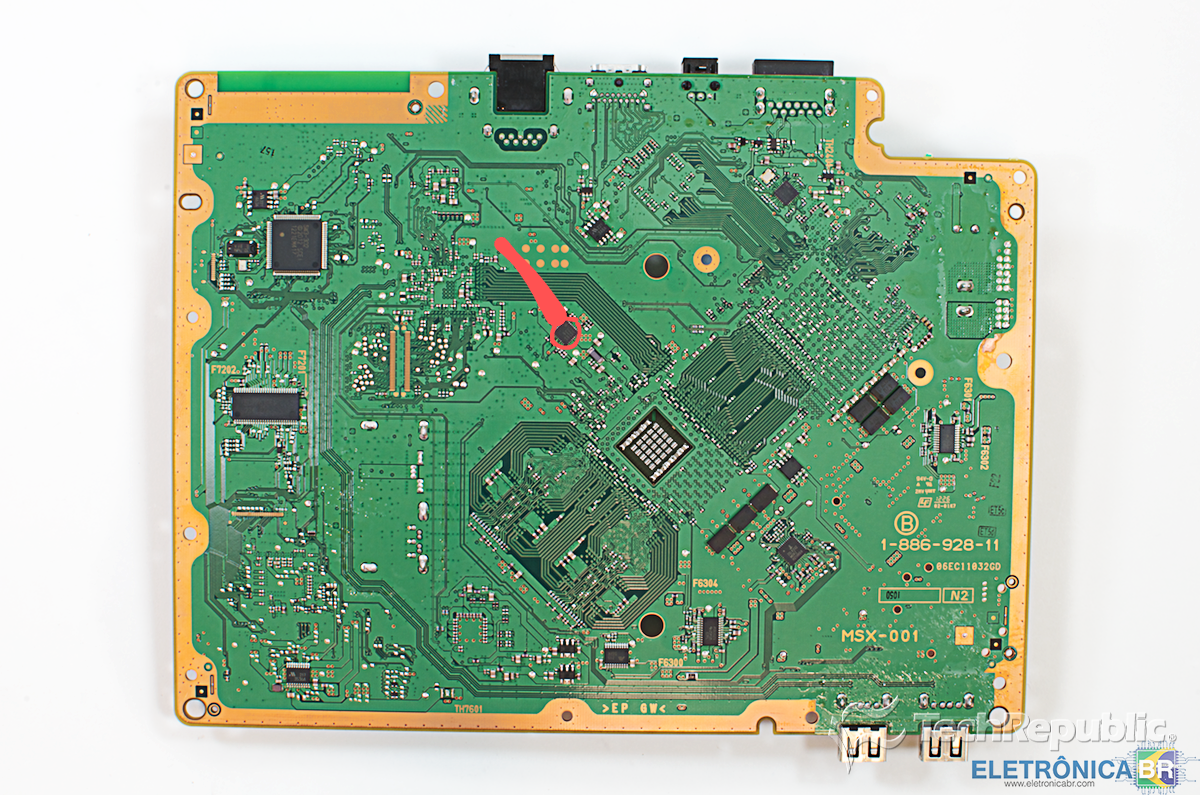
– Tilt the motherboard a cool 45 degrees and let’s check out some of the heavy hitters powering the PlayStation 3 Super Slim:
– Cell Broadband Engine CXD2996BGB
– Hynix H5RS5223DFA 512 Megabits GDDR3 VRAM (four chips combine for a total of 256 MB)
– Sony CXM4027R MultiAV driver
– Panasonic MN8647091 HDMI transmitter
– Elpida X1032BBBG-3C-F 1 Gb (two chips together giving you 256 MB) XDR DRAM
Step 15

– Here are some cool components hanging out on the top of the motherboard:
– 1. Sony RSX CXD530 “Reality Synthesizer”
– 2. Marvell Avastar 88W8781 SoC WLAN/Bluetooth chip
– 3. Sony CXD9963GB I/O bridge controller
– 4. Macronix MX29GL128FLT2I flash storage
– 5. Sony CXD5132R SATA/PATA Blu-ray drive controller
– 6. Integrated PCB Wi-Fi antenna
Step 16

– Here’s a little fun on the other side:
– SW3-302 SCEI 1220EM42E
– BD7761EFV 227 T25
– Intersil ISL6332 MDRZ H223BCC
– IDT 4227ANLG 1149L
– Texas Instruments TPS53123 Dual Synchronous Step-Down Controller
Step 17


The Super Slim has certainly shed some pounds and inches in the fan department compared to the Slim.
– The Super Slim cools off as we carefully remove the squirrel cage fan and the two heatsinks—it’s time for a breath of fresh air.
– In this (last?) hurrah of the PS3 series, Sony has packed in cutting-edge tech to make the console smaller, lighter, and quieter, rather than focusing on turbocharging performance.
Step 18


– PS3 Super Slim Repairability: 7 out of 10 (10 means super easy to fix!).
– Accessing, repairing, or upgrading the hard drive? A total breeze!
– The tray-free disc loader is modular, so swapping it out is a piece of cake.
– Standard tools are all you need, except you’ll need a T8 Security bit—nothing too wild.
– There’s a cheeky little ‘Warranty Void’ sticker that’s more annoying than serious, so don’t sweat it.
– The power supply is tucked behind a bunch of clips. While it’s a bit of a hassle, it’s not something you’ll likely need to mess with often.
– To get to the fan or heat sinks, you’ll have to remove the entire motherboard assembly—takes a bit of patience, but totally doable.
– The sliding disc tray door feels a bit wobbly and might not hold up forever if it’s overused.
Success!