PlayStation 4 Pro Power Supply Replacement Guide
Duration: 45 minutes
Steps: 7 Steps
Ready to dive in? Let’s walk through how to safely remove the power supply unit from your PlayStation 4 Pro. While a little disassembly is needed, don’t worry – this is one of the first parts to come off, making it a great place to start your repair journey. Just follow along, and you’ll have it out in no time!
Step 1


– Flip the console upside down like you’re showing it who’s boss.
– With a bit of finesse, use your finger to pop off the plastic cover hiding the hard drive. It’s like opening a treasure chest, but cooler!
Step 2


– Grab your trusty screwdriver and unscrew that single Phillips #0 screw holding the hard drive caddy in place. You’ve got this!
– Now, give that hard drive caddy a gentle pull straight out. Easy peasy!
Step 3


Don’t be shy – it’s time to get a little aggressive with your (https://pollinations.ai/referral?topic=console). This step may require some serious elbow grease, so go ahead and apply some extra force if needed.
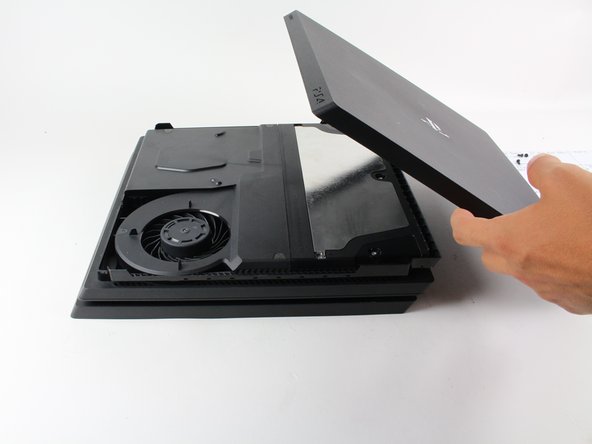
– Set the console upright and make sure it’s steady.
– Grab those two front corners with confidence—you’re in charge here!
– Give them a good upward pull until you hear that satisfying click—yep, that’s the sound of progress.
– Once both corners are free, smoothly slide the cover back and lift it off like a pro.
Step 4


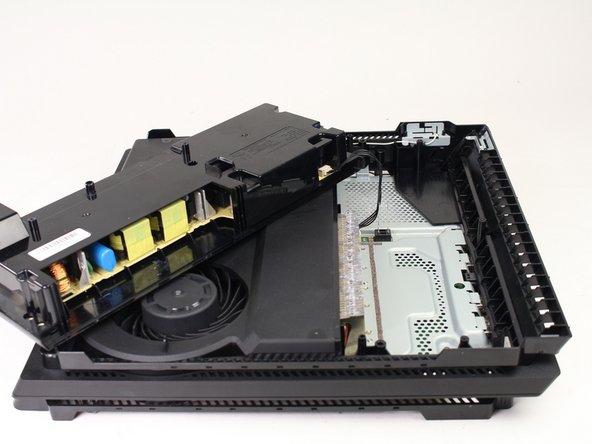
– Let’s get started! Use a T8 Torx Security screwdriver to remove the five screws that are holding everything together.
– Next up, carefully remove the metal plate – it’s time to take a peek inside!
– Now, remove the two 31mm screws. You’re making great progress!
– Almost there! Remove the three 10mm screws, and you’ll be one step closer to fixing your device. If you need help, you can always schedule a repair
Step 5


– Turn the console over to its back once more.
– Grab a T8 Torx Security screwdriver and remove the three black 7mm screws from the back panel.
– Take off the bottom cover just like you did with the top. Grab both sides, pull up until you hear a click, and slide it off.
Step 6


– Grab your T8 Torx security screwdriver and pop out those two 10mm silver screws from the metal plate.
Step 7


Hold up! Don’t tug too hard, the assembly’s still hangin’ on at one spot.
– To put everything back together, just work your way through these steps in reverse – easy peasy!
– If you need help or got stuck, don’t worry! You can always schedule a repair
– You did it! Now go enjoy your newly fixed device!
Success!
