PlayStation 5 Slim Fan Replacement Guide: Step-by-Step DIY Tutorial
Duration: 45 minutes
Steps: 8 Steps
Feel free to use this guide to give that dusty fan a good cleaning!
Just a heads up, make sure to check things out before grabbing a new fan.
Ready to kick that faulty fan in your PlayStation 5 Slim to the curb? If it’s not spinning, moving at a snail’s pace, or making sounds that would scare a cat, it’s time for a replacement! And hey, if it’s just a bit dusty, give it a good clean before you think about swapping it out. Grab your tools, take out the current fan, and wipe off any dust bunnies, dirt, or stray hairs that might be causing the trouble – sometimes that’s all it needs! If, after a thorough cleaning, your fan is still acting up, then it’s definitely time to bring in a shiny new replacement. For expert help or to schedule a repair, just reach out!
Step 1


Heads up before you dive into your repair:
– Time to get started! Shut down your console, then unplug all cables and accessories to give yourself a clean slate.
– Next, carefully remove any stands that are holding up your device and lay it down flat – we’re about to get hands-on!
Step 2

– Alright, let’s get this party started! Give your PlayStation a little side hustle – lay it down so the right side covers are facing you. You got this!
Step 3

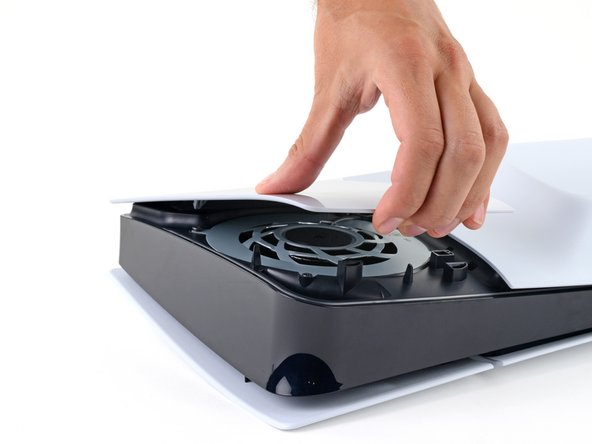
The cover is held in place with a few hooks on the back side and a couple of clips on the front.
You’ll hear a satisfying *pop* as each clip lets go.
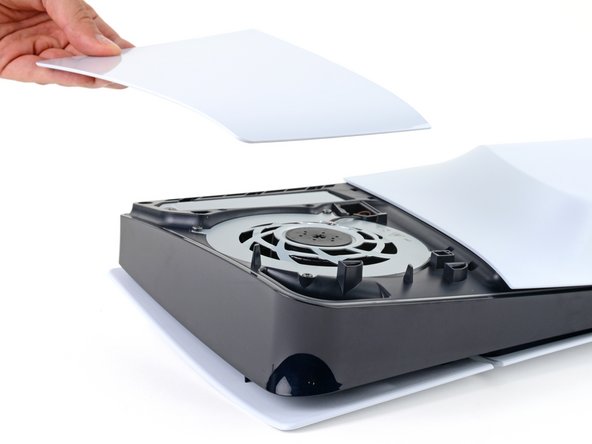
– Gently lift the front edge of the smaller, upper cover to pop those clips free.
– Take off the cover and set it aside.
– When you’re ready to put the cover back on, align the hooks with their cutouts at the rear edge and give the front edge a firm press to snap those clips back into place.
Step 4


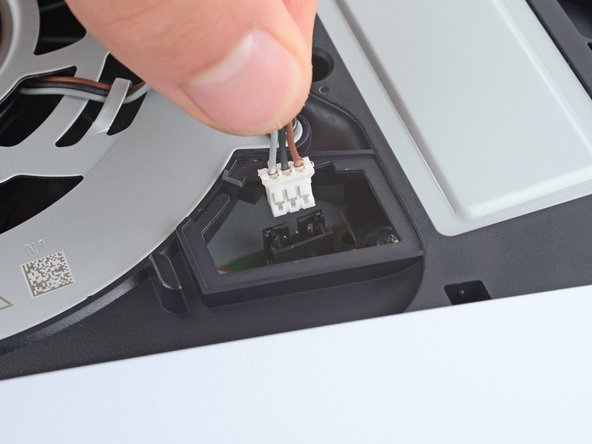
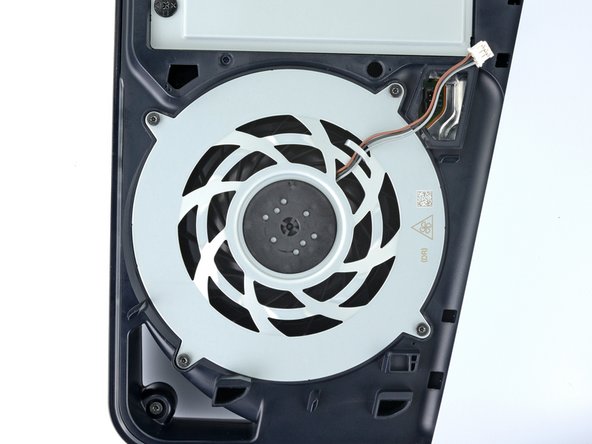
There’s a nifty little piece of plastic keeping those fan cable connectors cozy and secure.
– Use your fingers to gently pry off the plastic cover – it’s like removing a sticker, easy does it!
– When you’re putting everything back together, simply press the plastic piece into place. If it doesn’t stick, no worries! Just grab some double-sided tape and you’re good to go.


Step 6

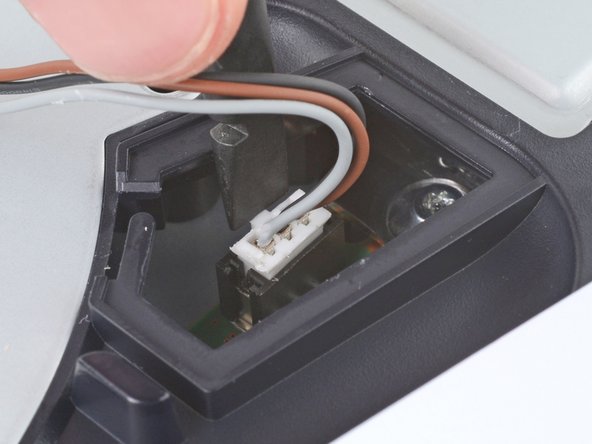
Having a bit of a struggle? No worries! Just hold onto the cables right above the connector head and give them a gentle tug. You got this!
– Take hold of the fan cable’s white connector head and give it a gentle tug straight up to release it from its cozy socket.
– When putting things back together, ensure the connector is perfectly perched above its socket. Press down on the sides with the flat end of your spudger until it settles in snug and secure.
Tools Used

Step 7

As you dive into this repair adventure, remember to keep an eye on those screws! They each have a special home, so when you’re done, make sure to return them to their original spots. It’ll keep your device chirping happily. If things get tricky, don’t hesitate to schedule a repair.
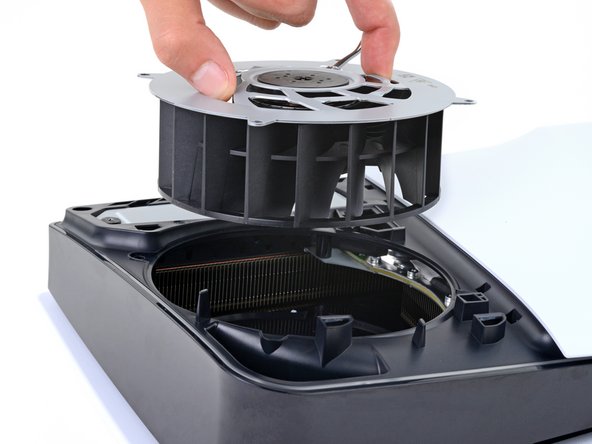
– Grab your trusty T8 Torx Security screwdriver and let’s get to work on that fan! First things first, unscrew those four screws holding it in place:
– One screw that’s 31.2 mm long, ready to be removed!
– Next up, you’ll find two screws measuring 21.3 mm—let’s bid them farewell!
– And don’t forget the last screw, which is a nifty 11.6 mm long. Time to remove it too!
Step 8

If you’re using this guide to give your fan a good scrub, grab some compressed air and a clean cloth. Let’s blast away any dust bunnies hanging out in there!
– Now, let’s put your device back together by retracing our steps in reverse. Easy peasy!
– Got some old gadgets lying around? Make sure to take them to an R2 or e-Stewards certified recycler. It’s the responsible thing to do!
– Things not going as smoothly as you hoped? No worries! Give some basic troubleshooting a shot, or reach out to our Answers community for a helping hand.
– If you decided to pause on this guide, that’s totally okay. You can always come back when you’re ready!
– Remember, every repair is a learning experience. You’ve got this!
Tools Used

Success!

