Polaroid PTAB7XC Motherboard Replacement
Duration: 45 minutes
Steps: 7 Steps
This replacement involves soldering tiny electronic parts and dealing with some stinky adhesive. Dive in only if you’re comfortable handling a soldering iron and working with fine details. For tips on desoldering, check out this handy guide.
Step 1


If the screw heads are looking a bit rusty or have been stripped, you might need to grab a bigger screwdriver head, like the J0, to get the job done.
– Grab a J00 Phillips screwdriver and gently twist those two 7 mm screws at the top of the device. Turn them counterclockwise to loosen them up. Easy does it!
Step 2


At this point, the power and/or volume buttons might pop out. Don’t worry, it’s totally normal! Just remember to pop them back in when you’re reassembling your device. You’ve got this!
– Gently wiggle the large plastic opening tool into the seam between the screen and the case on all four sides until that pesky plastic casing pops right off!
– Carefully lift your device away from the case and flip it over, so it’s lounging screen side down.
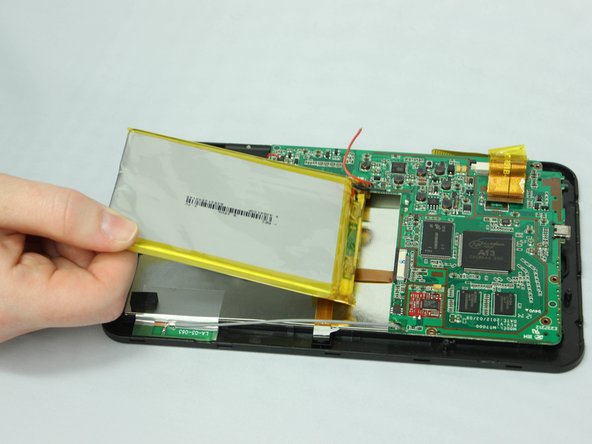
– Congratulations! Your device is now liberated from the plastic casing.
Step 3

If those wires are being a little stubborn during desoldering, grab your tweezers and give them a gentle tug—just enough to set them free, but not so much that they fight back!
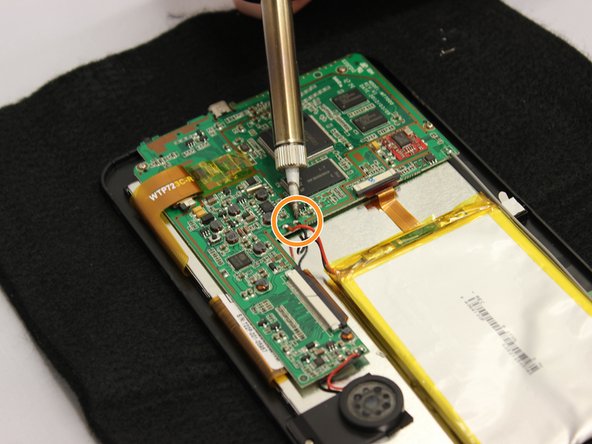
– Place your device on a surface that can handle a little heat—nothing too fancy, just safe for some warmth.
– Gently desolder the red wire from the motherboard. It’s connected to the battery unit, so take care here.
– Now, do the same for the black wire. Carefully desolder it from the motherboard, where it connects to the battery unit.
Tools Used

Step 4

If any of the wires are still hanging on after the desoldering party, just give them a gentle nudge with some tweezers to help them along.
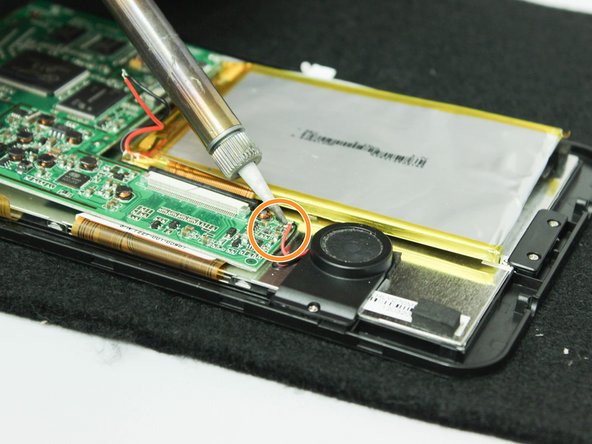
– Time to get those components off the motherboard! Let’s dive in.
– First up, gently desolder the red wire that’s cozying up to the speaker unit on the motherboard.
– Next, say goodbye to the black wire connecting to that same speaker unit—snip it away!
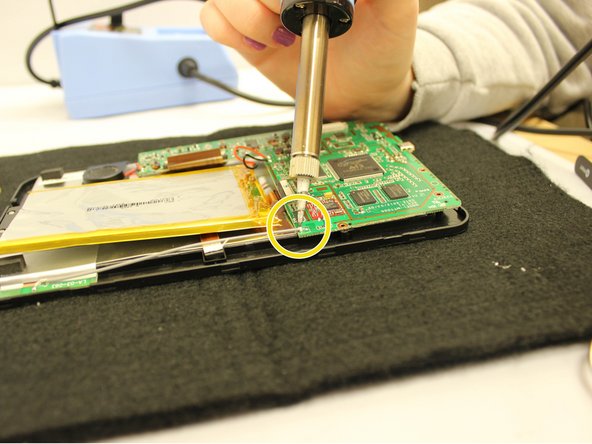
– Now, let’s tackle the gray wire that’s making its way along the edge of the device. Desolder it with care.
– And just like that, your motherboard is free from all those pesky wires! You’re doing great!
Tools Used
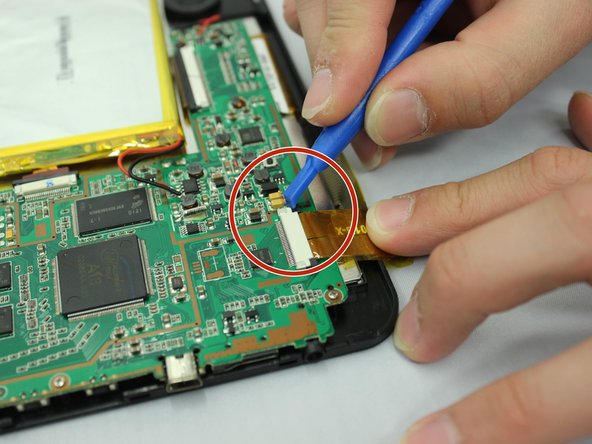
Step 5
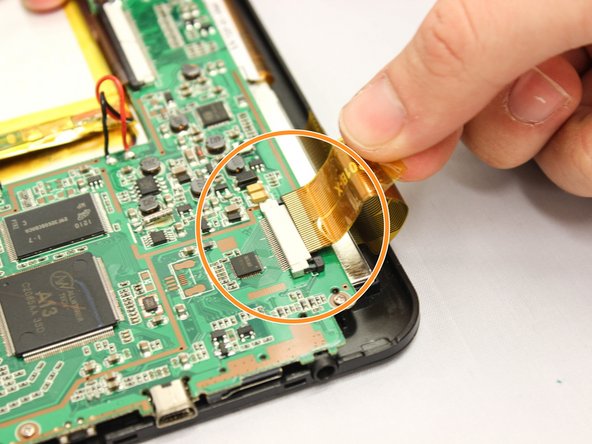

– Grab some tweezers and carefully pry that medium-width yellow ribbon cable loose from the motherboard.
– Use a small plastic opening tool to slide the two tiny black clips off the white connector holding the medium-width yellow ribbon cable.
– Gently wiggle and pull the medium-width yellow ribbon cable out of the white connector using your fingers.
– Repeat those last two steps to disconnect the narrower yellow ribbon cable and the wider yellow ribbon cable from the motherboard.
– Now the motherboard is free and clear from any ribbon cables attached to the device.
Tools Used
Step 6
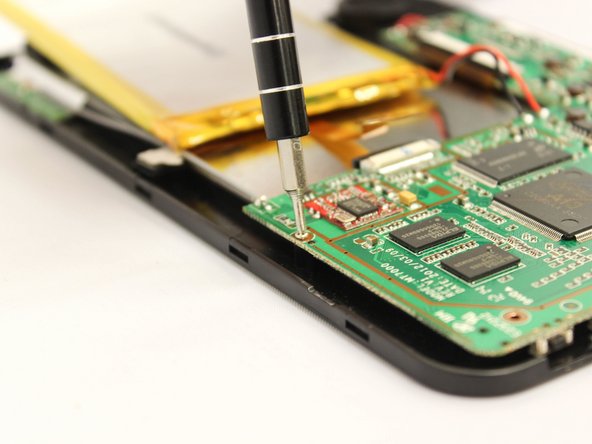

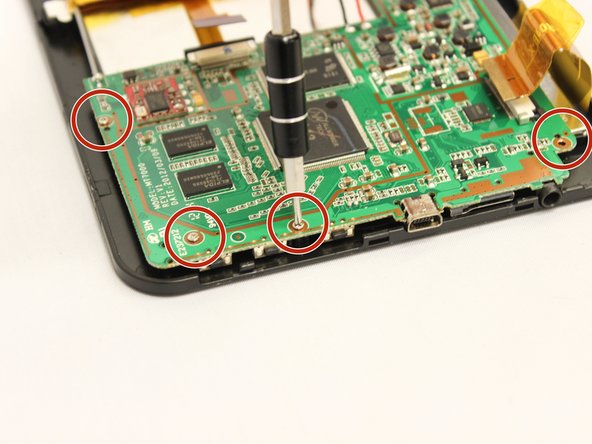
– Grab your trusty PH000 screwdriver and let’s get to work! Carefully unscrew those four 5 mm screws at the bottom edge of the motherboard by turning them counterclockwise. You’ve got this!
Step 7

– Now it’s time to put your device back together! Just retrace your steps from earlier, and you’ll be back in action in no time.
– If you find yourself in a pickle, don’t hesitate to schedule a repair for some extra hands!
Success!


