Polaroid PTAB7XC USB Port Replacement
Duration: 45 minutes
Steps: 8 Steps
Get ready to channel your inner soldering master! This replacement process requires some serious skill with a soldering iron and a super steady hand. If you’re new to desoldering, don’t worry, we’ve got you covered – check out this helpful guide for some expert tips.
Step 1


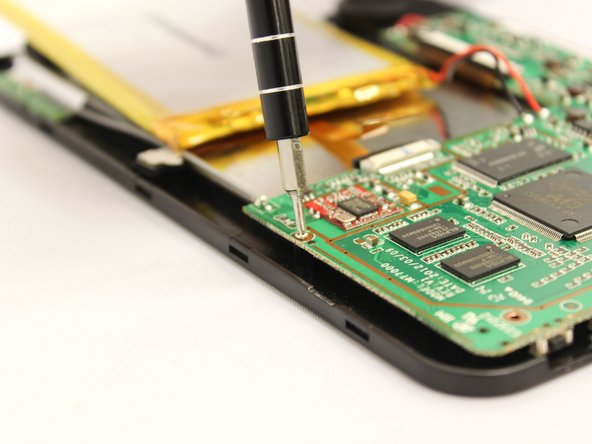
If the screw heads are all stripped or corroded, try stepping up to a bigger screwdriver bit like the J0 for a better grip.
– Grab your trusty J00 Phillips screwdriver and get ready to work some magic! Carefully unscrew those two 7 mm screws sitting pretty on the top of your device by turning them counterclockwise. You’ve got this!
Step 2


At this stage, the power and volume buttons might decide to take a little vacation and pop out. Don’t sweat it! Just make a mental note to pop them back in when you’re wrapping things up on your device reassembly journey.
– Gently work the large plastic opening tool into the groove between the screen and the case on all four sides, prying it open until the plastic casing pops off.
– Carefully lift the device out of the case and flip it over so it’s resting screen side down.
– Congratulations! The device is now free from its plastic shell.
Step 3

If some wires are feeling a little stubborn and refuse to let go during the desoldering adventure, just give them a gentle tug with your trusty tweezers.
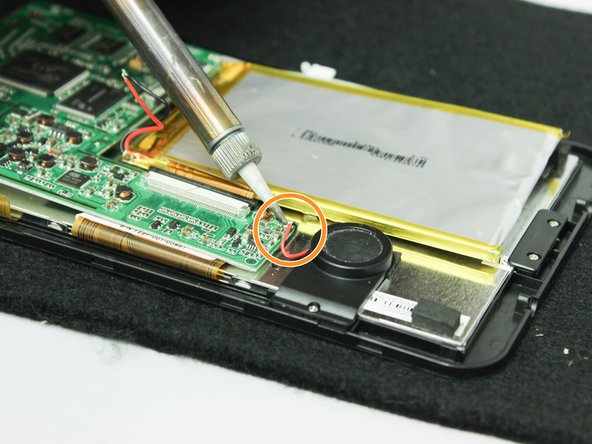
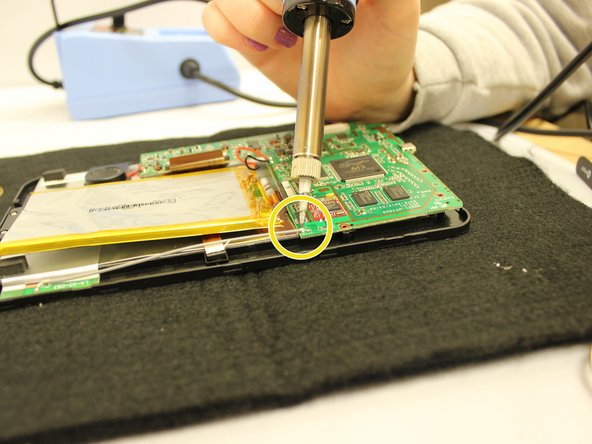
– Time to get your hands a little dirty! First up, gently desolder the following components from the motherboard.
– Let’s start by desoldering the red wire that connects to the speaker unit. Careful now!
– Next, it’s the black wire’s turn to be desoldered from the speaker unit. You got this!
– Now, tackle that gray wire that runs along the edge of the device. Almost there!
– Onward to the red wire connecting to the battery unit. Just a few more steps!
– Don’t forget the black wire connecting to the battery unit. You’re doing great!
– And voilà! The motherboard is now free from all those pesky wires. Well done!
Tools Used

Step 4
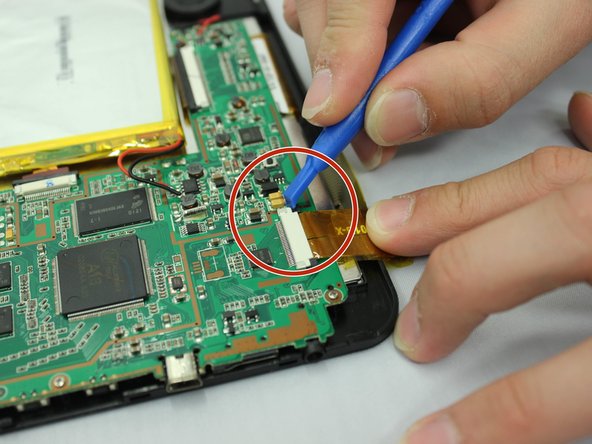

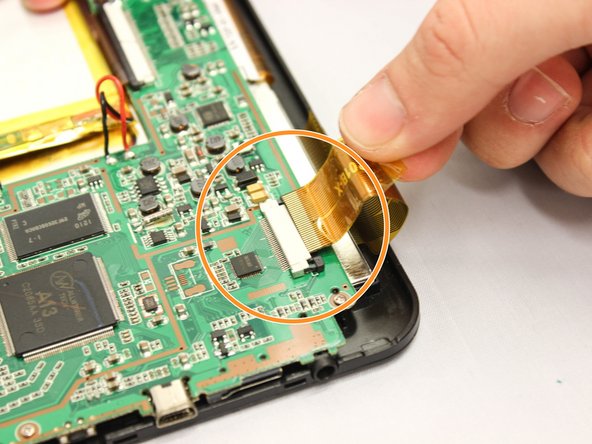
– Grab your trusty tweezers and carefully peel off the medium-width yellow ribbon cable from the motherboard—think of it like removing a stubborn sticker.
– Use a small plastic opening tool to gently slide off the two tiny black holding clips from the white connector securing the medium-width yellow ribbon cable. No sudden moves!
– Now, use your fingers to smoothly pull the yellow ribbon cable out of its white connector—like unplugging a delicate charging cord.
– Repeat those last two steps to detach the narrower and wider yellow ribbon cables from the motherboard. It’s a ribbon cable breakup party!
– At this point, the motherboard and battery are officially free from any ribbon cable ties to the device. Liberation achieved!
Tools Used
Step 5

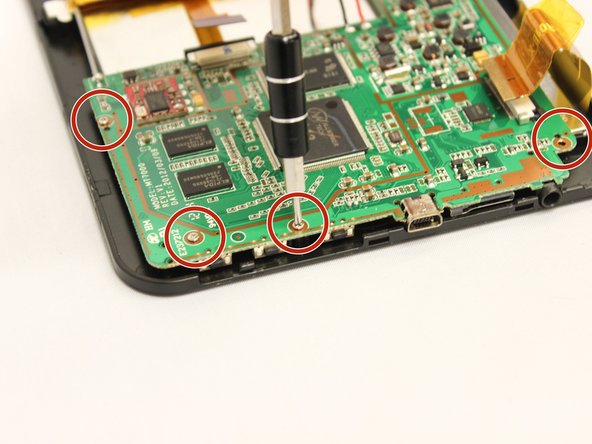
– Grab your trusty PH000 screwdriver and let’s get to work! Carefully remove the four 5 mm screws along the bottom edge of the motherboard by turning them counterclockwise.
– And just like that, the motherboard is free from the device! Well done!
Step 6

– Gently lift the motherboard out of the device with your hands—you’re the boss here.
– Place the motherboard on a heat-resistant surface with the gray side proudly facing up—like it’s striking a pose.
Step 7

– Carefully desolder both sides of the USB port where it connects to the motherboard.
– Voila! The USB port should now be gently freed from the motherboard.
Step 8

Jiggling the port could snap those tiny connectors still hanging onto the motherboard—handle with care!
– Grab your tweezers and gently pull the USB port straight out from the motherboard. Keep it steady—no wiggling up, down, or side to side.
– With that done, the USB port is now ready for replacement!
Tools Used
Success!


