Ratchet Teardown
Duration: 45 minutes
Steps: 6 Steps
Step 1

– Complete ratchet: Grab your ratchet and get ready to turn up the repair game. This tool is essential for loosening and tightening those tough screws. Make sure you have the right size, and keep your spirits high—you’re making progress! If you hit a snag or need extra hands, you can always schedule a repair with Salvation Repair for the tricky bits.
Step 2

– The head is held in place by a machine screw and a split washer, keeping things nice and secure.
– If the head starts slipping, try gently bending the split washer back into shape or swap it out for a fresh one.
Step 3
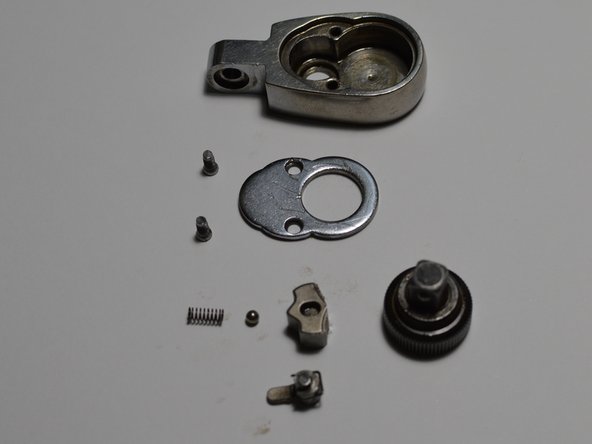

– Alright, the head is now fully opened and in pieces! Time to dive in and get to work. Stay focused, keep those parts organized, and you’ll be back in business in no time!
Step 4


– Take a closer look at the ratcheting mechanism from different angles – it’s like a little dance of gears! Check it out from the top, bottom, and sides. Understanding how each part moves will help you tackle the job like a pro. If you need help, you can always schedule a repair.
Step 5

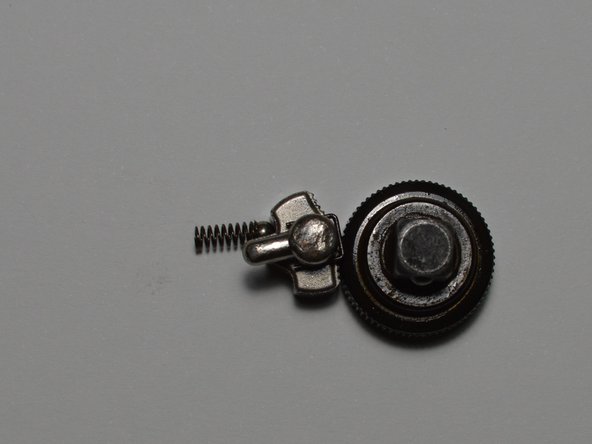
– Spring: this little guy keeps the ball bearing pressed against the pawl, acting like a tiny spring-loaded buddy.
– Ball bearing: it’s basically the guardian that keeps the pawl snug in its spot, preventing it from wandering off.
– Pawl: think of this as the gatekeeper that only lets the gear or tang rotate in the direction you want—no backtalk allowed.
– Gear/Tang: this is the rotating part that does the spinning, the star of the show in your mechanism.
– Lever: this controls the pawl’s position and decides which way the gear gets to turn—your control center for movement.
Step 6

– Get your parts organized and ready to go! Lay everything out in front of you so it’s easy to grab as you work. Trust us, this will make the repair go a lot smoother!
Success!