Replace Apple Classic Mac Power Converter Guide – Step-by-Step
Duration: 45 minutes
Steps: 6 Steps
Having power issues with your computer? It might be time to swap out that power converter. This guide will walk you through the steps to find and safely remove the power converter, one step at a time. If you need help, you can always schedule a repair.
Step 1


– Grab your trusty #2 Phillips head screwdriver and unscrew those six 19 mm screws. Easy peasy! If you need help, you can always schedule a repair.
Step 2


The catch is a bit off to the side, but it’s still perfectly aligned with the center of the speaker below.
– Give that catch a little nudge with a plastic opening tool and watch it pop right open!
Step 3
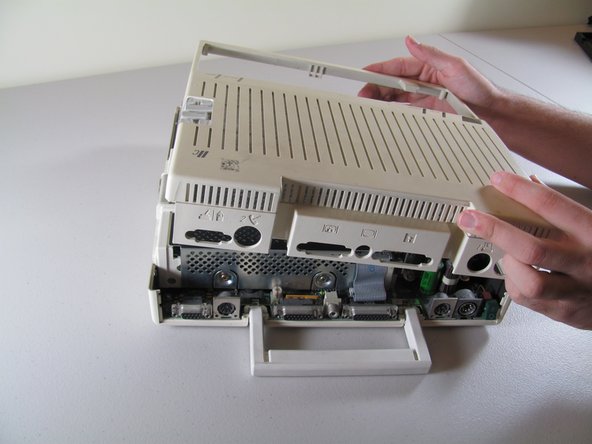

– Gently slide the case towards the ports on the back, then give a little lift under the catch and pull it up while heading towards the ports to pop it off.
Step 4


– Gently pull the handle straight up to release it.
Step 5

– Grab your trusty screwdriver and carefully take out those two Phillips screws, each measuring a cool 7.7mm. They’re holding the power converter in place, so let’s set them free!
Step 6
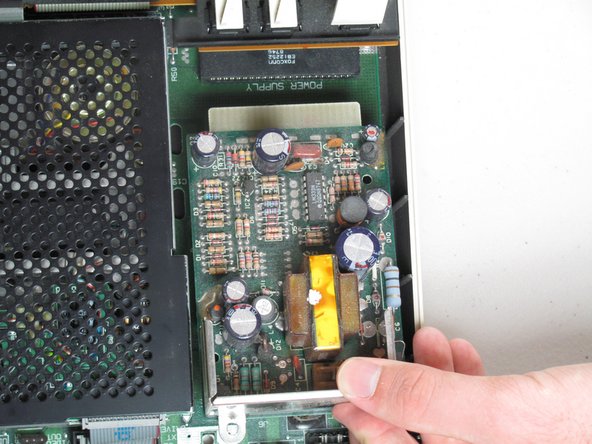

Removing the power supply can be a bit tricky, so take your time and be gentle to avoid bending or damaging any nearby components while you carefully pull it out.
– Take hold of the back of the power supply and gently pull it out while lifting upward. This will help it slide past the other components without a hitch!