Replace Galaxy Note Headphone Jack: Step-by-Step Guide
Duration: 45 minutes
Steps: 19 Steps
Follow this guide to replace the headphone jack and earpiece speaker assembly on your Samsung Galaxy Note. If you need help, you can always schedule a repair.
Step 1


– Time to give that stylus cap a little wiggle and send it on its way! Gently pull the cap straight out of its slot in the midframe. If you need help, you can always schedule a repair.
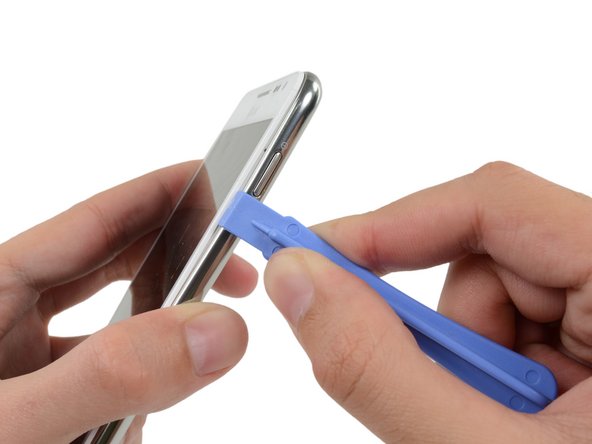
Step 2


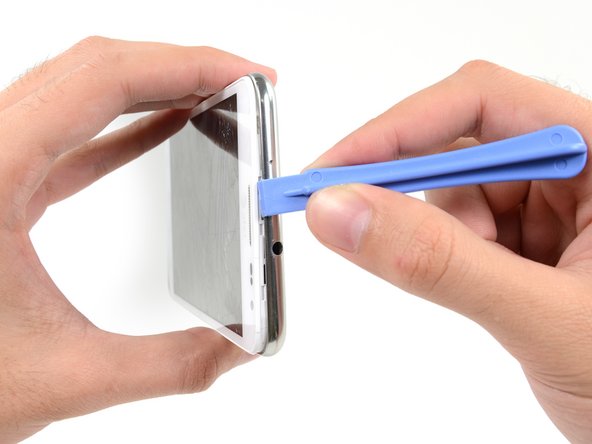
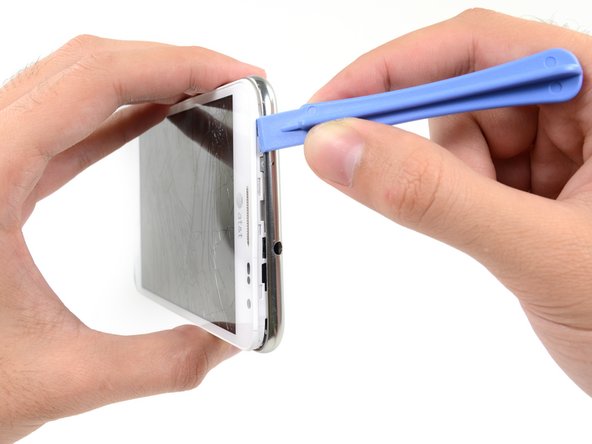
– Right next to the volume rocker, near the rear-facing camera, you’ll find a little groove. Use your trusty plastic opening tool (or even your fingernail!) to gently pry open this spot. Think of it as giving your device a little nudge to get things going! If you need help, you can always schedule a repair
Step 3


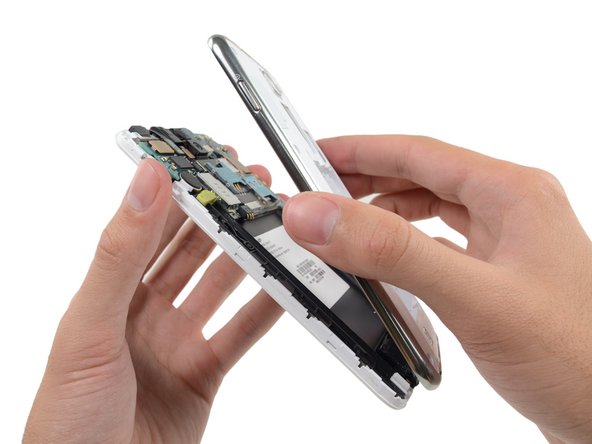
– Let’s get started by carefully lifting and removing the rear case from your phone. This is the first step in giving your device a brand new lease on life. If you need help, you can always schedule a repair


Step 5


– Gently nudge the microSD card into its slot using the flat end of a spudger or your fingernail until you hear that satisfying click – it’s like a little confirmation that you’re on the right track.
– Once you’ve heard the click, let go of the card and it should pop out of its slot with ease. If you’re having trouble, don’t worry – it’s all part of the process.
– When you’re ready to put everything back together, simply push the microSD card into the slot until it clicks into place. And if you need help along the way, you can always schedule a repair with the experts at Salvation Repair.
Tools Used

Step 6

– Let’s get that microSD card out! Give it a gentle nudge and pop it out of its slot in the midframe. If you need help, you can always schedule a repair
Step 7


– Alright, tech whiz! Let’s scoop out that SIM card. Give that plastic tool or nail some action to pop that card outta its home. Here’s a pro tip: hold it sideways so the little golden guy on the card lines up with the hole in the phone. Gotta love those tiny details!
Step 8


– Gently push the SIM card out with your thumb and give it a little wiggle to free it from the device. You’ve got this!
Step 9

– Let’s get started by taking out those nine 3.4 mm Phillips #00 screws that are holding the midframe snugly against the display assembly. You’ve got this!
Step 10

– Gently slide your trusty plastic opening tool to the left of the power button, squeezing it between the midframe and the front panel assembly, and give it a little pry!


Step 12

– Start by inserting your trusty plastic opening tool to the left of the headphone jack, where the midframe and display assembly meet – it’s time to get this repair started!
– Now, gently slide the opening tool along the top edge of your phone, taking your time to get a good grip.
– Keep running that plastic opening tool around the perimeter of your phone until the midframe is separated – you’re making great progress! If you need help, you can always schedule a repair
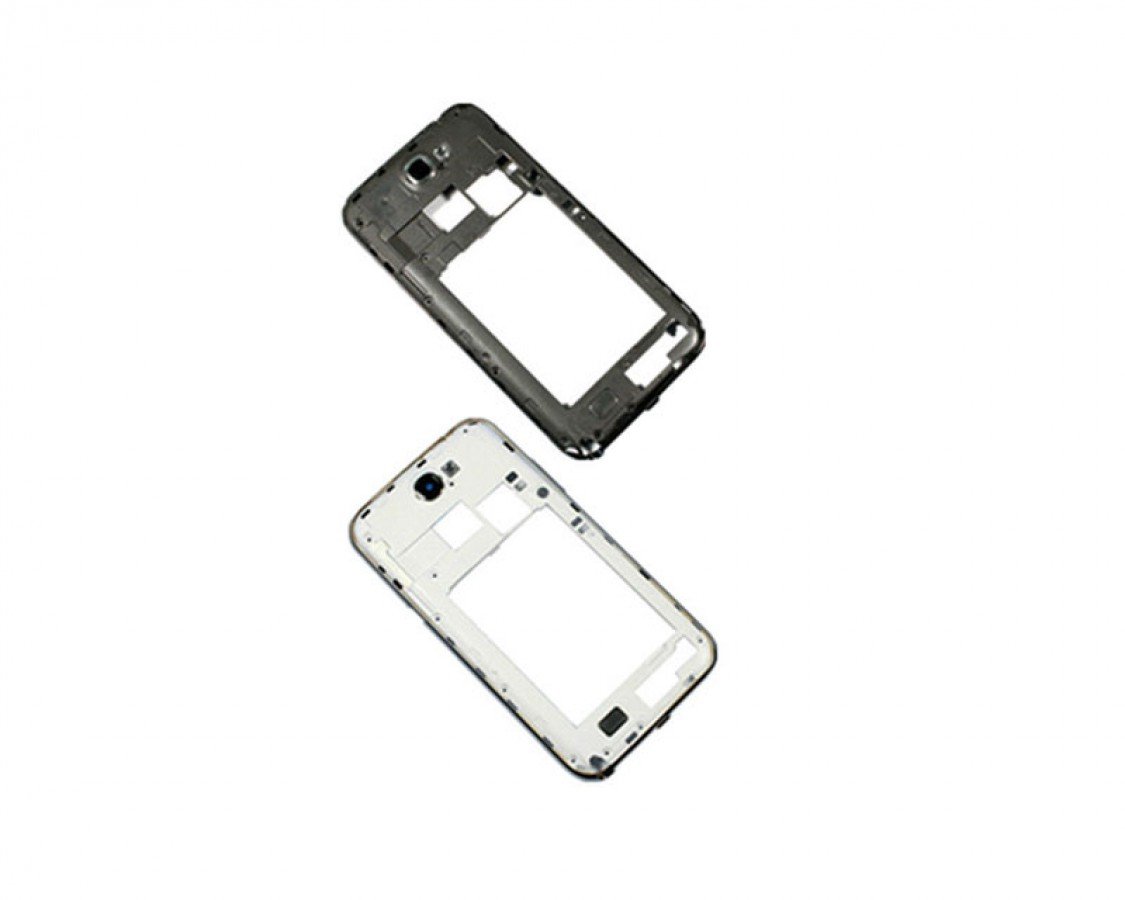
Step 13

– Alright, let’s get that midframe separated from the display assembly! It’s time for some gentle separation.
Step 14

– Grab your trusty spudger and gently pry apart the headphone jack/earpiece speaker assembly cable connector. You’ve got this!
Tools Used
Step 15

– Unscrew those two 3 mm Phillips #00 screws holding the upper display assembly bracket in place. You’ve got this!


Step 17

– Alright, now it’s time to give that headphone jack connector the boot! Grab your trusty spudger and use the flat end to gently disconnect it. It’s like giving it a little high-five, but with a tool. 😉
Tools Used
Step 18

– Let’s get this headphone jack out! Grab your spudger and gently pry it out of its little home in the display assembly. You got this!
Tools Used
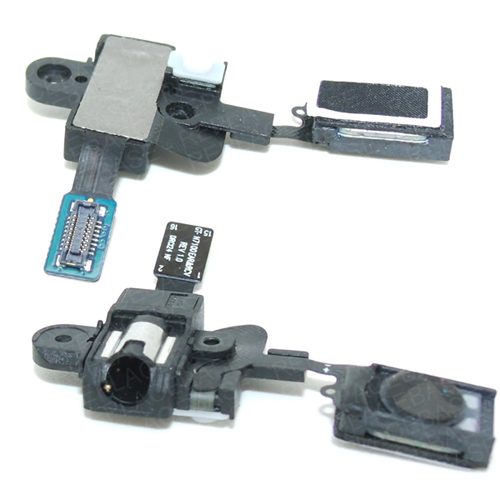
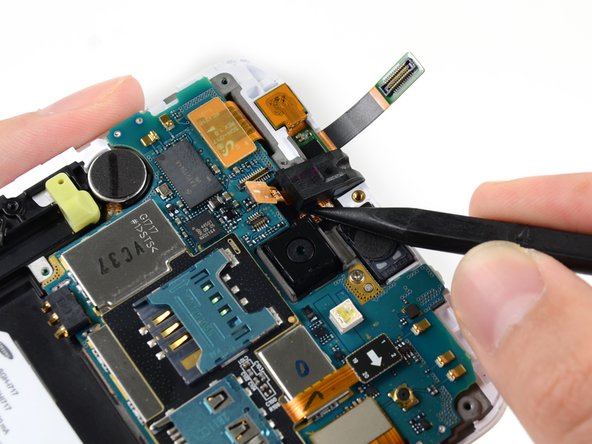
Step 19

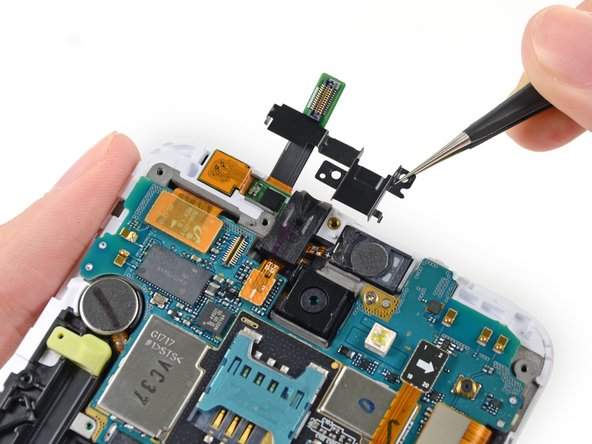
– Grab a pair of tweezers or just use your fingers to gently pop out the headphone jack/earpiece speaker assembly from the display assembly. You’ve got this!
Tools Used