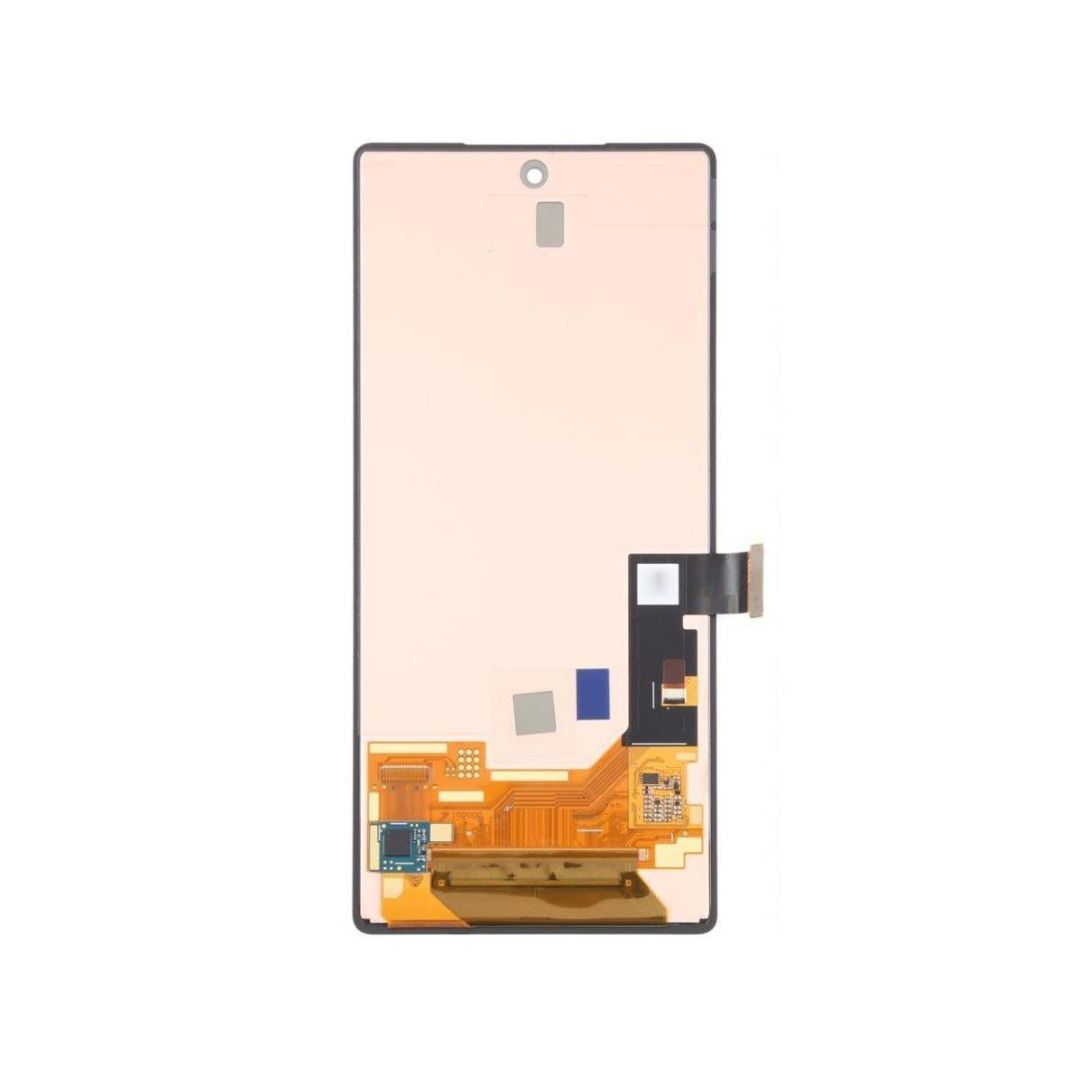
Replace Google Pixel Fold 5G mmWave Antenna – DIY Guide
Duration: 45 minutes
Steps: 37 Steps
This repair guide was created by the Salvation Repair team, so you know it’s legit! Need a little extra help? You can always schedule a repair.
Welcome to your handy guide for swapping out the 5G mmWave antenna in your Pixel Fold! Just a heads up, some of the pictures here show different stages of disassembly, but don’t worry—those little visual quirks won’t mess with your repair flow. If you need help, you can always schedule a repair for those tricky bits. Let’s get to it!
Step 1

– Hey there, tech hero! Let’s get your gadget up and running again. Take a break, fully power off your device, and unplug those cables. Now, breathe easy – we’ve got this! If you need a hand, don’t hesitate to reach out for help. We’re here for you, and you can always schedule a repair.
Step 2

Feel free to grab a hair dryer, heat gun, or hot plate to help out—but remember, too much heat can be a total buzzkill for your display and internal batteries. So, keep it chill and proceed with caution!
– Let’s get this party started! Lay your phone down on a nice, clean surface with the back glass facing up.
– Grab that iOpener and give the bottom edge of the back glass a nice, warm hug for two minutes. You got this!
Tools Used

Step 3


Get ready for the next three steps where we introduce the Anti-Clamp, a nifty little gadget designed to make opening your device a breeze! If the Anti-Clamp isn’t your jam, feel free to skip ahead three steps for another way to tackle this.
Want the full scoop on how to rock the Anti-Clamp? Check out this guide.
Just a friendly reminder: ensure the suction cup on the inner screen isn’t making contact with the bezel, or it won’t stick like it should!
If your phone’s surface is feeling a bit slippery for the Anti-Clamp to grab onto, grab some tape to make things stickier. And if your glass is cracked, packing tape is your best buddy for helping those suction cups cling on.
– Give that blue handle a gentle tug backwards to free the Anti-Clamp’s arms.
– Completely open up your phone and let the Anti-Clamp arms glide over the left side of the back glass.
– Place the suction cups near the bottom of your phone—one on the front side and the other on the back.
– Press those cups together to create a strong suction in the area you need.
Step 4


– Get creative! Grab something sturdy to prop up your phone, like a box or a stack of books, so it’s nice and level as it hangs out between the Anti-Clamp’s arms.
– Give that blue handle a gentle tug forward to get those arms locked in place.
– Now, twist that handle clockwise a full 360 degrees or until you see those cups starting to stretch out. You’ve got this!
– Keep a close eye on those suction cups—they need to stay aligned! If they start to drift apart, just detach them and give the arms a little realignment. Easy peasy!
Step 5

Take it easy, champ! Just a quarter turn at a time and give it a minute to breathe. Let the Anti-Clamp and time do the heavy lifting for you.
If the Anti-Clamp isn’t giving you enough space, crank up the heat a bit and give that handle a quarter turn! We’re almost there.
– Gently slide an opening pick into the little gap beneath the back glass. You’ve got this!
– Feel free to skip the next step like a pro!
Step 6


Is your back glass looking like it survived a rock concert? No worries! Slapping on some clear packing tape can boost the suction cup’s grip—like a best friend holding on tight. Prefer something stronger? Super sticky tape can do the trick too! And if you find yourself in a real pickle, a dab of superglue on that suction cup might just save the day, sticking it right to the shattered glass.
Depending on how vintage your phone is, things might get a little tricky. If you’re running into hiccups, don’t hesitate to turn up the heat a notch on that edge and give it another go!
– Stick a suction cup on the back glass, aiming for the center of the bottom edge.
– Yank up on the suction cup with a strong, steady pull to make a gap between the back glass and the frame.
– Slide an opening pick into the gap.
Step 7


Hey there! Just a friendly reminder: when you’re using the opening pick to separate the back glass adhesive, keep it to a max depth of 3.5 mm. Going deeper might lead to some unintentional damage to those delicate internal components!
– Gently slide the opening pick back and forth along the bottom edge to break that adhesive seal, like a pro!
– Once you’ve made some progress, just tuck that opening pick into the bottom left corner and hold tight before you move on.
Step 8

– Let’s get that back glass nice and toasty! Apply a heated iOpener to the left edge for about two minutes. You got this!
Tools Used
Step 9


– Give that bottom left corner a little love! Gently slide the opening pick around the corner to loosen up the adhesive.
Step 10


– Pop in a second opening pick at the bottom left corner and get ready for some action!
– Gently glide that opening pick up towards the top left corner to break free the adhesive.
– Keep that opening pick snug in the top left corner while you move on to the next step!
Step 11

– Get that back glass nice and toasty with a heated iOpener for two minutes. You’ve got this!
Tools Used
Step 12


– Let’s get this party started by gently wiggling the opening pick around the top left corner. We’re gonna loosen that adhesive like a champ!
Step 13


– Let’s get that top corner loosened up! Insert a third opening pick into the top left corner, and gently slide it towards the top right corner. This will help separate the adhesive holding things together.
Step 14

– Warm up a trusty iOpener and let it dance on the right edge of the back glass for a cozy two minutes.
Tools Used
Step 15


This corner is a bit of a delicate diva! Treat it with care and a little heat, and remember to go gently around this area while you work your magic.
– Get that pick nice and flat against the back glass. It’s all about that angle, baby.
– Now, give that opening pick a little spin around the top right corner to loosen up that adhesive. We’re getting close!
Step 16


– Stick a fourth pick in the top right corner.
– Glide the pick down to the bottom right corner to loosen the adhesive.
Step 17


This sharp corner is a little sensitive, so let’s be careful! Apply some heat and be gentle as you work around it. You got this!
– Rock’n’roll that pick, flatter than a pancake against that back glass. Dance around the bottom right corner, let the adhesive surrender to your moves!
Step 18


Hold your horses! Don’t yank off that back glass just yet; it’s still connected to your phone by a sneaky little cable.
Now, it’s time to part ways with that back glass! If it’s still holding on for dear life around the edges, grab an opening pick and gently coax it away from any stubborn adhesive that’s still lingering.
– Swing the left edge of the back glass upwards and over to the right side of your device with a smooth motion.
– Gently set the back glass down to the right of the phone and get ready for the next step!
Step 19

As you work through this repair, be sure to keep an eye on those screws and remember where they belong—it’s like a little treasure hunt!
The Pixel Fold has its own fancy Torx Plus screws, but don’t worry—regular Torx bits can step in as trusty sidekicks too. Just grab a size that matches or go one size up (T3 or T4 Torx bits will work with those 3IP Torx Plus screws) and apply steady, downward pressure to keep everything snug and safe from stripping.
– Grab your trusty Torx Plus 3IP driver and let’s get to work! Carefully unscrew those two 2.8 mm-long screws that are keeping the middle bracket in place. You’ve got this!
Step 20


– Grab those tweezers or use your fingers to gently nudge the middle bracket to the left until it pops free from its clip. You’re doing great!
– Take out that middle bracket and give yourself a pat on the back!
– When it’s time to put everything back together, remember to slide that middle bracket clip back into its cozy spot in the frame before lining up those screw holes. You got this!
Tools Used

Step 21


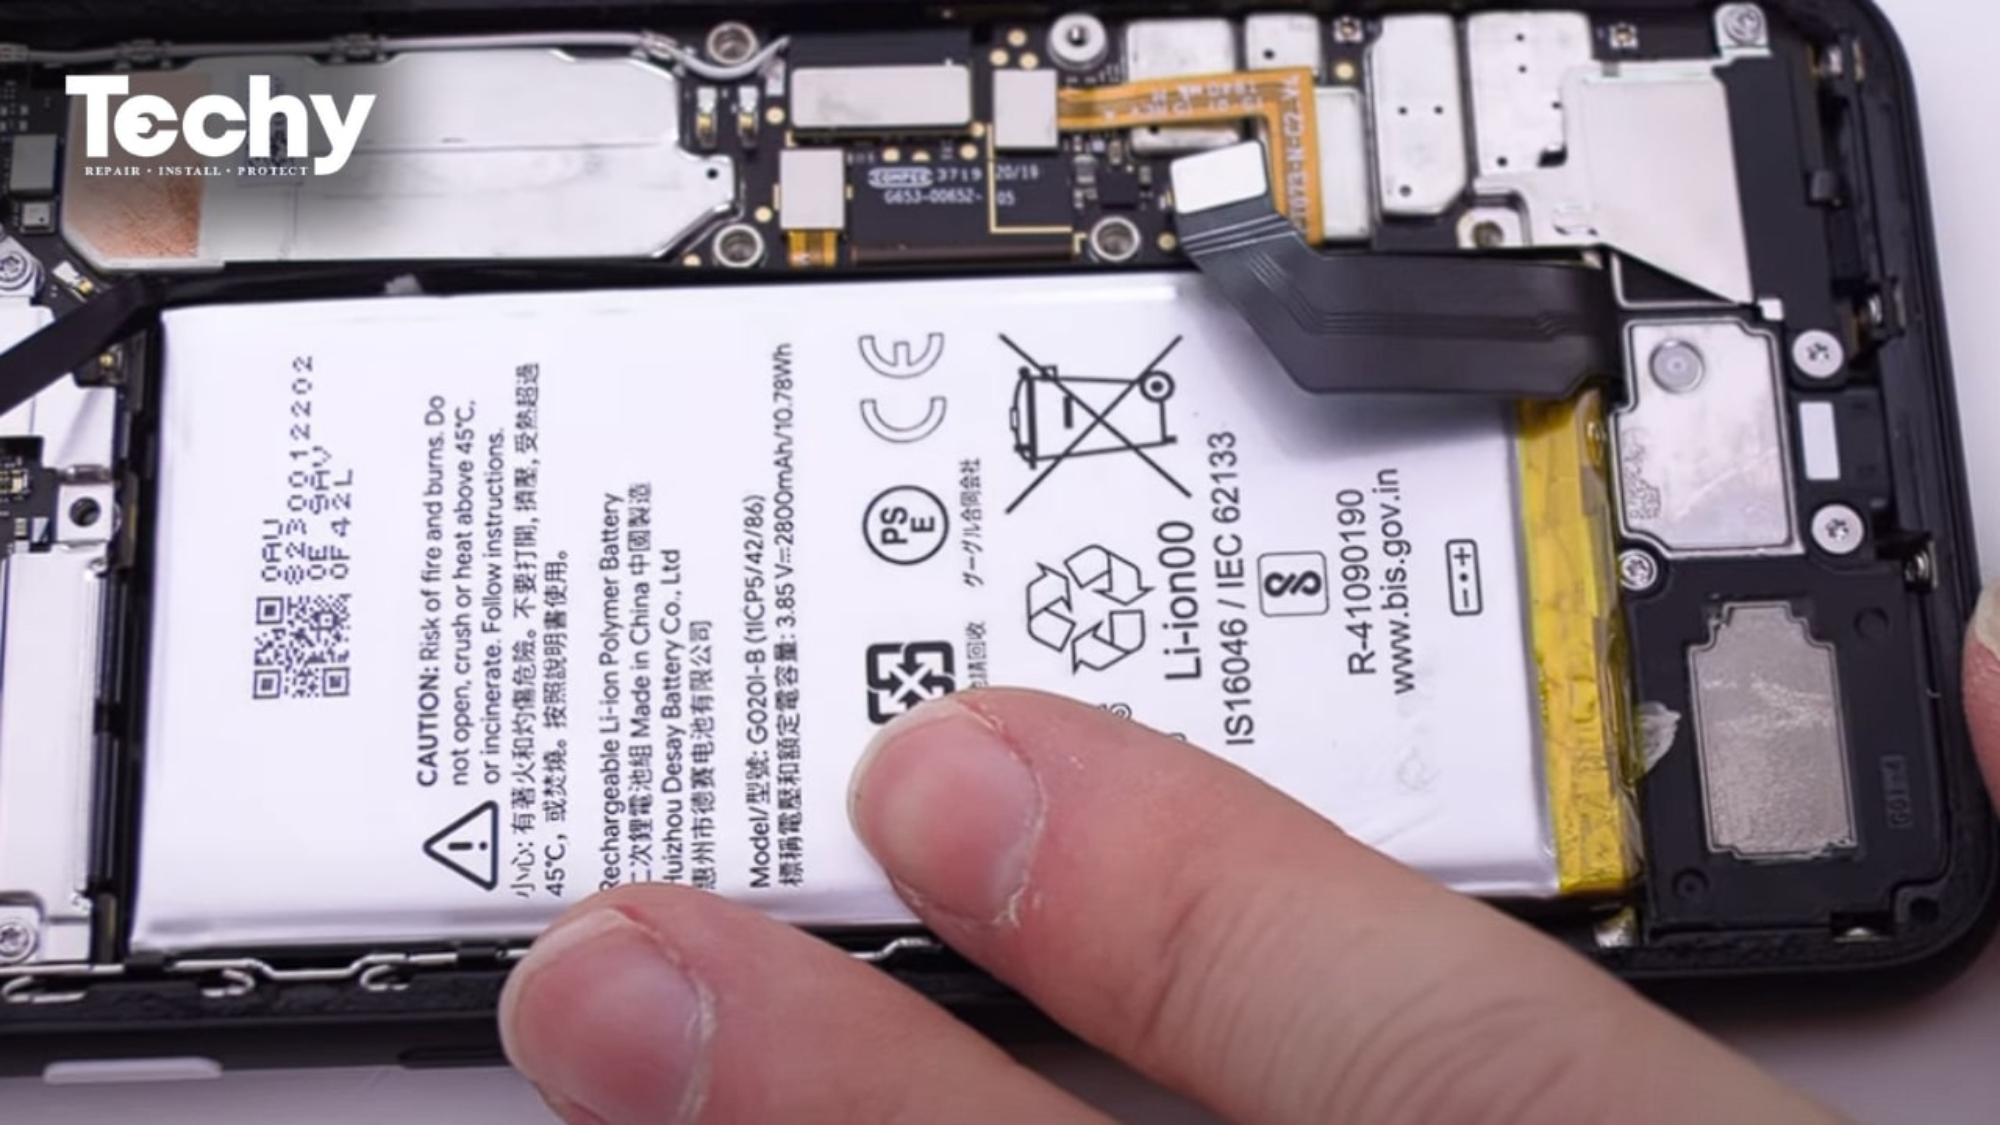
– Gently use the tip of a spudger to lift and disconnect the back glass cable from the motherboard. You’ve got this!
To get those connectors back in action, gently align them with a bit of finesse. Start by pressing down on one side until you hear that satisfying click. Then, give the other side some love the same way. Avoid pressing in the center, though! If things seem a bit off, just remember: misalignment can lead to bent pins, and nobody wants that kind of permanent damage. Keep it smooth and easy!
Tools Used