Replace Hard Drive Mac Pro 2006-2008 (First Generation) – DIY Guide
Duration: 45 minutes
Steps: 5 Steps
Heads Up!
Swapping out your hard drive is a breeze, and all you’ll need is a Phillips head screwdriver. Dive into this guide to switch up the hard drive in your Mac Pro. IMPORTANT: Don’t forget to back up your files onto the new hard drive before you make the switch! If you’re going for a shiny new hard drive, you might need to reinstall your operating system to keep everything running smoothly. And remember, handle your hard drive with care—damaging it could mean waving goodbye to your precious files. If you need help, you can always schedule a repair.
Step 1

– Pop the lever to release the case this time. 😊
Step 2

– Pop off the side panel of your Mac Pro with ease!
Zap those pesky static charges by grounding yourself before diving into any internal repairs. A quick touch on the metal PCI slot covers or any grounded metal surface will do the trick. You could also rock an anti-static wrist strap for extra peace of mind. If you need help, you can always schedule a repair.
Step 3

– Find that sweet spot where your hard drive bay is hiding after you crack open the case.
– It’s usually the drive that’s chilling near the front of the case.
Step 4


Just a friendly reminder to make sure that clip for the side panel is open; otherwise, those Hard Drive bays might just play hard to get and won’t slide out.
– Grab the metal sled at the bottom and give the hard drive a firm pull. It might be a bit tricky at first, but once it budges, it should slide out with ease. If you need help, you can always schedule a repair.
Step 5
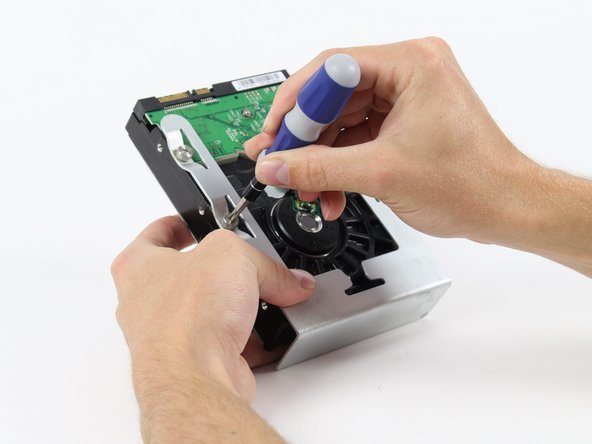

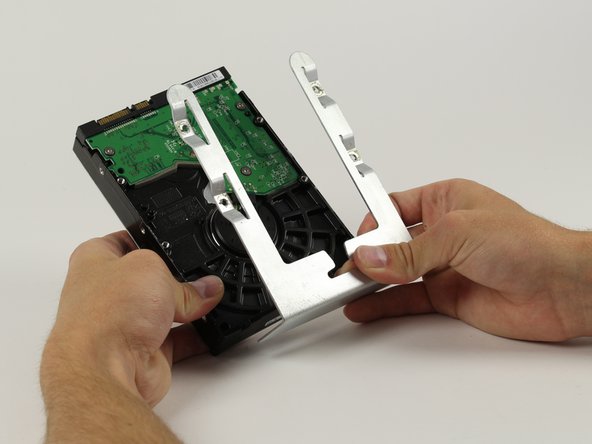
Handle the hard drive by its sled or sides, and keep those hands off the green circuit board you see in all three pics. If you need help, you can always schedule a repair
– First things first, let’s find those four little 6-32 type screws hanging out on the Hard Drive sled. They’re waiting for you!
– Grab your trusty Phillips head screwdriver and gently twist out those four screws. Once they’re free, you can easily slide the metal sled away from the Hard Drive. You’re doing great!