Replace iPhone 6s Plus Screen Guide: Step-by-Step Tutorial
Duration: 30 min.
Steps: 19 Steps
Welcome to your iPhone 6s Plus rescue mission! In this guide, we’re going to help you swap out that pesky, broken display unit. If your screen looks like a puzzle with cracks, your 3D touchscreen is playing hard to get, or the LCD has decided to take a permanent vacation by staying black or flickering, you’re in the right place! Let’s get started on bringing your device back to life!
Step 1
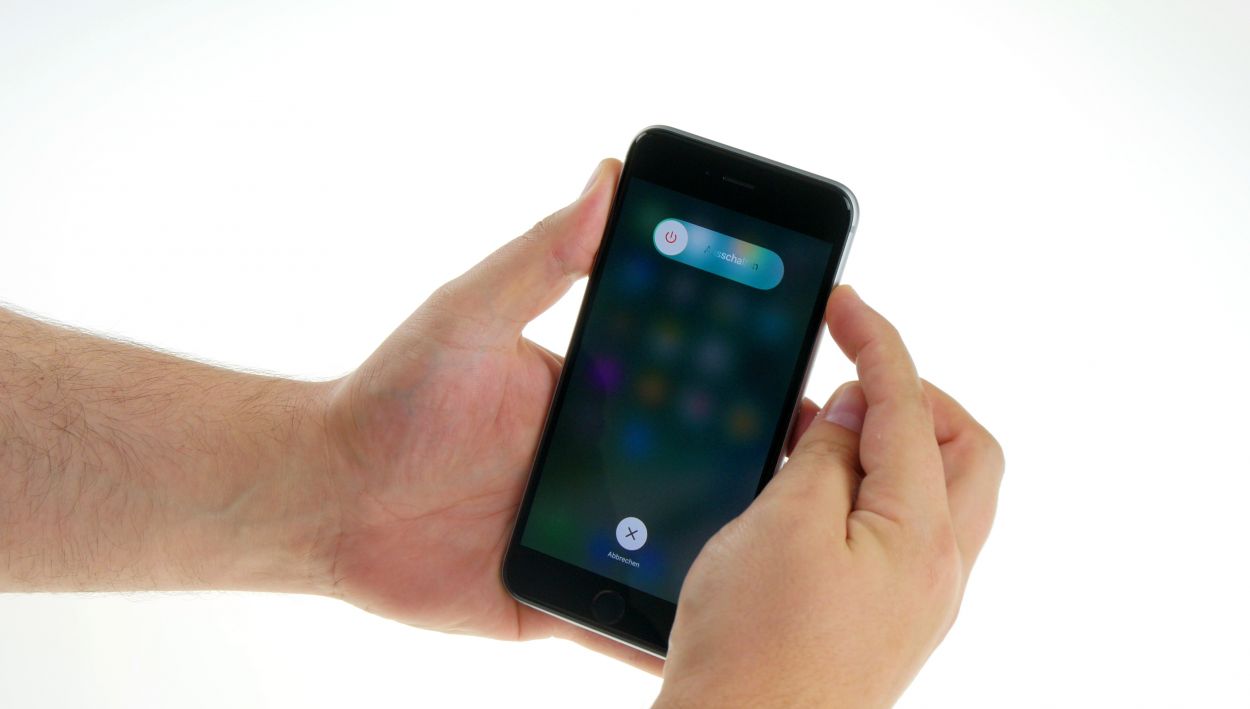

– First things first, let’s power down that iPhone to keep it safe while we work our magic! Just press and hold the standby button for about three seconds until the slider pops up.
– Now, slide that bad boy from left to right. Your iPhone will be shutting down completely, which might take around ten seconds. Hang tight!
Step 2

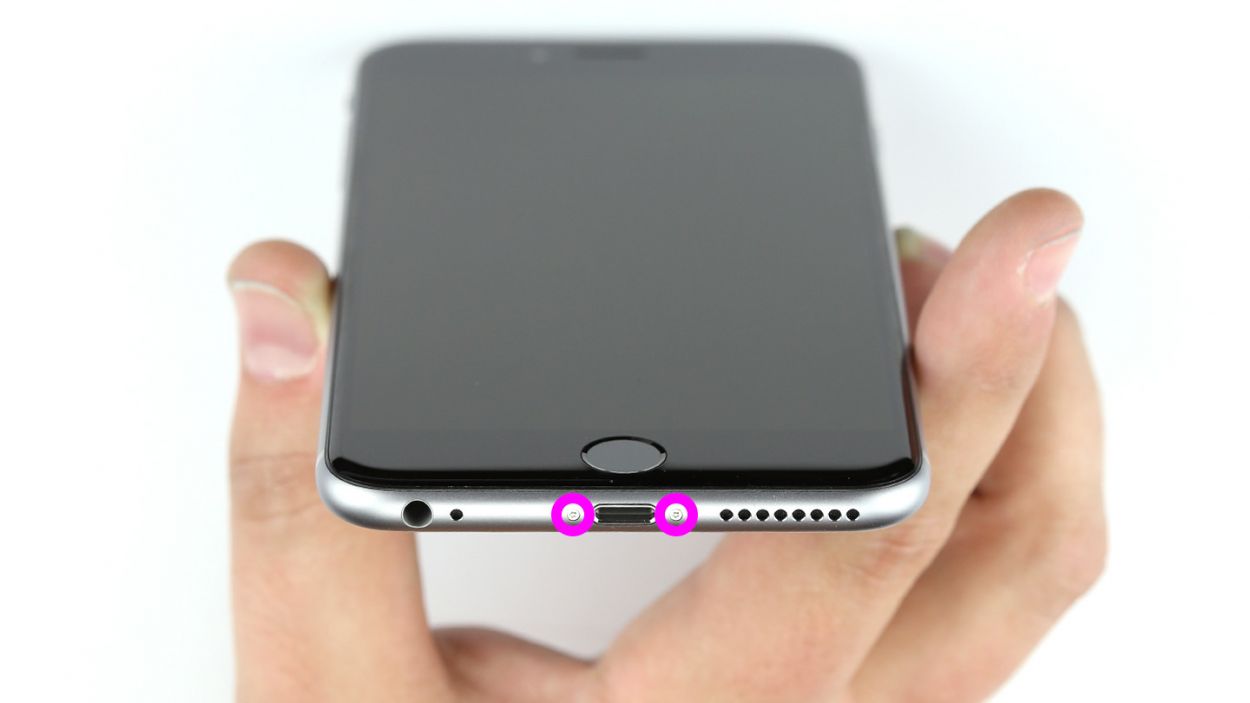
– Grab your trusty pentalobe screwdriver because it’s time to open up that iPhone 6s Plus!
– Now, let’s tackle those two pentalobe screws at the bottom of the enclosure. They’re hanging out on either side of the Lightning connector, just waiting for you. Make sure to keep those screws safe in the same container! 2 x 3.3 mm pentalobe screws.
Step 3

Watch out for those sneaky shards! Broken glass can be sharp, so handle with care.
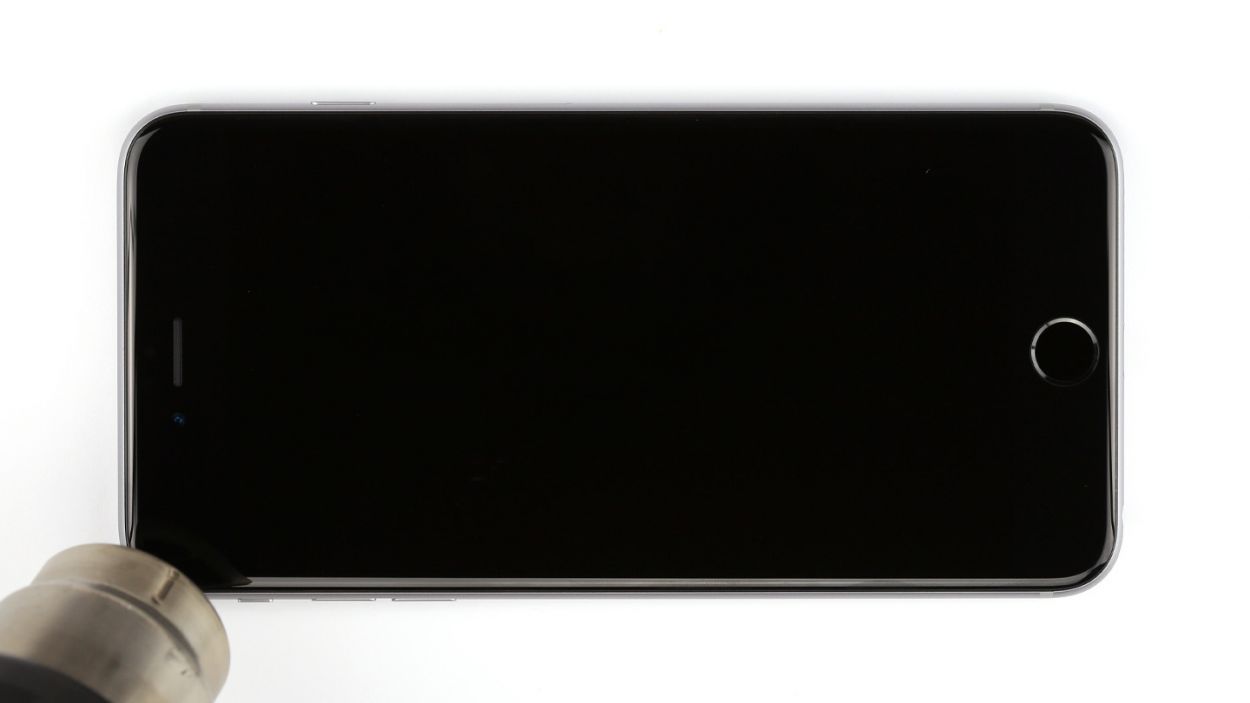
– First, let’s make sure your iPhone 6s Plus is resting on a soft, clean surface to keep that back looking sharp.
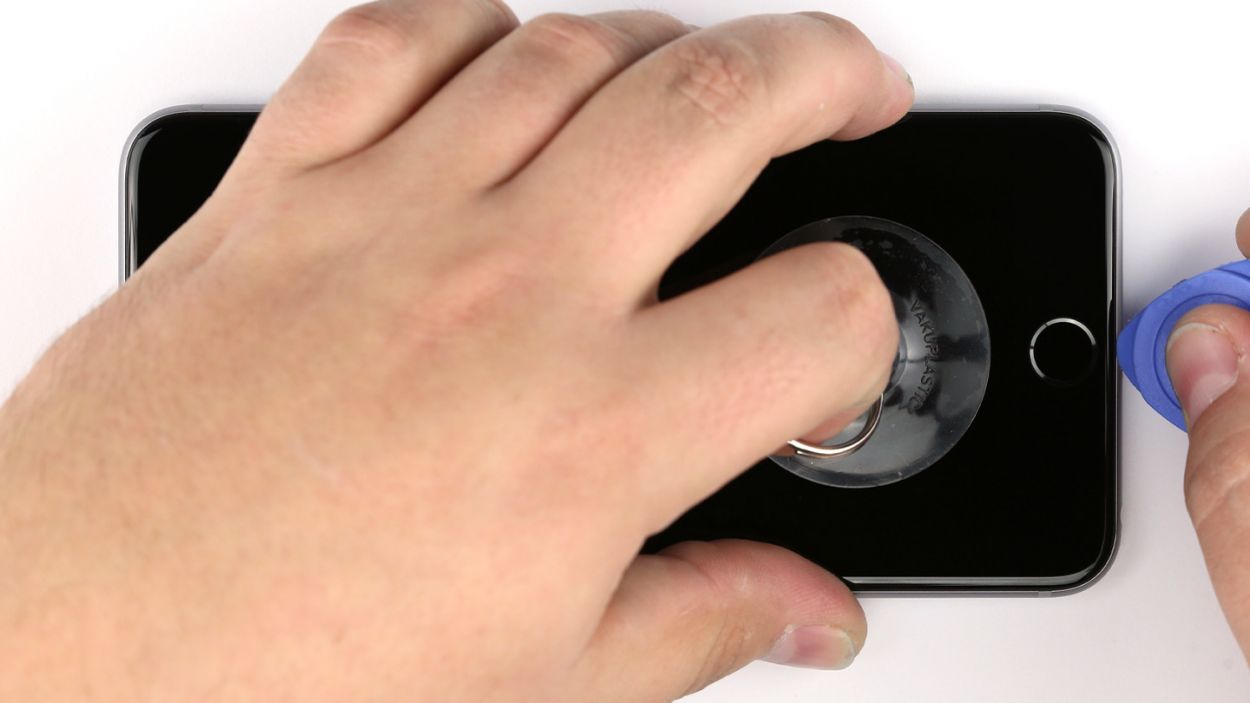
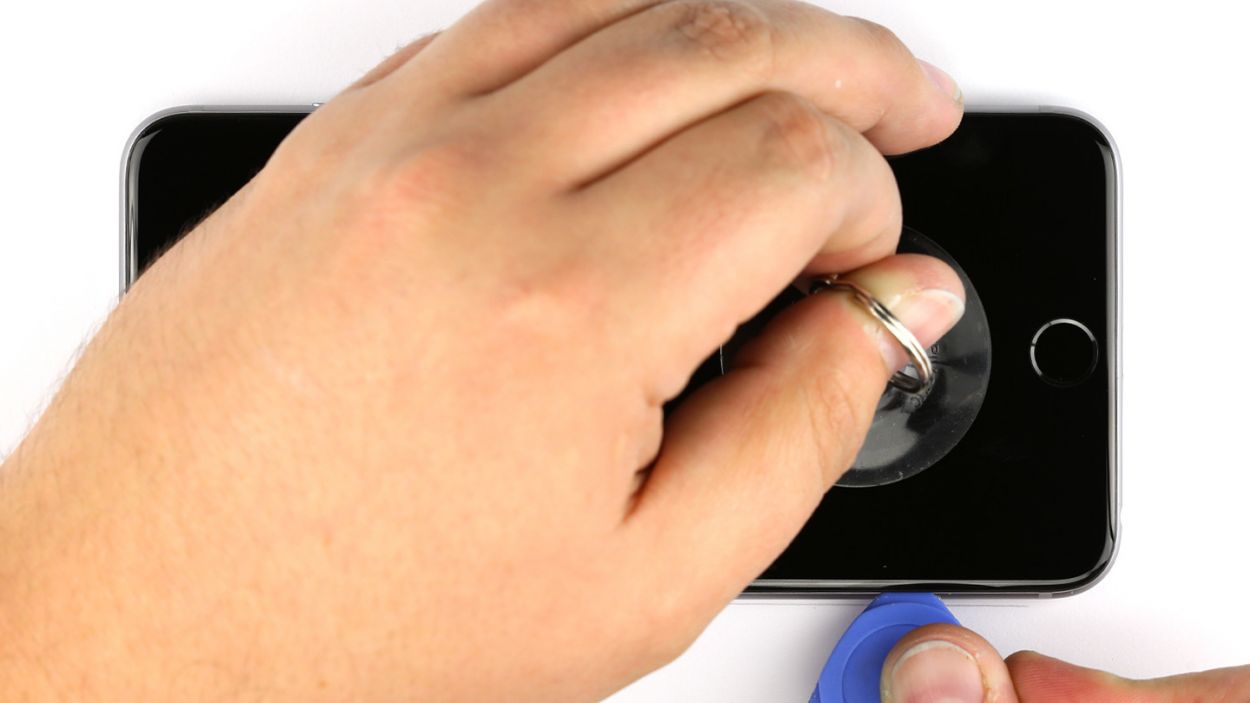
– To lift the display like a pro, grab a suction cup, a hard plastic pick, and a heat gun. If your screen is all cracked up, cover it with packing tape first to avoid any glass mishaps—safety first!
– The screen is just a bit glued to the frame. Use your heat gun to warm the edges of the display to around 60°C (140°F).
– Place the suction cup over the Home button if you can (if not, just put it next to it). While you gently lift the display with the suction cup, use the hard plastic pick to push down on the aluminum frame. Slide that pick between the frame and the display—this might take a few tries, but you’ve got this!
– Once you’ve opened a tiny gap, twist that pick a bit to widen it further.
– When you can lift the display a few millimeters, carefully work your way around the edges until it’s free on both sides. If needed, give the outer edges a little heat boost every now and then.
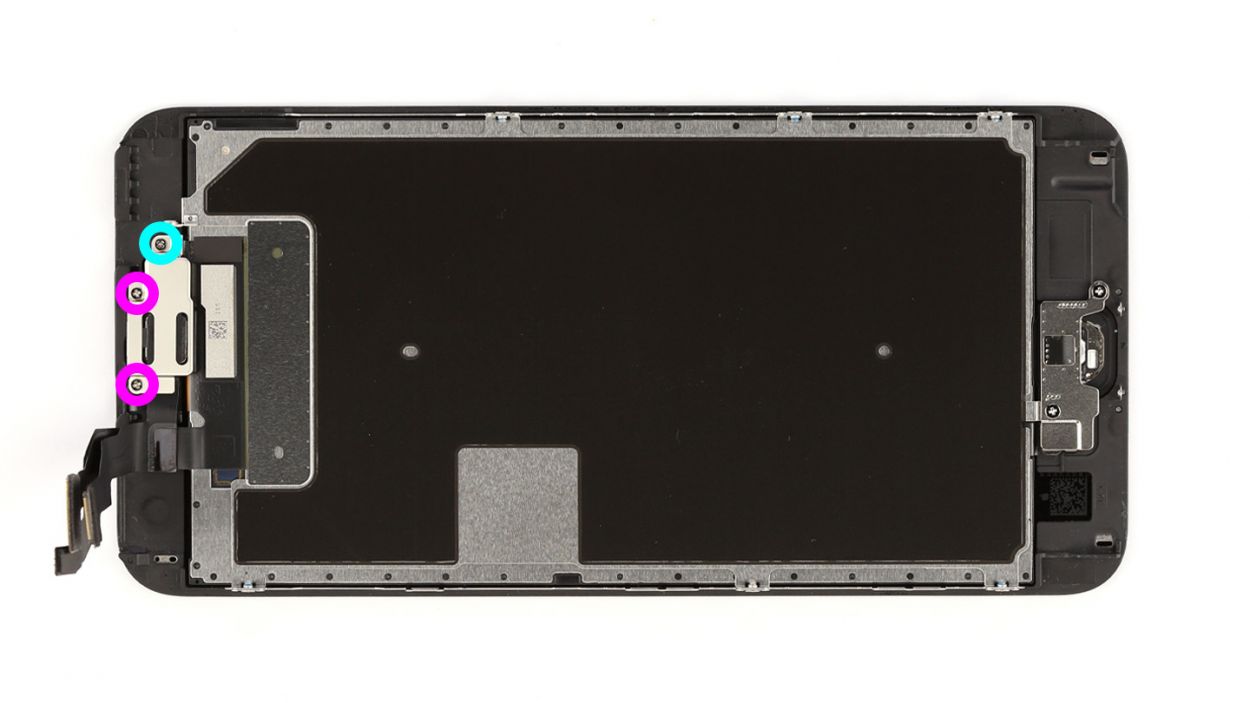
Step 4


– Alright, let’s kick things off by removing those two Phillips screws and lifting off the shiny silver cover. You’ll be dealing with 1 x 2.0 mm Phillips screw and 1 x 2.9 mm Phillips screw.
– Next up, grab your trusty spudger and gently disconnect the lower connector for the battery contact, antenna, and Lightning connector. You’ve got this!
Step 5
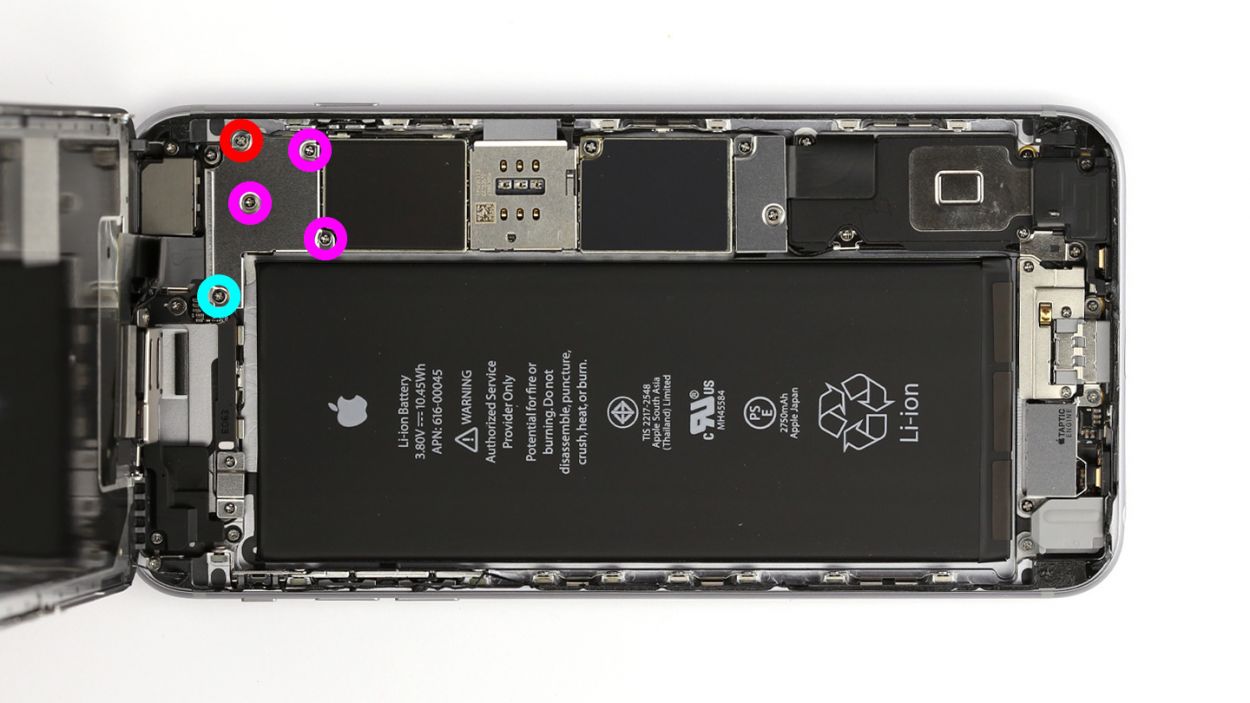

– First, let’s tackle those five Phillips screws on the shiny silver cover. Keep them safe in a container so they don’t wander off! Once they’re out, gently lift the cover off.
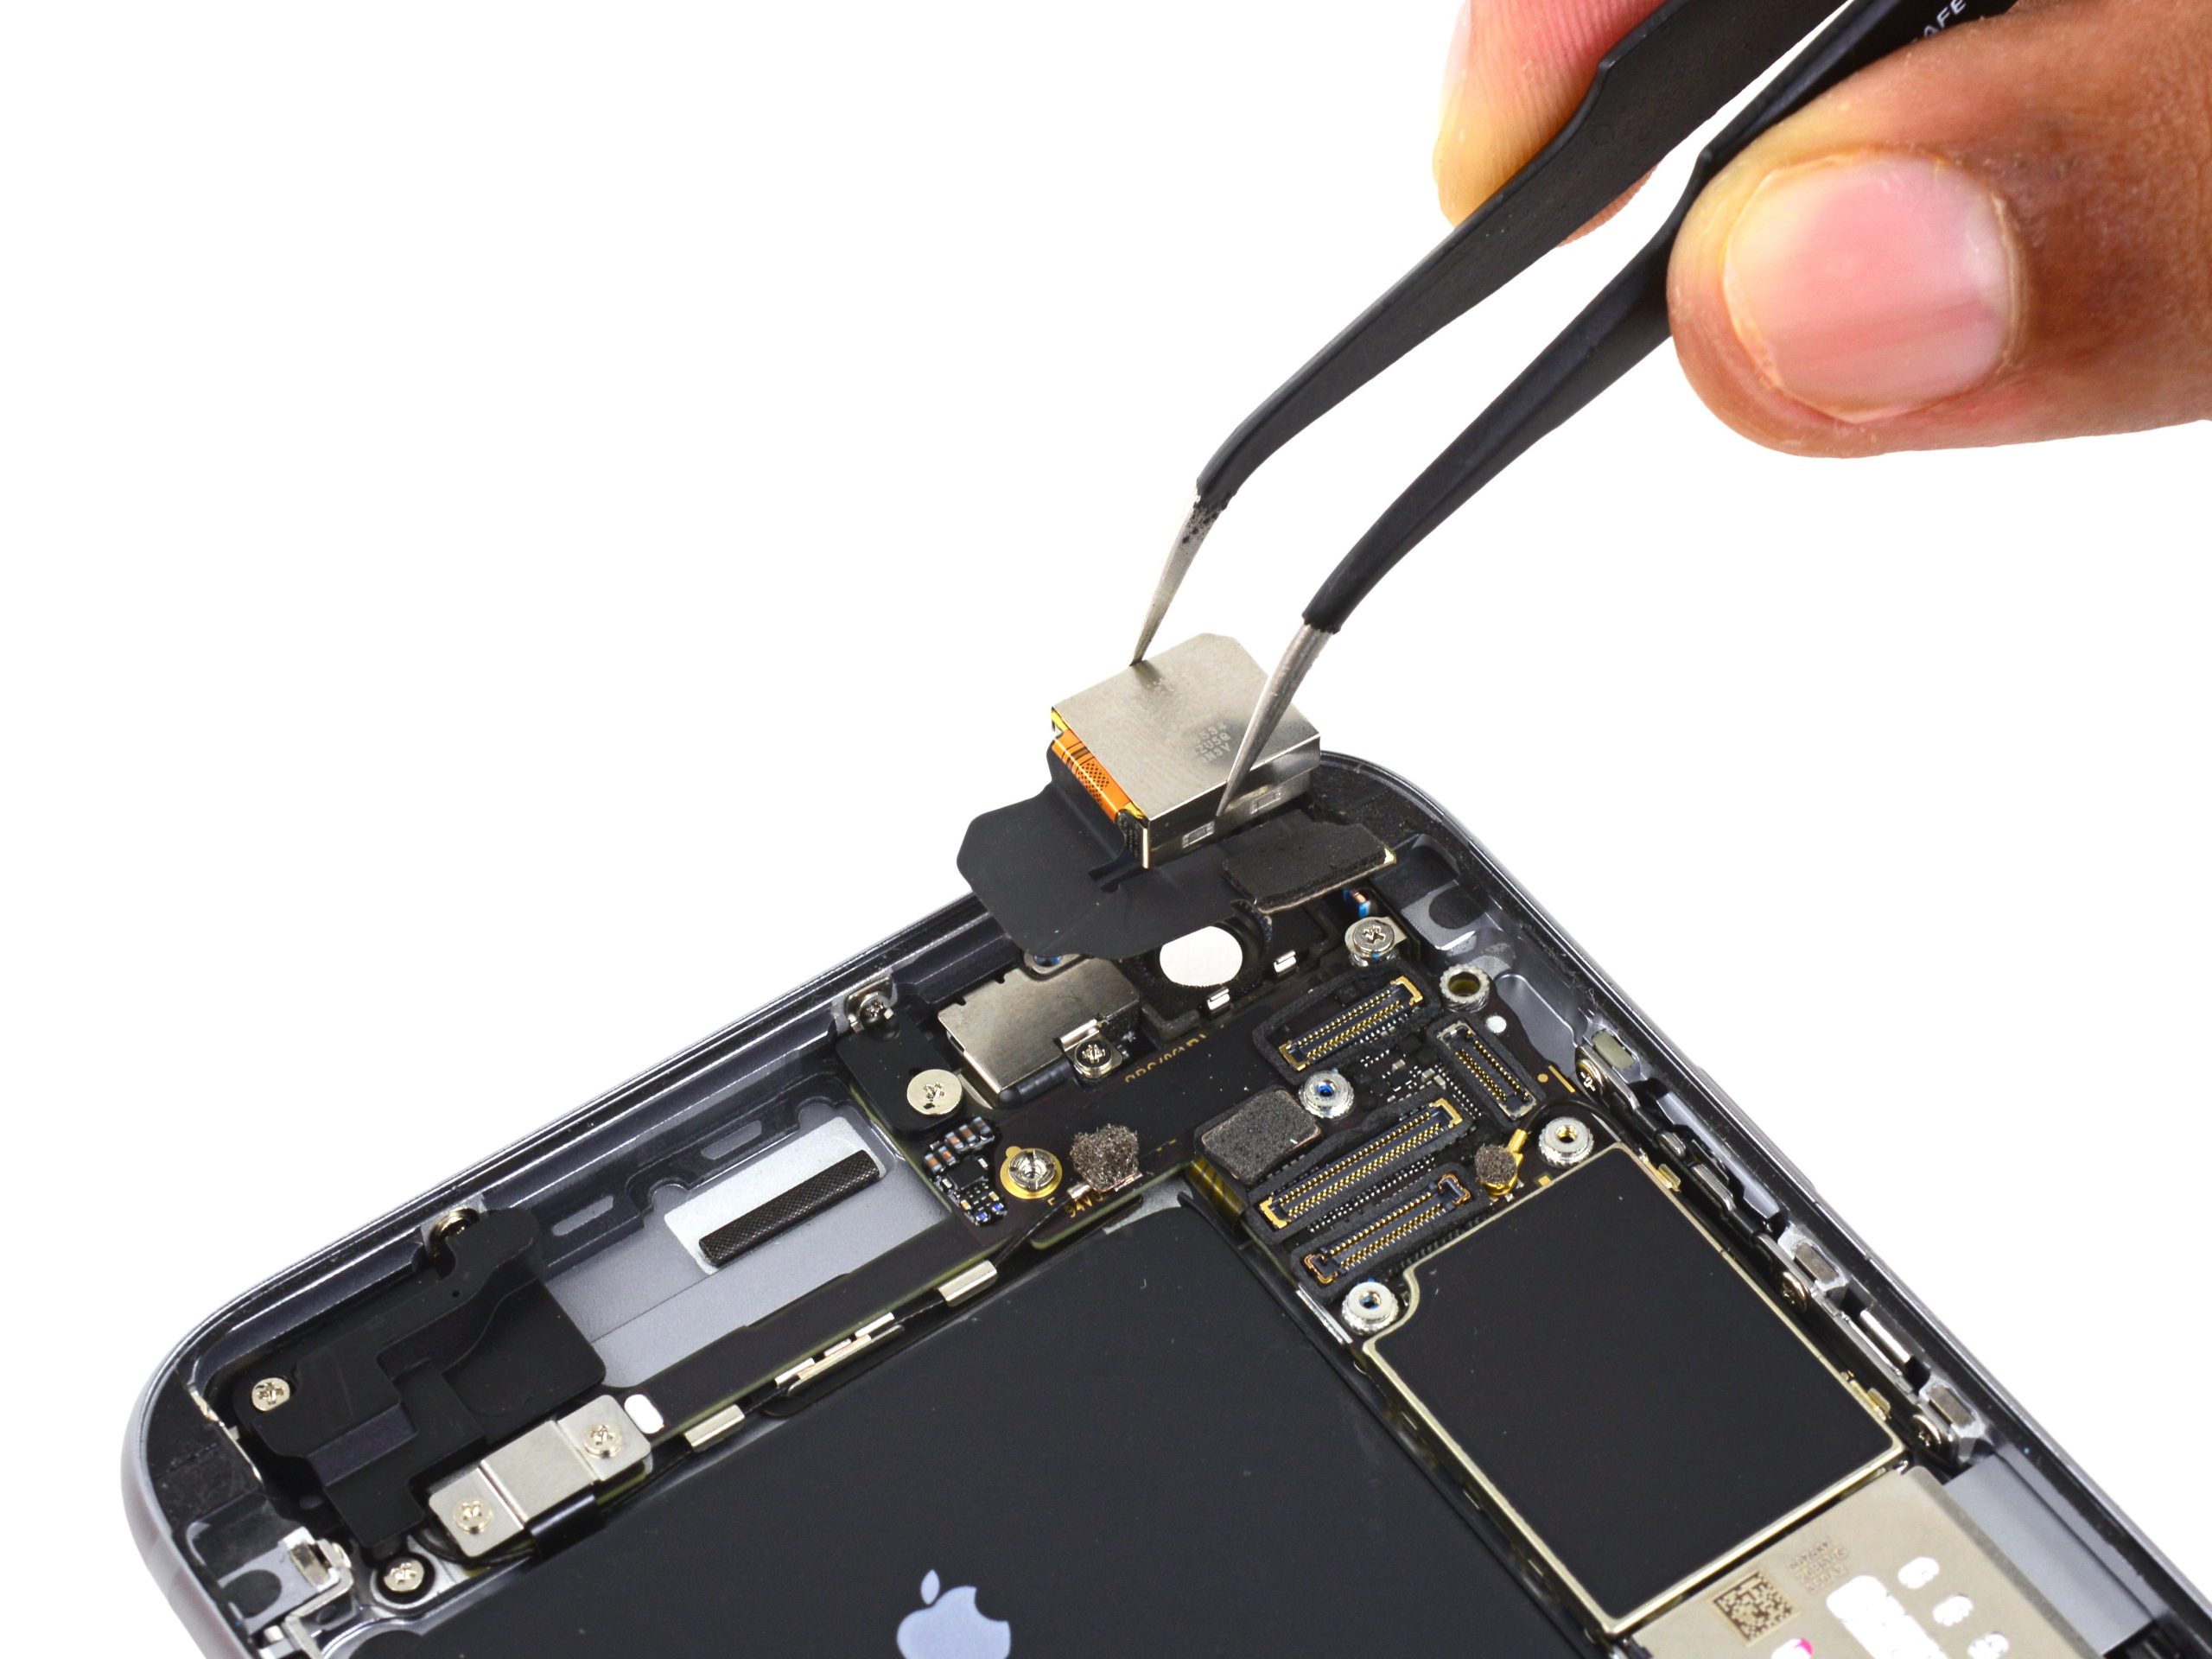
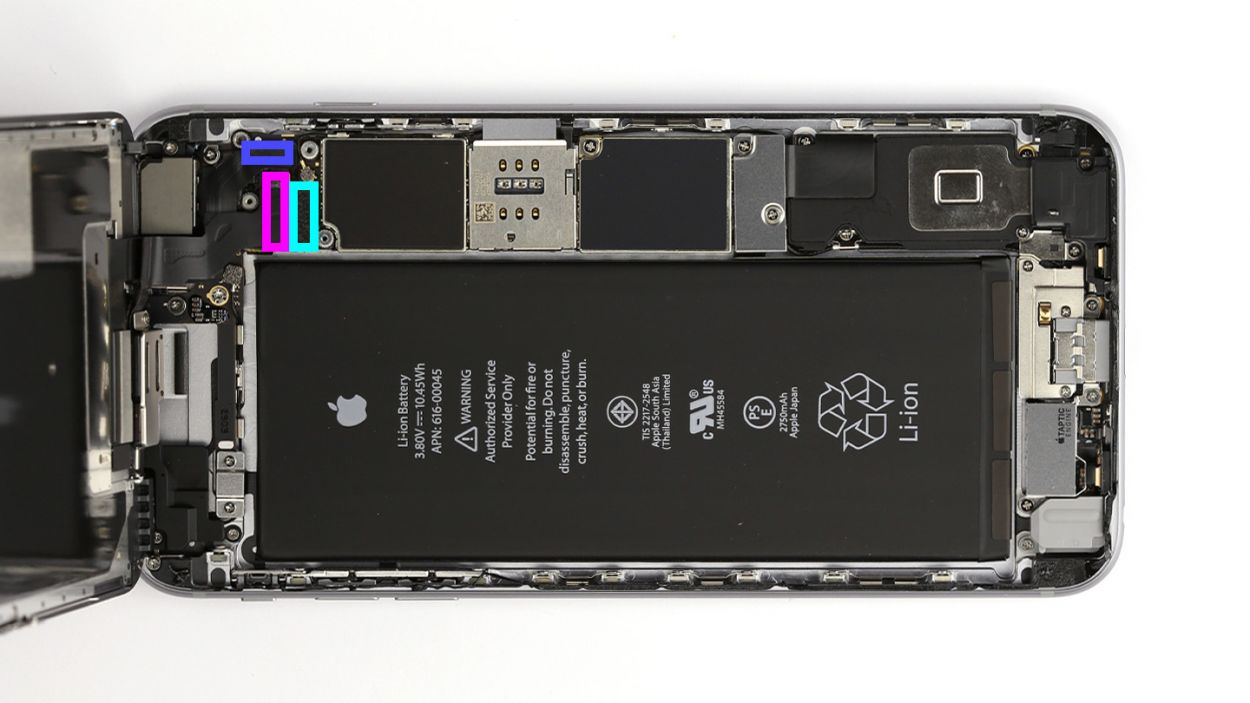
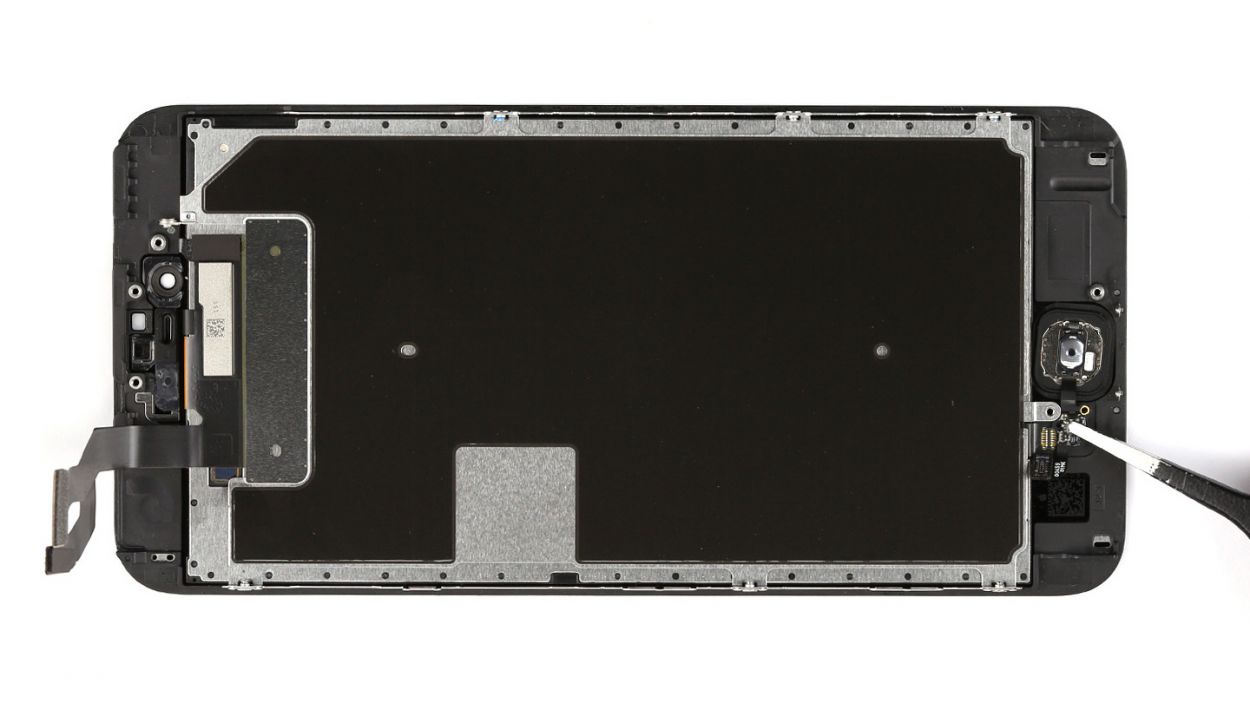
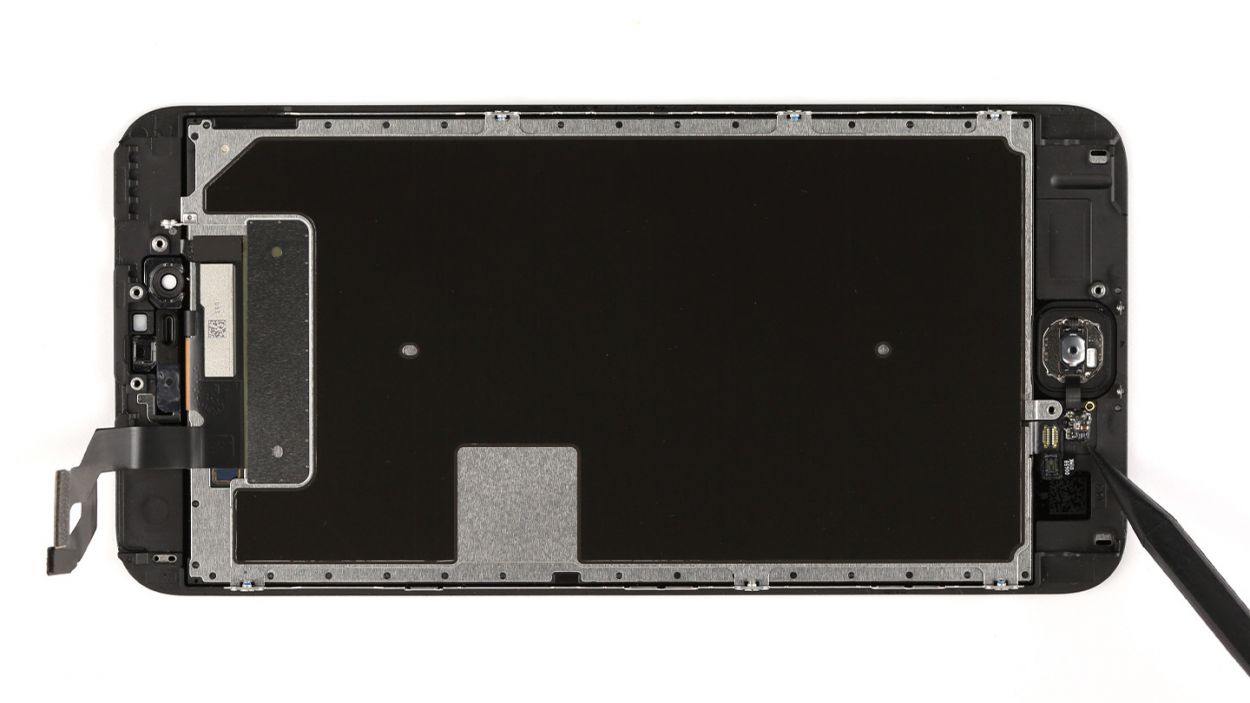
– Now, it’s time to disconnect those three overlapping connectors in the order shown below. Be super careful! Use the pointed tip of your spudger to gently lift each contact just a tad below where it connects. Here’s what you’ll be disconnecting: Touch ID cable, Front camera/sensor/earpiece/ambient microphone, and the Display.
– Next up, let’s test out that new display! Temporarily connect the new display assembly. The LCD connector can be a bit finicky, so take your time. Power up your iPhone and check if the LCD and touchscreen are working like champs. Make sure those connectors are snugly plugged in; if they’re not, you might end up with a black screen or some funky stripes. If your display looks a bit yellow, don’t forget to check the last step of this guide.
– Go ahead and connect that new display assembly. Remember, the LCD connector can be a little tricky!
– Once it’s connected, power up your iPhone and see if the LCD and touchscreen are functioning properly. Ensure those connectors are securely in place; otherwise, you might see a black display or stripes.
– If the display has a yellow tint, check out the last step in this guide.
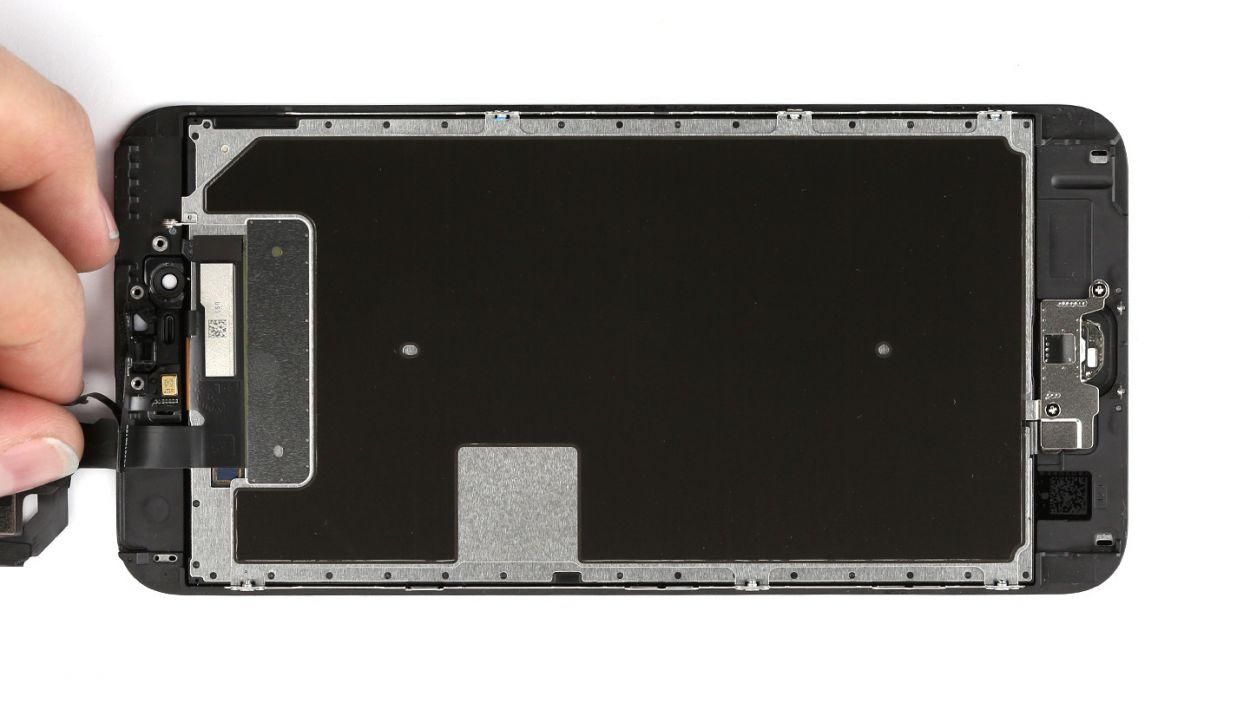
Step 6

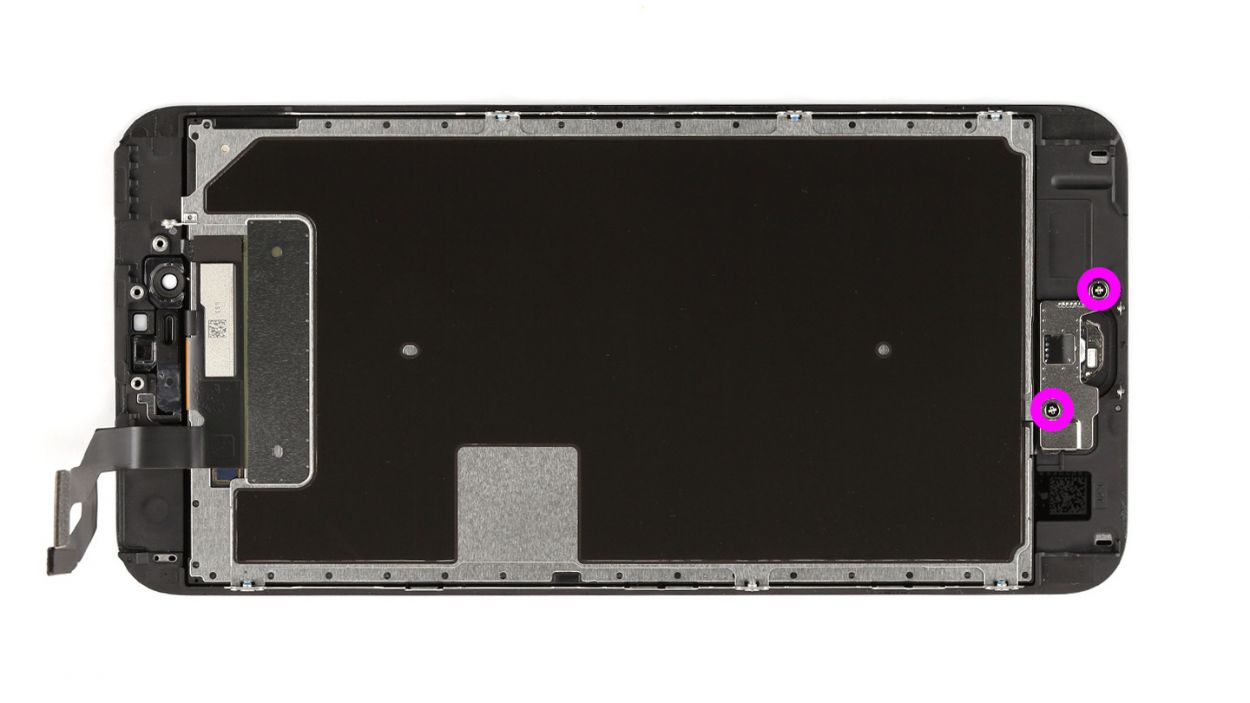
– The earpiece hangs out on the back of the display unit. Time to take off those three Phillips screws from the earpiece cover and toss them in the same container. You’ll need 2 x 2.7 mm Phillips screws and 1 x 1.4 mm Phillips screw.
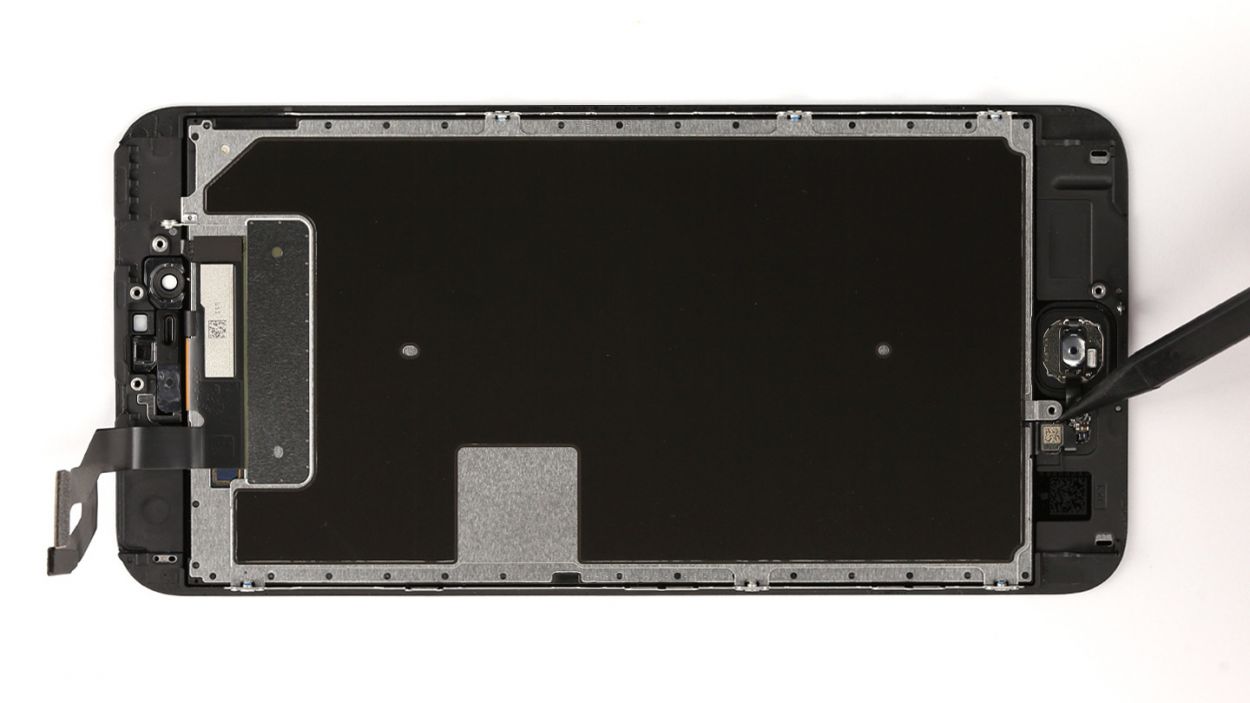
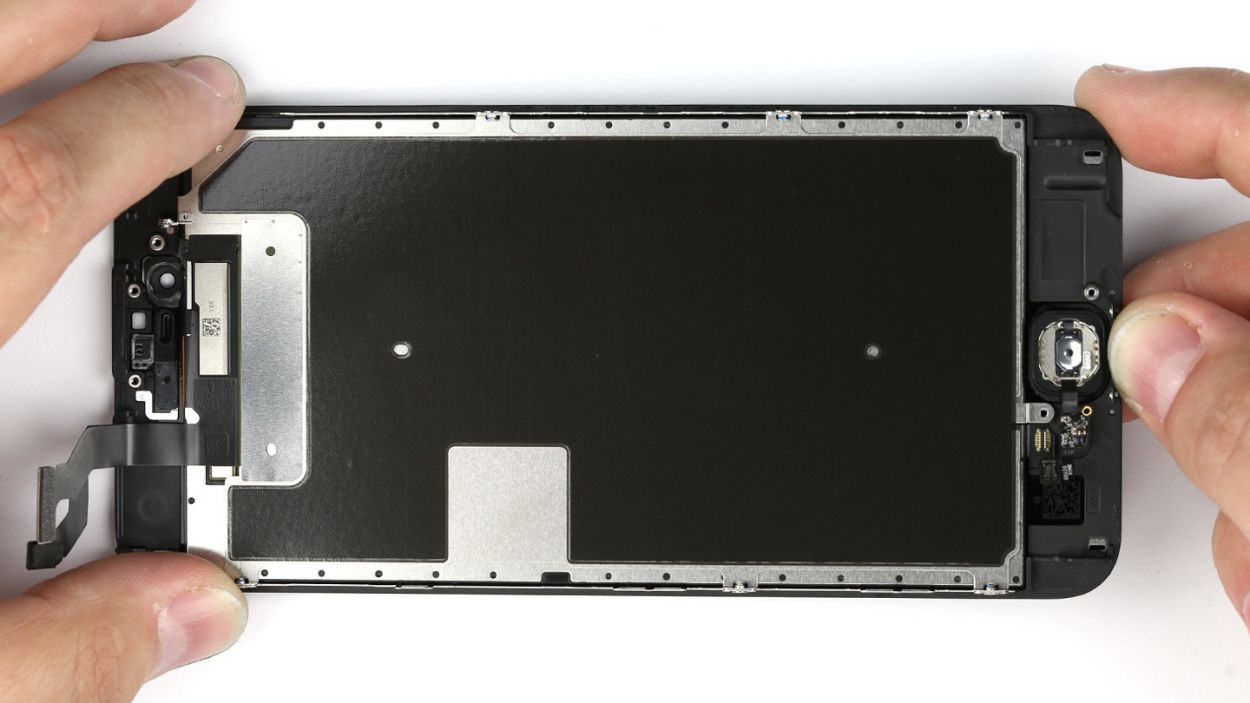
– Now, gently lift off the cover and keep it with the screws you just removed. Teamwork makes the dream work!
– The earpiece is chilling under the front camera’s ribbon cable. Just fold that cable a little to the side, and voilà! You can now remove the earpiece with ease.
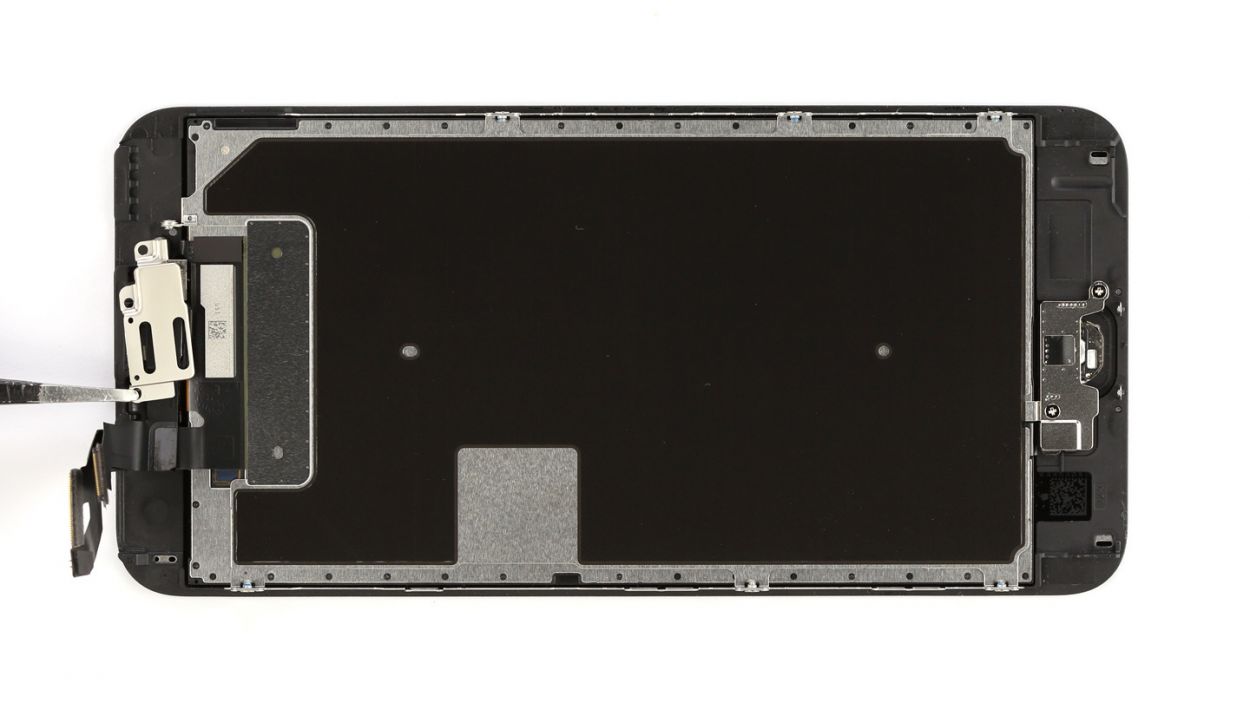
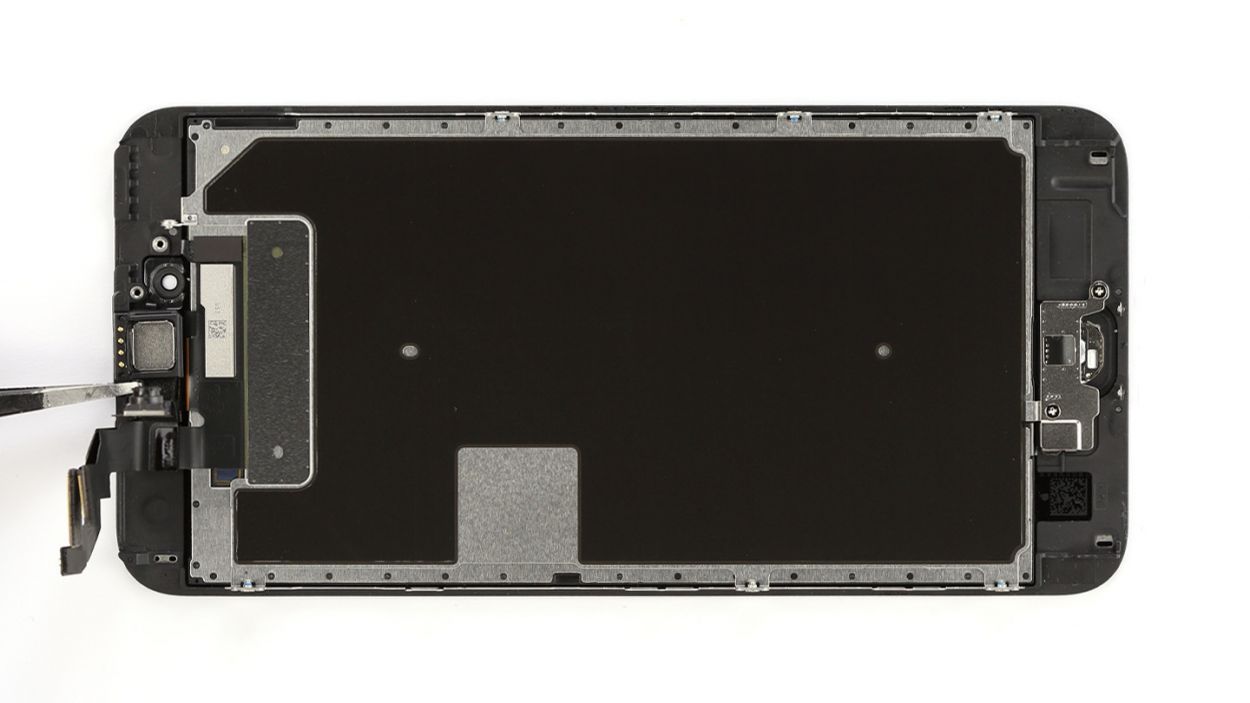
Step 7

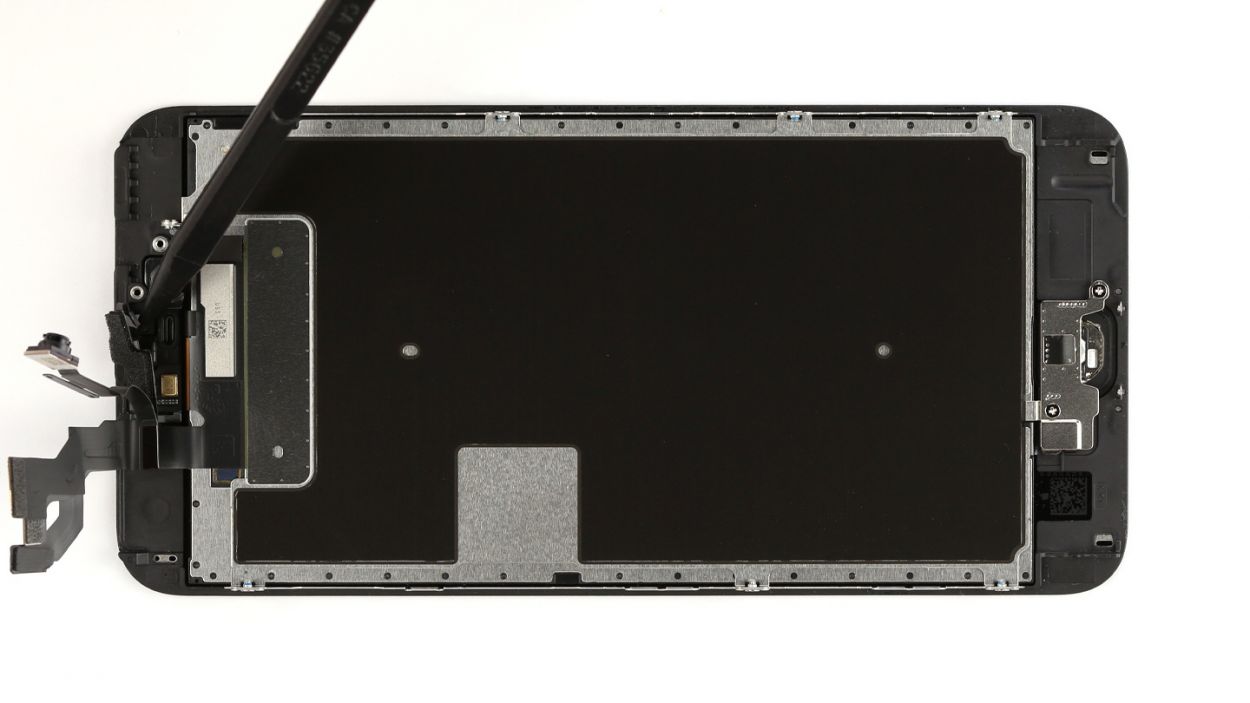
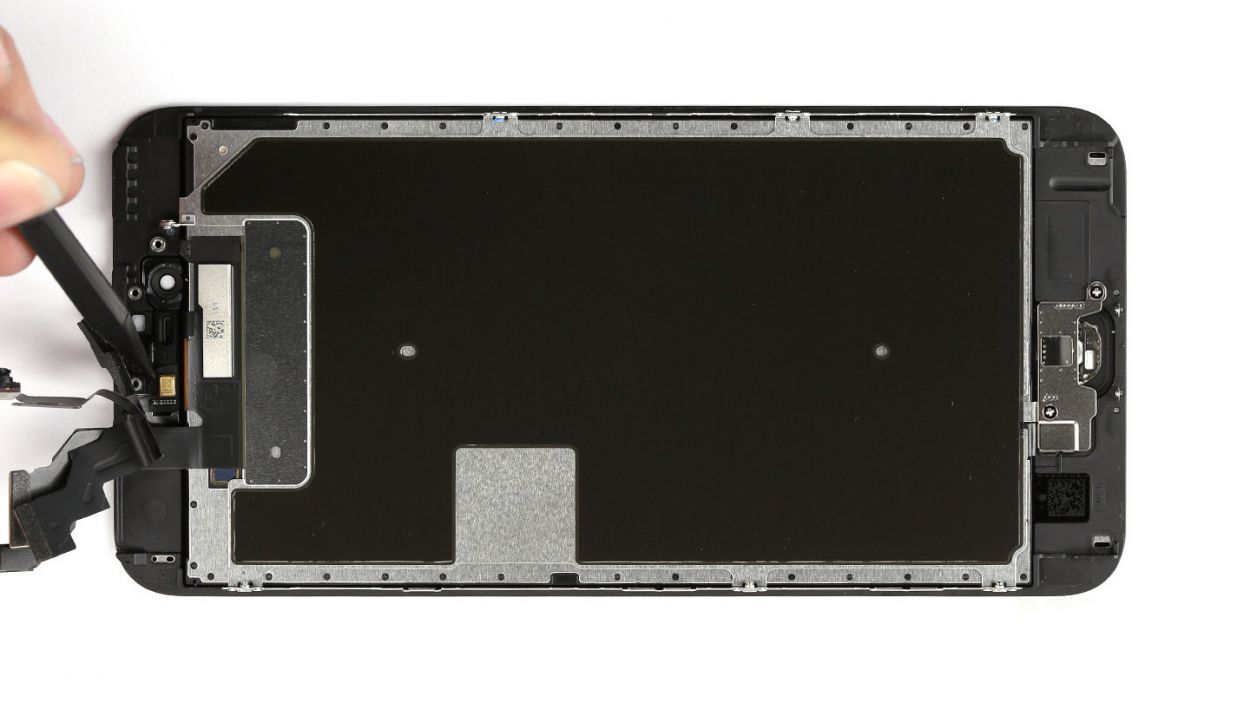
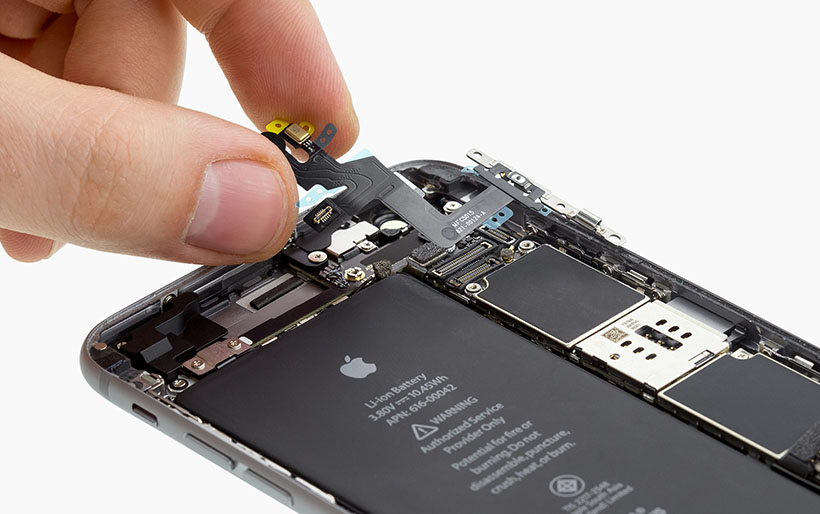
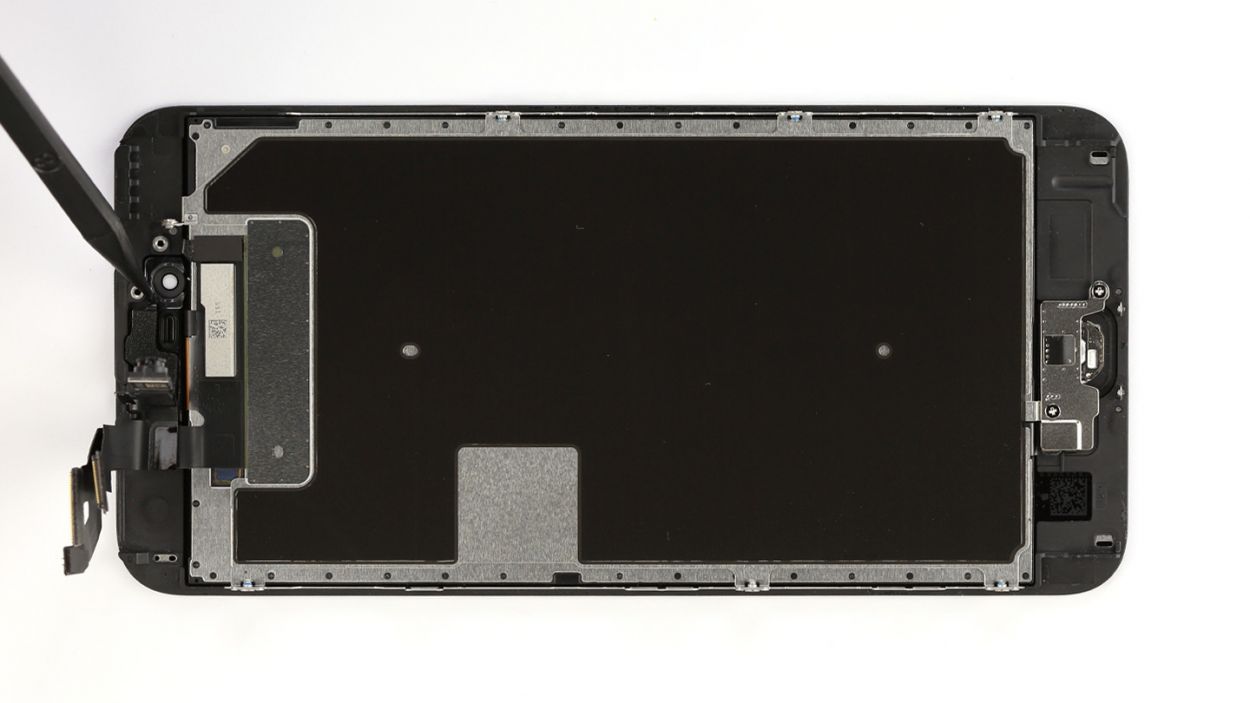
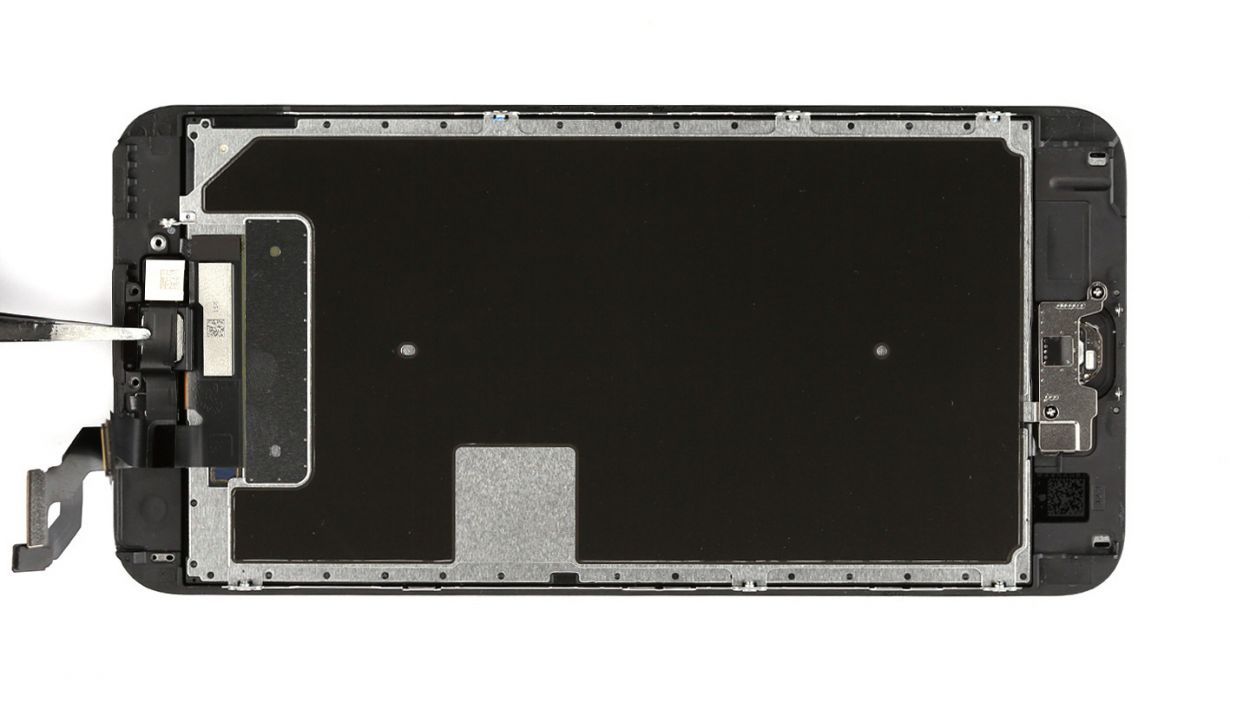
– Let’s tackle the cable set in two easy-peasy steps! First up, gently lift those sensors with care.
– Next, grab your trusty spudger and slide it right underneath the ribbon cable where the ambient microphone is hanging out. It’s just a little stuck with some light glue, so no worries!
– Now, with a little finesse, you can lift out the cable set like a pro!
Step 8


– Let’s kick things off by unscrewing those two Phillips screws that are the same size. Once they’re out of the way, gently take off the shiny silver cover. And hey, make sure to keep everything together in one handy container—no one likes a rogue screw! 2 x 1.8 mm Phillips screw.
– Grab your trusty spudger and carefully disconnect the Home button cable. You’ve got this!
– Now, gently slide the flat end of the spudger beneath the cable set, which is usually glued down. Take your time to detach it without any drama.
– The Home button is snugly glued to the screen from the inside. Using your finger, give that button a gentle push from the front side to help it out.
– Once you’ve successfully detached the cable set, feel free to lift it out. You’re doing great!
Step 9
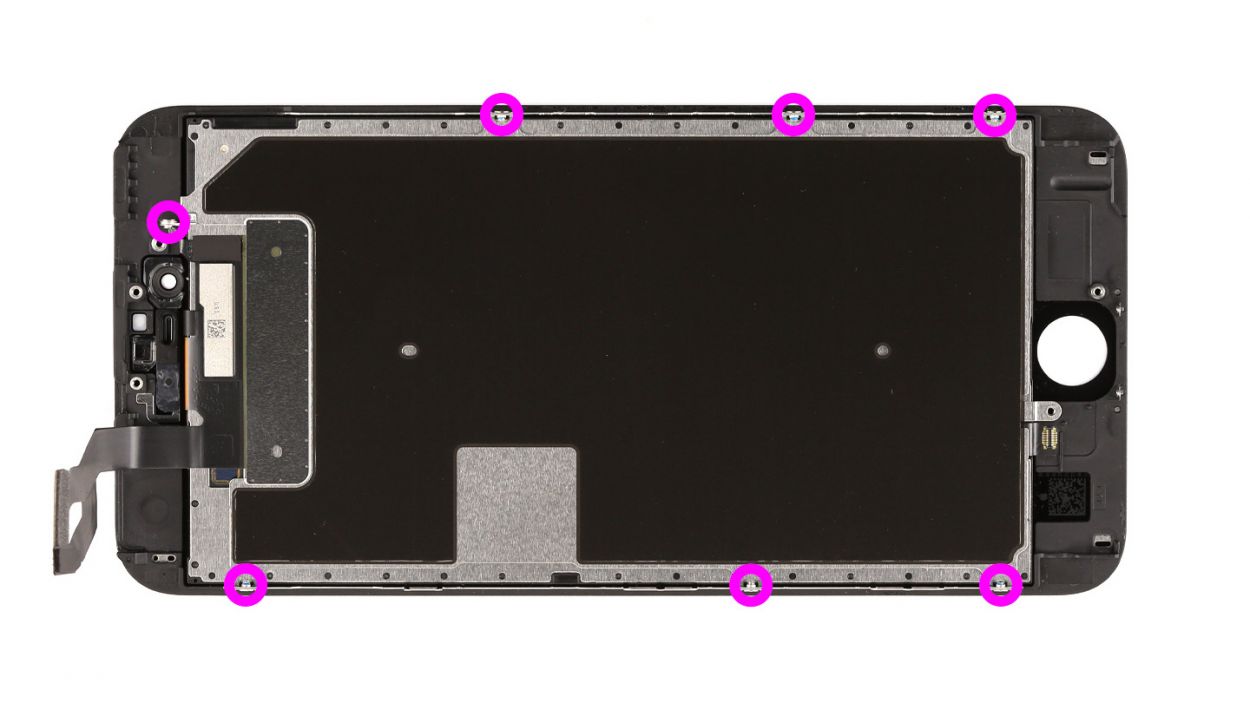
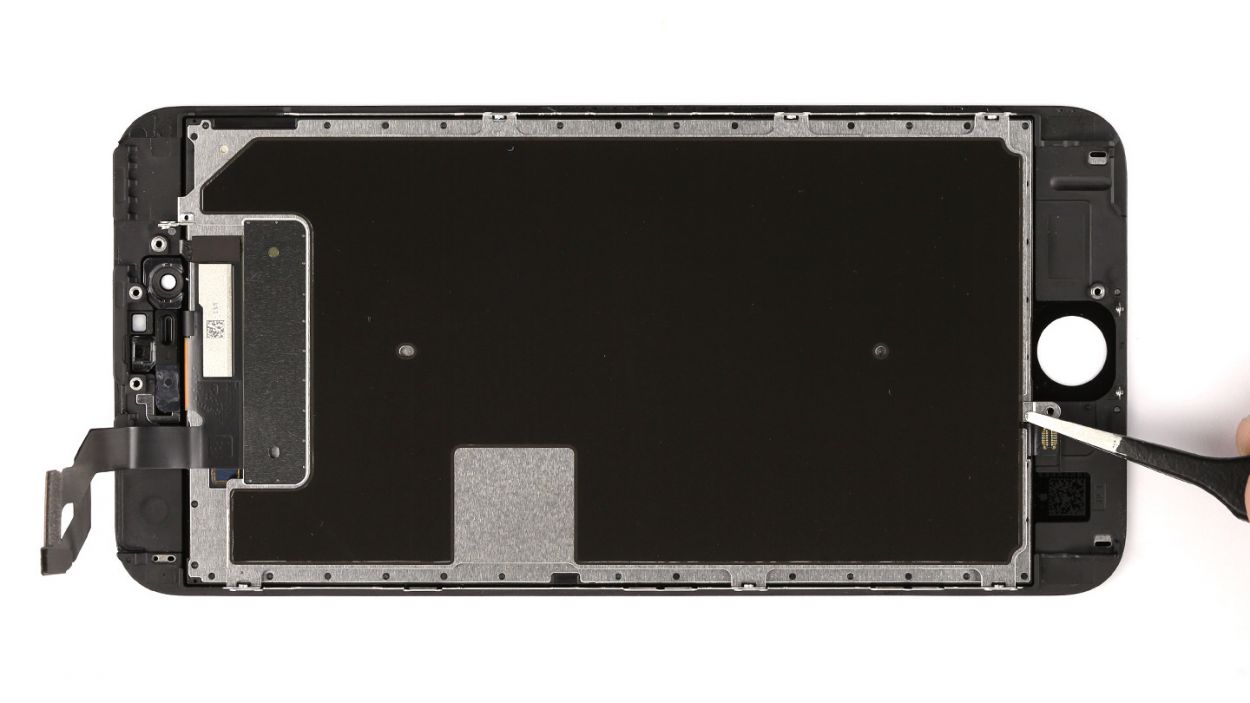
– Let’s get those seven Phillips screws out of the way so we can free the metal cover! You’ll need to tackle 7 x 1.4 mm Phillips screws.
– Now, gently lift off the rear panel and reveal the inner workings of your device!
Step 10
If your new display has a protective film on the back, don’t forget to peel it off before diving in!
– Not every display is created equal, and some might come with their own unique features! If you find yourself in need, you might have to rescue a few parts from your old display before welcoming the new screen. Here’s a quick list of what you might need to borrow: Front camera bracket (it’s just lightly glued), and the sensor bracket (also lightly glued).
– Front camera bracket (lightly glued in place)
– Sensor bracket (lightly glued in place)
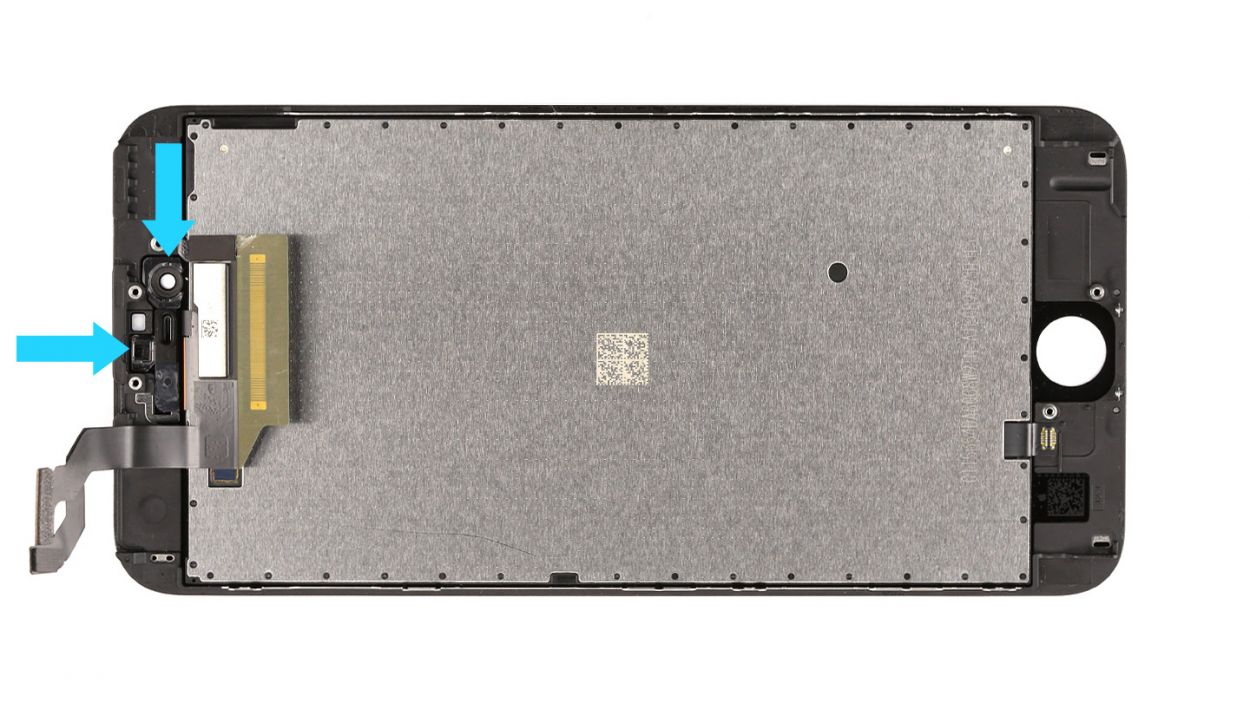
Step 11
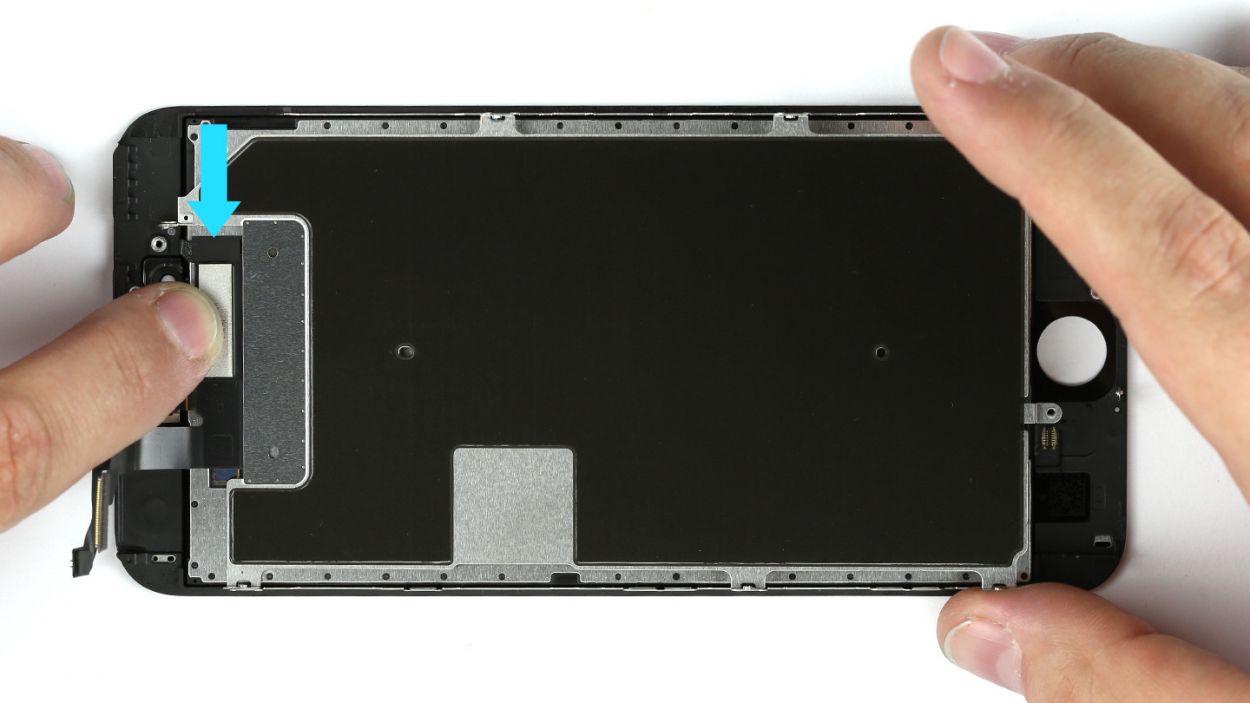

Just a friendly reminder: make sure that part of the 3D Touch cable is tucked away under the rear panel. (Check the arrow for guidance!)
– Time to give that shiny silver rear panel a cozy spot on the back of your new display! Just line it up and screw it in tight. You’re almost there!
Step 12


– Reinstall the Home button and reconnect its cable like a pro!
– Now, pop that shiny silver cover back on and secure it with screws.
Step 13


Make sure to place those sensors just right! If they’re not in their happy place, the proximity sensor might throw a little tantrum and not work properly.
– First, let’s get that ambient microphone back in its cozy spot!
– Next, make sure to secure each of the sensors in their designated brackets. It’s super important to get those sensors in the right place; otherwise, the proximity sensor might not play nice!
Step 14


Heads up! The screws are not all created equal in length. If you mix them up, you might end up with one pressing against the display glass from the inside, and we definitely don’t want that!
– Place the earpiece back in its cozy spot between the FaceTime camera and the sensors. Then, put the cover back on like a pro!
– Now, let’s tighten those Phillips screws. Be sure the front camera is perfectly centered on the display. Adjust it a smidge if needed. 2 x 2.7 mm Phillips screw, 1 x 1.4 mm Phillips screw
Step 15


– Reconnect those connectors! Sometimes getting the display connector to play nice takes a few tries, so be gentle and avoid bending it. We’re talking about the Touch ID cable, Front camera/sensor/earpiece/ambient microphone, and the Display here!
– Once everything is snug, fire up your iPhone! Check if the LCD, touchscreen, proximity sensor, front camera, and earpiece are all working like champs. If those display connectors aren’t connected just right, you might see some funky stripes or parts of the touchscreen acting up.
– Now, let’s wrap it up! Install the cover and secure it with those screws: 1 x 2.6 mm Phillips screw, 3 x 1.2 mm Phillips screws, and 1 x 1.6 mm Phillips screw. You’re almost there!
If those display connectors are feeling a bit shy and don’t connect just right, you might see some funky stripes or parts of the touchscreen acting up. Let’s make sure they’re snug as a bug!
Step 16

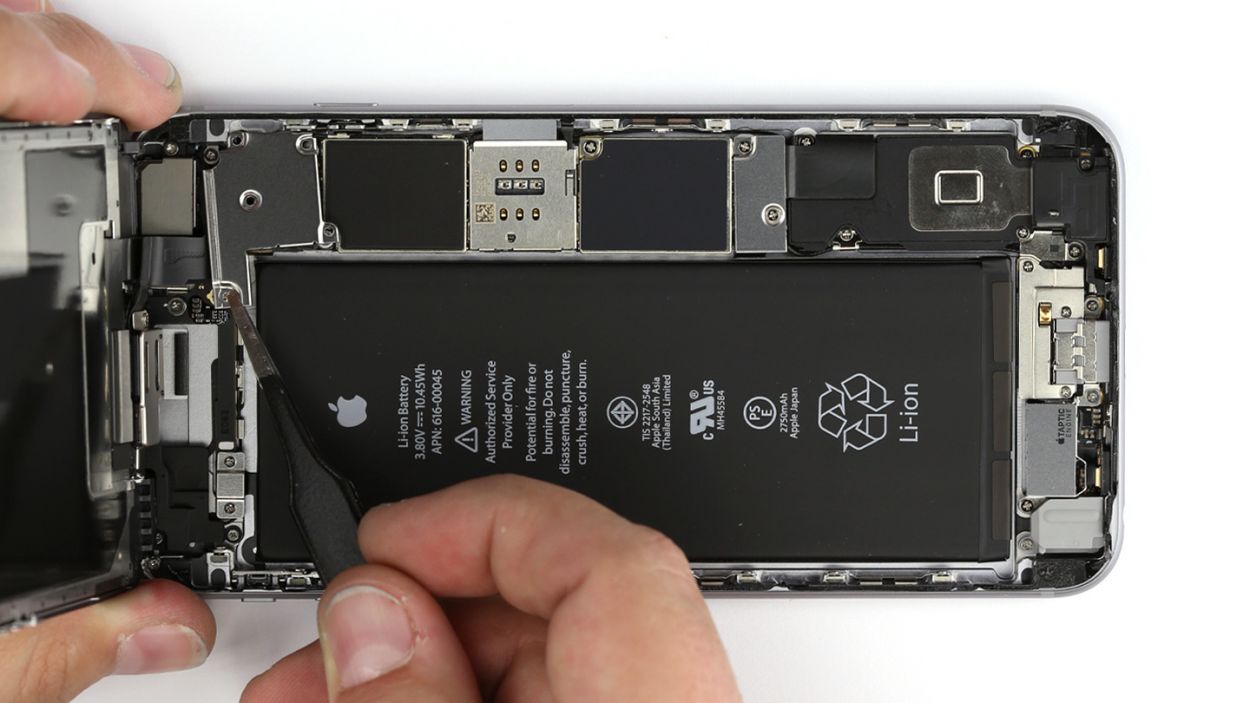
– Reconnect the antenna, Lightning connector, battery, and logic board like a champ!
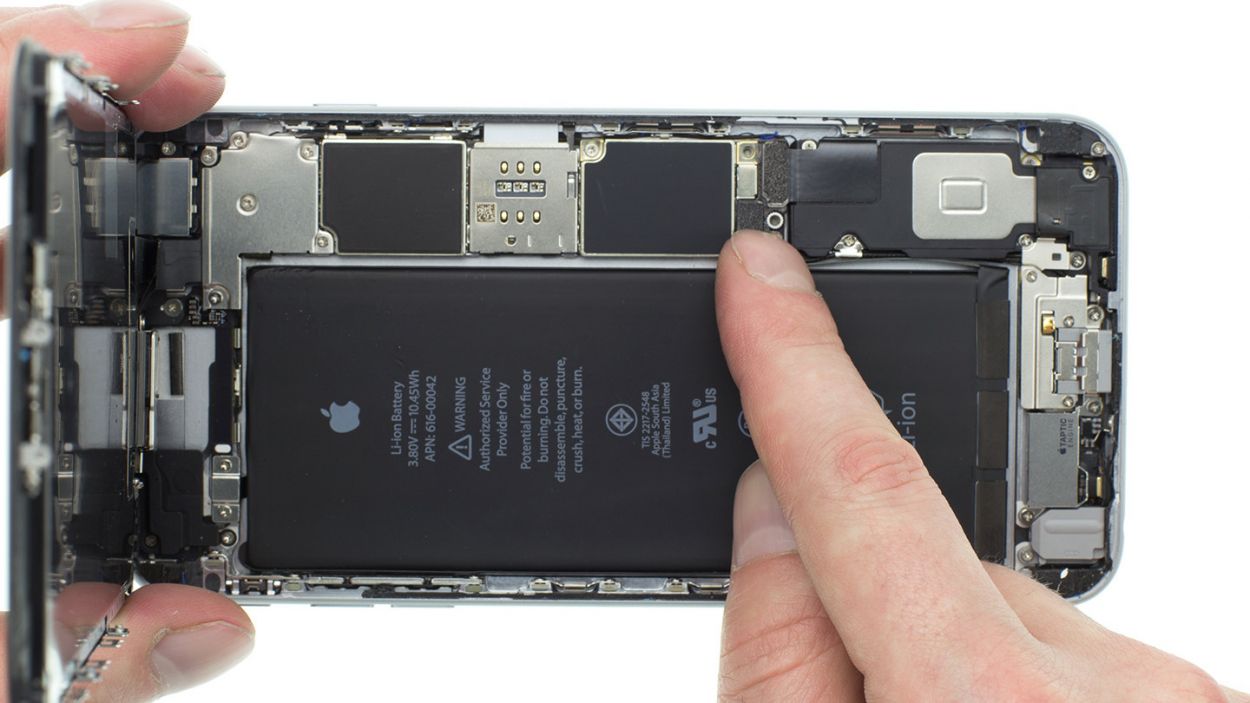
– Now, let’s give that silver cover a warm welcome back.
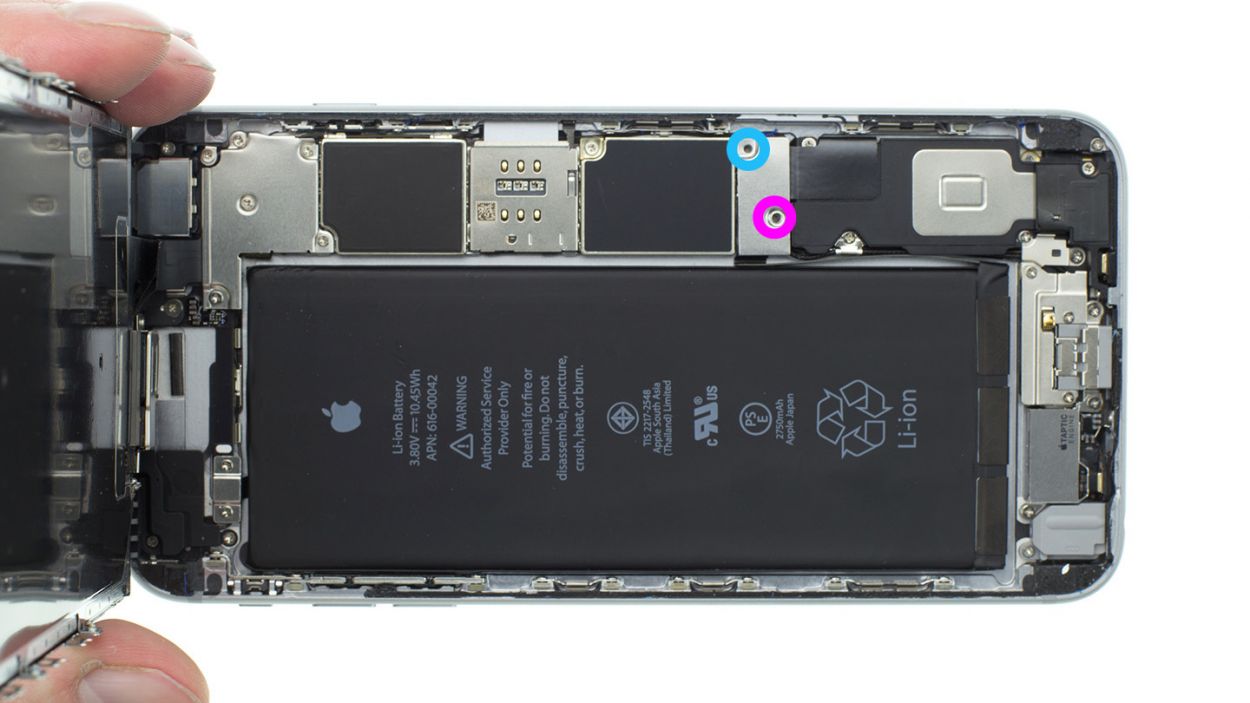
– Secure the cover onto the logic board with a couple of screws: 1 x 2.0 mm Phillips screw and 1 x 2.9 mm Phillips screw. You’re almost there!
Step 17
– Now, gently fold down that display and listen for that satisfying click as it locks into place at the top edge where the connection cables hang out. You’ve got this!
– Give the display a little nudge towards the Home button until it’s snugly seated in the frame. It should be perfectly flush with the frame, looking sharp!
Step 18
– Time to tighten things up! Grab your pentalobe screwdriver and secure those two screws at the bottom of the enclosure. They’re the 2 x 3.3 mm pentalobe screws that will keep everything in place!
Step 19