Replace Mac Pro Internal SATA Blu-ray Drive 2006-2008 (First Generation) – DIY Guide
Duration: 45 minutes
Steps: 16 Steps
Installing the optical drive is a piece of cake, but it does have a few tricky steps. We highly recommend reading this guide thoroughly before diving in to avoid any unexpected twists along the way. If you need help, you can always schedule a repair.
Step 1

– Hey, before you get started, make sure to unplug all the power and external cables from your Mac Pro. Trust me, it’ll make life easier!
Step 2

– Let’s start by popping off the side door on your Mac Pro.
Step 3

– First things first! Check that the locking latch on the back-right side of your Mac Pro is happily sitting in the unlocked ‘Up’ position.
– Next up, gently pull out all 4 drive bays and set them aside like the pros you are!
Step 4

Peek into the PCI Express Bay at the top right of your Mac Pro. It’s time to clear out some space in there for the next steps!
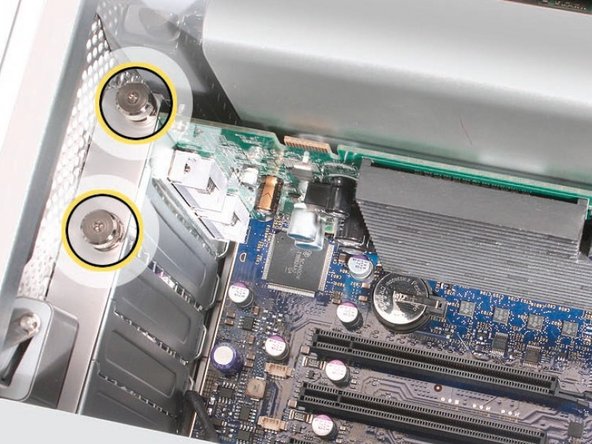
– Grab your trusty Phillips P0 screwdriver and let’s get that PCI Express cover retaining plate loosened up and off!
– Look for a little tab at the top where the metal plate hooks in. Unscrew those 2 screws, and then just slide the plate down and out of the tab like a pro!
Step 5

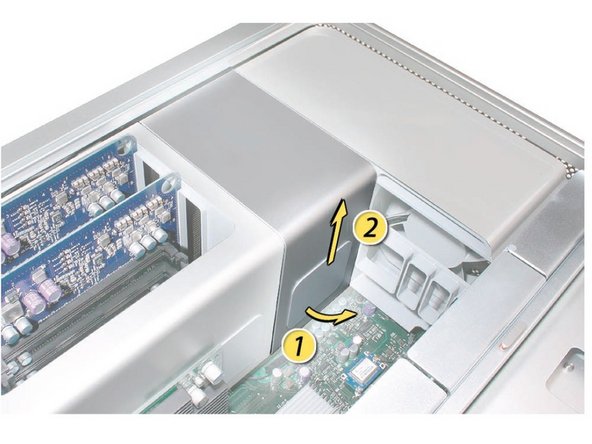
Heads up! When you’re taking out or putting in a card, make sure to grab it by the edges only. Keep your fingers away from the connectors and components on the card. Pull the card straight out from the connector to remove it, and slide it straight in to install. No wiggling it side to side, and definitely don’t force it into the slot. You’ve got this!
– 1) Gently lift the small clip at the card’s logic board connector towards the media shelf.
– 2) With a confident grip on the card’s top corners, pull it up from its expansion slot and say goodbye to that old card. If you need help, you can always schedule a repair.
Step 6
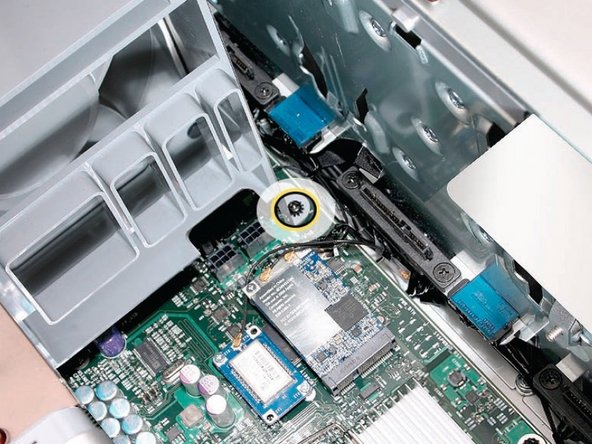

– Using a long-handled, magnetized #1 Phillips screwdriver, pop out the screw at the top rear of the front fan assembly that keeps it connected to the logic board.
– Now, take out the second Phillips screw at the bottom front of the assembly. Need help? You can always schedule a repair.
Step 7
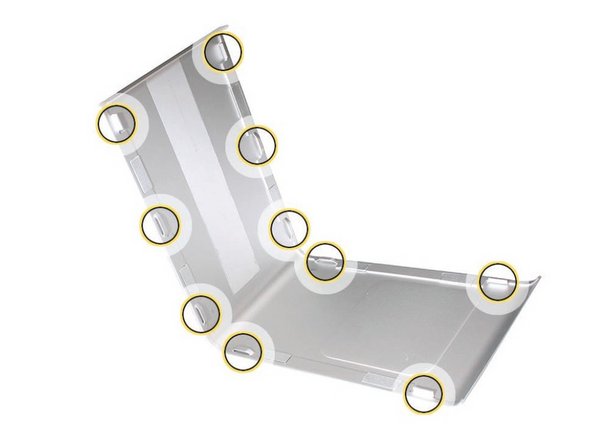

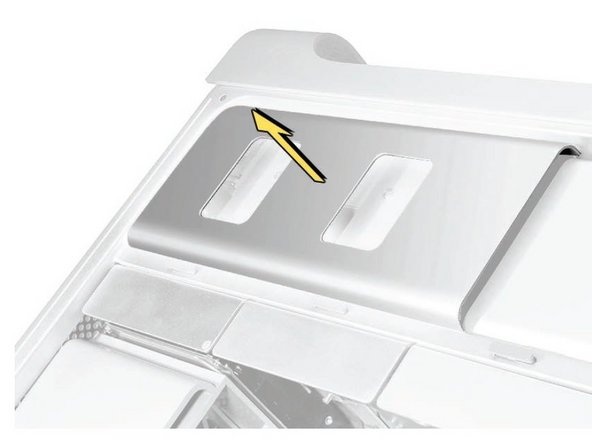
Hey there! Just a heads up: the heatsink cover is snugly secured with some tabs and magnets on its underside. Make sure to give those tabs a little nudge to set them free before you can gracefully lift the cover out of its cozy home!
– Slide your fingers under the edge of the heatsink cover closest to the logic board. Give it a gentle lift towards the media shelf to pop those tabs and magnets loose from the top side of the cover.
– With your fingers still holding the bottom lip of the cover, lift it straight up to free the rest of those sneaky tabs and magnets hiding under the front face.
– Now, go ahead and take the cover off the enclosure like a pro!
Step 8

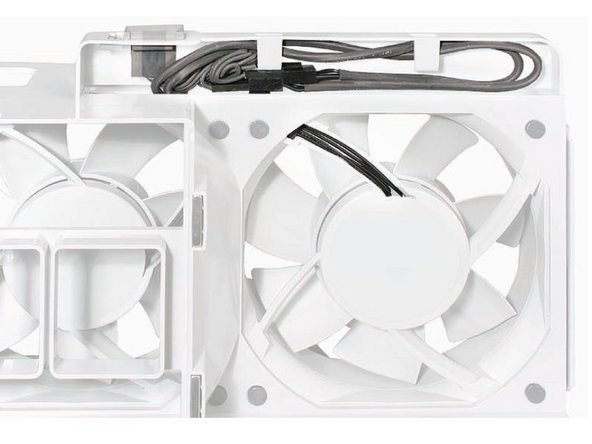
Replacement Note: Before you pop that front fan assembly back into the enclosure, double-check that those fan cables are cruising along the right path in the fan channel. It can be a bit of a puzzle, so keep an eye on how the connectors line up with the fan unit and logic board. You’ve got this!
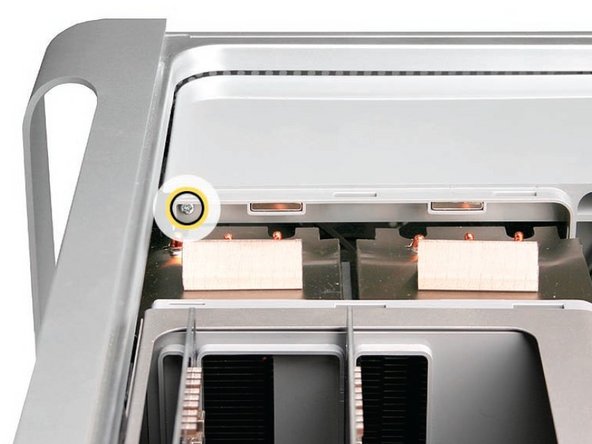
– First, let’s get those screws out that are keeping the fan enclosure snug. I found one screw at the top that was directly into the logic board and another hidden away at the bottom (you’ll spot it under the left yellow arrow in image 1). Now, grab the fan with one hand on each side, give it a little lift straight up, and gently pull it free from the enclosure. You’ve got this!
Step 9


– Check that the latch on the back panel is up, ensuring that the drives and carriers are unlocked.
– Slide the optical drive carrier partway out of the computer.
– Unplug the power and ribbon cables from the optical drive(s) and take out the carrier.
Step 10
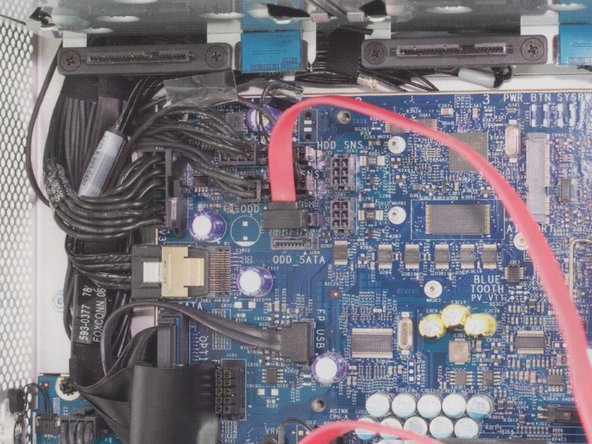

– Alright, you’ve done a great job getting to the logic board! Now, take a moment to locate the 2 SATA ports we’ve highlighted for you.
– Next up, grab that L-shaped SATA cable and plug it into the top SATA port on the logic board. You’re on the right track!
Step 11

– Let’s get that SATA cable moving! Gently guide it up through the corner of the optical bay, making sure to follow the path of those existing wires. You’re doing great!
– Before you move on, double-check that the cable is snugly tucked behind the connector. For a little visual help, take a peek at the first graphic. Keep it up!
Step 12

Heads up: Apple has already hooked you up with 4 screws on the back of the drive carrier. Simply remove them and secure the drive to the carrier. If you need help, you can always schedule a repair.
– Pop your shiny new SATA optical drive into the carrier snugly in that empty lower bay. You’ve got this!
Step 13

Heads up: When buying an optical drive, make sure it’s Mac Compatible. This guarantees the drive door is removable. If you need help, you can always schedule a repair
– Grab a paper clip and gently slide it into the emergency eject hole to pop that drive door open about half an inch.
– With a little finesse, use your fingertips to pull the tray out approximately two inches.
– Now, following the design of your optical drive, carefully remove the drive plate door.
Tools Used

Step 14

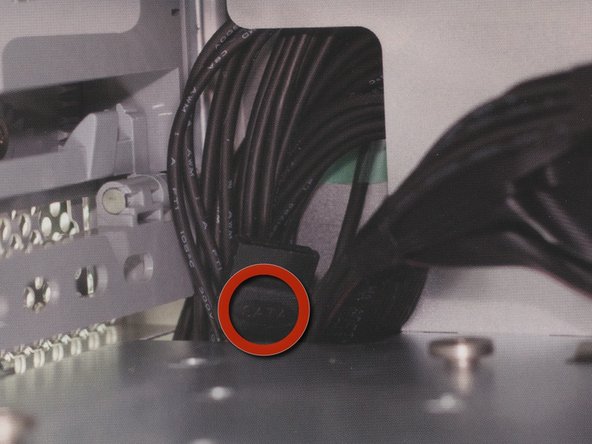
– Plug the power converter cable into the handy secondary power connector that’s already in place. You’re almost there!
Step 15

Hey there! Don’t forget to hook up the PATA and power cable to the other optical drive, if you have one handy. You’re doing great!
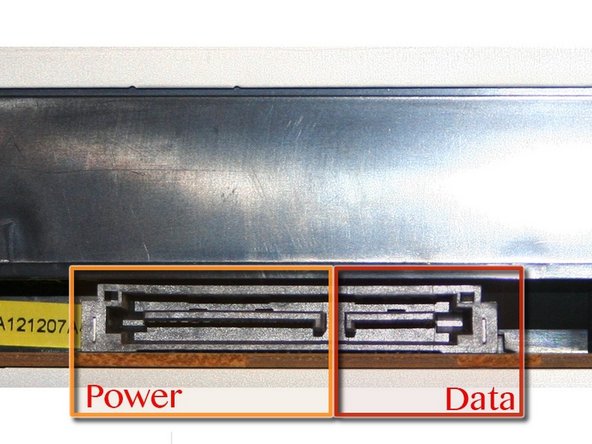
– Plug in the SATA cable and the power cable to the shiny new drive. You’re almost there!
Step 16

Heads up: Make sure to route those cables with care! We don’t want them getting pinched or disconnected when you’re sliding the carrier into the optical bay. You’ve got this!
– Gently place the optical drive assembly into the optical drive bay, lining it up with the two screws that fit into a track at the bottom.
– Push it in completely until the drive assembly is perfectly aligned with the bay.
– Congratulations! The new optical drive is all set. Now, let’s put that Mac Pro back together!