Replace Microsoft Surface 4 Feet
Duration: 45 minutes
Steps: 5 Steps
As time passes, the rubber feet at the bottom of your laptop may wear down or even go missing. Don’t sweat it! This guide will walk you through replacing the feet on your Microsoft Surface Laptop 4 (13.5-inch).
Step 1


– Close the lid and flip your laptop over so the back is facing up, exposing those four little rubber feet waiting for your attention.
Step 2


Each foot has a little groove that makes it super easy to pop off. Go ahead and give it a gentle pry!
– The back feet recesses are situated nearest to the rear edge of the laptop.
– The front feet recesses are located closest to the front edge of the laptop.
Step 3


Watch out for those speedy little feet—they can pop off in a flash! Keep an eye on them so they don’t wander off.
– Slip one arm of your trusty tweezers into the little groove of one of the feet.
– Give the tweezers a twist and pop it up to loosen the adhesive and unclip that stubborn foot from the laptop.
– Carefully lift and remove the foot—it’s outta here!
– Rinse and repeat for the rest of the feet until your laptop is foot-free.
Tools Used

Step 4

– Alright, this laptop is sporting two types of feet! When you’re putting it back together, just make sure each foot finds its cozy little spot.
– Give those feet a nice press into their recesses to lock them in tight to the frame.
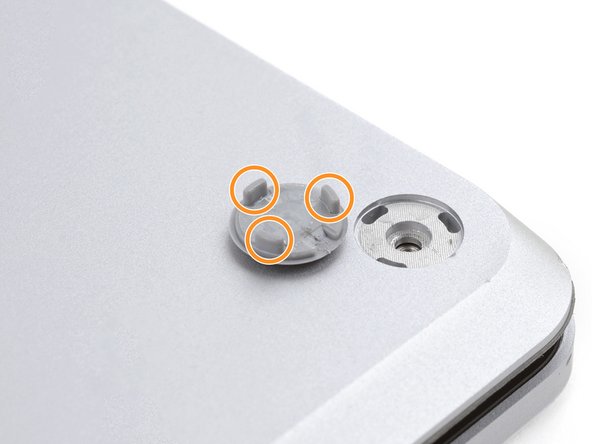
– The rear feet are pretty straightforward with just one center clip to worry about.
– Now, the front feet are a bit more special with three clips, so they can only fit one way—make sure you get them right!
– If the old feet aren’t sticking like they used to, just peel off the old adhesive and slap on a bit of Tesa Tape where it used to be for a fresh start.
Step 5


– Got some worn-out or busted feet? No worries! Grab some 8 mm rubber furniture pads for a quick fix.
– Carefully peel off a pad from its backing—like unwrapping a tiny gift.
– Line up the pad with the foot cavity, press it down firmly, and you’re good to go!
Success!
