Replace Optical Drive Mac Pro 2006-2008 (First Generation) – DIY Guide
Duration: 45 minutes
Steps: 6 Steps
Swapping out the optical drive? Easy peasy! Grab your trusty Phillips head screwdriver and follow this guide to replace the optical drive in your Mac Pro. If you need help, you can always schedule a repair.
Step 1

– Give that lever a gentle lift to pop the case open!
Step 2

– Time to get cozy with your Mac Pro! Gently detach the side panel like you’re peeling a banana—smooth and easy. You got this!
Step 3


– Grab those handles with confidence and give it a good pull to pop out the optical drive bay. If you need help, you can always schedule a repair.
Step 4

– Gently grip both connectors and give them a little tug to release them from their cozy sockets.
Step 5

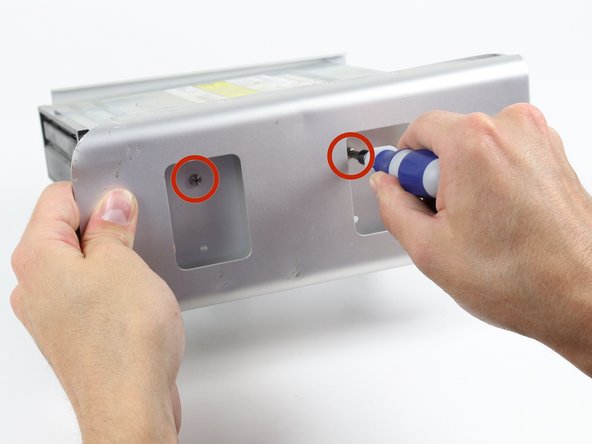
– Carefully remove the two 6-32 screws on each side of the optical drive, just like a pro! You’ve got this!