Replace PlayStation 5 Pro CMOS Board Guide
Duration: 45 minutes
Steps: 16 Steps
Ready to tackle the CMOS board replacement for your PlayStation 5 Pro? If you just need to swap out the CMOS battery, follow this guide. The CMOS board keeps track of your console’s date and time. If your PlayStation is having trouble keeping time or the date’s going haywire, it’s time to replace that CMOS board.
Step 1


Before you dive in: Get ready to rescue your device from damage!
– Power down your PlayStation and unplug all the cables and accessories.
– Remove any stands supporting your console and lay it down so the right side is facing up.
Step 2


To get started, you’ll need to release the console cover, which is held in place by hooks at the back and clips at the front. Don’t worry, it’s easier than it sounds!
As you work the clips free, you’ll hear a satisfying ‘pop’ sound – that’s your cue to know you’re on the right track!
– Give that front edge a good pull to pop those clips loose. You’ve got this!
– Now, go ahead and lift off the cover like a pro.
Step 3


– Let’s keep rollin’! Use the same process to pop off the other three covers.
– To put a cover back on, line up the hooks with their cutouts along the back edge and give the front edge a good press to snap the clips back in place. You got this!
Step 4


Remember to keep track of all the tiny screws! They like to play hide-and-seek, so make sure they go back where they belong. You got this!
– Grab your trusty Phillips screwdriver and unscrew that 17.1 mm-long bad boy holding the expansion slot cover. Time to show this device who’s boss!
Step 5


– Gently lift the expansion slot cover near the notch by the screw hole using your fingers and remove it.
Step 6


The cover is stuck down with some light adhesive, but don’t worry, it’s easy to remove!
– Use your fingers to gently pry off the plastic cover that’s hiding the fan cables connector. It’s like a little puzzle, and you’re the master solver!
– When you’re putting everything back together, simply press the plastic piece back into place. If it’s being stubborn, a few strips of double-sided tape will keep it securely in place.


Step 8


If you’re finding it tricky, grip the cables just above the connector head, and give it a gentle tug.
– Grab the white connector head of the fan cables and give it a confident tug straight up to release it from its socket.
– When putting it back together, simply hover the connector over its socket and gently press down on the edges with the flat end of a spudger until it fits snugly in place!
Tools Used

Step 9


– Grab your trusty T8 Torx Security screwdriver and let’s tackle those four screws holding the fan in place:
– One screw that’s 31.7 mm long, ready to be unscrewed.
– Two screws that are 21.5 mm long, just waiting for your attention.
– And lastly, one little 11.5 mm long screw, because every screw counts!
Step 10


It’s time to give your fan a good ol’ fashioned cleaning! Grab a clean cloth and some compressed air to blast away any pesky dust bunnies. Your device will thank you for it!

Step 11


In the U.S., the Magnuson–Moss Warranty Act has your back, making those warranty-voiding stickers illegal. Don’t let them scare you! Elsewhere, warranty protections may vary.
– Underneath the sneaky tamper-evident sticker lies one of the screws on the right side of the inner shell, just waiting to be revealed. Let’s get it out in the open!
– Grab your trusty tweezers and gently peel back that sticker until the screw comes into view. You’ve got this!
Step 12


– Use your fingers to carefully release the plastic grille near the fan recess by gently prying it away.
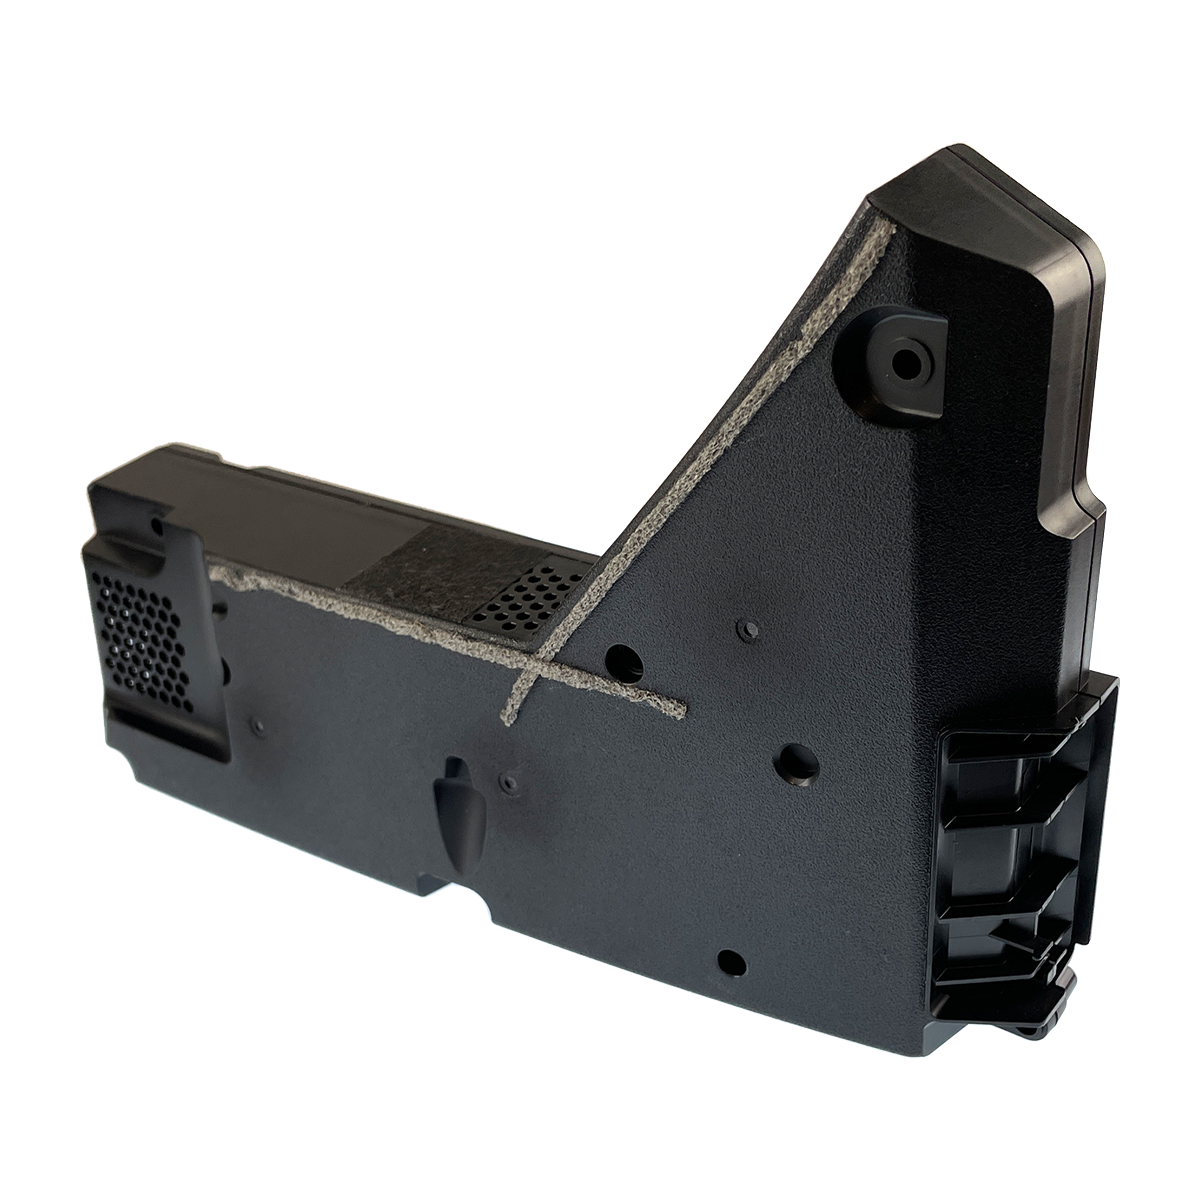
Step 13


– Grab your trusty T8 Torx Security screwdriver and get ready to tackle those screws holding the right-side inner shell in place. Here’s what you’re looking for:
– Four screws that are 18.8 mm long – those little guys are coming out first.
– Next up, we’ve got two screws measuring 18.6 mm long.
– And finally, finish strong with four screws that are 31.7 mm long.
Step 14


– Gently lift the right‑side inner shell straight up and set it aside like a pro!
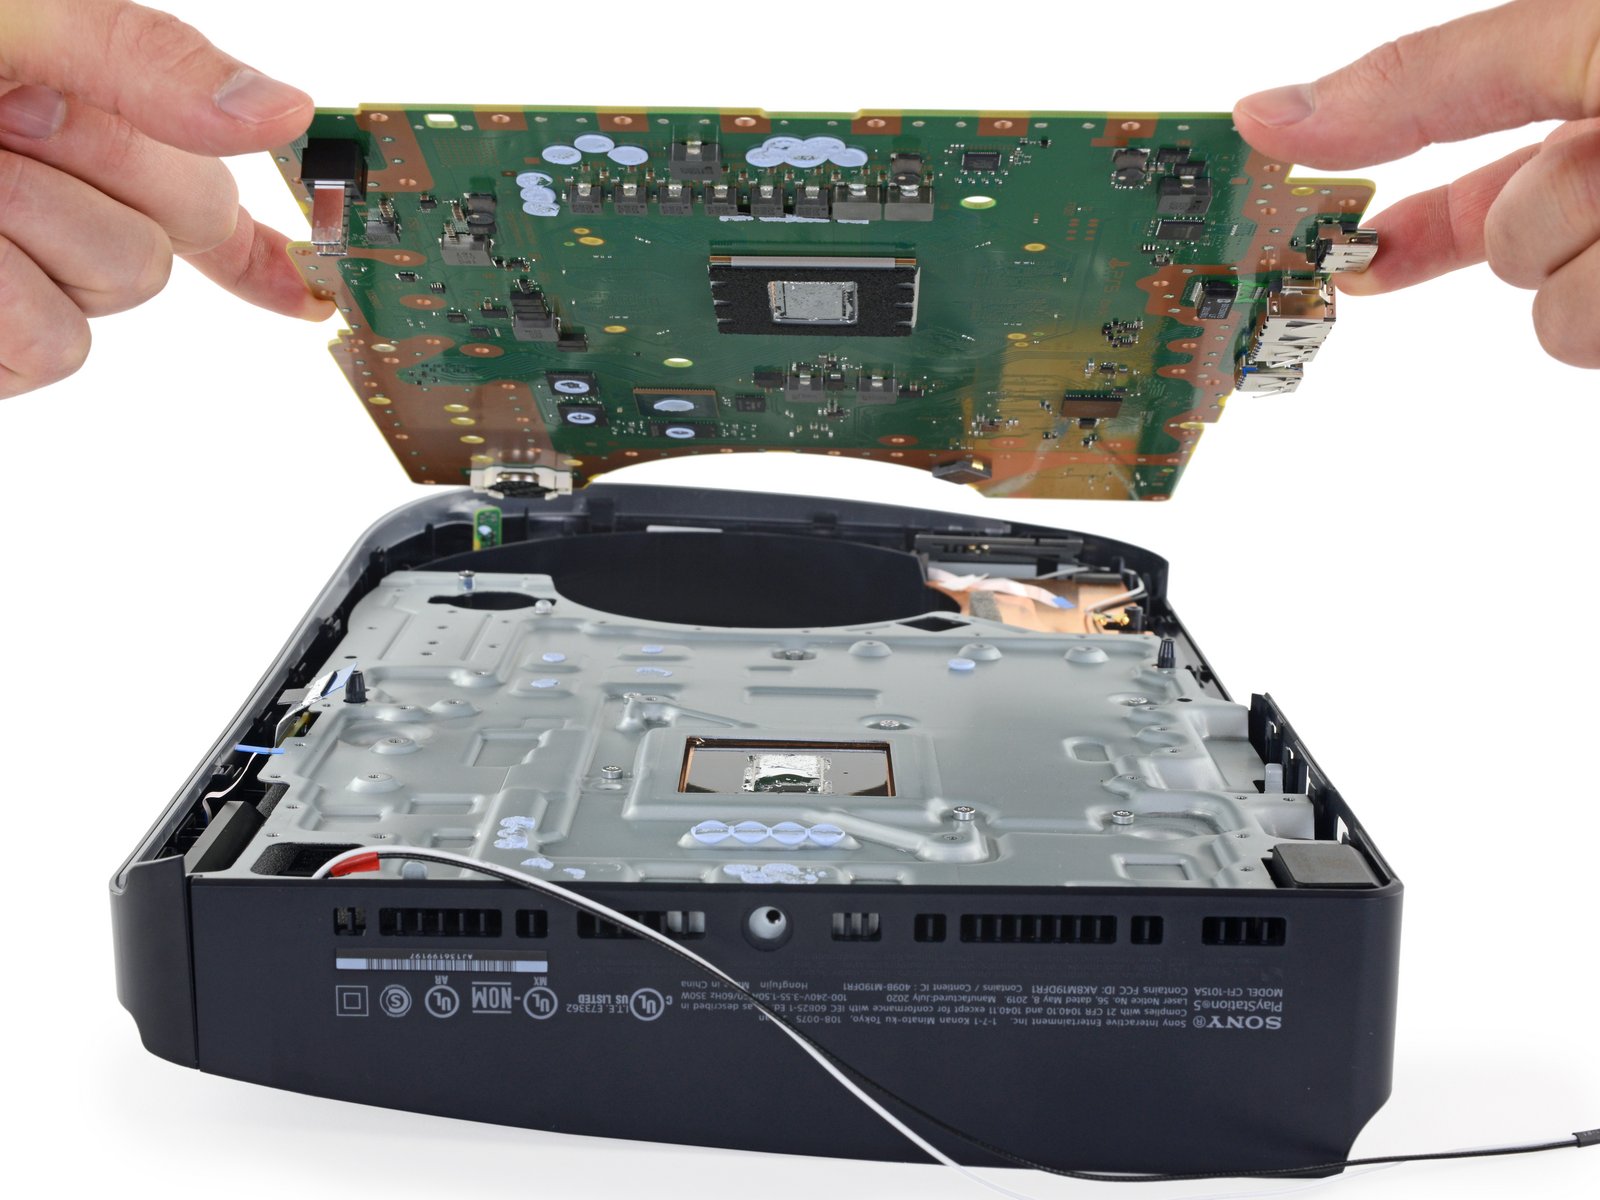
Step 15


If you’re struggling, give the connector a gentle wiggle side-to-side to help loosen it up.

Step 16


– Putting your device back together? Just do the steps in reverse. Easy peasy!
– Dispose of your e-waste responsibly with an R2 or e-Stewards certified recycler.
– Did the repair not go as planned? Try some basic troubleshooting or get help from our Answers community.
– Cancel: I did not complete this guide.
– If you need help, you can always schedule a repair.