Replace Samsung Galaxy Core Prime Camera Lens: DIY Guide
Duration: 45 minutes
Steps: 11 Steps
Hey there, friend! You might notice that your Samsung Galaxy Core Prime’s camera lens is looking a little rough around the edges. But don’t fret, because Salvation Repair is here with an awesome solution! Instead of getting a brand new phone, you can totally replace just the camera lens. And guess what? We’ve got a totally cool guide to help you out. The tools you’ll need are an iOpening tool, a metal spudger, and a Phillip #00 screwdriver or any similar tools. Don’t worry if you don’t have all of them – if you need help, you can always schedule a repair with us! Let’s get your phone looking sharp and ready for its close-up! 😀
Step 1

– First, let’s get started by switching off your smartphone using the power button located on the right-hand side. If you need help, you can always schedule a repair


Step 4


– Find the battery hanging out near the bottom of your phone. It’s that square, flat piece with ‘SAMSUNG’ written on it, just waiting for your attention!
Step 5

– Gently use your fingernail or a flat tool to pop the battery out. If you need help, you can always schedule a repair
Step 6
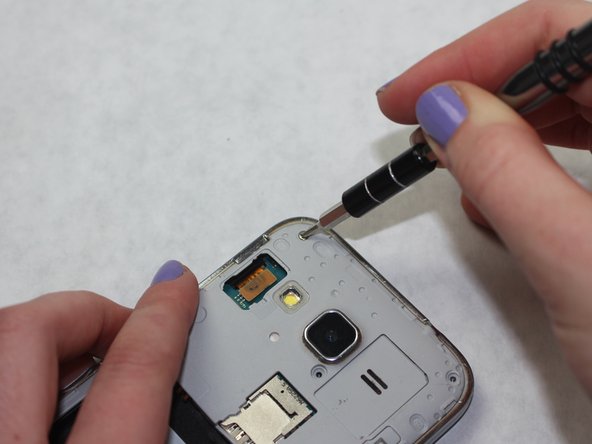

– Grab your trusty Phillips #00 screwdriver and carefully remove all eight 4mm screws from the midframe. If you need help, you can always schedule a repair
Step 7

Be careful when using heat tools, we want you to stay safe while fixing your device. If you need help, you can always schedule a repair
– Warm up the frame using a heat gun or a hair dryer until the adhesive starts to loosen up.
Tools Used

Step 8

– Let’s get this party started! Use the iFixit Opening tool to pry off the midframe. You got this!
Tools Used

Step 9


– Gently disconnect the power ribbon on the left side of the phone using your fingers or grab some tweezers for a little extra finesse.
Step 10

– Time to get hands-on – carefully lift the motherboard out of the phone using an iFixit Opening Tool. If you need help, you can always schedule a repair
Tools Used
Step 11
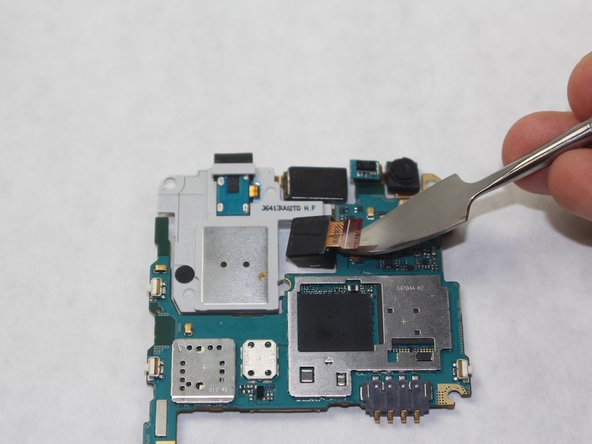

– Flip the Motherboard over and give that camera ribbon a gentle nudge with your iFixit Metal Spudger to disconnect it. You got this!
Tools Used
