Replace Samsung Galaxy Star Pro Screen
Duration: 45 minutes
Steps: 5 Steps
Ready to give your phone a brand new screen? Replacing it is easier than you think. Screens can take a beating from daily wear and tear or physical damage, but don’t worry, this step-by-step guide from Salvation Repair has got you covered. Since the screen is a crucial part of your phone, we’ll walk you through the process to get you back up and running in no time. If you need help, you can always schedule a repair. Our goal is to save you time and money with this clear and easy-to-follow guide.
Step 1

– Alright, let’s get this party started! Grab your phone and give it a nice, firm hug. Place one hand flat on the back of the phone and gently pop off the back cover. You got this!


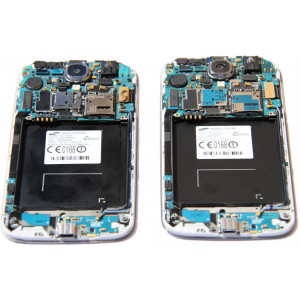
Step 3

– Alrighty, after learning how to pop the battery, let’s loosen that bad boy! Grab your screwdriver and unscrew those five 1.2mm Phillips Screws found on the backside of your phone. If you’re stuck and need some help, you can always schedule a repair.
Step 4

Handle with care! We don’t want you to accidentally mess up that press-fit connector between the screen and the motherboard.
– Now that the screws are out, flip your phone over and use that trusty plastic opening tool to gently unclip the connector that’s holding the screen in place on the motherboard. If you need help, you can always schedule a repair
Step 5

– Grab your trusty plastic opening tool and gently work your way around the screen, prying it apart from the plastic. Start on one side and keep the momentum going until you’ve made your way all around the phone. You’ve got this!