Replace Samsung Galaxy W Digitizer: Step-by-Step Guide
Duration: 45 minutes
Steps: 13 Steps
So, my niece had a little mishap with her Galaxy W (that’s the Bell version, by the way), and guess who got roped into replacing the digitizer? Yep, me! I spent what felt like an eternity trying to track down alternative names for this phone just to find the right digitizer. Finally, I stumbled upon the name Exhibit II and confirmed it was indeed the same device. Once I had that revelation, snagging a digitizer on eBay was a breeze! The whole repair journey turned out to be pretty straightforward, with just a couple of minor hiccups along the way. After tackling numerous iPod, iPhone 4, 4S, and iPad screen replacements, I can confidently say this repair was a walk in the park compared to those! If you find yourself in a similar situation and need a hand, don’t hesitate to schedule a repair.
Step 1

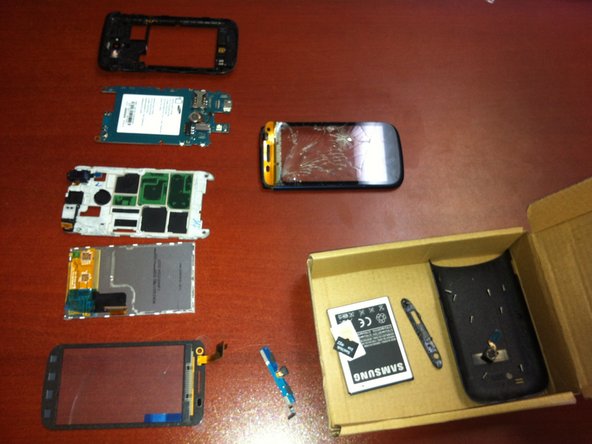
– Hey there, Looks like I got so excited about fixing this bad boy up that I totally forgot to take a picture of what it looked like before. But no worries, you get the idea! Check out the final result, it’s looking pretty sweet! If you need help getting yours fixed, you can always schedule a repair.


Step 3

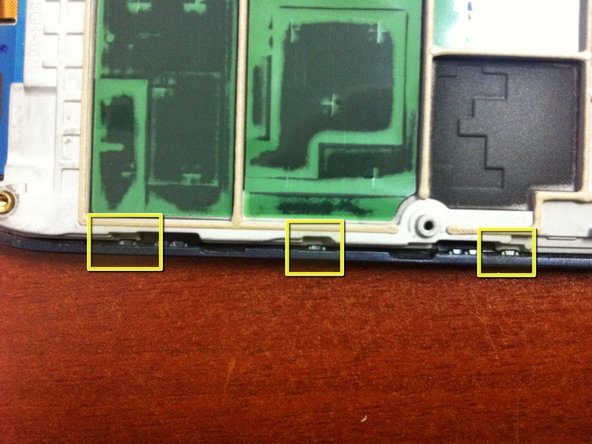
– Let’s get started by carefully prying off the top panel. Take a look at the images below to locate the clips, and remember – it’s all about finding the right spot to gently pry up. We found that the corners of the USB ports are a great place to start, so begin with the short side and take it from there.
– Now that the top panel is removed, take a peek at what’s underneath. You’ll notice three small tabs and a bunch of adhesive. To remove the rest of the cover, try using a small flat head screwdriver on the pointy corner closest to the headphone jack – it should pop right up. From there, slowly work your way across and the rest of the cover should follow suit.
– As you lift the cover, be patient and take your time to avoid damaging the adhesive. It’s a good idea to let it stick to the top cover, as you can see in the second picture. If you need help or feel unsure at any point, don’t worry – you can always schedule a repair with Salvation Repair.
Step 4


– You’ll find six screws on the back of the phone and two at the top to remove. Need help? You can always schedule a repair.
Step 5

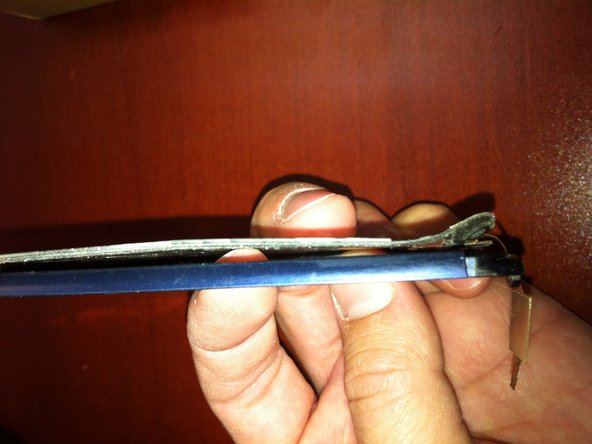
– Getting the phone open was a breeze! I kicked things off at the bottom edge with a flat head screwdriver and gently pried up the back cover. It popped open smoothly, until I hit the top section.
– In the tiny gap I found, I slipped in a small flat head screwdriver and twisted it slowly. Once that gap opened up, the rear case slid off like it was ready for a vacation!
Step 6

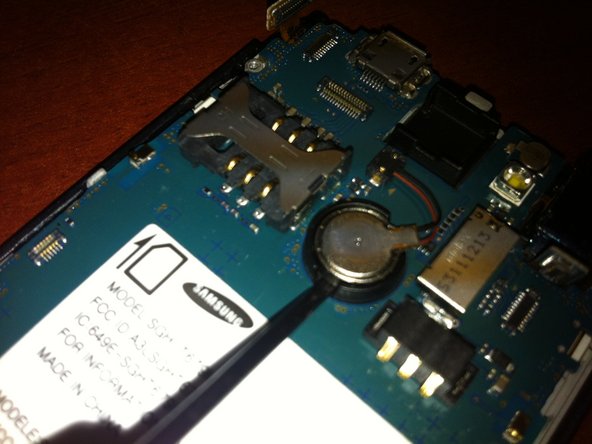
– To get started, remove the battery by inserting a small flat head screwdriver into the gap in the plastic rim surrounding it. Gently pry the battery up and out, leaving it connected to the main board for now.
– Next, you’ll need to disconnect four connectors. Simply use your fingernail to carefully hook underneath and lift them up – easy peasy!
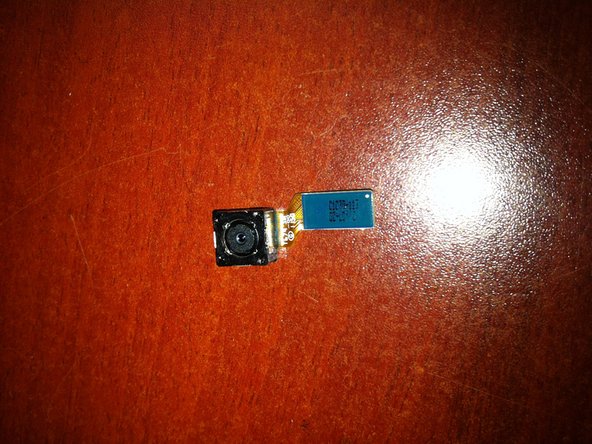
– Now, locate the camera connector, which has a yellow and blue rectangle on it. When you lift this connector, the camera will be free to remove. If you need help, you can always schedule a repair
Step 7

– It’s time to gently lift the main board right out of the chassis! You’ll find one sneaky connector hiding underneath that needs to be popped off. A little finesse with your fingernail should do the trick, just like it did for me!
– Once that connector is off, the main board is free as a bird from the rest of the phone.
Step 8

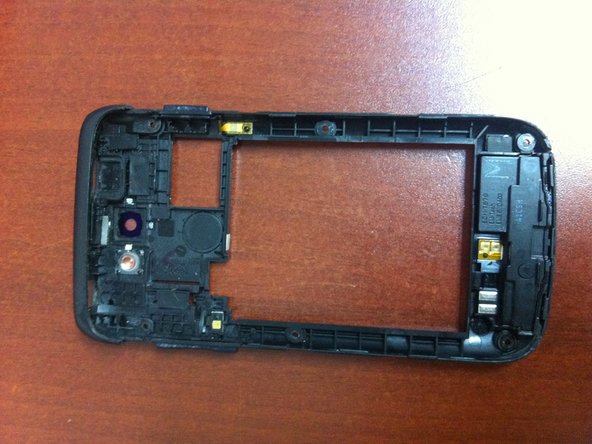
– Alright, time to get a little hands-on! We’re going to separate the phone’s chassis from the front panel. It’s like a puzzle, but a little trickier. You’ll see a bunch of clips holding these two parts together. Use that trusty flathead screwdriver to gently pry them apart, being careful not to damage anything.
– Once the pieces are apart, take a look. You might notice the LCD is stuck to the front of the phone. Sometimes it sticks to the chassis. If this happens, you’ll need to carefully separate the LCD from the front. (see step 11)
– If you get stuck, no worries! You can always schedule a repair with us.
Step 9

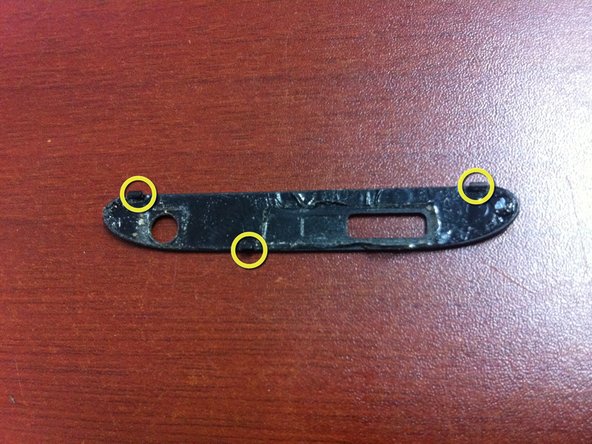
– Check out the yellow rectangle – that’s your microphone board! You’ll want to gently remove it to swap out the digitizer. Just pry away a couple of those little clips, and voilà, it should pop right out without a fuss.
– Now, take a look at the blue rectangle; that’s your LCD. Easy peasy!
Step 10
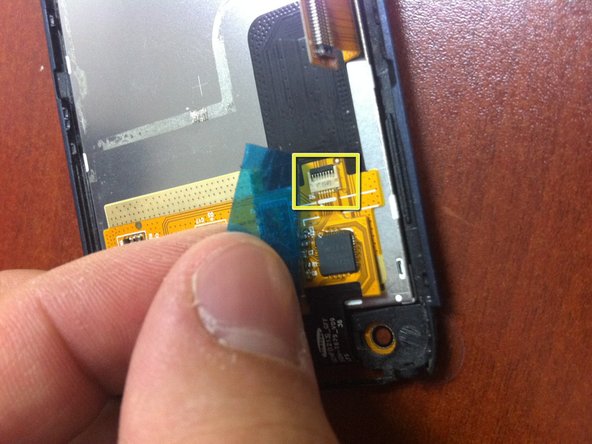

– sounds fun, eh? lifting up that blue tape to get to the digitizer connector? piece of cake! you’ll be like a pro flipping that yellow rectangle, isn’t it neat? easy peasy, lemon squeezy! no worries if your fingernail isn’t up for the job, just slip that cable out and back in like a champ. If you need help, you can always schedule a repair just to be on the safe side!
Step 11

– To safely remove the LCD from the front panel, take your time and work carefully along the edges – we don’t want any accidents!
– Once it’s loosened up a bit, you can use a guitar pick to slide along the two long edges and gently free the adhesive. If you need help, you can always schedule a repair
Step 12

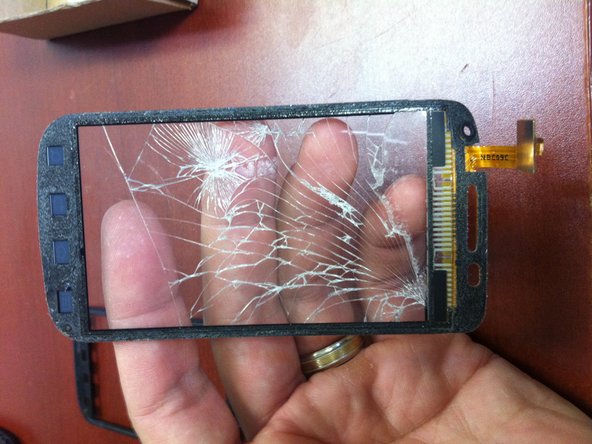
– Check out the front of the phone – the digitizer is still hanging on like a champ!
– Surprisingly, the digitizer popped out as a single unit, even though it looked like it had a rough time.
– I skipped the heat gun this time, but it might have made things a tad easier. Removing the digitizer turned out to be a breeze, even without the heat!
Tools Used

Step 13

– Luckily, that little rubber part that was trying to make a break for it just needed a gentle nudge back into place – problem solved. No more worries about it falling out.
– Putting everything back together is a breeze – just the reverse of what you did to take it apart. The Digitizer you got from us comes with adhesive already on it, so it’s a perfect fit. Once that’s in place, you’ll be done in about 5 minutes. If you need help, you can always schedule a repair