Replace Screen Adhesive Google Pixel 8 Pro: DIY Guide
Duration: 45 minutes
Steps: 13 Steps
This repair guide is brought to you by the awesome team at Salvation Repair. While we’re not officially backed by any big names, we’re here to help you every step of the way! Ready to dive in?
Before you roll up your sleeves and get started, let’s make sure you’re all set!
This handy guide is brought to you by the talented folks at Salvation Repair. Ready to tackle the challenge of replacing your screen adhesive and installing the screen on your Google Pixel 8 Pro? Awesome! Before diving in, make sure you’ve wrapped up your previous repair steps and have your phone reassembled up to the screen. If you haven’t done that yet, go ahead and get it done before you continue here. Let’s make your device shine!
Step 1


Watch your step! Be super careful around those spring contacts lining the edges of your device during the next couple of steps. We don’t want any unplanned adventures here!
To ensure the new adhesive seals like a champ, make sure to get rid of all that old screen adhesive and any leftover goo.
If things get sticky, a few drops of strong (over 90%) isopropyl alcohol can do wonders to loosen up the adhesive. Just apply it and gently scrape away!
– Grab your trusty spudger and gently pry up that old screen adhesive. It’s like giving your device a fresh start, and we’re all about fresh starts, right?
Tools Used

Step 2


– After you’ve cleared away all that old adhesive, it’s time to tackle any stubborn residue! Just add a few drops of super-concentrated (over 90%) isopropyl alcohol onto the leftover bits on the frame and give it a gentle wipe with a microfiber or lint-free cloth. You’ll have that frame looking spick and span in no time!
Tools Used


Step 4


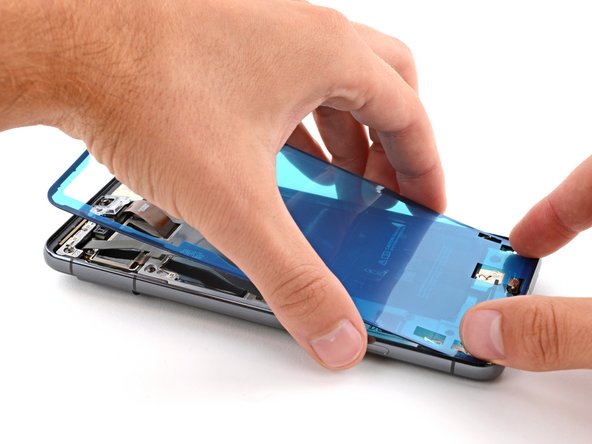
Before you get that new adhesive on, take a moment to check out how it’s going to fit on your phone. It’s a little sneak peek that can really help out!
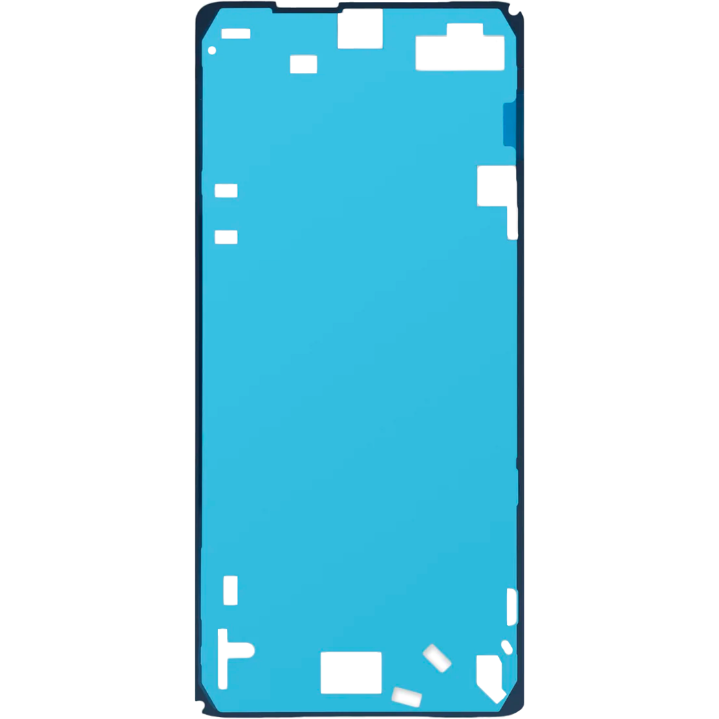
– Grab that adhesive sheet and flip it so the clear liner is facing down. Now, gently place it over your phone and wiggle it around until everything lines up just right!
– Check out the blue liner—it’s got a big cutout for the cable on the left side of your phone and some handy cutouts along the bottom for those spring contacts. Easy peasy!
Step 5

– Time to peel back that big ol’ clear liner on the back of the sheet and get ready to stick some awesome adhesive!
Step 6


Step 7


Those little spring contacts are super important, so be gentle! They’re like the party-starting crew of your phone, and we don’t want to hurt them. 😉
– Now, press down firmly and slide the flat end of a spudger around the entire perimeter of the frame. This will help secure the adhesive and make sure everything is nice and snug. You’ve got this!
Tools Used
Step 8


– Grab the handy pull tab at the top of your phone and gently lift it up to peel away that larger blue liner. You’re doing great!
Tools Used


Step 10


– Grab a little box or a stack of books to give that screen a cozy lift.
– Pull those two handy tabs on the upper right edge of your phone to slip off those last pesky blue liners.
Tools Used
Step 11


– Before you lock down that screen, double-check that the front-facing camera is cozily nestled in its little home.
– If you’ve swapped out your screen, take a peek at the front-facing camera hole and the sensor cutout on your new screen. Don’t forget to peel away any pesky liners that might be lingering around!


Step 13


Let’s make that new screen adhesive extra strong! To ensure a snug fit all around the edges, you’ll want to consider the rear camera bump. Just find some trusty little objects to place on the rear cover to create even pressure.
– Uh-oh! Looks like things didn’t go as smoothly as you hoped. No worries, give some basic troubleshooting a shot, or feel free to reach out to our awesome community for a helping hand.
– Cancel: I didn’t wrap up this guide.
– If you’re feeling stuck, remember that it’s totally okay to ask for help. If you need assistance, you can always schedule a repair.
Success!