
Samsung Connect Home Teardown
Duration: 45 minutes
Steps: 8 Steps
Samsung’s Connect Home is the all-in-one smart router that keeps your SmartThings ecosystem running smoothly. Curious about how it packs so much power? Let’s take it apart and see what’s inside! If you’d like to connect with us or get updates, check us out on Facebook, Instagram, and Twitter. For step-by-step guides delivered straight to your inbox, sign up for our newsletter. Remember, if you run into any tricky spots, you can always schedule a repair with Salvation Repair.
Step 1


– So, what’s this high-tech puck all about?
– If you went with the snazzier Connect Home Pro, here’s what you get:
– Wi-Fi speeds: 400 Mbps on 2.4 GHz, 866 Mbps on 5 GHz (AC1300).
– Covers up to 1,500 square feet with wireless goodness.
– SmartThings works over Bluetooth, Zigbee, and Z-Wave.
– Doubles as a hockey puck in a pinch (but, you know, maybe don’t).
– Or, with the Pro: Wi-Fi speeds jump to 800 Mbps on 2.4 GHz and 1,733 Mbps on 5 GHz (AC2600).
Step 2


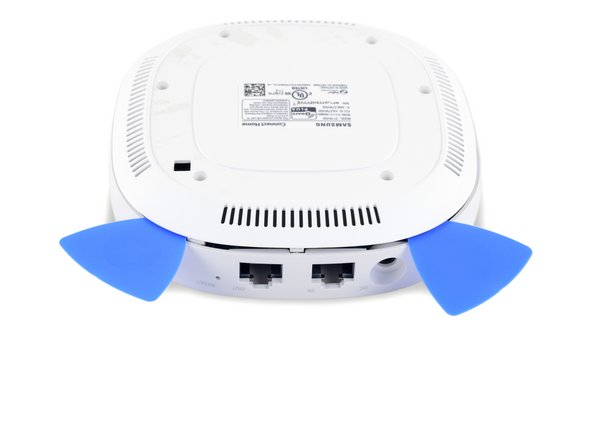
We were hoping the bottom sticker might hide some top-secret goodies, but it’s just sporting the usual serial numbers and wireless certification info.
– No, that’s not a new droid — just the back of the Connect showing!
– Vents along all four edges of the bottom panel help keep the Connect cool during operation.
– Sleek and simple, the Connect Home has just three ports—power, WAN, and LAN—and a small reset pinhole for easy troubleshooting.
Step 3


– Let’s kick off our screw hunt in one of their favorite spots—under a rubber foot!
– Hold on, these aren’t the screw holes we were after. Oh wait, just kidding, they totally are! And guess what? They’re standard Phillips #00—way to go, Samsung, for keeping it simple!
– These opening picks aren’t just great for getting into those tricky cases; they also add a bit of flair to your device.
– Just a heads-up: letting your Connect take a dip isn’t the best idea!
Step 4

That’s some impressive cooling power packed into this stealthy little router.
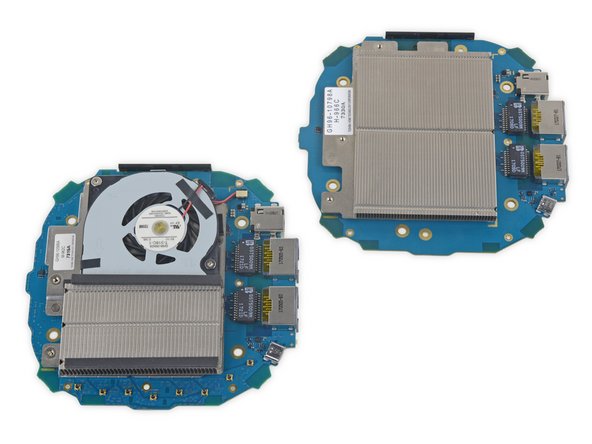
– Whoa, things heat up fast around here! First thing we notice is a huge ducted heatsink—something in here needs serious cooling.
– And just when we thought the Home version was packing heat, the Connect Pro steps it up with a fan too!
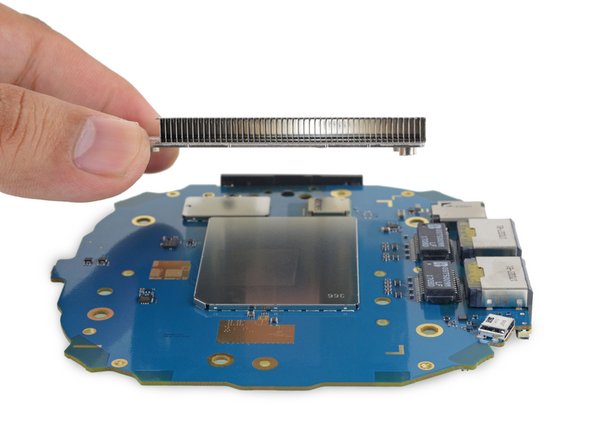
– Let’s peek under the Connect’s heatsink and—surprise!—there’s a big shielded zone. Guess we’ll need to dig a little deeper to see what chips are hiding.
Step 5

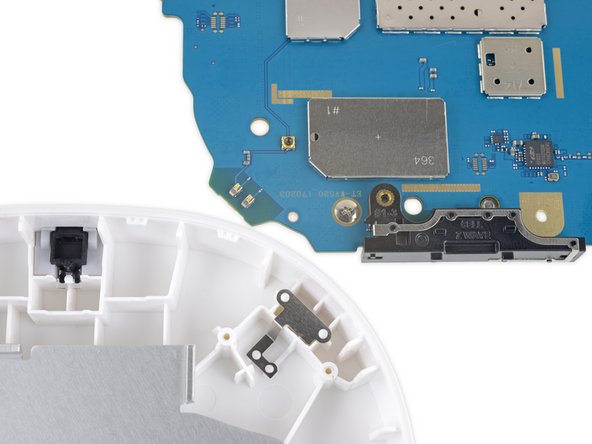

– On the back of the board we spy the Z-wave antenna (the black rectangle on the left), and some metal contact clips mounted in the case.
– The board has some coaxial connectors, but seems to be using spring contacts instead—a nice repair-friendly, low wear connection option.
– And finally, a lone LED handles the task of communicating the Connect’s status to the world. Stay strong little guy!
Step 6

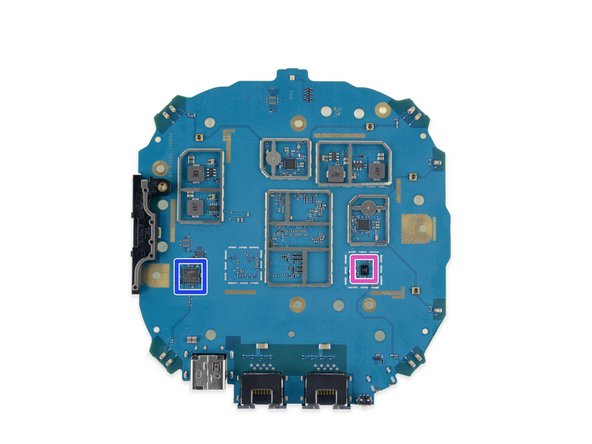
– Alright, now that we’ve removed the EMI shields, let’s uncover some of the key components lurking underneath:
– Qualcomm IPQ4019 SoC – this is the powerhouse of the device, and also the reason we have that massive heatsink.
– Qualcomm Atheros QCA8072 ethernet switch on a chip – handling network traffic with style.
– Sigma Designs SD3503 serial interface modem SoC – your device’s connection to the outside world.
– Samsung K4B4G1646E-BYK0 512MB DDR3L SDRAM – memory that’s working behind the scenes.
– Samsung KLM4G1FEPD-C031 4GB NAND Flash memory – storing all the important stuff.
– Silicon Labs EFR32MG1B232F256GM48 Zigbee radio controller – keeping your wireless connections smooth.
– Qualcomm (formerly Cambridge Silicon Radio) CSR8811 Bluetooth 4.1 radio – bringing your Bluetooth to life.
Step 7


– Wondering how the Pro version stacks up? Let’s break down the key upgrades: First up, a CPU boost with the Qualcomm IPQ8065 quad-core network processor replaces the previous IPQ4019, giving you faster processing power. The Ethernet switch has been upgraded to a Qualcomm QCA8337 from QCA8072, improving network connectivity. RAM gets a double shot with two Samsung K4B4G1646E-BYK0 512MB DDR3L SDRAM modules instead of just one, offering more memory for multitasking. Plus, there are two Qualcomm QCA9984 802.11ac radio SoCs now, so more devices can connect at speedy rates without a hitch. And to keep everything running smoothly with all these upgrades, extra power sources and converters have been added to handle the load. If you need help, you can always schedule a repair.
Step 8

– And that wraps up our repair journey. Thanks for hanging out with Salvation Repair for your repair manuals and cool tear-downs. If you hit a snag or need a pro touch, remember you can always schedule a repair. Happy fixing!
Success!