Samsung Galaxy A20 Charging Port Replacement Guide
Duration: 45 minutes
Steps: 5 Steps
This guide walks you through the process of removing a faulty charging port and swapping it out for a shiny new one. It’s perfect for those times when your device decides to play hard to get with the charging. Just a heads up, this guide is a bit of a workout and you’ll want to be comfortable with a soldering iron. If you need help, you can always schedule a repair. Special Skills: Heat gun usage, Soldering iron usage.
Step 1


Before you dive in, make sure to unplug and shut down your device. Safety first, my friend!
– First up, let’s pop out that SIM card and its tray. Easy peasy!
– Grab your trusty iOpener or heat gun and give that adhesive a little warm-up. We want it nice and cozy!
– Slide an opening pick into the gap between the back cover and the chassis while it’s still warm and ready to play.
– Now, gently glide the pick all the way around the perimeter. You’re doing great!
– Finally, lift off the back cover like a pro and reveal the magic inside!


Step 2


– Time to get those thirteen 3.6 mm Phillips screws out of the midframe! Grab your trusty screwdriver and let’s get to work.
– Next, take your opening pick and gently pry up to lift out that midframe. You’re doing great!
Step 3

– Grab that trusty opening tool and gently lift the press connectors on both sides of the two ribbon cables. Easy does it!
– With your opening tool in hand, carefully pry up the press connectors at both ends of the two ribbon cables. You’ve got this!
Step 4
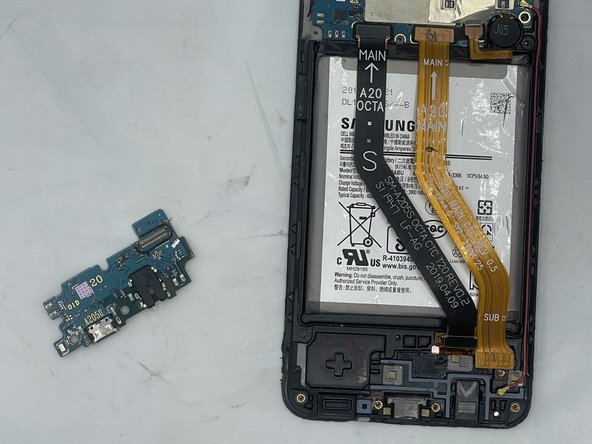

– First things first, let’s disconnect that snazzy red antenna cable from the I/O board. It’s time for a little separation!
– Now, grab your trusty opening pick and gently pry up the I/O board. It’s like a little dance move – just be smooth and steady!
Step 5


Soldering can spark some unexpected fires and lead to burns. So, make sure to set up shop in a breezy workspace and keep things safe while you work your magic!
– Remove the solder from the charging port.