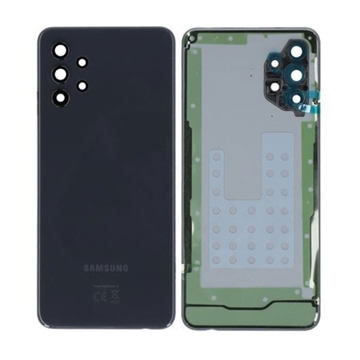
Samsung Galaxy A32 5G Back Cover Replacement Guide
Duration: 45 minutes
Steps: 7 Steps
Ready to give your Samsung Galaxy A32 5G a fresh new back cover? This guide will walk you through the process step by step. Just remember, you’ll need some replacement adhesive to stick everything back together when you’re done. If you need help, you can always schedule a repair.
Step 1

You can grab a hair dryer, heat gun, or hot plate to help out, but watch out for overheating your device! The display and internal battery can be sensitive to heat, so keep it cool and steady. If you need help, you can always schedule a repair.
– Grab your trusty iOpener and give it a warm hug against the back cover for about two minutes. This will help loosen up that pesky adhesive hiding underneath!


Step 2


If the back cover has a crack, the suction handle might not stick like it should. No worries! You can try lifting it with some sturdy tape, or if you’re feeling crafty, superglue that suction handle in place and let it set. Once that’s done, you’ll be ready to move on!
Struggling to create a gap? Just apply a little more heat to help loosen that pesky adhesive. Remember to follow the iOpener instructions to keep things from getting too toasty!
– Grab a suction handle and attach it to the bottom edge of the back cover, getting as close to the edge as you can.
– Gently pull up on the suction handle to make a tiny gap between the back cover and the frame.
– Slide an opening pick into that gap you’ve just created.
– Carefully glide the opening pick to the bottom right corner to slice through the adhesive.
– Keep the opening pick in position to stop the adhesive from sealing back up.
Tools Used

Step 3


– Pop in a second opening pick at the bottom edge of your phone for a smooth start.
– Gently glide that pick over to the bottom left corner to cut through the adhesive like a pro.
– Keep those opening picks in place to stop the adhesive from sticking back together.
Step 4


If the adhesive is giving you a tough time and seems hard to slice, it’s probably cooled off. Give your iOpener a quick warm-up for one to two minutes to get things back on track.
– Pop in a third opening pick at the bottom left corner of your phone, like you’re giving it a little hug.
– Gently glide that pick along the left edge to slice through the adhesive like a pro.
– Keep that pick snug in the top left corner to stop the adhesive from playing tricks and resealing.
Tools Used
Step 5


– Pop a fourth opening pick right under the top left corner of your phone.
– Gently slide that pick along the top edge to cut through the sticky stuff.
– Keep the opening pick snug in the top right corner so the adhesive doesn’t try to play peek-a-boo again.
Step 6


– Slide a fifth opening pick under the top right corner like a pro.
– Gently glide that opening pick down the right edge of the back cover to cut through the leftover adhesive.
Step 7


– Time to pop off that back cover!
– Once it’s off, grab some isopropyl alcohol (>90%) and give those areas a good clean before applying fresh adhesive where needed.
– Now, let’s secure that snazzy new back cover with either pre-cut adhesive or some trusty double-sided tape. After you’ve got it in place, press down firmly for a few minutes to let the adhesive really stick—using a stack of heavy books can help with that!