Samsung Galaxy A5 (2017) Battery Replacement Guide
Duration: 45 minutes
Steps: 11 Steps
be careful not to compromise the waterproof sealing
it should function normally now
or it might lose its water-protection
avoid heating your phone, it’s not good for it
you’ll need some replacement adhesive to get the job done
Get ready to breathe new life into your Samsung Galaxy A5 (2017) by replacing the battery. Keep in mind that opening your device will compromise its waterproof sealing, so be sure to replace the adhesive seals to maintain its water-protection. If your battery is swollen, take necessary precautions – no heat, please. Swollen batteries can be hazardous, so wear eye protection and be cautious. If you’re unsure, consider reaching out to a pro or schedule a repair. You’ll need some replacement adhesive to reattach the battery and back cover when you’re reassembling. Don’t worry, we’ve got you covered with this step-by-step guide from Salvation Repair.
Step 1

The adhesive on the Samsung Galaxy A5 (2017) is pretty tenacious! If the iOpener isn’t doing the trick, you can give a hair dryer, heat gun, or hot plate a whirl. Just remember, we don’t want to turn your device into a crispy critter—both the AMOLED display and internal battery are a bit heat-sensitive. So, keep it cool while getting it open!
– Alright, let’s start by powering down your phone. No worries, it’s just a quick safety thing!
– Now we’re going to use a handy-dandy iOpener to gently loosen up that adhesive under the back cover. Hold the iOpener on for a couple of minutes, then maybe a few more times if you need to. We’re in this together!
Tools Used

Step 2


If you’re having a tough time sliding that opening pick between the back cover and the frame, no worries! Just grab a suction handle to help you create a little gap.
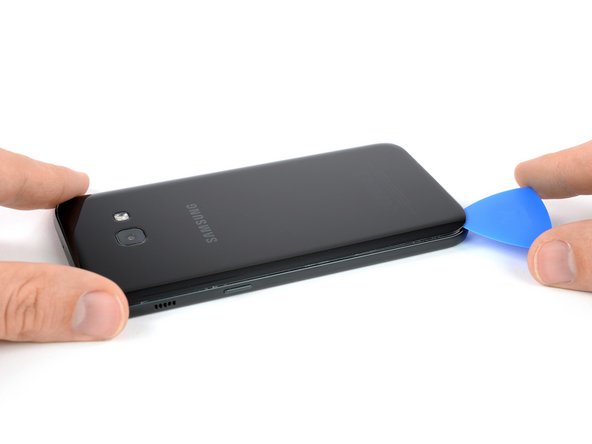
– Slide an opening pick into the bottom edge of your phone like a pro.
– Gently glide the tip of the pick towards the bottom left corner, slicing through that adhesive with ease.
– Keep the opening pick snug in the bottom left corner to stop the adhesive from sticking back together. Grab another pick and start cutting through the adhesive along the left side of your phone.
Tools Used

Step 3


If the adhesive is putting up a fight, don’t sweat it! Grab an iOpener to help loosen things up. Remember, the back cover is always under a bit of pressure during removal, so keep that adhesive nice and loose to avoid any breakage.
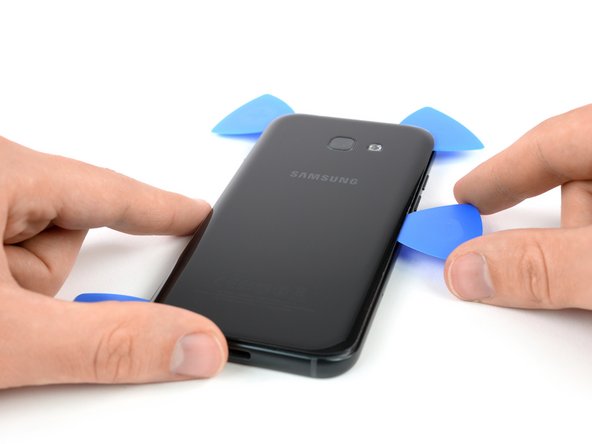
– First, use an opening pick to carefully cut the adhesive on all sides of your phone. To keep things from getting sticky again, leave one pick in each corner.
– Next, insert an opening pick into the right side of your phone – now that the adhesive is cut, it’s time to get a grip. Flip the pick sideways until you’ve got a good handle on the back cover. If you need help, you can always schedule a repair
Tools Used
Step 4
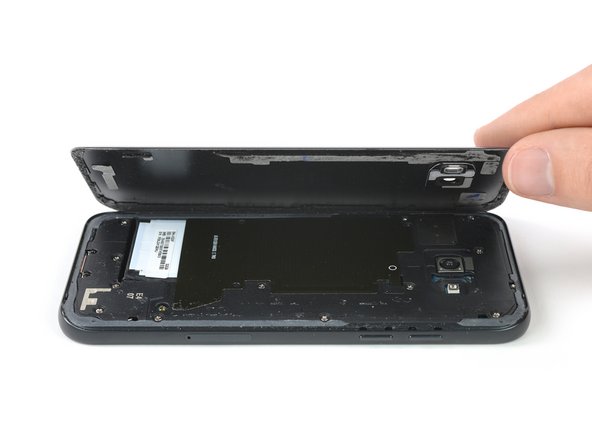
– Take off the back cover of your phone — it’s time for a little makeover!
– Before you slap on that fresh adhesive, make sure to get rid of any leftover sticky stuff from the back cover and the frame. Give those surfaces a good cleaning with isopropyl alcohol and a lint-free cloth to make them squeaky clean!
Step 5

– Unscrew the eight Phillips #00 screws that keep the motherboard cover snugly in place. Time to give that cover a little freedom!
Step 6


– Grab a trusty pair of tweezers and gently lift the motherboard cover at both upper corners of the phone to free it from its clamps.
– Carefully remove the motherboard cover along with the NFC antenna and the loudspeaker. You’ve got this!
Tools Used

Step 7

– Grab your trusty spudger and gently use the flat end to disconnect that battery flex cable. You’ve got this!
Tools Used


Step 9

Just insert the spudger up to the notch on its flat end. Check out the next step for more details.
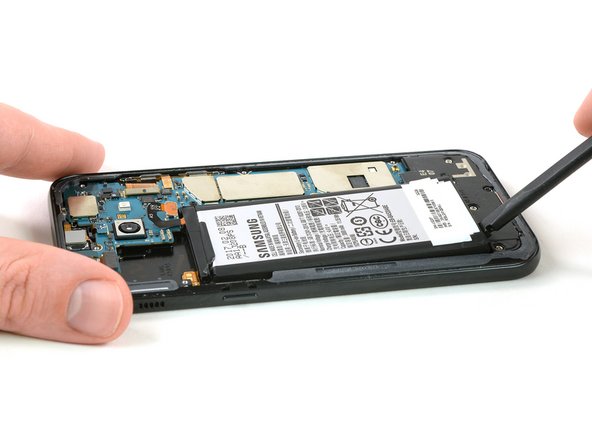
– Gently slide the flat end of your trusty spudger into the little gap at the bottom of the battery and start prying up that bottom right corner like a pro.
– Next, shift your spudger over to the bottom left corner of the battery and give it a little nudge to lift it up. You’ve got this!
Tools Used
Step 10


Heads up!
– Gently slide the spudger under the battery along the edges of the recess to slice through the last bits of adhesive until the battery is free and ready to come out.
– Make sure to only pry in the areas highlighted in yellow (rim) for a smooth experience.
– Steer clear of the red-marked area (center) because that’s the backside of the display. We want to keep it safe!
Tools Used
