Samsung Galaxy A52 Battery Replacement Guide: DIY Tutorial
Duration: 45 minutes
Steps: 16 Steps
Make sure your battery is below 25% before we dive in!
Ready to breathe new life into your Galaxy A52? Let’s swap out that tired battery! If your battery looks like it’s been to the gym and is swollen, remember to handle it with care. For your peace of mind, let’s bring that battery charge down below 25% before we dive in. This way, we minimize any risk of a wild thermal event if we happen to accidentally poke the battery during our little adventure. Oh, and don’t forget, you’ll need some replacement adhesive to keep everything snug and secure when putting your device back together. If you skip the adhesive seals during reassembly, your device will still work like a champ but might lose a bit of its water resistance. If you need help, you can always schedule a repair!
Step 1

Using a hair dryer, heat gun, or hot plate can work wonders, but watch out—too much heat can be a bummer for your phone! Both the display and the internal battery are not fans of excessive warmth. Keep it cool, and if you hit a snag, remember you can always schedule a repair.
– Get your trusty iOpener ready and place it on the back cover for a solid two minutes. This will help loosen up that stubborn adhesive underneath, making your repair journey a breeze!


Step 2


Having trouble with the suction handle? If the back cover is damaged, it might not stick as it should. No worries, just try lifting it with some strong tape or superglue it in place and let it cure – you’ll be back on track in no time!
Struggling to create a gap? Don’t sweat it! Just apply a bit more heat to soften the adhesive, and be sure to follow the iOpener instructions to avoid overheating. If you need help, you can always schedule a repair
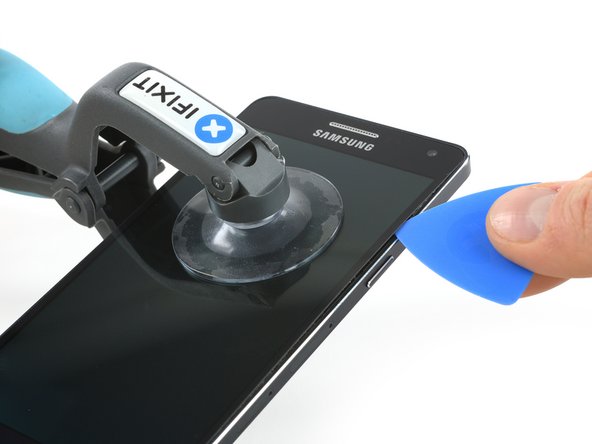
– First up, grab a suction handle and secure it to the right edge of the back cover, keeping it nice and close to the edge. You’ve got this!
– Now, gently lift the back cover with that suction handle to create a little gap between the cover and the frame. Just a tiny opening will do.
– Next, slip an opening pick into that gap you’ve skillfully created. You’re making great progress!
Tools Used

Step 3


– Gently slide the opening pick to the top right corner to cut through that pesky adhesive!
– Keep the opening pick right where it is to stop that adhesive from sealing up again.
Step 4


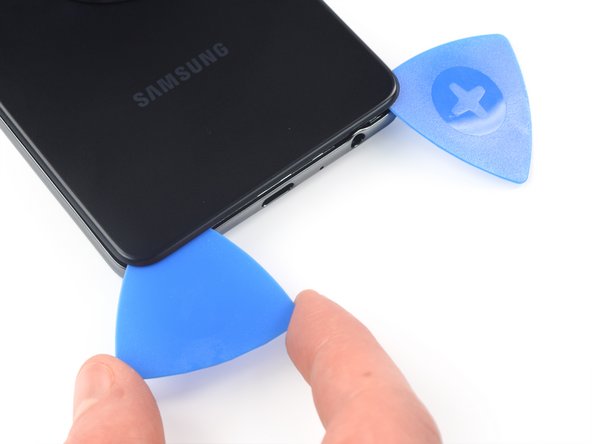
– Let’s get this party started! Slide a second opening pick under the top right edge of your phone.
– Now, gently slide the opening pick to the bottom right corner, cutting through that sticky adhesive.
– Keep that opening pick in place, so the adhesive doesn’t get all up in your business!
Step 5

If you’re finding it tricky to slice through the adhesive, it’s probably cooled off a bit. Give your iOpener some love and heat it back up!
– Pop in a third opening pick at the bottom edge of your phone for a smooth start.
– Gently glide that opening pick along the bottom edge to slice through the sticky stuff.
– Keep the opening pick nestled in the bottom left corner to make sure the adhesive doesn’t decide to rejoin the party.
Tools Used
Step 6


– Let’s get this phone open! Slide your fourth opening pick under the bottom left corner of your phone. It’s like a tiny, helpful pirate, ready to explore!
– Now, let’s cut that adhesive! Carefully slide your pick along the left edge. You got this!
– Alright, almost there! Keep that opening pick in the top left corner. You don’t want that adhesive sneaking back together, right?
Step 7


– Slide a fifth opening pick under the top left corner like a pro.
– Gently glide the pick along the top edge of the back cover to cut through the last bits of adhesive.
Step 8

– First up, let’s get that back cover off! It’s like peeling the skin off a banana – just be gentle.
– Next, grab some isopropyl alcohol (make sure it’s over 90%!) and clean the areas that need a little extra love. After that, apply some fresh adhesive where it’s needed.
– Now, it’s time to secure that shiny new back cover with some pre-cut adhesive or double-sided tape. Once it’s in place, give your phone a big hug by applying steady pressure for a few minutes. A stack of heavy books is perfect for this—who knew your books could help out with repairs?
Step 9

– Grab your trusty Phillips screwdriver and get ready to tackle those ten 4.4 mm screws holding the motherboard cover in place. You’ve got this!
Step 10

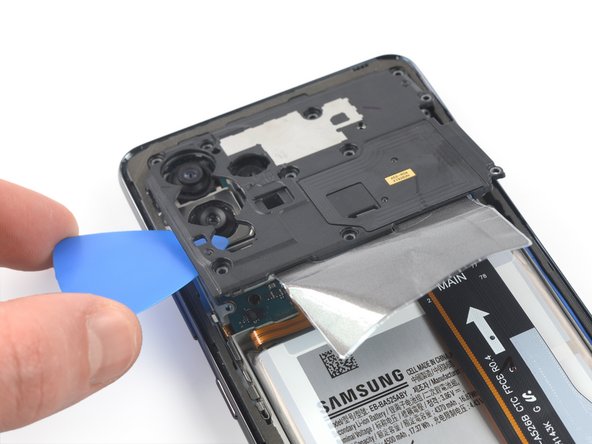

– Let’s get started by sliding an opening pick under the left edge of the motherboard cover – it’s the first step to freeing it up.
– Now, use that trusty opening pick to gently pry the motherboard cover loose.
– Almost there – remove the motherboard cover to reveal the goodies inside. If you need help, you can always schedule a repair


Step 13


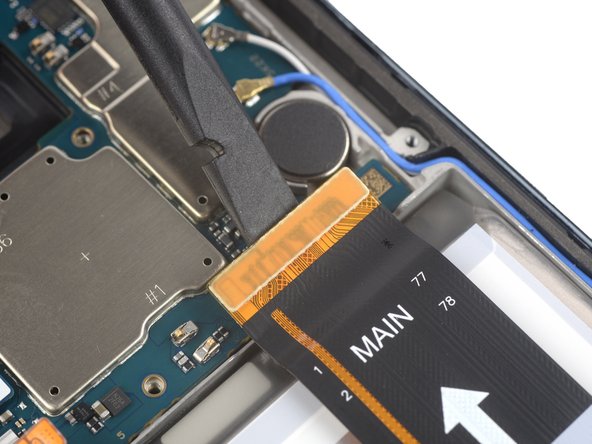
Hey, during this step, be careful not to bend the cable too sharply! We want to make sure it stays healthy and happy. If you need help, you can always schedule a repair.
Don’t let that cable go wandering! Use a little piece of tape to keep it in place on your work surface. You wouldn’t want to accidentally damage it while you’re busy with the battery, right?
– Gently bend the interconnect flex cable toward the charging port to clear the way for the battery. You’ve got this!