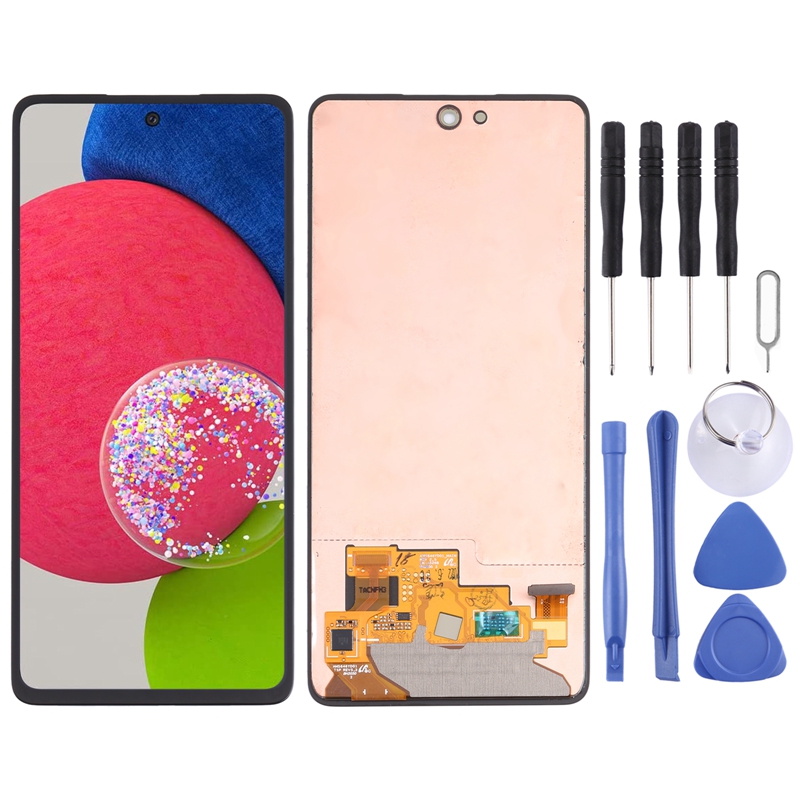
Samsung Galaxy A52 Screen Replacement Guide
Duration: 45 minutes
Steps: 22 Steps
Before you start taking things apart, make sure your device’s battery is at 25% or less – safety first! If you need help, you can always schedule a repair
Ready to tackle that cracked or shattered screen on your Galaxy A52? You’ve got this! Just a quick heads-up: if your frame is looking a bit wonky, it’s a good idea to swap it out too. This ensures your new screen fits snugly and avoids any pesky pressure-related damages. First things first—make sure to drain your battery below 25%. We want to keep things safe and sound, as a punctured battery can be a bit dramatic. But don’t worry, discharging it reduces the risk significantly! Quick note: this guide focuses on swapping out just the screen while keeping the original frame and motherboard intact. Some screens, however, come with a shiny new frame (also known as a chassis), which means a different game plan is in order. So, double-check your parts before diving in! And don’t forget, you’ll need some replacement adhesive to put everything back together. If you skip the adhesive seals during reassembly, your device will still work, but may lose its water resistance. If you need help, you can always schedule a repair.
Step 1

Feel free to use a hair dryer, heat gun, or hot plate, but remember to keep it cool! Overheating can be a bummer for your phone’s display and internal battery, which just can’t handle the heat. So, let’s keep things chill! If you need help, you can always schedule a repair.
– Grab your trusty iOpener and let it work its magic on the back cover for at least two minutes. This will help loosen the adhesive lurking underneath, making your repair journey a whole lot easier!


Step 2


If the back cover is looking a bit worse for wear, your suction handle might struggle to stick. No worries! Just grab some strong tape to give it a lift, or if you’re feeling crafty, use a bit of superglue to secure that suction handle and let it set so you can move on with the repair.
Having a tough time making a gap? Just crank up the heat a little more to soften that adhesive further. Remember to follow the iOpener instructions to keep things cool and avoid overheating.
– Grab a suction handle and give it a cozy spot on the right edge of the back cover, right up against the edge if you can manage it.
– With a gentle tug on the suction handle, lift the back cover just enough to make a tiny gap between it and the frame.
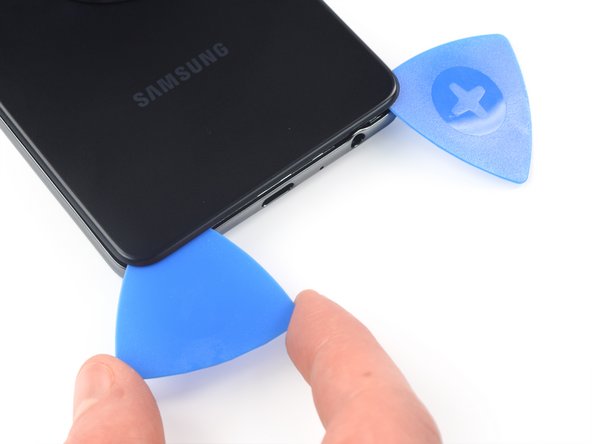
– Now, slide an opening pick into that little gap you just created.
Tools Used

Step 3


– Slide the opening pick to the top right corner and give that adhesive a good slice!
– Keep that opening pick in place, don’t let that adhesive sneak back together.
Step 4


– Slide a second opening pick under the top right edge of your phone, just like tucking in a cozy blanket.
– Gently glide the opening pick down to the bottom right corner to cut through that sticky adhesive like a pro.
– Keep the opening pick in place to stop the adhesive from making a comeback. You’ve got this!
Step 5

If that sticky stuff gets stubborn, it’s probably just feeling a little chilly. Just give it a little heat with your trusty iOpener and it’ll be back to its gooey self in no time!
– Time to get that opening pick in action! Insert a third opening pick at the bottom edge of your phone.
– Slide that opening pick along the bottom edge, slicing through that adhesive like a hot knife through butter.
– Leave the opening pick chilling in the bottom left corner, preventing the adhesive from getting cozy and resealing. We don’t want that, right?
Tools Used
Step 6


– Slide a fourth opening pick right under that bottom left corner of your phone. You’ve got this!
– Gently glide the opening pick along the left edge to cut through the sticky adhesive. Easy peasy!
– Keep that opening pick snug in the top left corner to stop the adhesive from sealing back up. We’re almost there!
Step 7


– Now it’s time to add a fifth opening pick under the top left corner – nice and easy.
– Gently slide the opening pick along the top edge of the back cover to cut through the remaining adhesive. If you need help, you can always schedule a repair
Step 8

– Start by gently removing the back cover. You’ve got this!
– Next, grab some isopropyl alcohol (>90%) and clean the areas where you’ll be applying new adhesive. A fresh start is always a good idea!
– Now, it’s time to secure that new back cover! Use some pre-cut adhesive or a bit of double-sided tape. Once it’s in place, give your phone a loving squeeze for a few minutes to help the adhesive stick like your favorite playlist. A stack of heavy books works wonders for this!
Step 9

– Grab your trusty Phillips screwdriver and get ready to tackle that motherboard cover! Unscrew those ten 4.4 mm-long screws and let’s uncover what’s inside. You’ve got this!
Step 10

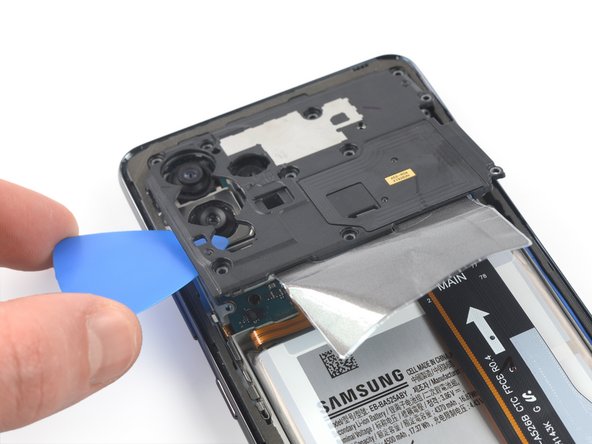

– Slide an opening pick under the left edge of the motherboard cover – it’s like giving it a little tickle!
– Gently pry up the motherboard cover with the pick. Don’t worry, it’s just like opening a treasure chest.
– Now you can remove the motherboard cover – you’re on your way to fixing things up!


Step 12


– Use the flat end of a spudger to gently disconnect the right connector of the interconnect cable from the daughterboard. No worries, it’s like unplugging a tiny cable!
– Carefully bend the cable to the top of the phone, getting ready to tackle that screen connector socket. You’re doing great!
Tools Used
Step 13


– Time to get started – carefully slide an opening pick under the screen connector to loosen it up.
– Now, gently pry up the screen connector – you’re making great progress! If you need help, you can always schedule a repair

Step 15


If your screen looks like it just survived a battle, slapping on a layer of clear packing tape could help the suction handle stick. If you’re feeling adventurous, you can opt for super strong tape instead of the suction handle. And if you’re really in a bind, a little superglue can work wonders to attach that suction handle to your screen. Remember, if you need help, you can always schedule a repair.
– Get a grip on that screen by attaching a suction handle to the right edge – it’s go time!
– Lift the screen gently with the suction handle to create a small gap between the screen and the frame. You’re making progress!
– Now it’s time to bring in the opening pick – insert it into the gap between the midframe and the screen. Easy does it!
– Slide the opening pick up to the top right corner to slice through the adhesive. You’re almost there!
– Leave the opening pick in place to keep the adhesive from resealing. If you need help, you can always schedule a repair
Tools Used
Step 16


– Slide a second opening pick beneath the top right corner and gently glide it down the right edge to the bottom right corner. This will help separate the adhesive like a champ!
– Keep that opening pick right where it is to stop the adhesive from making a comeback.
Step 17


– Now it’s time to create a third opening – gently insert it underneath the bottom right corner.
– Next, carefully slide the opening pick all the way to the bottom left corner.
– Leave that opening pick right where it is, so the adhesive doesn’t start to reseal – you’re making great progress! If you need help, you can always schedule a repair
Step 18


– Slide a fourth opening pick under the bottom left corner and glide it along the left edge of your phone all the way to the top left corner. Nice and smooth!
– Keep that opening pick right where it is to stop the adhesive from getting all clingy again.
Step 19


When you’re getting cozy with the front-facing camera, just slide in the tip of your opening pick (about 3 to 4 mm) gently. We want to keep that camera safe and sound, so let’s avoid any damage or smudges!
– Slide a fifth opening pick under the top left corner and gently glide it along the top edge to slice through that adhesive like a pro!
Step 20


– Warm up that iOpener and give your screen a little love! This will help loosen up the adhesive that’s holding it down.
– Before we dive into the next step, let’s take a moment to appreciate the rectangular-shaped adhesive hanging out under your screen. It’s about to get a makeover!
Tools Used
Step 21


– Time to get started. Insert a plastic card into the gap between the display and phone assembly on the right edge – it’s like a little puzzle piece.
– Now, gently press the card in and slide it back and forth. Keep going until you’ve cut through the adhesive all the way across.
– Once you’ve broken through the adhesive, you can remove the four opening picks from the corners. If you need help, you can always schedule a repair
Step 22


– Let’s get started by carefully threading the screen cable through the frame – take your time, it’s a delicate process.
– Next, remove the screen – it’s time to get a closer look.
– Now, apply new adhesive where it’s necessary, but first, give the relevant areas a good clean with isopropyl alcohol (>90%). This will ensure a strong bond.
– During reassembly, if you need a little extra guidance, follow this guide, especially if you’re using a pre-cut adhesive card. And remember, if you need help along the way, you can always schedule a repair with the experts at Salvation Repair.