Samsung Galaxy A70 Battery Replacement Step-by-Step Guide
Duration: About 90 minutes of fun and repair magic!
Steps: 12 Steps
Ready to breathe new life into your Galaxy A70? It’s time for a battery swap! Follow our step-by-step photo guide to make this process a breeze. We’ll be using an original battery for the Galaxy A70, so you’re all set for a smooth repair. Good luck! If our guide helps you out, we’d love to see your positive review. And remember, if you need a hand, schedule a repair with us!
Step 1
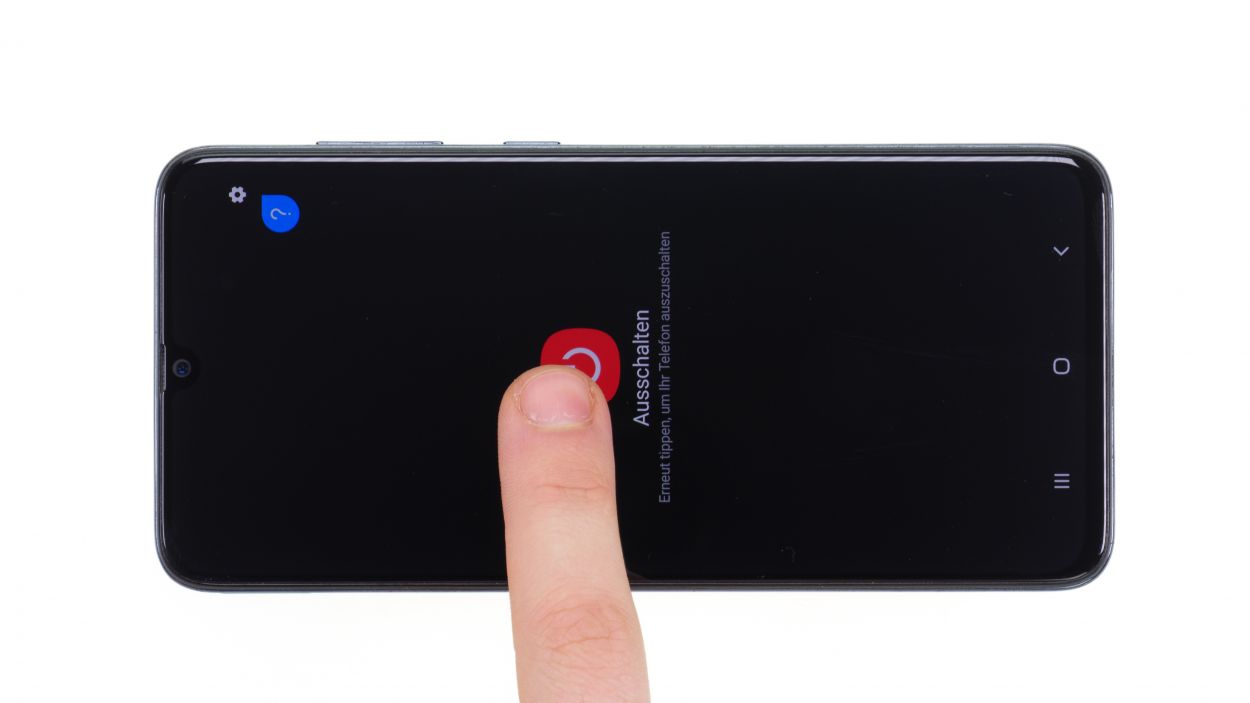
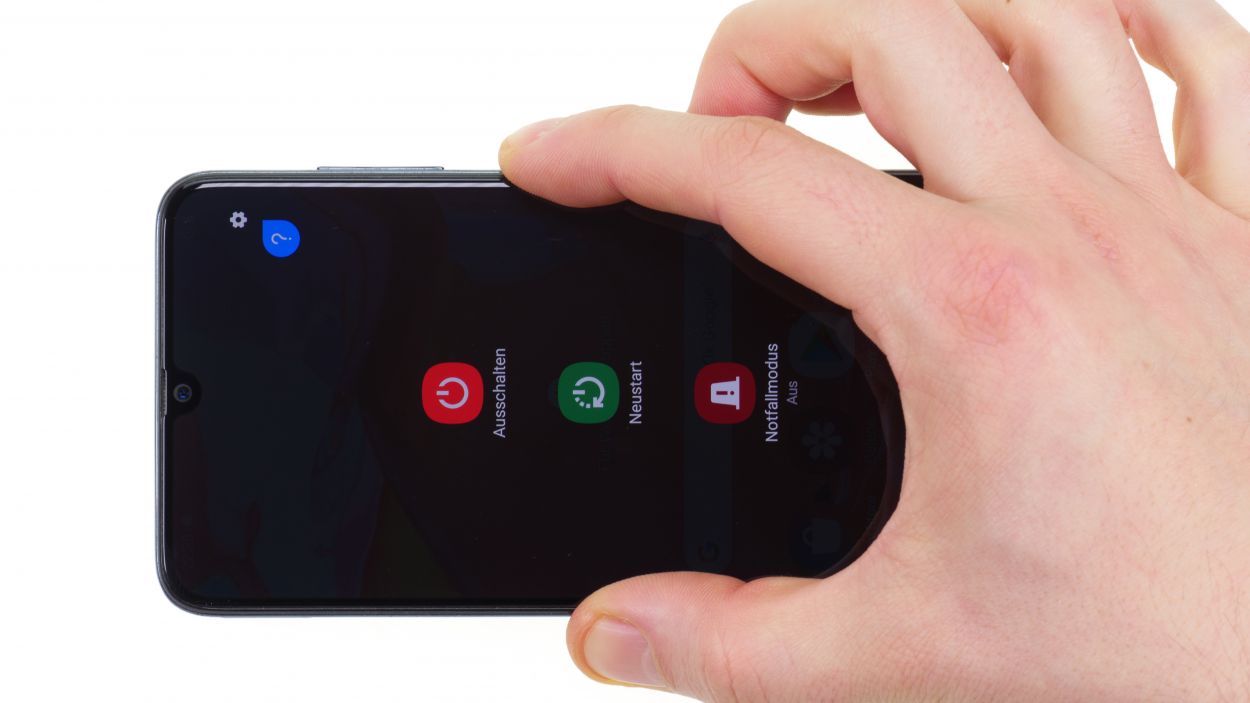
– Power down your Galaxy A70 by holding down the power button for a few seconds. It’s like giving it a little nap before the big battery refresh!
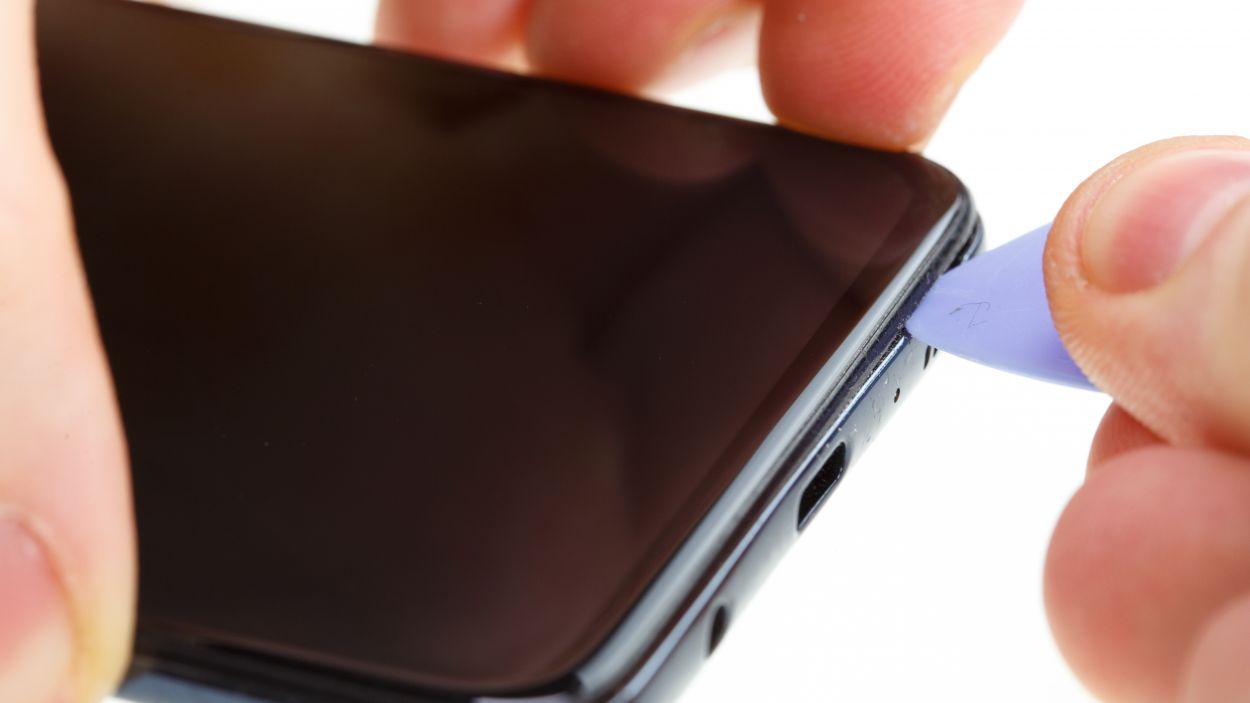
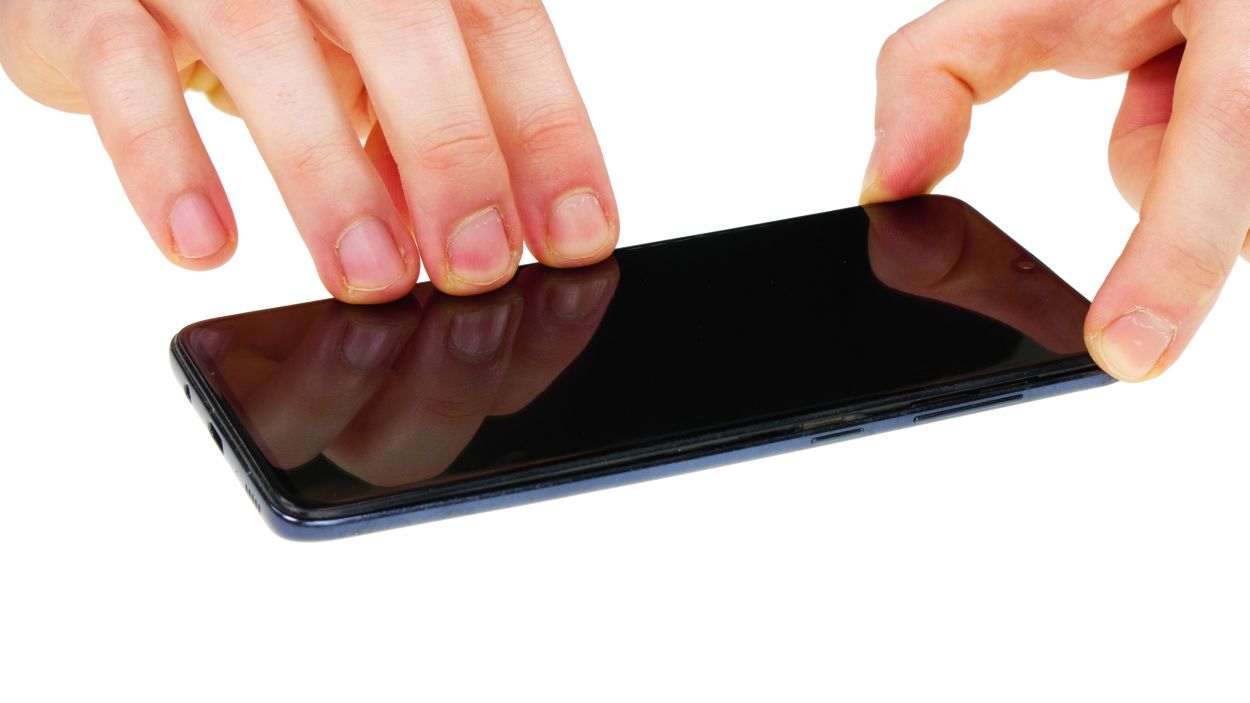
Step 2
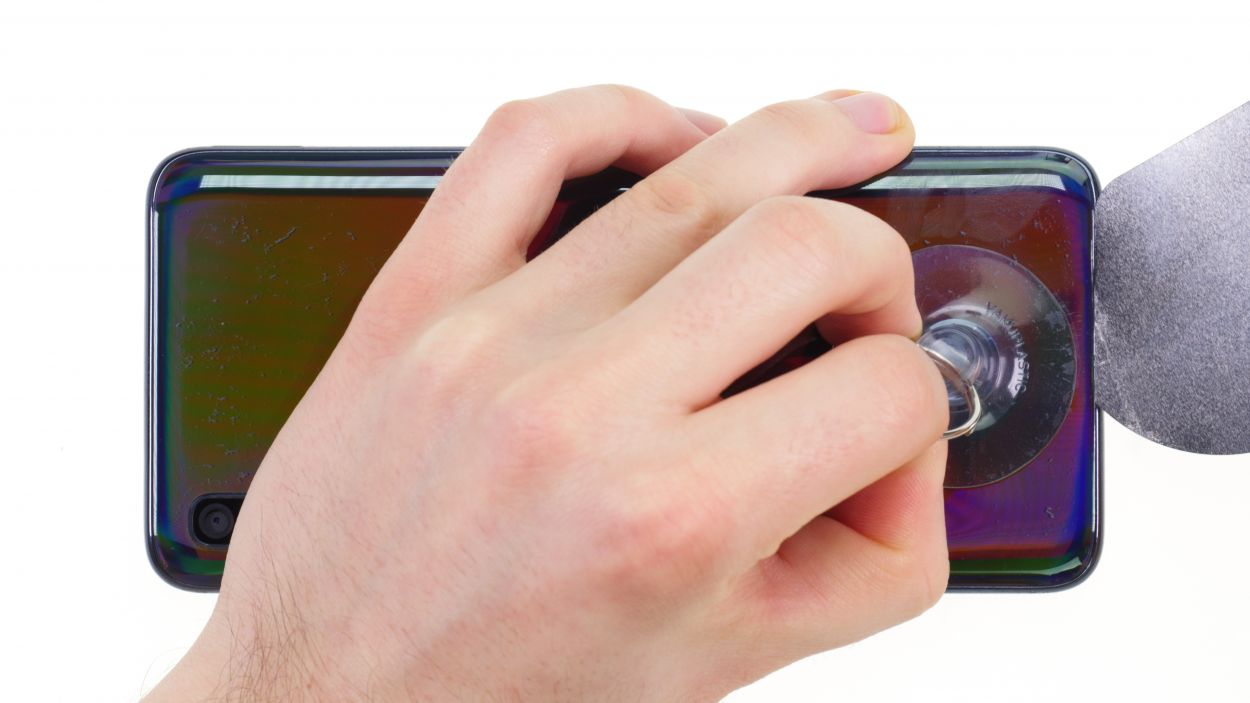

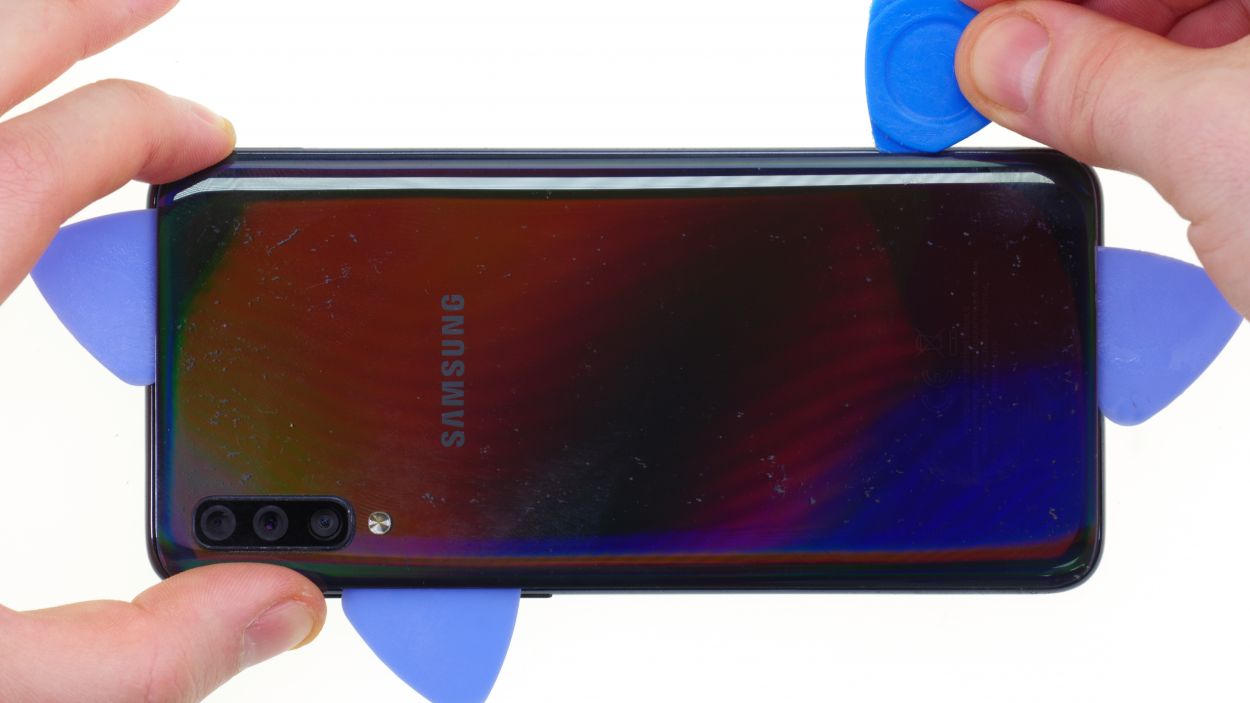
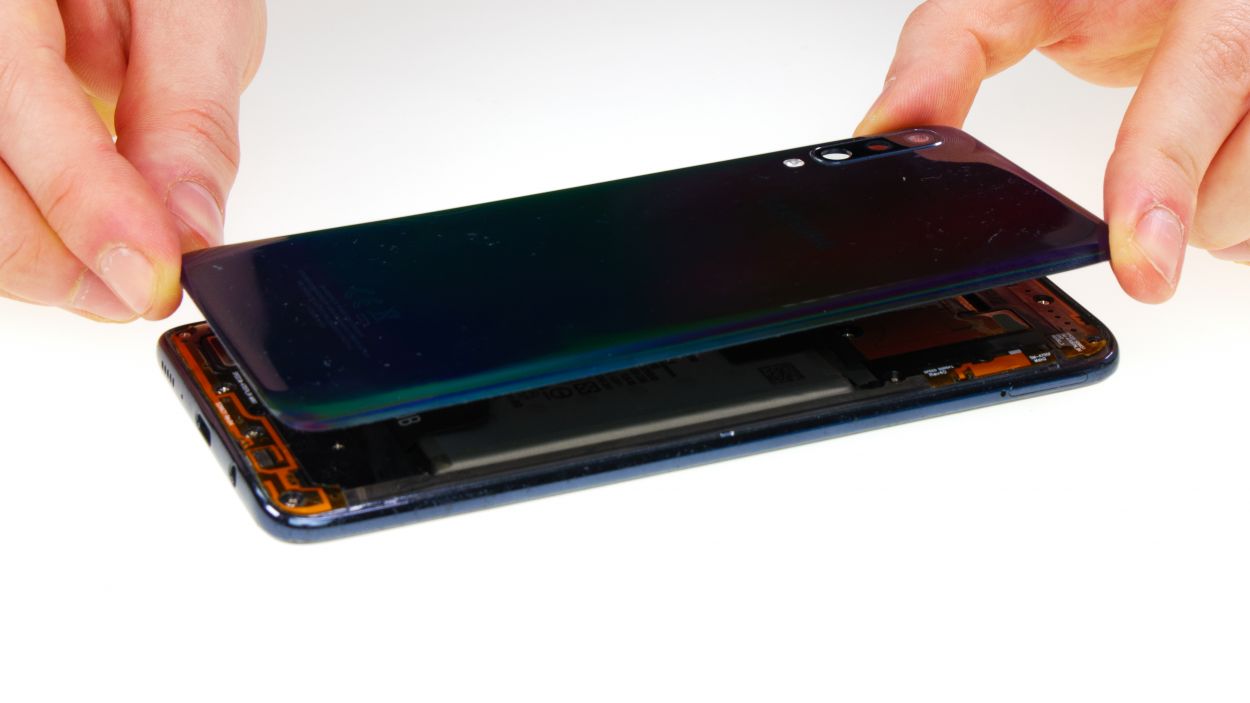

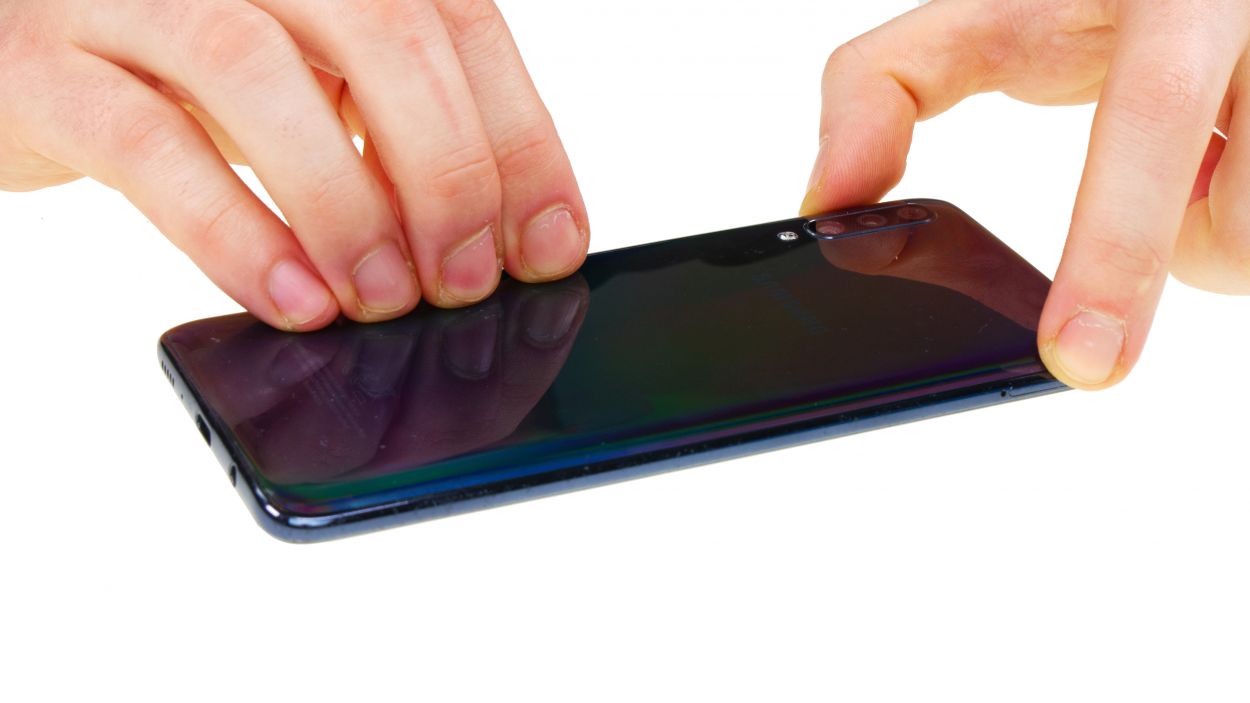
– Once you’ve warmed up the edge of your device, grab a suction cup and stick it on the lower part of the back cover. Gently pull it upwards to create a little gap between the back cover and the center frame. While you’re doing that, slide a sturdy, flat tool into the gap. We suggest using the iFlex or the iPlastix for this task.
Remember, keep your tool at a safe distance while diving into your device—too deep and you might bump into some sensitive components and flex cables! Stay safe and repair smart!
The iFlex is crafted from metal, so it comes with a sharp edge—handle with care! On the flip side, the iPlastix is made from flexible plastic, giving it a gentler touch. To keep your device looking sharp (pun intended!), we suggest kicking things off with the iFlex for this step and switching to the iPlastix as soon as you can. Happy repairing!
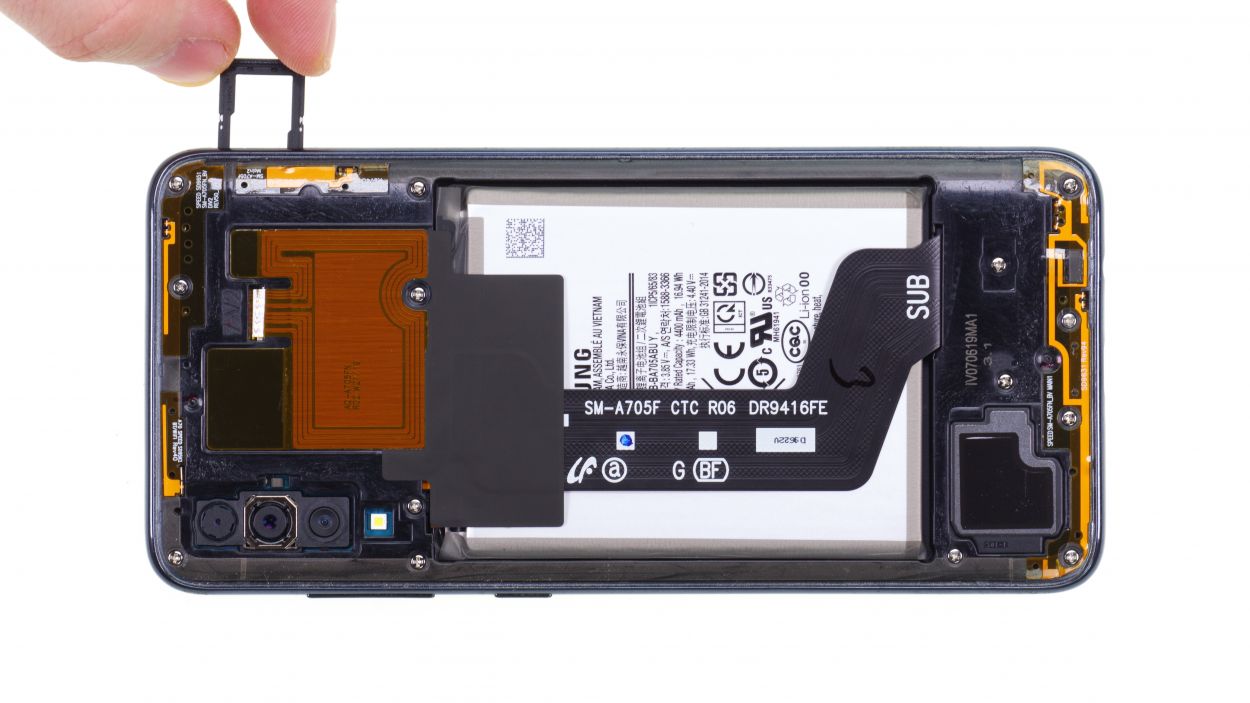
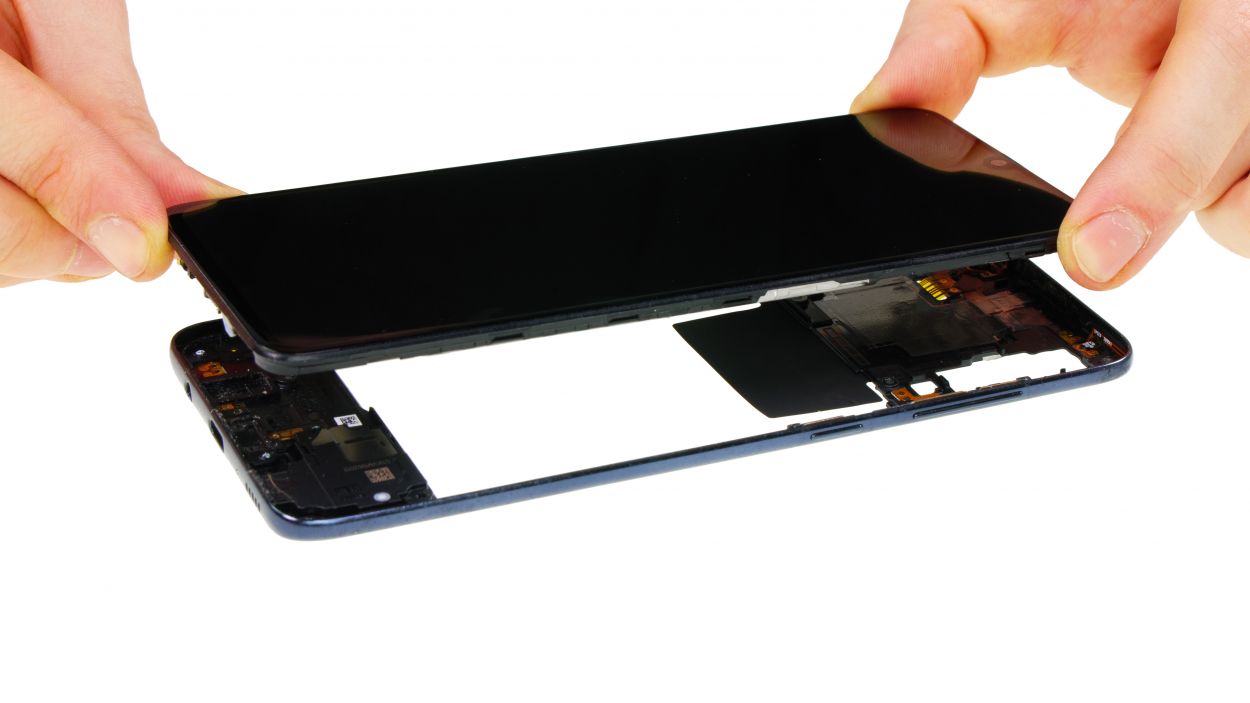
Step 3
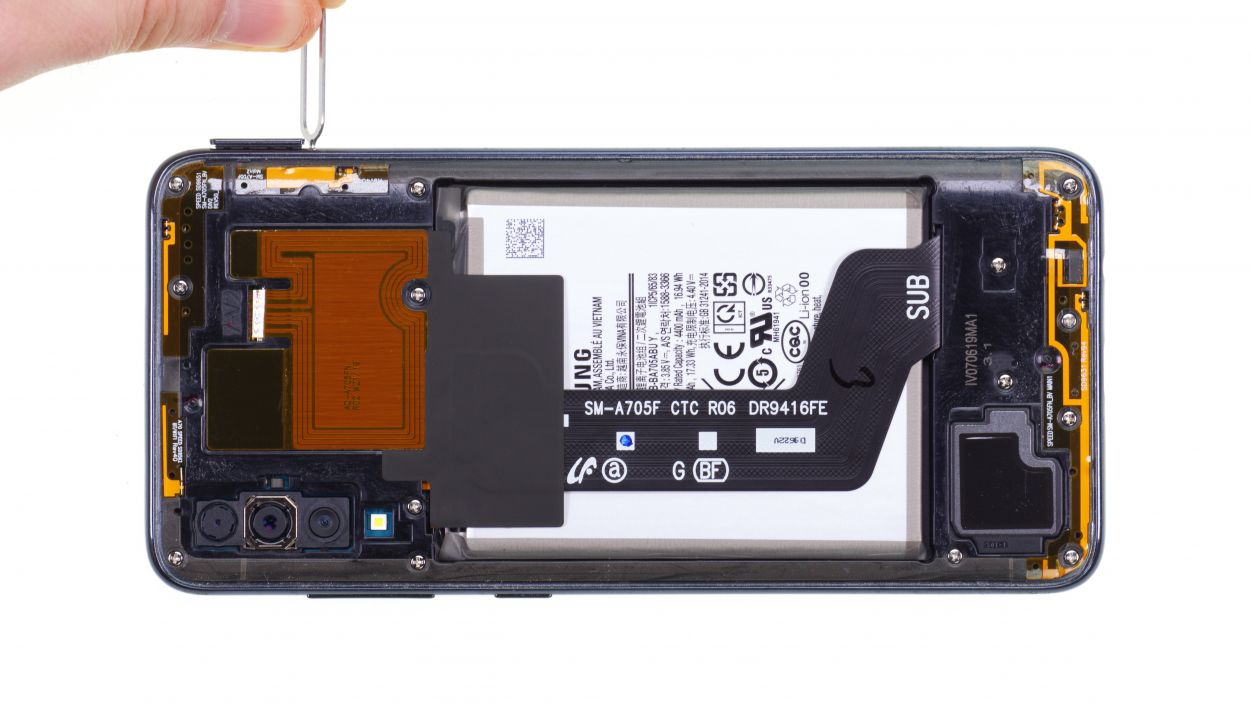
14 × 4.0 mm Phillips
– To get that middle frame off, start by popping out the SIM card holder—grab your trusty SIM tool or any pointy object you have handy!
– Next up, loosen those screws holding the middle frame snugly against the display.
– Now, let’s create a little wiggle room! Use a plectrum to gently pry apart the display from the middle frame.
– Go around the edge of the display with your tool to fully release the middle frame. You’ve got this!
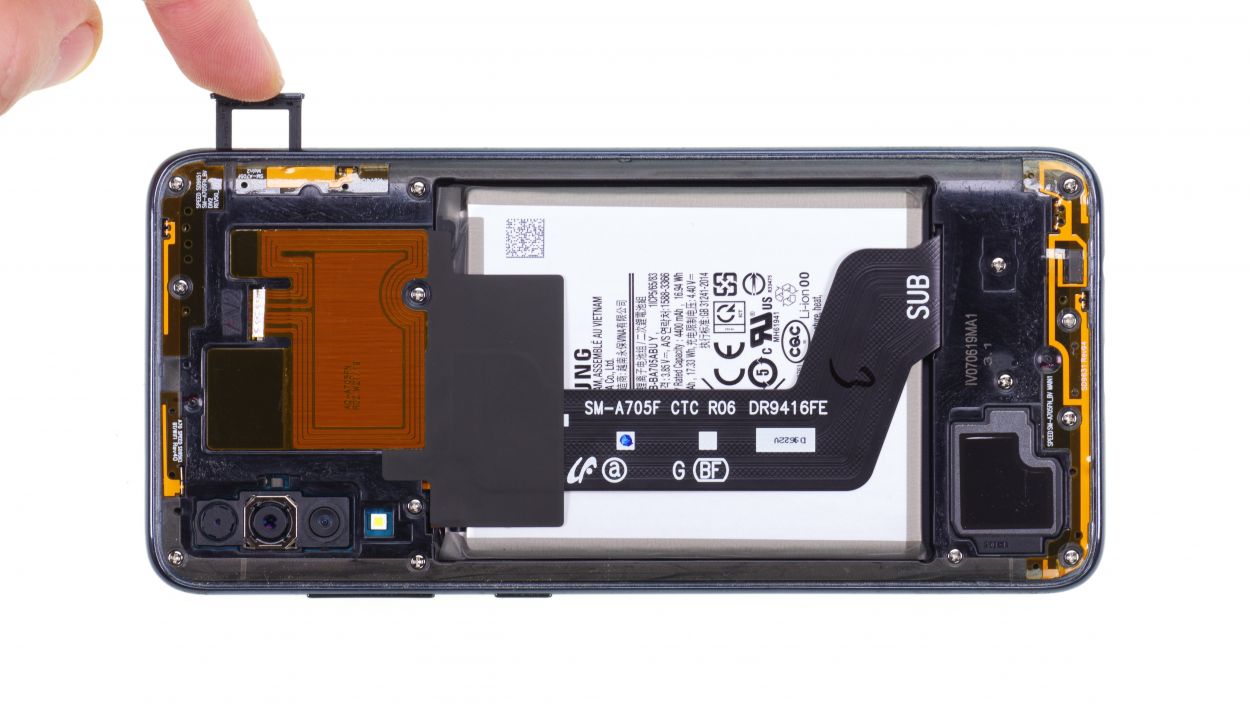
Step 4
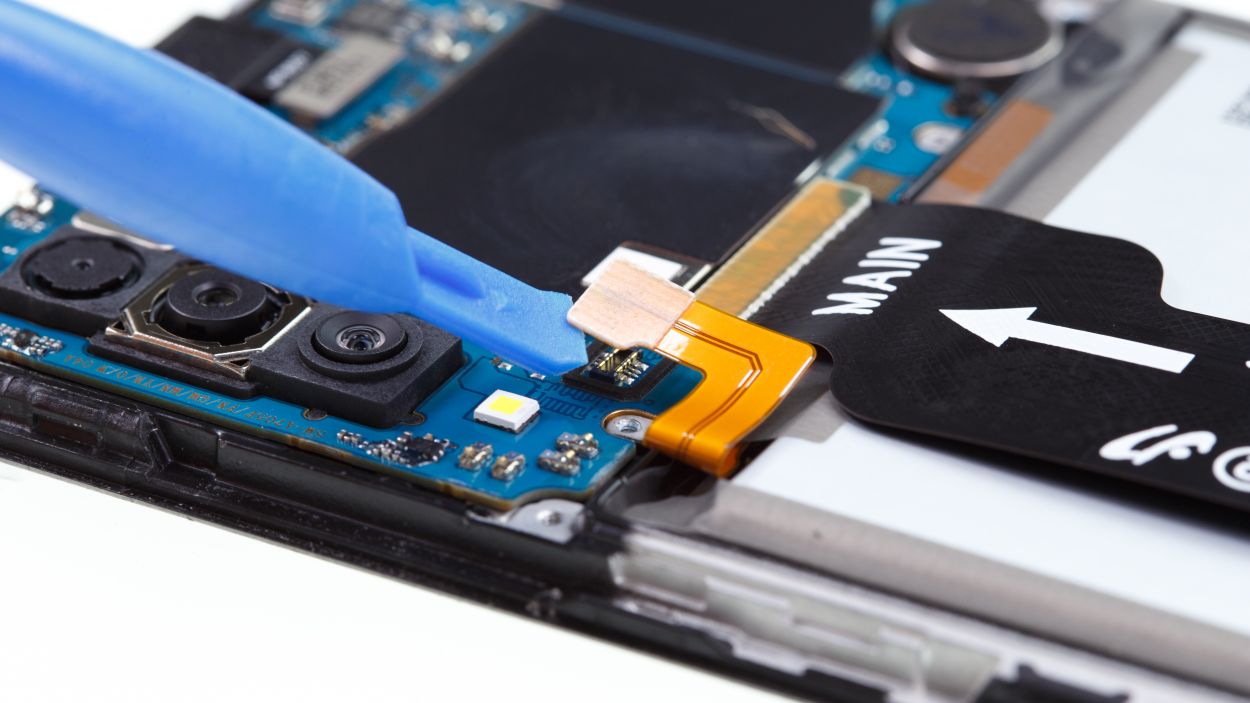
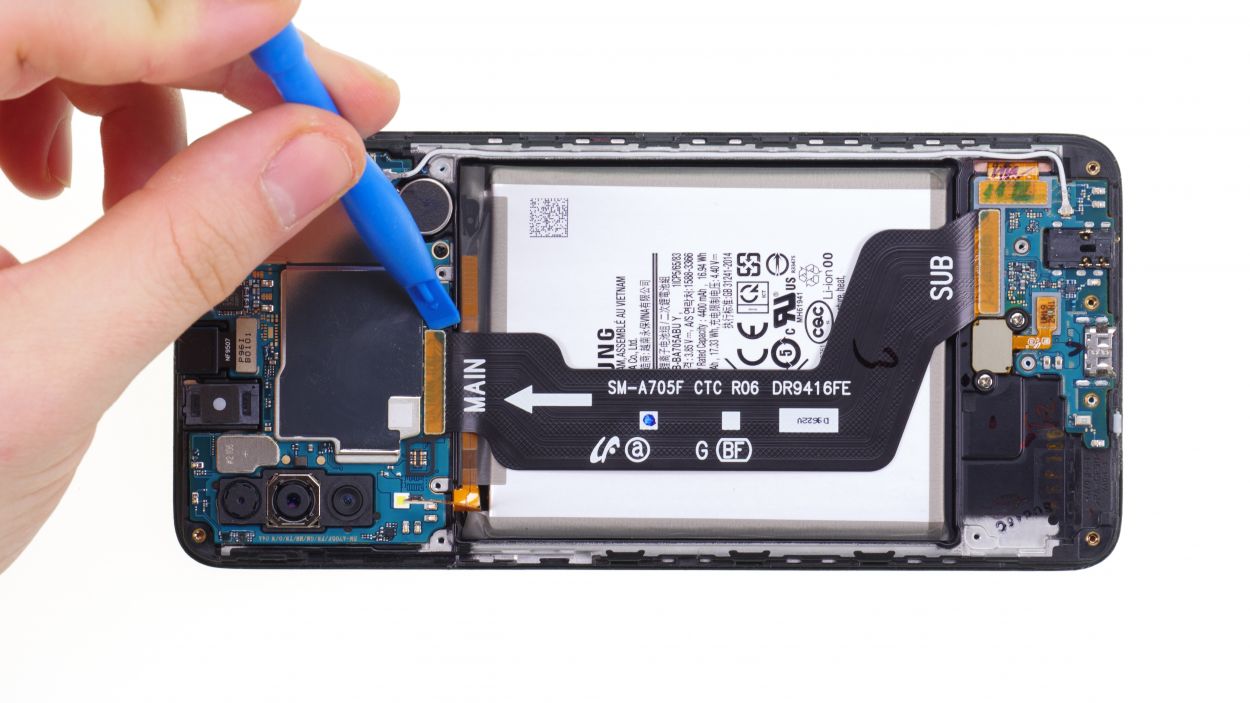
When you’re working on that connector, remember to stick to the side without all those tiny components hanging around. This way, you can keep everything safe and sound!
– To keep things safe and sound during your repair journey, disconnect that battery connector! Just slide a plastic spudger underneath it and gently lift it off. Easy peasy, right?
Tools Used
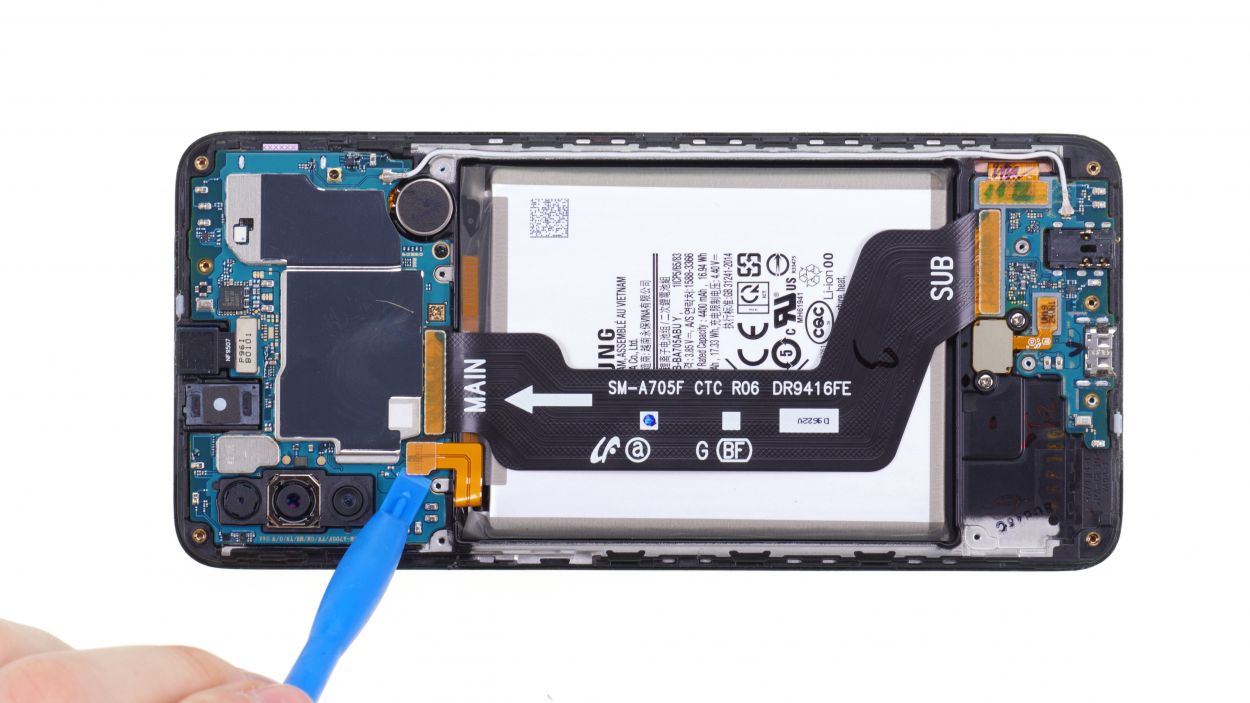
Step 5
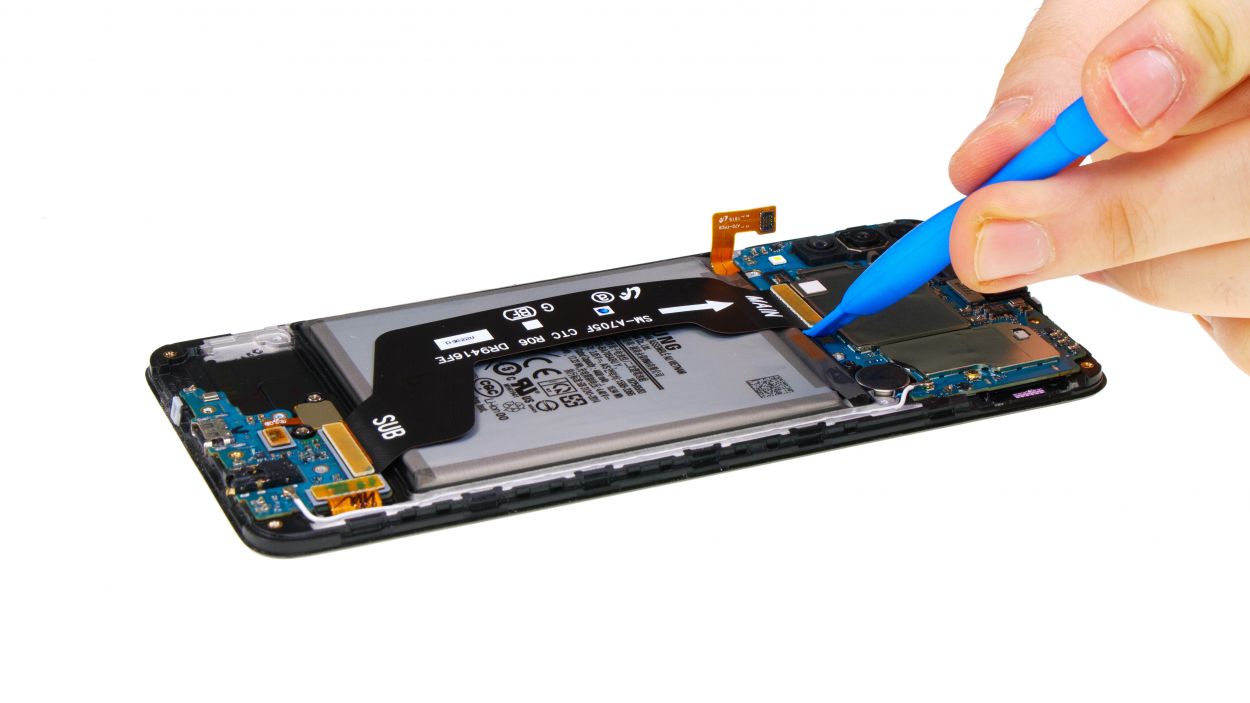

– Grab your trusty plastic spudger to loosen that flex cable connecting the mainboard to the USB board. It’s your new best friend for this task!
– Carefully slide it under the two connectors of the flex cable and give them a gentle lift-off. Once you’ve done that, just set the loosened flex cable aside and you’re all set!
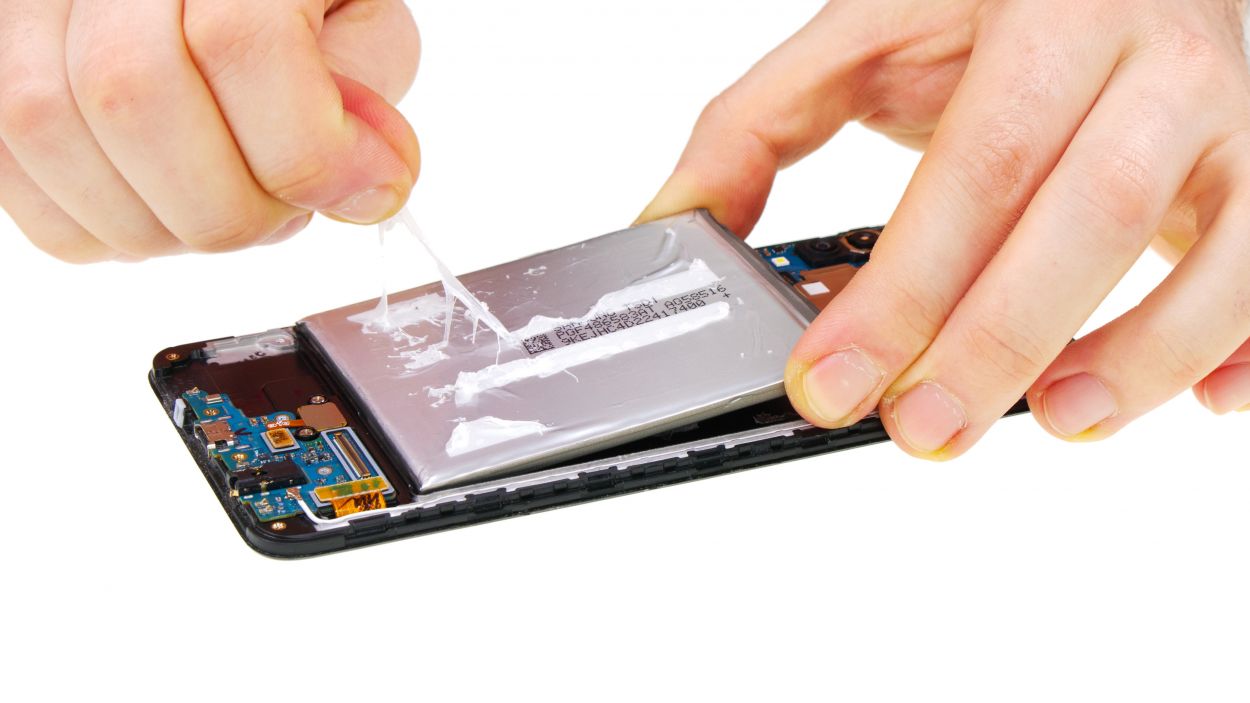
Step 6

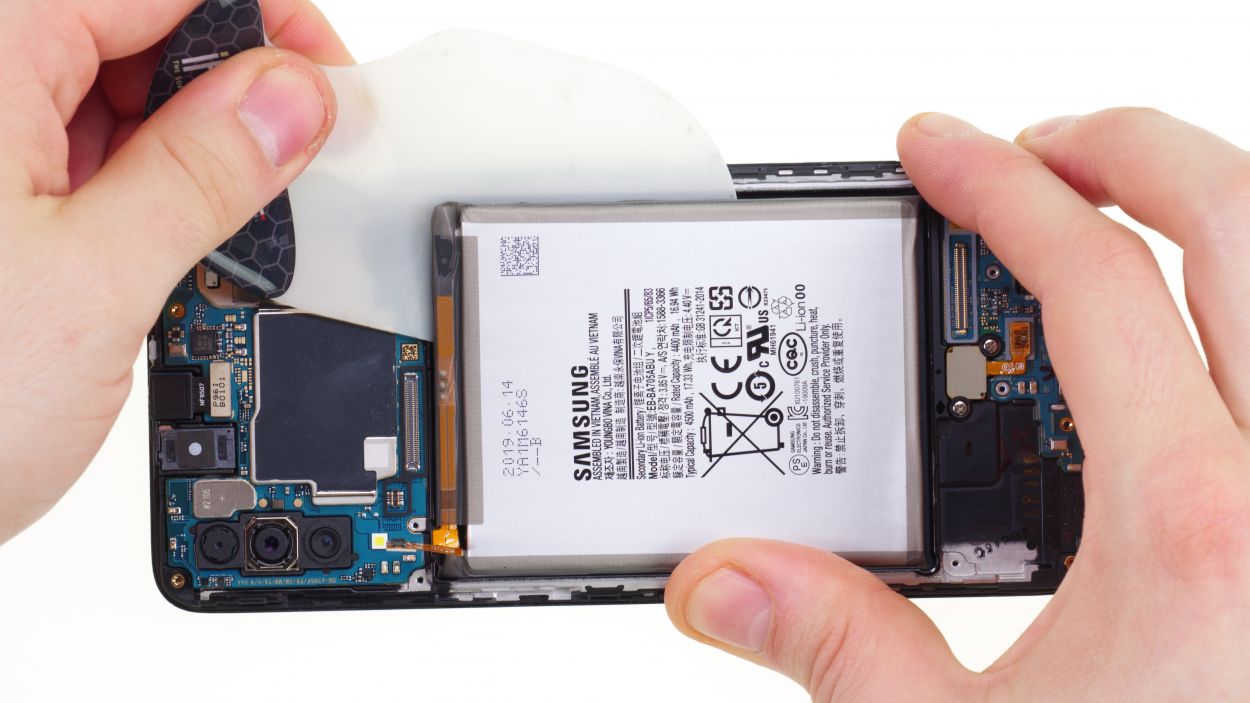

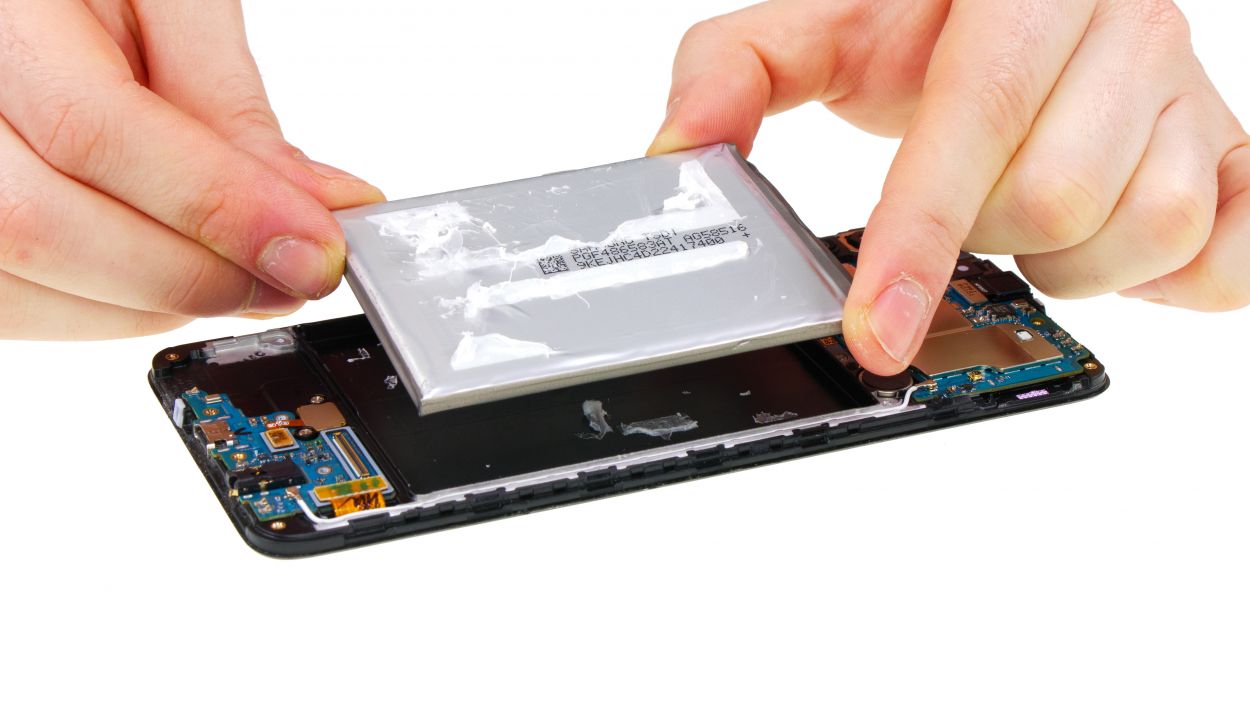
– First, give that glued battery a little warmth from the display side using a hot air dryer. It’ll make the removal process a whole lot smoother!
– Next, grab your battery spudger and place it on the bottom edge of the battery. Gently lever it upwards to start loosening it up.
– As soon as you feel that battery giving in a bit, switch to the iPlastix. This nifty tool will help you slide underneath the battery and break that pesky glue’s hold.
Tools Used
Step 7
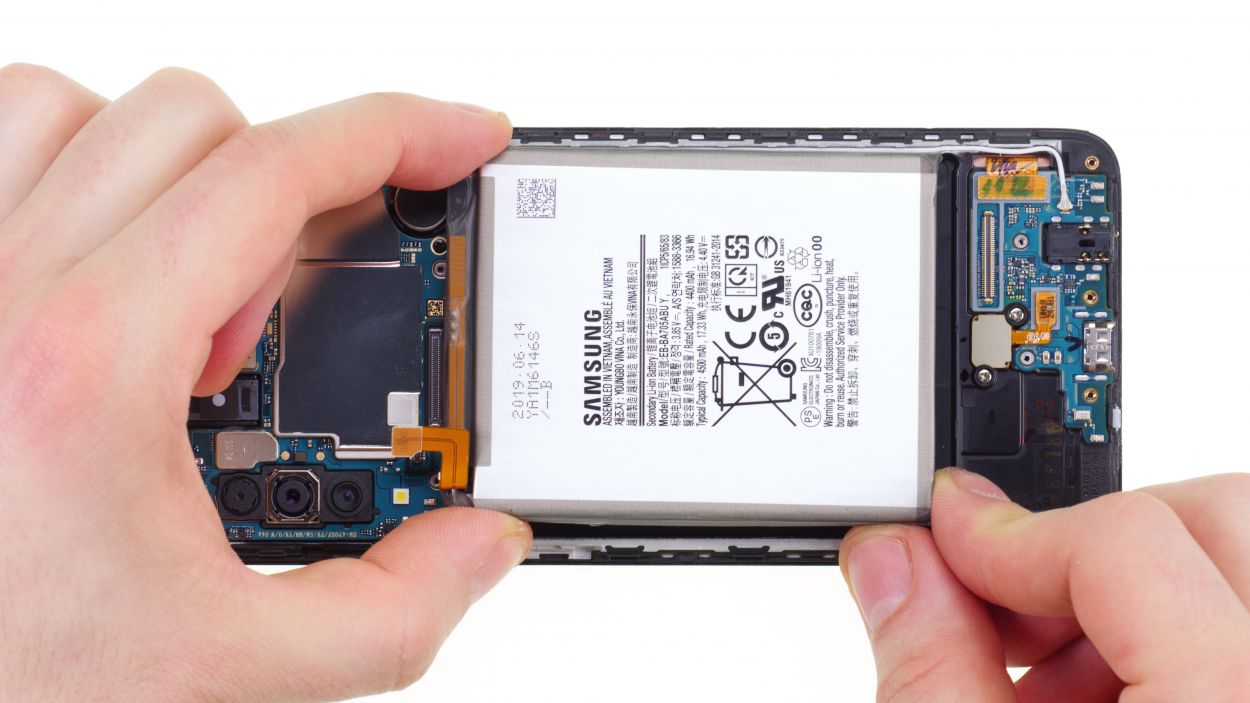
Ensure there’s plenty of wiggle room for the battery all around—no squishing allowed! Keep it comfy in its new home.
Step 8
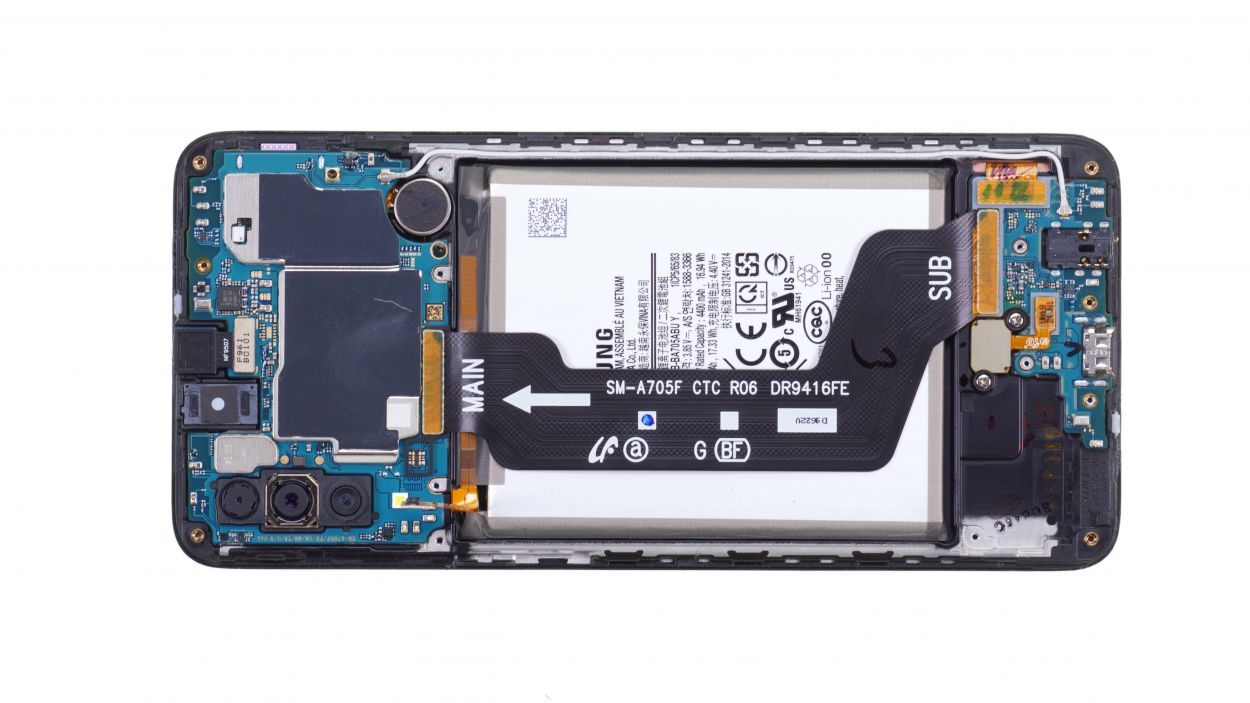
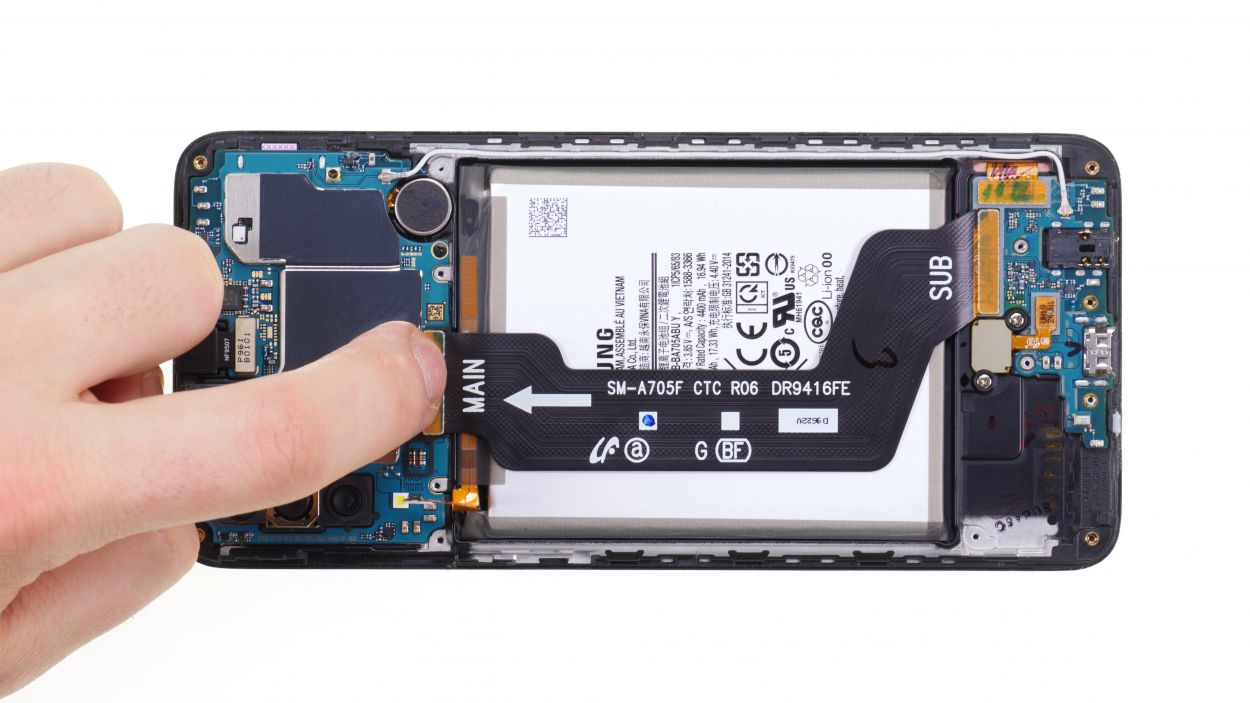
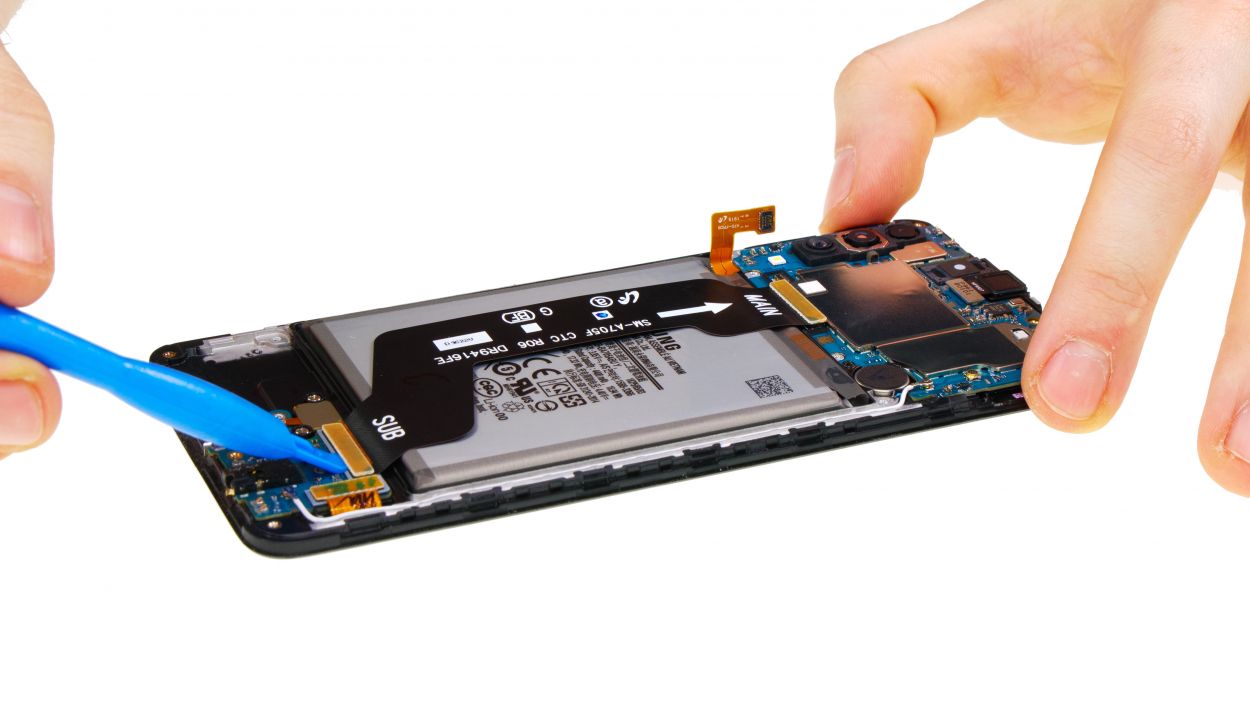
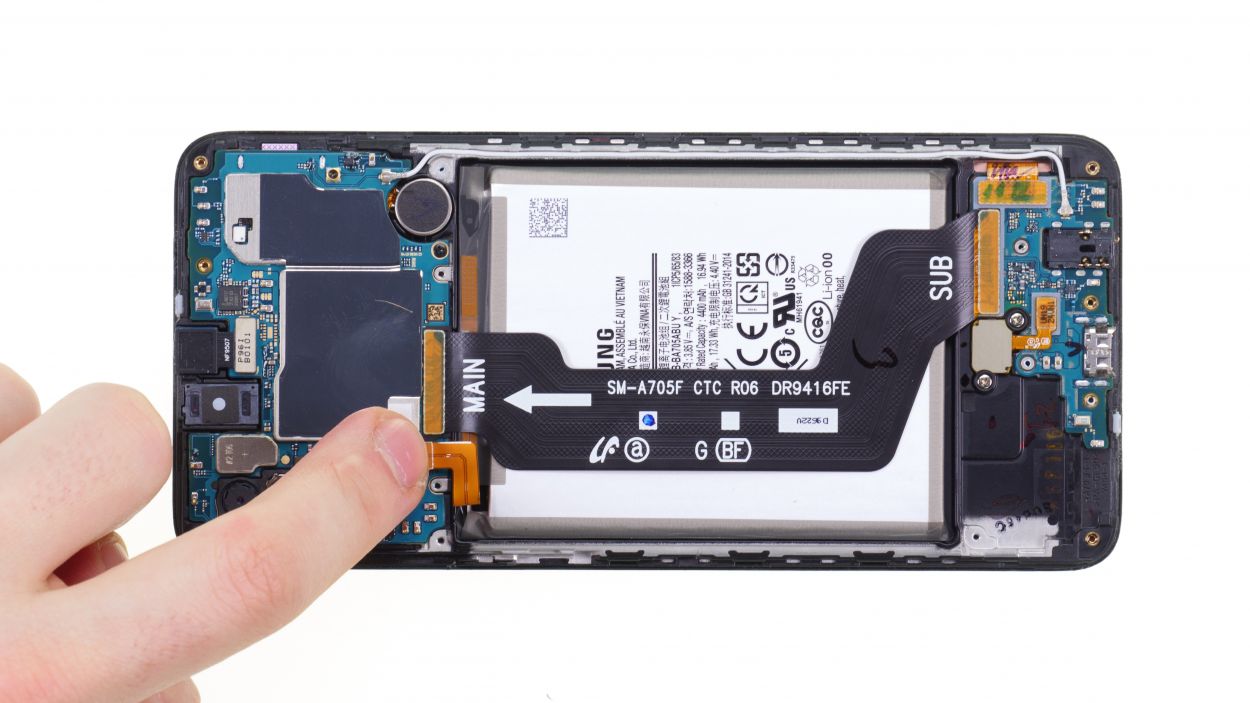
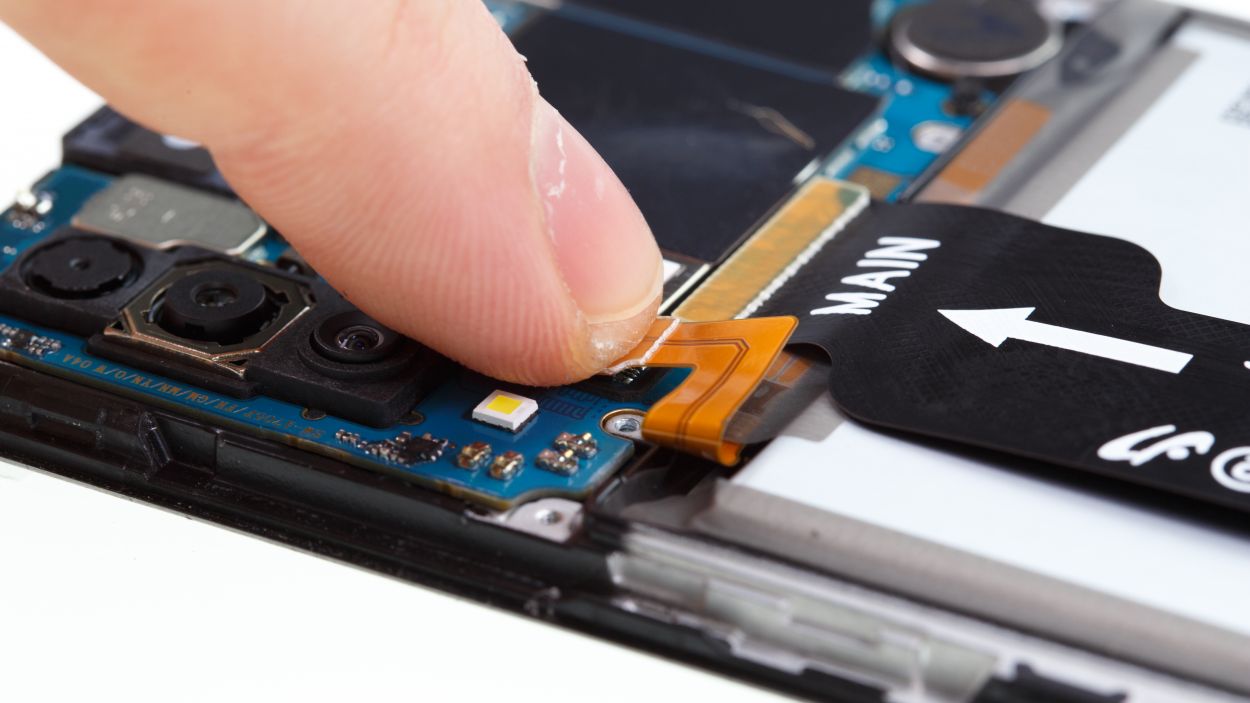
Keep your eyes peeled for those flex cable labels! Make sure the “Main” label is snugly connected to the side of the main board. You’ve got this!
– Gently press the flex cable onto its two connectors on the main board and USB board until you hear that satisfying click. It’s like giving them a little handshake—just make sure they’re snug and ready to go!

Step 10
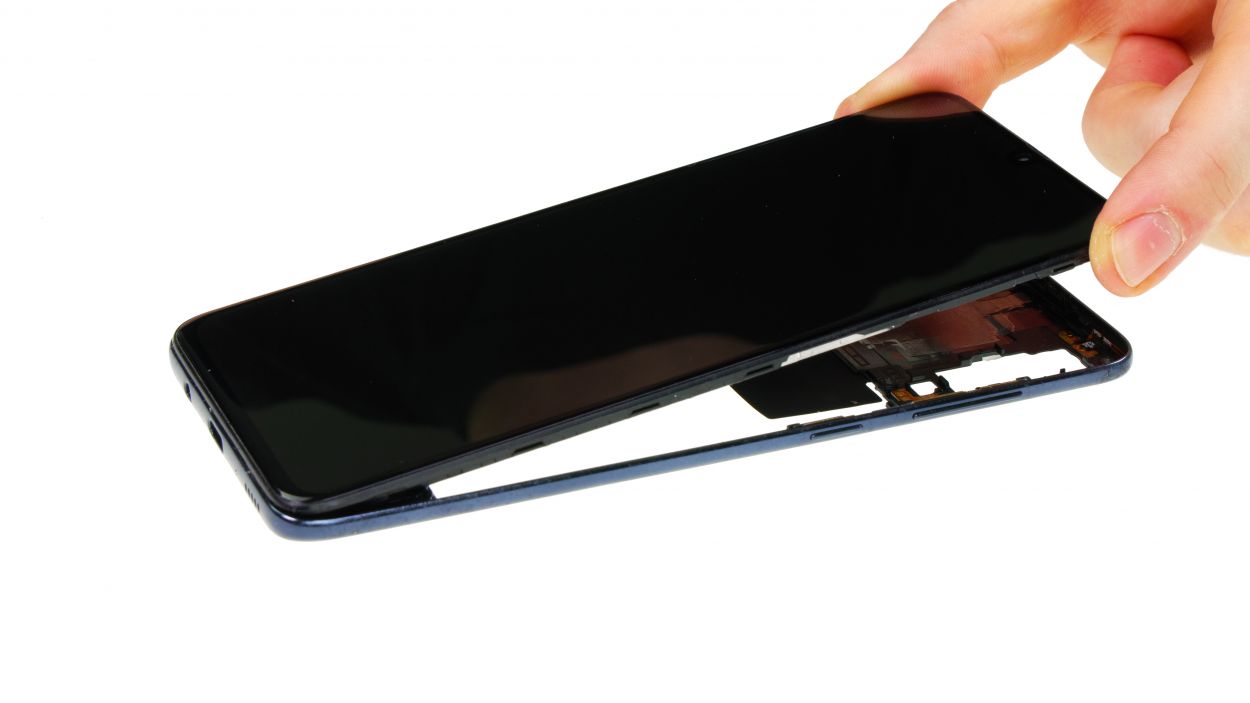
Be sure to line up that display just right! Keep an eye on those openings like the camera and speakers to guide you along the way.
Step 11
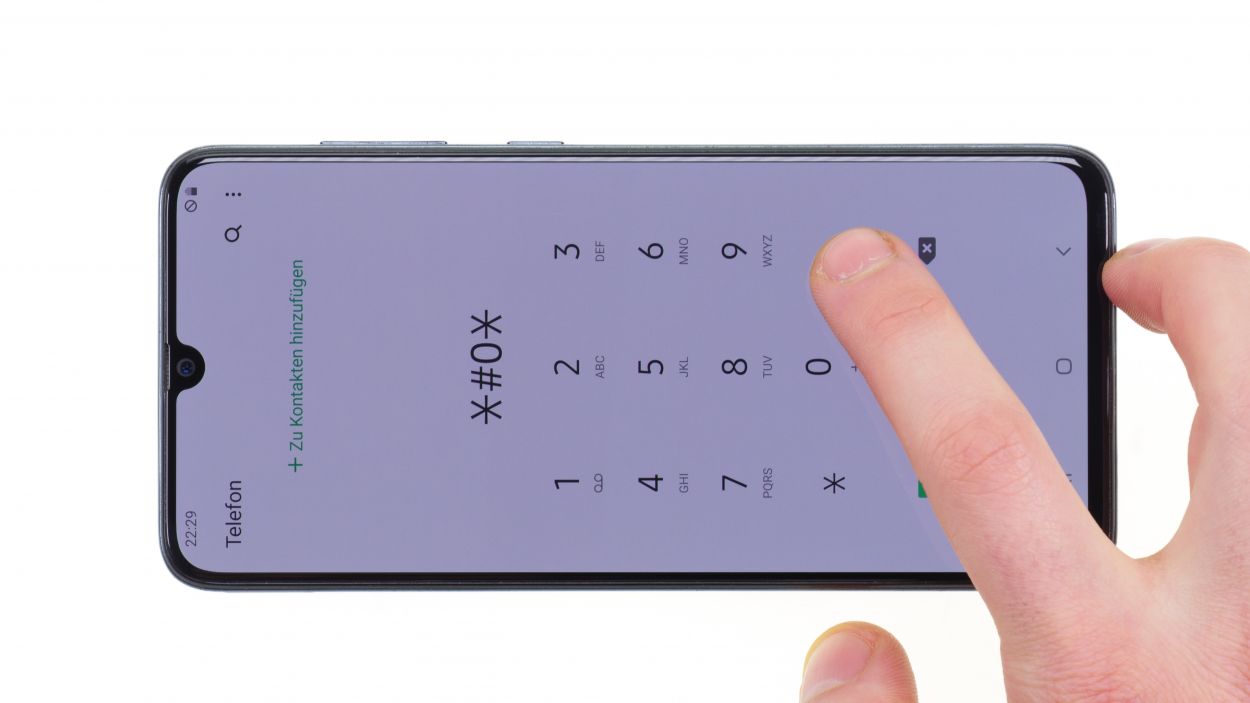
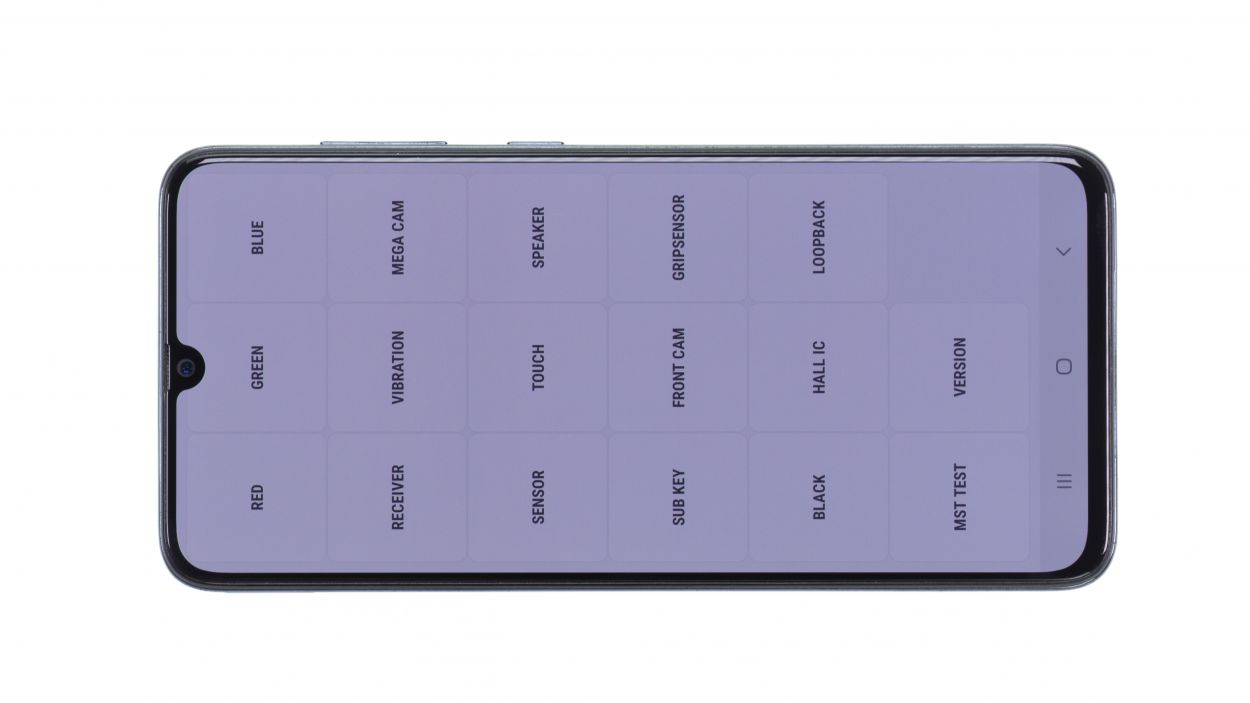
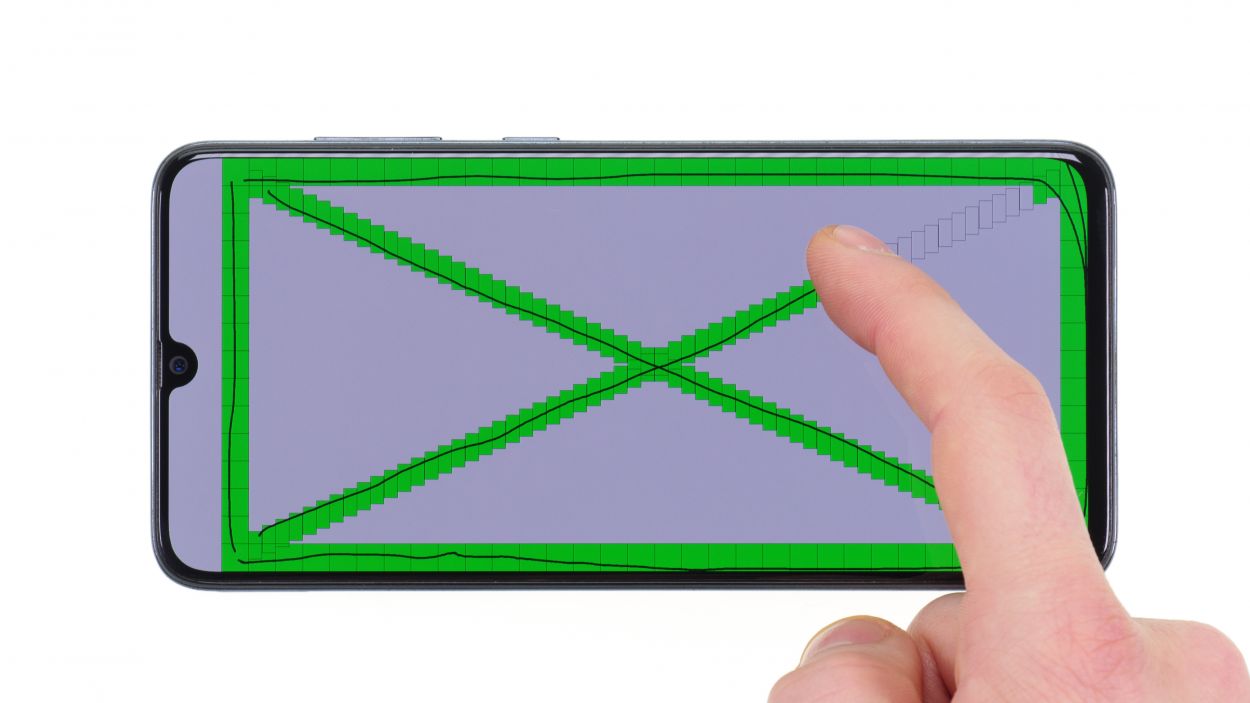
– Before you seal up your Samsung Galaxy A70, give that new display a quick test drive to ensure everything’s working like a charm!
– Fire up your phone and launch the call app. Type in *#0*# in the number field to access the Samsung test menu.
– Make sure to check that colors pop as they should and that the touch sensitivity is spot on across the entire display. Don’t forget to test out all the other fun features too, like the speakers and vibration motor!
– If everything’s looking good and working as it should, go ahead and lock it up!
Step 12
– Pop that back cover back on and give it a gentle press along the edge to help that adhesive frame stick like it means it!
– Now, warm up the edge of the back cover once more with some hot air, then grab a few books to weigh it down. This will help the glue spread out nicely all around!