Samsung Galaxy Attain 4G Repair Guide: Step-by-Step Replacement
Duration: 45 minutes
Steps: 13 Steps
Step 1

– Start off by flipping the device over so that its back is facing you, with the screen resting down like it’s ready for a cozy nap.
Step 2


Step 4

– When swapping out the battery, just remember to position it so the arrow at the bottom points downwards. If you need help, you can always schedule a repair
Step 5

– Let’s get started by removing the 6 Phillips head screws that hold the rear housing in place. Take your time and make sure they’re all out before moving on to the next step. If you need help, you can always schedule a repair
Step 6

– Alright, time to give that phone a little love! Grab your spudger or a plastic pry tool and gently work your way around the phone, between the display and the rear housing. You’ll be releasing those clips, one by one. Take your time, and don’t be afraid to go slow. If you need help, you can always schedule a repair
Tools Used


Step 8

– Now, it’s time to give that headphone jack flex cable a little break! Grab your trusty spudger or plastic pry tool and gently disconnect it. No need to be rough, just a little nudge to set it free!
Tools Used
Step 9

– Time to get started with your repair. Using your trusty spudger or plastic pry tool, carefully disconnect the rear speaker flex cable. If you need help, you can always schedule a repair
Tools Used
Step 10

– Alright, time to give that vibration motor some breathing room! Gently lift it out of its home using your spudger or pry tool. It’s got a little bit of sticky stuff holding it down, so be careful not to break anything. If you need help, you can always schedule a repair
Tools Used
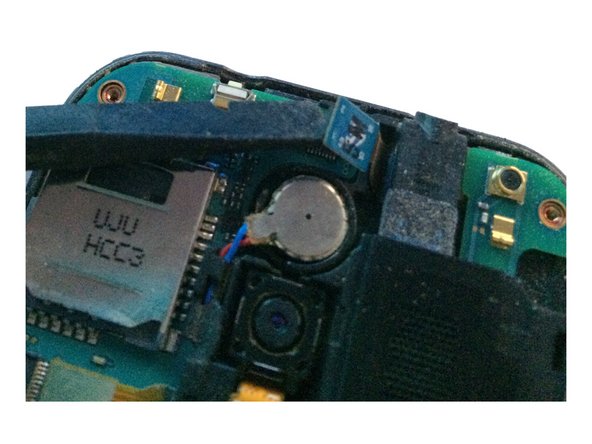
Step 11

Hey there! Just a friendly reminder: don’t go yanking the logic board out completely yet, because you still need to disconnect that display assembly flex cable!
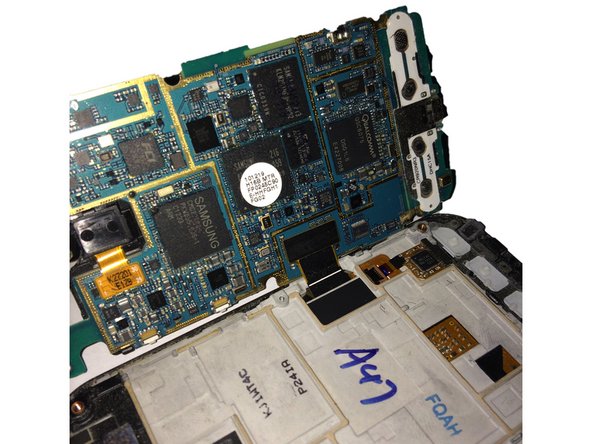
– Alright, now that both flex cables are out of the way, give that logic board a gentle nudge towards the left side of the screen assembly. It’s like a little dance!
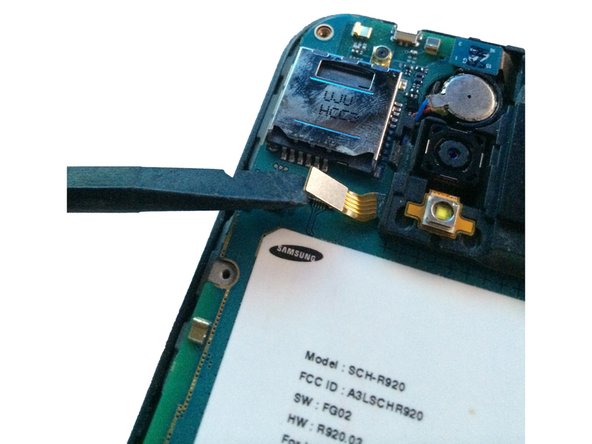
Step 12

– Now, let’s get that LCD/Digitizer flex cable unplugged! Grab your trusty spudger or plastic pry tool and gently disconnect it. You’re doing great! If you need help, you can always schedule a repair.
Tools Used
Step 13

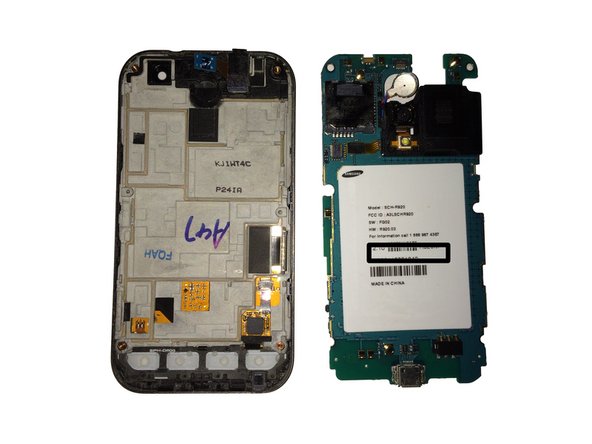
– Congratulations! You’ve successfully liberated the logic board from the display assembly. Way to go!